Bath height from the floor: standards, norms and permissible deviations during installation
The height between the floor surface and the side of the bathtub is extremely important when choosing the ideal model.It is highly undesirable to make a mistake when determining this size. After all, the convenience and safety of operating the main hygienic facility in a house or apartment mainly depends on it. Do you agree?
A properly selected height of the bathtub from the floor is a standard and ensures comfort, as well as eliminating traumatic situations that may arise during the period of hygiene procedures. Our article presents the standards according to which this characteristic is determined. Recommendations for installation are given.
The content of the article:
Review of existing types of baths
There is a wide range of bathtubs on the plumbing market. You can purchase a model made of cast iron, steel, acrylic, or something new like a quarry product. The choice is dictated by the size of the bathroom and the amount you are willing to spend on the purchase.
The most profitable, from an economic point of view, is steel bath. It is lightweight, does not create problems during transportation, and its price is quite affordable. The use of this material allows you to give products any geometry.
But a steel bathtub will not last very long, because it has little resistance to mechanical damage. In addition, it does not hold heat well and is very noisy.
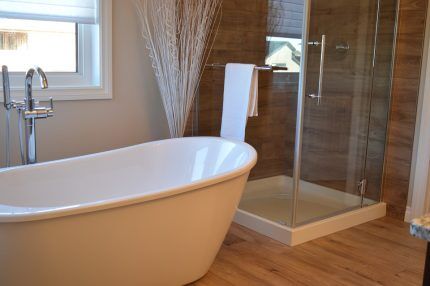
A cast iron bathtub is a classic. This solid, reliable product is renowned for its durability.A heavy cast iron bathtub does not have a wide variety of shapes, although there are original design solutions. The water in it retains heat for a long time. A cast iron bathtub costs 2 or even 3 times more than a steel one.
These two traditional types of plumbing products began to replace acrylic bathtubs, which appeared on the market much later, but gained great popularity. They are lighter than their predecessors, but retain heat well. High-quality products made from this material can last 10, 20 or more years.
The advantage of acrylic models is the variety of colors and shapes, but a large number of intricate lines reduces the strength characteristics. There are no pores on the surface of acrylic, so pathogens will never multiply in the bathroom.
Comparison of technical characteristics and performance cast iron and acrylic bathtubs is given in the following article, which we recommend that you read.
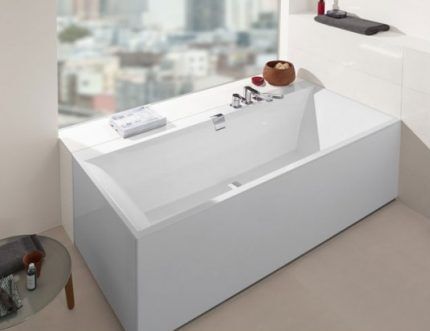
A novelty in the world of sanitary products is a bathtub made of the composite material quaril, which includes acrylic, quartz, and polymer additives. Serve quaril baths long and fully justify their high price.
This material stable To ultraviolet, hygienic, With hard surface. Models are heavier than acrylic ones - they weigh approximately 50 kg. The cost of the products is high because they are produced only in Europe.
In addition to the varieties listed, there are wooden bathtubs, natural and artificial stone. Their sizes are regulated by norms and standards common to all products.
What does SNiP recommend?
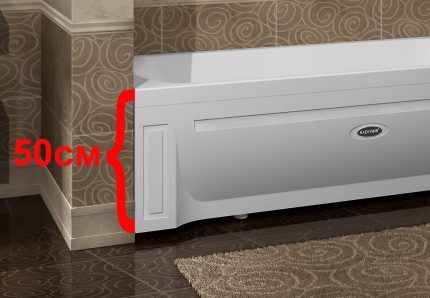
Process bath installation - a difficult and responsible job that requires compliance with technical standards. First of all, it is necessary to maintain such a parameter as its height from the floor surface. SNiP recommends 0.6 m for any bath size.
This value does not depend on the location of the bowl. It can be placed against the wall if the room is small or in the middle when the bath is spacious. The main thing is that there is free space around - at least 1 m. SNiP also limits the height of the threshold in the bathroom - it should not be higher than 3 cm.
There are exceptions to the established standard - bathtubs in hospitals and children's institutions are raised to a height that is 10 cm less than the parameter established by the standards.
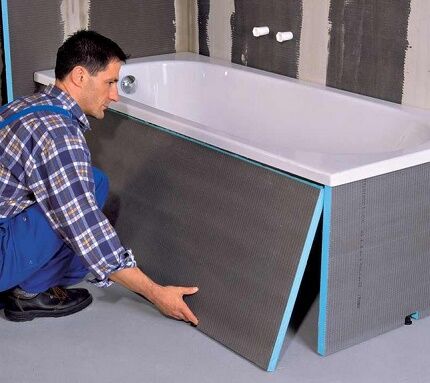
The 60 cm standard is not strict and unshakable for home conditions. The height cannot be the same for all family members, therefore a deviation of 100 mm is allowed, both in a smaller and larger direction. It is important to feel comfortable getting into and out of the bath.
Installation of bathtubs made of different materials
The installation height of the bowl should be determined in advance. To do this, you need to focus on information such as the height of the smallest member of the family.
General installation rules
This parameter is also affected by the type of wall cladding. If you choose tiles, then it is advisable to know the size of the tiles. At a height regulated by SNiP, 2 to 3 rows can be laid on an area of 0.6 m without any residue.
Correct installation of the font involves:
- Its position is strictly horizontal.This is controlled using a level placed along the side of the bathtub in contact with the wall.
- The angle created by the side and the wall should be 90⁰. Therefore, a large triangle will be required to constantly check that this condition is met.
It is easier to ensure that the sides are horizontal by using metal spacers in the form of plates with parameters 100x100x5 mm.
Their presence under the supports is mandatory if the bath is installed on a base that is less hard than the screed. It can be a wooden floor or parquet, laminate. In this case, without additional rigidity elements, the container will sag during operation.
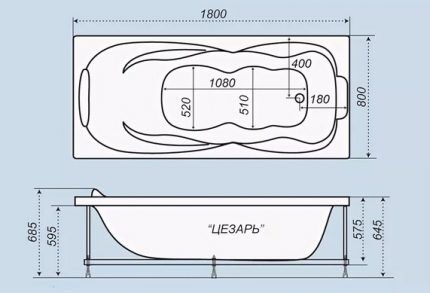
When choosing the height of the bathtub, you should also remember that under its bottom there will be siphon with water seal. For its normal functioning, a free space of about 150 mm is required.
The nuances of installing cast iron plumbing
It is especially important to select the height from the floor before cast iron bath installation. Since its weight is quite impressive, it is difficult to adjust this parameter after installation. The legs of such a bowl are usually solid and often have an exquisite design.
A cast-iron bathtub with legs of an ornate shape with engravings or ornaments is a classic option. She can stand on lion paws or supports in the form of petals or vines. The supports are attached rigidly to the body. They are fixed with complete metal wedges or coupling bolts.
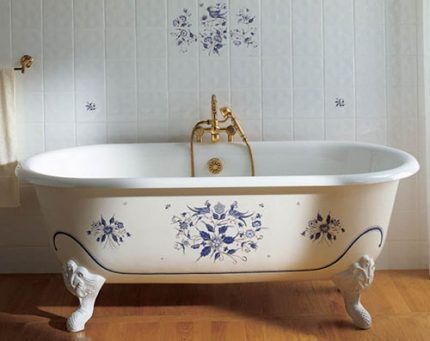
If included cast iron bath non-adjustable stands are included, the height is adjusted by trimming them and then sanding them.
The surface on which the product is installed must be strong and level. If the floor is not hard enough, metal pads with a diameter of 5 cm and a thickness of at least 5 mm are placed under the legs.
When installing the container on a slippery floor, its supports are secured with waterproof polymer glue. If the design of the legs allows for height adjustment, the parameter is adjusted using adjusting screws and then tightened with fixing nuts. Correctly align the bowl on one side and one end.

A modern cast iron bathtub on one of the legs or on its bottom has a special eyelet for connecting the ground wire. If this element is available, then you will need to strip the insulation so that the cable fits tightly at the connection point. Then all that remains is to attach the conductor using a bolt.
Models of the old image cannot be grounded using such a simplified scheme - they do not have a special ear. At the time they were produced, grounding was natural - the bath was connected to the ground by a cast-iron water supply.
Since many people have replaced cast iron with plastic, natural grounding has ceased to function. Therefore, for grounding, make a hole yourself in the area where the legs are attached to the bottom of the container. It is necessary to use a building level during installation to ensure that the sides of the bowl are parallel to the floor.
If, after final adjustment, the product needs to be moved, this can be done by gentle tapping. Perform manipulations only with those supports that are closest to the others in relation to the points of movement.
Adjusting the height of the steel bath
While a cast iron bathtub can be installed even in the middle of the room, a steel bowl must be adjacent to the walls. Before installing it and leveling it in height, you need to tiled the walls. Of the existing methods of fixing steel bathtubs, supports with self-adhesive linings are considered the safest and most reliable.
When installing legs with tightening bolts, enamel peeling may occur both when tightening the fasteners and during operation.
Self-adhesive, adjustable, following the contour of the bottom of the bowl, the legs are always paired. They have a channel shape and a slight deflection at the base. The fasteners are located here—adjusting screws equipped with plastic tips.
Particularly reliable legs for a steel bowl are short, but have long bolts for adjustment. The bath itself is installed against straight walls, which are not yet finished, pre-impregnated with a moisture-proofing agent.
Before installation of a new steel bathtub make a fitting of self-adhesive legs to the places where they join the bowl. In this case, the first one is installed at a distance of about 30 mm from the drain hole. The second - on a flat surface at the opposite edge.Before this, the contact points are wiped with alcohol or a solvent containing acetone for the purpose of degreasing.
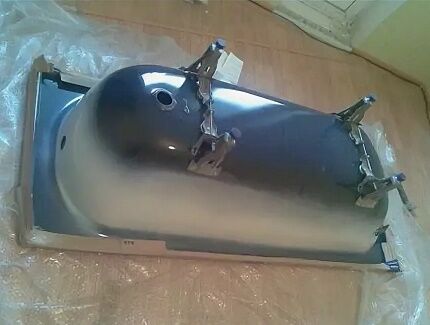
The overlay is slightly warmed up with a hair dryer. Then, having removed the protective film, install the supports exactly according to the markings and press tightly. Place clamping nuts on the adjusting pins and carefully drive them into the plastic tips until they stop. The nuts are moved close to the tips. The assembled unit is connected to the supports.
After the bathtub is installed in a permanent place, it is first leveled in terms of level and height. Next, proceed to precise alignment. To do this you will need 4 wooden wedges. They are driven between the walls and the side of the bath so that the edges protrude slightly.
The side is covered with paper tape. Then the resulting gap is foamed using a balloon with a narrow nozzle. After the polyurethane foam has hardened, remove the wooden wedges using pliers. All that remains is to cut off the remaining foam and eliminate the play by unscrewing the adjusting pins.
Proceed to the next stage - finishing work. Cover the bowl with a protective film, lay tiles on the walls and floor. After this, the legs are manually pulled in such a way that the bathtub adheres very tightly to the wall.
Clamp the nuts, twisting them tightly to the supports. To check the correct height adjustment of the bathtub, measurements are taken at four points from the side to the floor. The difference in measurements should not exceed 4 mm. If this condition is violated, the adjustment is performed again.
Features of mounting an acrylic model
Acrylic bathtubs are often equipped with a metal frame. There are adjustable legs here, with the help of which you can easily select the height of the polymer bowl. The supplied set includes different-sized metal profiles, which already have mounting holes, 4 legs, 4 stud-shaped stands, 4 thrust bearings, 16 nuts, self-tapping screws.
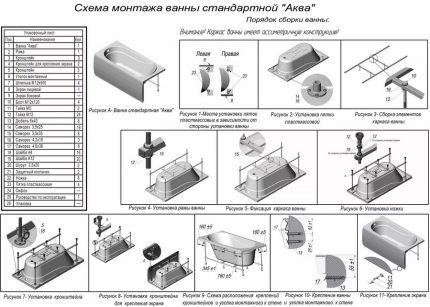
At first acrylic bath installations the assembled frame is installed in the middle of the center of the bottom of the bowl, located on the floor in an inverted state. The legs are attached to the frame. Two supports are secured under the bottom, three along the front edge, and two more along the wall. Adjust the legs to the required height.
The bath is turned over and checked for horizontality using a level. If there are no deviations, connect the siphon. The next step is to attach the edge of the bathtub to the walls. This is done using special hooks or corners. Finally, a decorative screen is installed.
When there is no metal profile frame, the bowl is installed on bricks, from which a podium-like structure is made. Sometimes, in order not to overload the ceiling, columns are made of brick instead of this bulky structure. There may be two or three of them - it all depends on the length of the model.
Conclusions and useful video on the topic
Video #1. Demonstration of bath installation rules:
Video #2. About the nuances that arise when installing a bathtub:
There are no strict requirements for compliance with such a size as the height of the side of the bathroom from the floor. The existing standards are rather advisory in nature. To make the right choice, you should proceed not only from these parameters, but also from individual circumstances.
How did you determine the optimal height of the bathtub rim before purchasing plumbing fixtures? Tell us about the guidelines that were decisive in finding the best model. Please write comments in the block below, ask questions and publish photographs on the topic of the article.


I have always believed that the height of the bathtub in relation to the floor is standard, does not change, and should not change. After all, if something happens, the plumber must have access to the pipes. But then my mother got sick and it became difficult for her to climb into a standard bathtub because of the height of the sides. I bought another model and installed it on a frame with a minimum permissible height of 150 mm, it became easier.