Refrigerators “Minsk”: review of the model range + analysis of frequent breakdowns
Household appliances made in Belarus were distinguished by enviable quality and durability, for which they were highly valued in the territory of first the USSR, and then the so-called post-Soviet space.
In some homes or dachas you can still find a Minsk refrigerator, despite the fact that the last one was released more than a decade ago. What is good about this equipment and how to repair it? We'll figure out.
The content of the article:
Features of brand refrigerators
The history of the appearance of Minsk brand refrigeration units began in 1959, when, by order of the government, the Gas Equipment Plant in the capital of Belarus was to begin production of household refrigeration equipment.
The first device with the name Minsk was released in 1962. Later, namely in 1977, the Atlant association was organized, which, in addition to the Minsk plant, also included a machine tool plant in Baranovichi.
This was important because they were made here compressors for refrigeration units. Atlant paid great attention to technical developments and their implementation in new models.
Therefore, it is absolutely no coincidence that it was here that the first Soviet two-chamber refrigerator appeared.Of course, Minsk brands. For its time, it became a real breakthrough and enjoyed unprecedented demand.
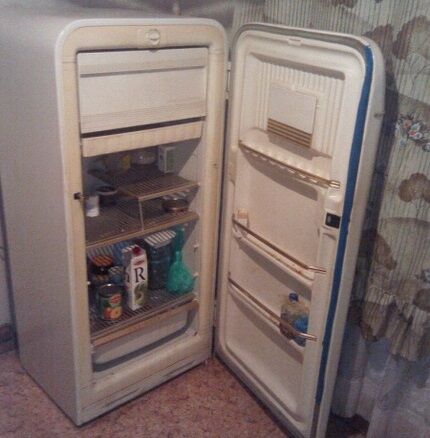
Later the association begins production refrigeration units Atlant. Gradually the names Minsk and Atlant merged, and for some time products were produced under the double name.
Today in stores you can more often find the Atlant brand, sometimes the second name can be attributed to it “in the old fashioned way”. Officially, Belarusian products are now called Atlant, but in fact it is still the same good old Minsk.
General characteristics of the manufacturer's models
The range of refrigeration units under the Minsk brand is quite wide. All devices are distinguished by high efficiency of cold production and economical energy consumption.
They are extremely easy to use and come in a variety of colors. Most of the equipment is small in size, which allows it to be placed even in a very small kitchen.
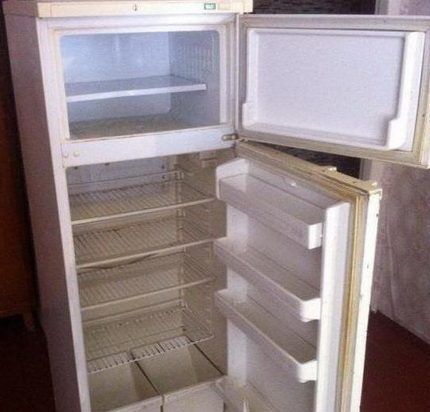
Among the technological features, it is worth noting simple design solutions. The devices are equipped with one, rarely two compressors.
The latter option was used for two-chamber systems. To operate, they were pumped with environmentally friendly, but today obsolete, refrigerant.
None of the Minsk devices had an Anti-frost system installed, which greatly simplifies their repair.
On its units, the Minsk plant installed a drip defrosting system, or as it is also called a “crying” defrosting system. It assumes the presence of drainage that removes accumulated moisture from the refrigerator compartment.
No defrosting system was used for the freezer compartment. It was defrosted manually as ice build-up accumulated. Electronics have also never been used in equipment control systems.
User reviews about brand equipment
Owners speak positively about the refrigeration units of the Belarusian manufacturer. Thanks to the simple design, there is practically nothing to break in the unit, and if a breakdown occurs, you can try to fix it on your own.
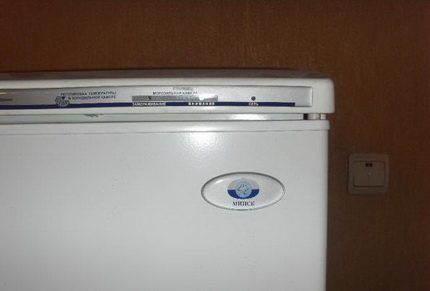
Thanks to their design simplicity and high quality of components and assembly in general, Minsk devices are reliable and last a very long time. It is this fact that is appreciated by numerous technology users.
There are often cases when a properly working refrigerator was disposed of only because it was morally obsolete. However, later the owners sometimes regretted it, because it is not always possible to get the same reliability and durability from new devices.
Typical malfunctions of various models
Over time, problems with the operation of refrigeration units may occur.
Practice shows that the following problems most often arise:
- The freezer compartment is working normally, but the refrigerator compartment is at an abnormally high temperature.
- The back wall in the refrigerator compartment freezes; after removing the ice, it appears again.
- The refrigerator compartment works fine, but the freezer compartment does not freeze.
- The compressor either does not start or runs without shutting down.
- The appearance of water inside the working compartments, the growth of a snow coat on the evaporator.
- The compressor starts, but after some time it randomly turns off.
- The unit shows no signs of life.
The reasons for these problems may vary. The easiest way to identify them is if you know the “sick” spots of your model.
Craftsmen working with Minsk devices identify characteristic breakdowns for a group of specific models. We invite you to consider them in more detail.
Group #1 - Minsk mxm 130, 131, 151, 152, 161, 162
For these models, a typical problem is freezing of the rear panel of the refrigerator. Most often, ice appears in the evaporator area on the left side of the plate.
A block of ice constantly freezes here, which melts when the device defrosts, but then freezes again. Thus, the owner has to defrost the unit more and more often. The problem only gets worse over time.
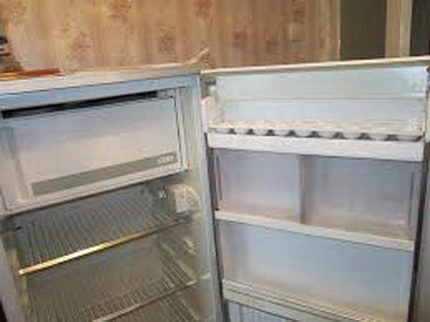
The rate of ice formation and its quantity gradually increase. If you do not take action, frost begins to “grab” the shelves, taking away the usable volume of the device.
In an attempt to get rid of ice, some housewives break it off with a knife, which can lead to a breakdown of the evaporator. This is a more complex problem that requires soldering the damaged part, replacing the filter and charging the system with refrigerant.
Group #2 - Minsk mxm 260, 268, 2706, 2712
These are two-chamber devices with a top freezer position. Their “pain point” is clogging of the capillary system.
This happens because R134A, a refrigerant that is prone to clogging, circulates in their circuits.
When mixed with a small amount of motor oil, it forms small “blood clots” that stop the system from working. This manifests itself as follows.
The freezer compartment continues to function normally, but sometimes it starts to freeze more than necessary. The temperature in the refrigerator compartment is steadily rising.
The rise in temperature can be sharp, but sometimes a coat of snow appears first. It melts quickly as the temperature becomes unacceptably high.
To solve the problem, the tube is purged, causing the clot to escape into the evaporator.
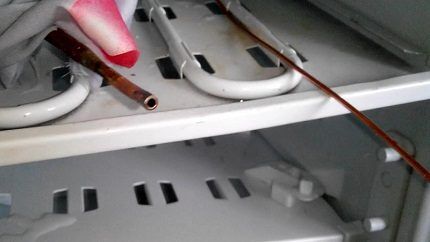
Group #3 - malfunctions Minsk 15m
This model fails quite often thermostat, which requires its replacement. The compressor may break down. In addition, quite often there is a refrigerant leak from the freezer evaporator.
In the latter case, the evaporator becomes covered with a coat of frost, and the temperature in the refrigerator compartment rises.
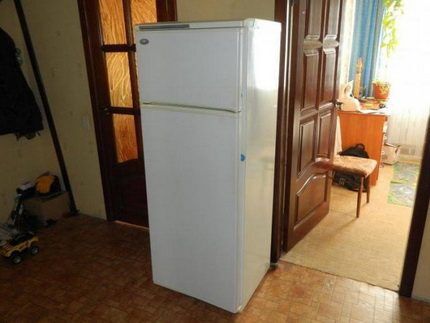
Unfortunately, it is not always possible to detect the location of the leak and the evaporator has to be replaced.In the best case, the damaged part is properly sealed.
Group #4 – Minsk mxm 126, mxm 1607, 1609
The Achilles heel of model number 126 is the thermostat.. If the unit operates cyclically, that is, it periodically turns off/on, but the temperature in the refrigerator compartment is unacceptably high, and the freezer compartment functions normally.
Most likely, the thermostat has failed and will have to be replaced with a new one.
Models with the nomenclature designations 1607 and 1609 have two main problems. The first is a clogged capillary tube, the second is a refrigerant leak that occurred in a foamed part of the equipment.
In both cases, the refrigerator compartment stops working, but the freezer continues to function for some time. But gradually it also stops working.
The main difference is that if there is a leak, the compressor continues to work, and there is no cold in both compartments.
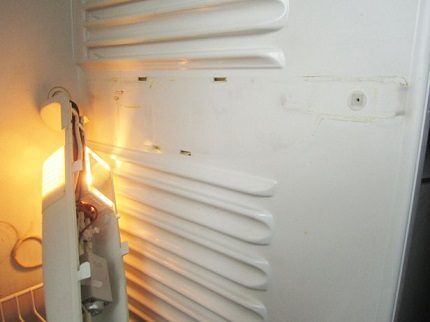
Self-repair of units Minsk
When deciding to go on your own carrying out repair work, you need to understand that a refrigerator is a complex unit. To diagnose and correct problems, you will need special knowledge and experience.
It is highly desirable that they exist. Otherwise, unqualified repairs can only aggravate the situation to the point where you will have to purchase new equipment.
If you have the skills and experience, you can try to cope with the problem on your own. Let's talk about how to repair typical problems with Minsk brand devices.
Problem #1 - capillary tube clogged
This is a labor-intensive operation that requires precision, so it is advisable to diagnose your refrigerator as accurately as possible.
So, we start the unit and take the discharge tube in our hand. Let's see, if at first it actively heats up, but literally after three or four minutes it starts to cool down, most likely there is a blockage.
A similar diagnosis can be made if the capacitor is only half heated.
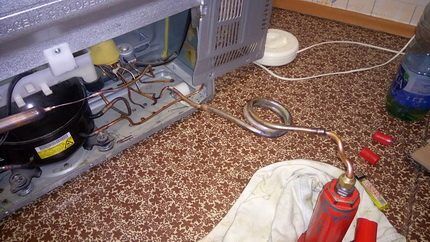
Now carefully wipe the condenser with a damp cloth, cleaning it from dirt and dust that prevent the device from fully cooling the gas mixture.
If after this part of the condenser remains cold and does not even heat up a little, this means that a blood clot in the capillary is preventing the cooled gas from moving further. After cleaning the condenser, the refrigerator may stop generating cold.
This is explained by the fact that the pressure in the cleaned element will decrease, therefore, the mixture will pass worse through the blockage in the tube. The most accurate diagnosis can be made only after opening the system.
Masters warn that this should only be done by those who have certain knowledge and have acquired the necessary tools. So, you need to open the filling pipe, and then connect a pressure gauge to it.
Now you need to start the compressor. The pressure at this stage should not go negative. Turn off the engine. If the pressure remains the same or rises, but very slowly, then the capillary is clogged.
We cut off the capillary on the filter and take a look.If refrigerant begins to spray out of the filter under pressure, the tube is clogged.
You can start cleaning the system. An extremely important point. The masters remind you that for the procedure you need to use only “native” oil.
There should be no solvents, washes or other chemicals. Only oil of the type already used in the system. We remind you that this can be either synthetic or mineral water.
It is strictly forbidden to mix them, as this will result in the formation of flakes that will clog the capillary even more. Having prepared everything necessary, we get to work. First, completely defrost the refrigerator.
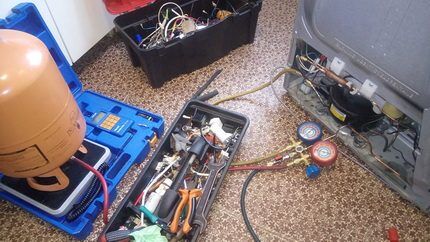
We solder the pipe from the hydraulic press to the capillary. Fill the press with oil prepared in advance.
Experts recommend having a separate press for each composition. It's expensive, but it guarantees no problems after cleaning.
Gently press the oil with a press. We do this until we feel that the handle of the press moves easily and effortlessly. Usually 5-6 pumpings are enough for cleaning.
Now it is advisable to purge the tube with nitrogen. If this is not possible, experts advise soldering a refrigerator compressor to the filter and starting it while purging it.
Next, you should change the filter and solder the system. After which it is evacuated and filled with refrigerant. It is very important to strictly follow the technical conditions and fill in a strictly defined norm of the gas mixture. The renovation is complete.
Problem #2 - freezing of the rear panel
The problem occurs as a result of a violation of the thermal insulation of the refrigerator compartment.For various reasons, condensation accumulates in the area of the evaporator, gradually destroying the thermal insulation.
The actual repair consists of restoring it. It is carried out as follows. To begin with, the unit is disconnected from the network and completely defrosted. Then the doors are sealed with tape.
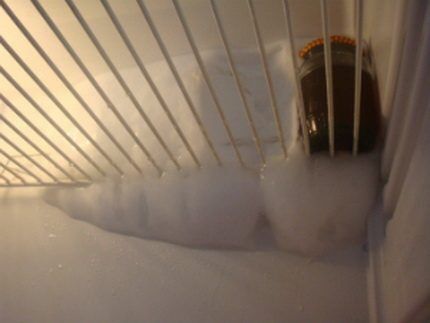
After which the equipment is placed on the stand with the door down. Now you need to carefully unscrew the three screws holding the capacitor. The last fourth screw is loosened, but not removed.
This way the part can be moved diagonally, gaining access to the area with broken insulation. We conduct research on insulating material. To do this, press on it with your finger.
If this leaves a depression from which moisture oozes, then the material has been destroyed. It must be removed very carefully. To do this, take a wooden spatula and use it to remove the damaged insulation.
It may seem that performing this operation with a knife will be easier. But this can damage the tubes and evaporator, and this is completely unnecessary. Carefully scrape off the insulation and reach the inner wall of the cooling compartment.
If there are slightly wet spots at the edges of the removed area, it’s not a problem. They need to be dried with a hairdryer. Important: this can only be done if there is little moisture and it has not penetrated deeply.
Some models of units are equipped with a so-called “felt boot” or an oval-shaped bulge on the rear panel. The insulation around it is carefully trimmed with a knife and removed. This is quite easy to do.
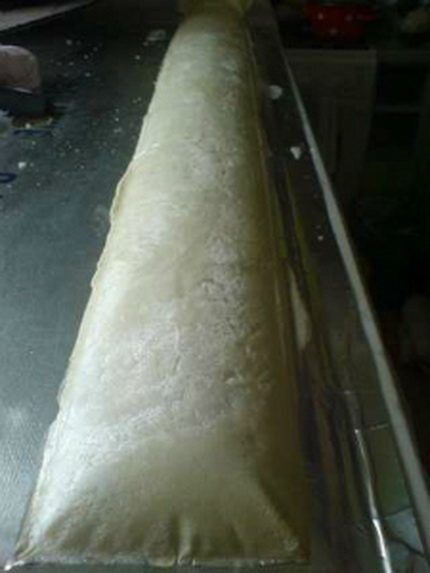
After all damaged insulation has been removed, we proceed to cleaning the spacer rings. They are located on the evaporator tube. Carefully remove them and clean them.
Craftsmen warn that the area where the tube enters the compartment is insulated with a sleeve. In addition, there is another plug just below. They must be handled with extreme caution, otherwise the seal can easily be broken.
After cleaning, the rings are put back in place. We take the sealant and carefully isolate the tube entrance area and the plug.
The next stage is the restoration of insulation. If the model has a felt boot, you will have to prepare a mold for filling. It is made of smooth sheet metal and completely repeats the configuration of the cut part.
For other devices, it is enough to take a piece of cardboard, the size of which corresponds to the removed fragment.
Next, prepare the mixture. Usually a two-component composition is used for thermal insulation. The components are poured into a common container and mixed thoroughly for half a minute.
You can use an electric drill for this purpose. The prepared composition is poured into the recess in insulation, covered first with film, and then, depending on the model of the device, with a prepared form or cardboard.
A load is placed on top. All you have to do is wait for the composition to harden, which takes about half an hour. After this, we remove the load, remove the film and very carefully inspect the resulting insulation for possible defects.
These may be too large pores or empty areas. If there is one, we prepare a new portion of the composition and remove the shortcomings.Having received high-quality insulation, we proceed to the final stage.
We remove excess foam with a knife, carefully clean all irregularities and protrusions with sandpaper. We take tape and carefully seal the entire repaired area. After this, you can put the capacitor in place.
Then we put the unit in a vertical position, remove the tape and plug in the device. It is important to understand that restoring insulation is a labor-intensive process. If you are not confident in your own abilities, it is better to invite a specialist.
Problem #3 - seal failure
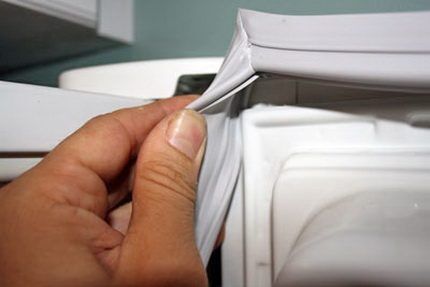
Replacing or repairing the rubber seal on the door is one of the simplest, but such work is in great demand. Over time, the rubber seal dries out, cracks and copes with its duties much worse.
As a result, the snow coat inside the freezer begins to quickly freeze, which is why defrosting has to be done more and more often. First, you can try to bring the seal back to life.
Read more about how to defrost a refrigerator. Further.
Perhaps it has not lost its elasticity, but has only become deformed. We take a hairdryer and carefully warm up the rubber. We carefully straighten the heated fragment, returning it to its original shape.
We do everything very carefully, since accidental overheating can cause the rubber to melt or completely lose its elasticity and shape. And then all that remains is to replace the seal. If all else fails, proceed to replacing the part.
It is best to purchase an original seal designed specifically for your model. Unfortunately, this is practically impossible for Minsk units. Therefore, you should find a seal with similar characteristics in stores.
Perhaps the best option is an element from any Atlanta model. Having prepared a new seal, you can begin dismantling the old one.
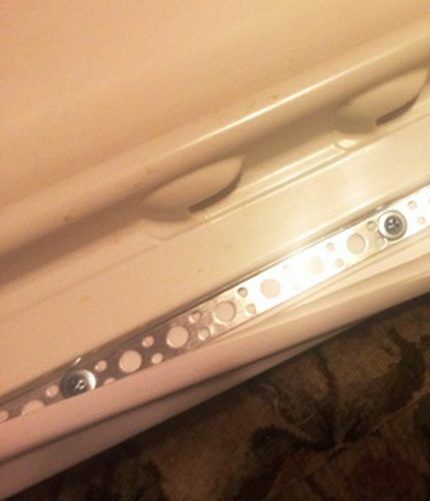
First you need to carefully remove it from the door. There are options here. Depending on the mount used, this can be done in different ways. The gasket secured in special grooves in the door is pryed with a screwdriver and removed.
The glued sealant is carefully removed from its place. If the part is screwed on with self-tapping screws, unscrew them and remove the rubber. After dismantling, the door is cleaned, washed and dried well.
After this, they begin installing a new gasket. It is attached in the same way as the old one was attached. Although some craftsmen are sure that the best option in this case is installation with self-tapping screws. They are secured under an elastic band.
If the previous gasket was already secured in this way, then the fasteners will have to be of a slightly larger diameter, since the holes for them are most likely broken.
Conclusions and useful video on the topic
How to properly adjust the thermostat:
Subtleties of repairing the start-up relay:
Video tutorial on restoring the refrigerator seal:
Minsk refrigeration units are reliable, generate cold well and work for a very long time. Despite the fact that their production has long been discontinued, they continue to work in many homes.Over time, problems may appear that can be easily corrected by an experienced technician.
If you want to try to repair the equipment yourself, you need to calculate your strength very well. Most often, in case of failure, the refrigerator has to be replaced with a new one.
Do you have experience using Minsk refrigerators? Please leave your comments and share your experience in the block below.


For quite a long time we had the Atlant MXM-162 refrigerator. I don’t know exactly from what year, but for almost twenty years I served faithfully. A reliable refrigerator with a large freezer compartment, which is separated from the refrigerator compartment. From time to time, ice actually forms on the walls; you have to defrost it from time to time. But even so, the refrigerator deserved good ratings. It was not particularly noisy and was freezing even in the hottest weather. It’s just that its time has passed, more functional models have appeared. Although even now I would safely put Minsk/Atlant somewhere in the country.
My fur coat was freezing on the back wall of the Minsk because the door stopped closing tightly. It turned out that the door had sagged and was catching on a plastic strip at the bottom. I tried to adjust the tilt of the door, but it was already adjusted to the maximum, I had to remove this bar, the appearance of the refrigerator without this bar was lost, but the door now closes tightly. If it sags any more, I'll try to move the doors to the other side.
Hello. We need to look for the cause of the subsidence. It's not a matter of which side the door is on.
First of all, check whether your refrigerator is level, why such distortions occur that the door has already begun to catch on the lower strut.
Secondly, try to unload the door; you can’t put a lot of food in there. And if all else fails, take us several photographs of your door and the location of the refrigerator from different angles in detail. We will definitely try to help you.
The removal of moisture/water from the refrigerator compartment does not work, I see a hole for removing excess moisture, but it looks like it is clogged or something else, all the water collects at the bottom of the chamber. What can be done about this?
The MINSK 11 refrigerator worked for 15 years. Only this year it stopped working because the motor winding burned out. The solution to the problem of draining excess thawed water is to install a rubber gas hose instead of a short silicone hose. with a nozzle for 5-2 liter bottles. A hose is inserted into a tube with a diameter of 15 mm and a length of 135 cm.
I ordered a seal for the refrigerator Minsk-15m. They delivered it for Minsk-268! The dimensions of 550 by 1000 are the same, but the thickness and appearance are alarming! The old seal is 20mm. And the new one is 15mm. I don’t know whether it will be possible to achieve tightness after installation! It is fastened with self-tapping screws, so it is no longer possible to hand over the goods to the seller.
I have a Minsk MHM 260 refrigerator. I can’t understand what’s going on with the defrosting. It turns out that when it defrosts, water flows out from under the door. I put a towel on the bottom and change it when it gets wet. I understand that this shouldn’t happen. Apparently , the drain holes are clogged. I don’t want to put anything in there. Can you recommend anything? Sincerely…