Installing a bathroom sink: installation instructions for modern models
Arranging a bathroom is a responsible undertaking that raises a lot of questions among owners who install the equipment on their own. A wide selection of sinks provides consumers with the opportunity to select equipment to suit any interior.
We will talk about how to install a bathroom sink in accordance with building codes and sanitary requirements. The article we presented discusses examples of installation of built-in and console versions. Taking into account our recommendations, you can handle the work yourself without any problems.
The content of the article:
Main types of shells
The method of installation of plumbing equipment is determined by the type of sink. Leading manufacturers produce several types of sinks.
The most common are four types of sinks, differing in the method of installation:
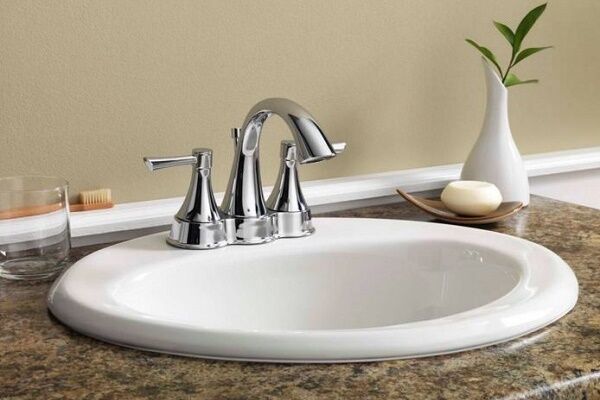
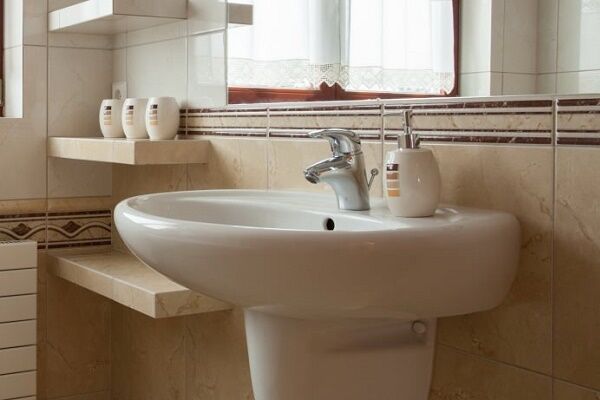
- Built-in. They are installed in the top of a cabinet, table or any other flat surface. Such models are convenient because they allow you to completely hide unattractive communications behind furniture doors.
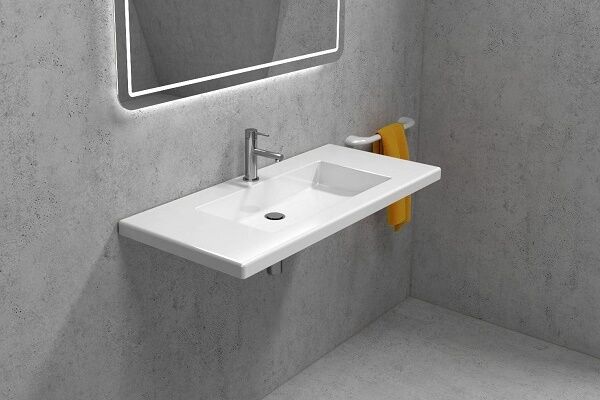
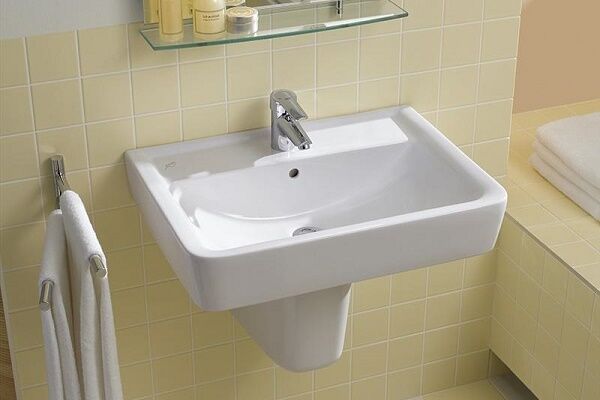
- Console. They are suspended structures that are fixed to the wall using a ready-made installation system. Models of this type look stylish and modern.
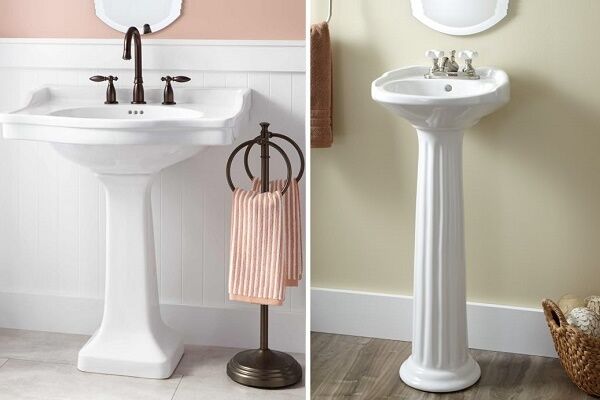
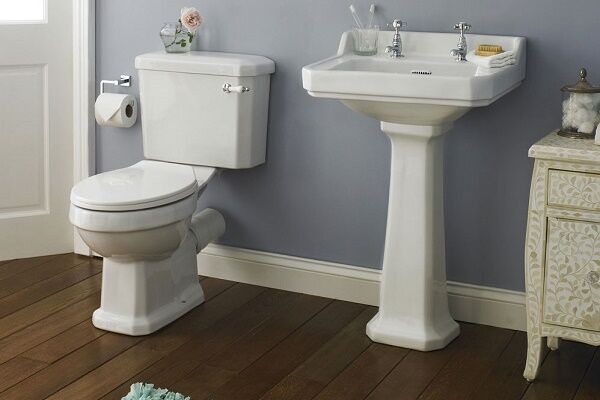
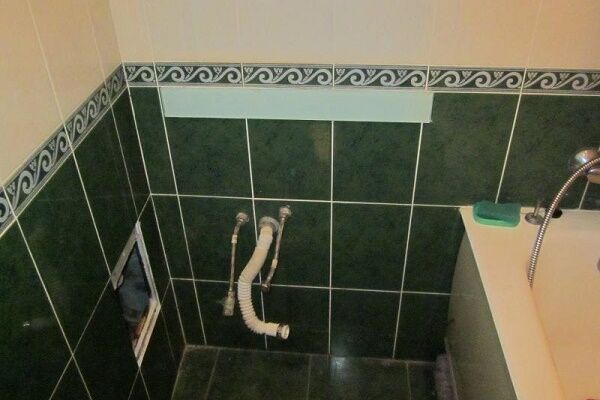
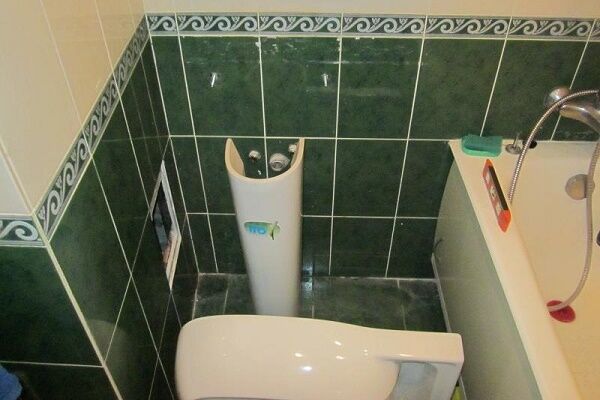
- With a pedestal. Models of the “Tulip” series have a decorative element in the form of a pedestal on which a massive bowl rests. The drain fittings are hidden inside the support.
- With a semi-pedestal. Models of this type are also equipped with a pedestal. But it rests not on the floor, but on the wall. Due to this, wall models look more elegant.Installation of such equipment is complicated by the need to bring the drain to a given height.
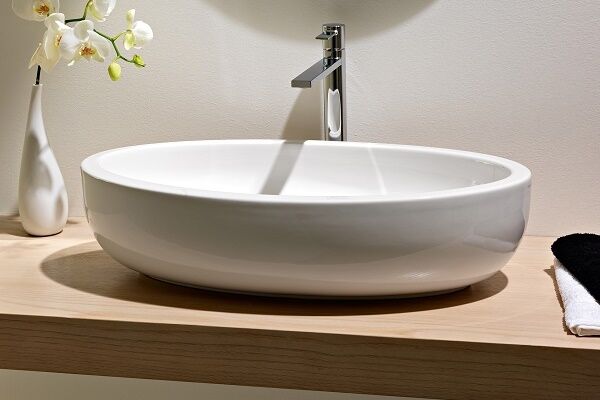
Built-in sinks can be mounted on top of the countertop, fixed with sides around the perimeter of the base, or built into the structure from below.

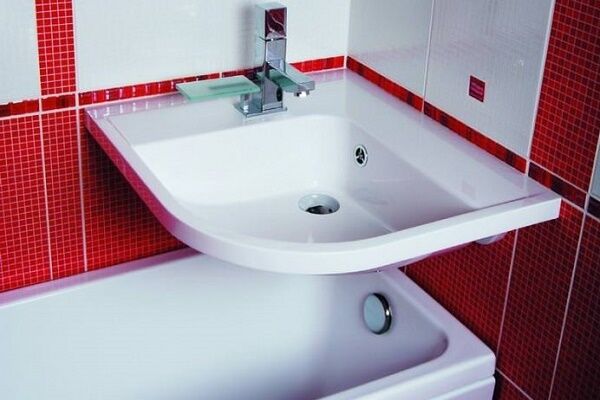
In bathrooms where it is not possible to install a countertop of standard width, it is convenient to use semi-built-in models that simply go around the edge of the countertop.
The only caveat is that when installing such plumbing, you will need to install an improvised cabinet, behind the walls of which all communications will be hidden.

How to dismantle old equipment?
To dismantle an old device, you must first turn off the water, then loosen the mixer. To do this, unscrew the nut securing it. The equipment is disconnected from the supply pipes, carefully removed and put away.

After this, the drain elements are dismantled:
- The nuts are unscrewed from the lower outer part of the plumbing element.
- Disconnect the siphon glass from the drain outlet, empty it of water and clean it of accumulated dirt.
- Remove the liquid from the drain and unscrew the locking nut by hand, turning it counterclockwise.
If the siphon is to be replaced during equipment dismantling, it must be separated from the drain pipe. To do this, unscrew the locking nut located at the connection point between the drain and the water seal, carefully lift the drain and remove the siphon.
Before removing the drain along with the installed gasket, you need to move the wedge-shaped spacer to the side. At the final stage, all that remains is to pull out the outlet pipe with the attached siphon from the sewer socket.

After completion of the work, in order to prevent the spread of an unpleasant odor, the opening of the sewer pipe is carefully closed with a stopper or a piece of fabric folded several times.
If you have to dismantle a sink attached to the wall using combined stands, you should look for the attachment points on the sides, closer to the bottom of the washbasin. If the bowl does not have a floor support, when unscrewing the nuts, the sink should be held with your hands so that it does not fall to the floor under its own weight.
Installation procedure for a console sink
There is nothing difficult about installing a sink in the bathroom without resorting to the services of professionals. The main thing is to strictly adhere to the installation technology, which includes several main stages.

To complete the work you will need the following tools:
- electric drill;
- concrete drills;
- building level;
- tape measure and a simple pencil;
- spanners;
- expansion dowels;
- construction adhesive;
- self-tapping screws;
- FUM tape.
Brackets for installing a wall-hung sink can be made in the form of L- and T-shaped welded elements, or in the form of frames that “encircle” the installed plumbing fixtures. The second option is preferable because it eliminates the risk of the bowl moving to one side.
Fastenings for exclusive designer types of plumbing fixtures that have an unusual shape are usually included in the kit.To make them more presentable, they can be coated with ceramic or metal compounds. Before starting work, it is important to determine whether the wall adjacent to the plumbing will withstand the additional load.

In the plastered layer of a concrete or brick wall, the length of the fastening and the depth of its immersion must be at least 30 mm. Since the bracket should be attached to the sink as tightly as possible, the anchors should be selected individually for each case, taking into account not only the strength of the base, but also the weight of the washbasin.
Preliminary surface marking
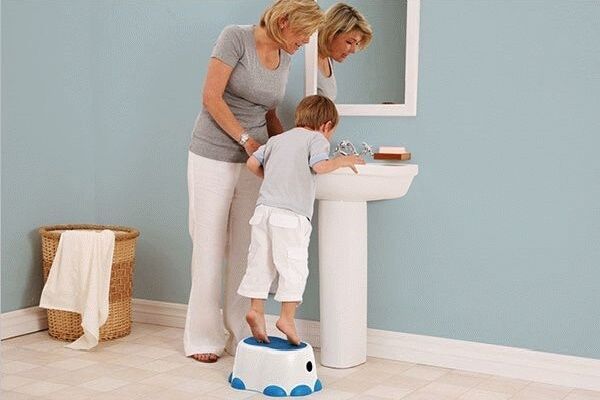
The first step is to determine the location of the sink in the bathroom and installation height. This parameter is determined to make it convenient for household members to use plumbing equipment.

Having decided on the height of the bowl, draw a horizontal line on the wall to indicate its upper limit. Additionally, two lines are drawn perpendicular to the floor, the distance between which corresponds to the width of the bowl, taking into account the thickness of its walls.
When setting marks, it is important to check the building level. If the wall is tiled to make hanging equipment look more aesthetically pleasing, when determining the location of the mounting holes for fixing it, it is worth taking into account the location of the tile seams.
Making holes for fasteners
To install the brackets into the outer supporting walls of the bowl from the back, turn the product upside down. The plumbing fixture with installed brackets is moved to the drawn horizontal line. Along the drawn line, the locations for mounting the fasteners are marked.
At the intended points of future fastenings, using an electric drill, holes are made with a diameter 1-2 mm smaller than the size of the prepared dowels. The fastening screw should fit into the made “socket” with difficulty.

Spacer dowels of nylon or other polymer design are driven into the prepared holes, and self-tapping screws of the appropriate diameter are screwed into them.Then screw in the brackets themselves.
A little trick: so that when making holes the drill bit does not slip on the tile, sticky foam is glued to the area being treated.
Installation of the sink bowl
By tightening the self-tapping screws, check the strength of the fasteners. A sink is placed on top of the mounting pins. Sealing inserts and washers are put on the self-tapping screws, and then the structure is carefully tightened. The washbasin is additionally secured with sealant or clips.

The task of the master when tightening the washers is to achieve an effect so that the bowl does not swing. The fastening places are decorated by putting on plugs. To prevent the appearance of mold when water gets into the gap between the sink and the wall, this place must be additionally sealed with silicone plumbing sealant.
Connecting the siphon to communications
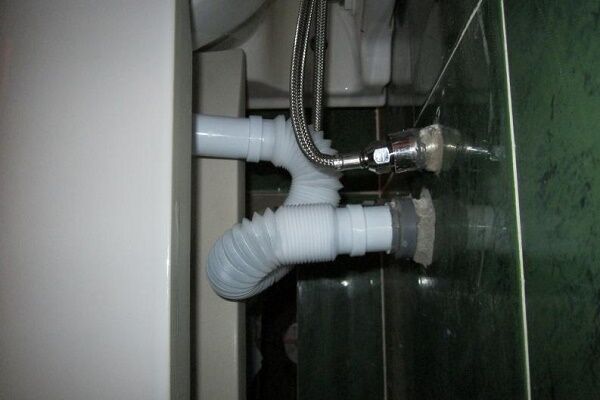
Installation of the siphon begins with securing the outlet. To do this, install a mesh, a rubber or silicone gasket and a pressure screw in the drain hole. The presence of a gasket is mandatory because it ensures the tightness of the connection.

After making sure that the gasket is installed correctly, tighten the clamping screw, thereby connecting the outlet to the siphon. After this, the end of the outlet pipe, made of hard plastic or corrugated hose, is connected to the sewer socket.
When connecting to a sewer, seals must be used, which can be rubber gaskets or cuffs for corrugations.
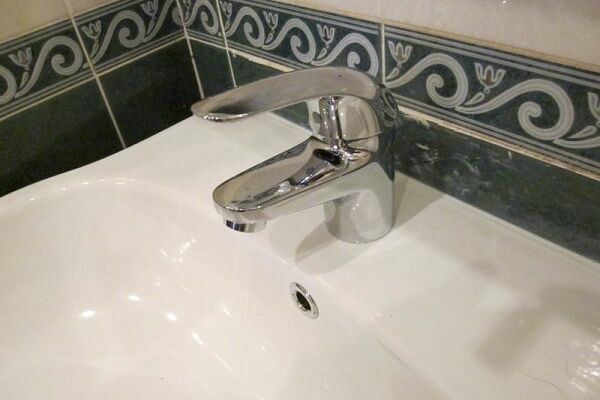
Faucet installation process
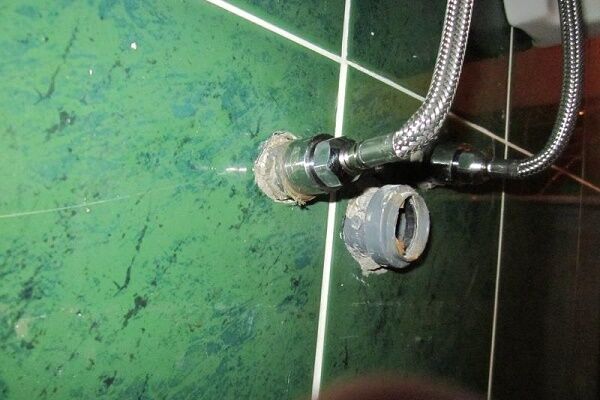
It is better to install the plumbing fixture before fixing the washbasin to the wall. Once the plumbing is installed, connecting it will be much more difficult. For this purpose, the included mounting pins and flexible hoses are screwed into the mixer.
Using this liner the connection is made basin faucet to the water supply. To seal the connections in order to prevent possible leaks, FUM tape is wound.

One end of the hose, equipped with fittings or fastening units, is connected to the mixer, and the other to the water pipes. If there is a discrepancy between the diameters of the pipe and the outlet, put on a sealing collar.
At the final stage of connection, all that remains is to check the functionality of the system and make sure that there are no leaks at the junction of the pipes and cuffs.
For a step-by-step guide to installing a faucet on a sink, see recommended article, which we strongly advise you to read.
Assembling and connecting a tulip sink
The bulk of the sink with a pedestal is distributed on a decorative support leg, but the bowl is still attached directly to the wall. The process of installing and connecting this plumbing includes a number of traditional steps. The following photo gallery will help you get acquainted with it:
The details of installing a tulip sink are outlined in detail. in the next article, the content of which is entirely devoted to this issue.
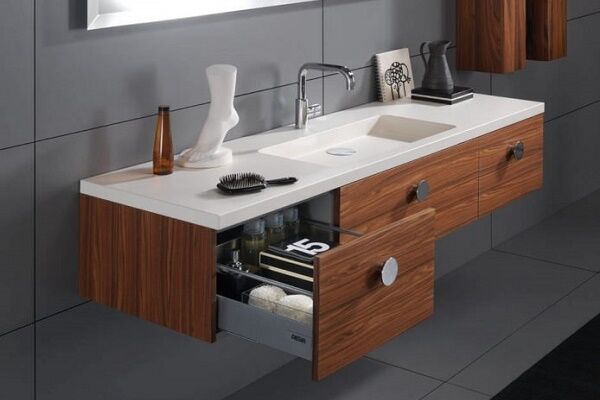
Features of installing a built-in sink
Built-in models are embedded into the countertop from below or from above.
Each installation method has its own nuances:
- When installing the bowl on top, it will protrude from one to three centimeters above the surface.
- The lower insertion method is preferable because during operation it is convenient to collect splashes with just one movement.
Regardless of whether the sink is completely recessed into the cabinet, or partially rises above the surface, the drain fittings will still be located inside the cabinet.

To insert from below, L-shaped fasteners are used, and fixation is performed to the base of the support.
Marking the installation site
Using a template will help simplify the marking of the countertop for installing a recessed sink. Many leading manufacturers include it in the kit for most built-in models.
When determining the location for installing a washbasin, they are guided by two conditions:
- The sink should not be on the very edge or close to the wall.
- It should provide easy access and ease of use.
The point of creating the correct markings is to ensure that the washbasin is firmly fixed in the countertop, but does not fall through the hole in it.
In the absence of a template, the shell is turned upside down and applied to the surface. Use a simple pencil to trace the outline.

To correctly calculate the distance from the edges of the plumbing fixtures to the fastening eyes, take measurements and transfer them to the outlined outline. The resulting size determines the distance that should be retreated from the line in order to create an internal contour that acts as a support for the sides of the bowl.
Sawing and finishing edges
The hole for installing the bowl is made using a jigsaw. If you have to work with a hacksaw, be prepared to trim the edges.
When working with a hacksaw, in order to get a neat cut, first drill a hole in the area of the marking line inside the outlined contour. Its diameter should be such that the hacksaw blade can fit freely.
Important! To minimize the risk of chips on the decorative surface of the tabletop, sawing should be done slowly and without excessive effort.
The end surfaces of the created hole are treated with fine-grained sandpaper or sanded with a file.

When choosing a sealant, it is important to focus on the type of material used in the manufacture of the countertop. Thus, alcohol-based sealing impregnations are used for plastic and wooden coatings.
Installing the bowl and connecting equipment
The bowl is installed in the countertop and buried. To ensure a tight fit, the product is turned slightly back and forth. After this, all that remains is to tighten the installed fasteners and remove the silicone with a napkin, which is squeezed out when the bowl is seated in place. The assembled and fixed structure is left for a day until the adhesive composition has completely dried.
To connect the equipment, install a mixer in the hole, connect it to the hoses and fix it with fasteners. The outlet of the siphon is brought into the sink, a pipe is connected to it, which is taken out into the sewer socket.
Overall technology mixer connection and the siphon of the built-in sink is almost identical to that described when installing the console model.
Specifics of assembling a complex from a countertop and an overhead sink is given here, we recommend that you familiarize yourself with the very useful material.
Conclusions and useful video on the topic
Some useful recommendations for installing sinks are presented in the following videos.
Video #1. Installation Guide for Wall Mount Model:
Video #2. Key points when installing the built-in model:
Video #3. How to properly install a sink into a countertop:
When planning to install a sink located below the table level, it is better to use the services of a professional plumber. After all, this installation method is often chosen for expensive models made of natural or artificial stone.
And this requires not only having at your disposal special equipment for cutting stone, but also knowing the intricacies of working with the capricious material.
Please write comments in the block below. Tell us about how you assembled and installed the sink in the wash area in the bathroom. Ask questions, share useful technological nuances you know, post photos related to the topic of the article.


It’s good that now you can find instructions on the Internet for installing and connecting literally any type of sink.There are instructions for mounting by hanging on the wall, and for attaching to an installation, and for installing on a countertop. Very useful information for independent owners who know how to hold a tool in their hands.
If the sink is placed in the place of the previous one, then it is even easier than starting from scratch. The places for fastenings are already marked; if the sizes are standard, then you can fasten them directly. It happens that the hole becomes loose, then you can use plastic or wooden dowels.
Worse, if the old and new sinks are of different designs and sizes, then you have to seal the old holes and drill new ones. If the differences are insignificant, and the holes are nearby, then the wall in this place may crumble.
In the photo gallery, the tulip is corner, placed next to the bathroom, not in the corner. The corrugation is rolled up like a snail, because the exit from the wall is lower than necessary - a grief master...