Installing a siphon on a bathtub: how to properly assemble and install a siphon
In the field of protecting the bathroom from the penetration of unpleasant odors and gases from the collector, the correct installation of the siphon on the bathtub is of great importance.This is a kind of buffer between the bathing tank and the sewer.
Its purchase should be preceded by an analysis of the main criteria influencing the correct choice. In this material we will talk about popular types of siphons and figure out how to choose the right device. We will also tell you a few secrets of installing these plumbing devices.
The content of the article:
Types of bath siphons
Among modern siphons, 4 types are most common: corrugated, elbow or tubular, with a flask, flat. Correctly selected both in terms of design and the material from which it is made, the siphon will ensure reliable and long-term operation.
Pros and cons of corrugated siphon
Among the listed types, the design of a corrugated siphon is the simplest. It consists of 2 main units - a slightly curved outlet and a pipe with a frame.
Ease of installation is the main advantage of the device. The corrugated pipe can be placed in any plane. Its disadvantage is that if, in the event of a blockage, such a siphon has to be cleaned, then this will need to be done manually, having first dismantled the structure.
Independently form and water seal. This type is used if the sewerage system has a non-standard design.
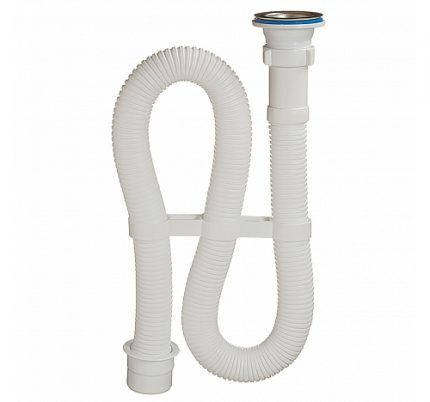
In its “pure form”, a corrugated siphon, which forms a water seal by simply bending a pipe, is not installed under the bathtub.Such a solution would threaten the frequent formation of congestion and would not be pleasing with the difficulty of clearing:
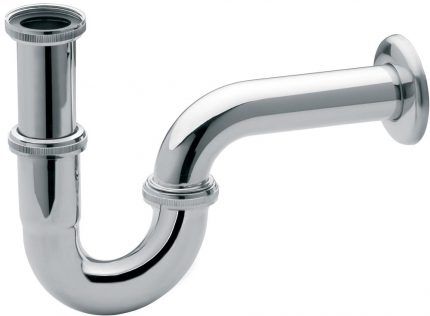
Tube type siphon
The shape of the inflexible structure resembles a horseshoe or the letter S in a horizontal position. A barrier to the spread of unpleasant odors from the sewer is water, which is constantly present in the bend of the pipe.
High-quality siphons have a plug at the bottom of the elbow to facilitate cleaning. If there is no such part, it is difficult to free the system from accumulated debris.
Metal siphons are part of expensive plumbing fixtures. In such systems, designers never use plastic. They are made of brass, bronze or stainless steel. The first 2 materials oxidize if they are not coated with a special compound.
Siphon with flask or bottle
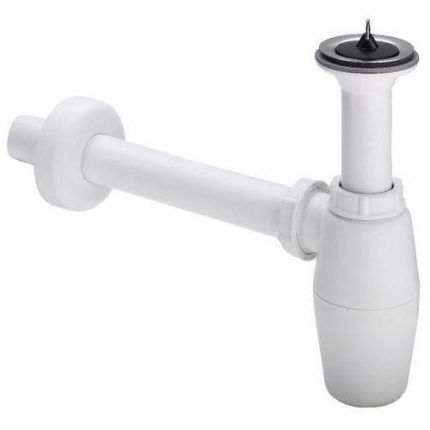
Siphons with a flask are most often used for installation under the sink and less often under the bathtub.It got its name due to the presence of a kind of bottle for storing water. Place the flask strictly opposite the drain hole, connecting through a rigid or corrugated tube.
If the drain pipe is flexible, a bottle siphon is used regardless of the location of the entrance to the sewer. The rigid drain is suitable for installation in the bathroom under the washbasin.
Modern flat siphon
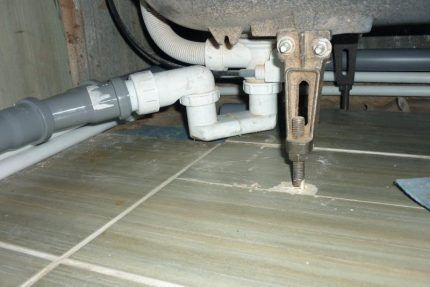
This type of siphon is similar to elbow or pipe devices. The difference is in the presence of a water seal and a horizontal flat outlet designed to accumulate debris.
Before installing this siphon under the bath, you need to take into account that it can only be used when the collector supply is located horizontally.
The advantage is quick installation and the ability to conveniently clean the pipes. Separately, you can purchase a special mesh for draining this siphon. This will additionally protect the system from small debris entering it.
Classification of siphons according to drain design
According to their design, all siphons can be divided into the following types:
- Mechanical. They have a plastic or rubber stopper to allow the drain channel to be blocked. Here all manipulations are performed without the use of any levers or automation - manually. The device is very simple, so it has a long service life.
- Semi-automatic. This is a complex structure that has a shut-off valve, which is controlled by cable or lever mechanisms. This adjustment is usually placed at the overflow hole above the water level. The reliability of this type of harness is somewhat lower due to the presence of a number of moving parts and assemblies.
- Automatic. In this case, the siphon is part of the same system as the filling device. Everything is controlled by a built-in microprocessor. The system includes an easy-to-operate Click-clack valve.
Automation allows you to fill the bath with water at a given temperature and maintain it. When the temperature decreases, the water is drained and the bath is refilled with warm water to the set volume.
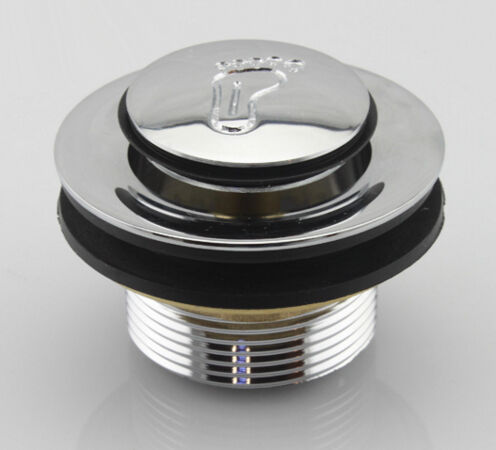
The click-clack design includes a locking cap secured to a pin. It rises when a certain column of water presses on it and forms a gap through which excess water flows out. Automatic siphons are made from non-ferrous metal alloys.
Semi-automatic siphons are produced in 3 versions. In the first, the overflow hole is opened by pressing the drain plug. To remove used water, simply press the lid to activate the overflow plug.
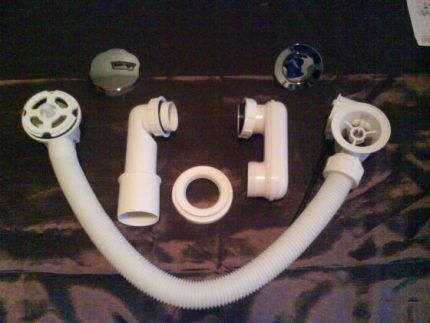
The design of the semi-automatic siphon includes a special handle with a plug function for the overflow hole. To open or close it, change the position of the handle. The plug is equipped with a special mechanism, by pressing which you can both open and close the drain. Over time, the quality of work decreases due to the formation of a limescale layer.
If a washing machine is installed in the bathroom, then to connect it the siphon must be metal, because plastic may not withstand high temperatures. We also recommend that you read the installation details siphon for washing machine.
When choosing a siphon, you should not proceed from the design of the product. The first thing the siphon should ensure is uninterrupted operation aimed at high-quality drainage of wastewater into the collector.
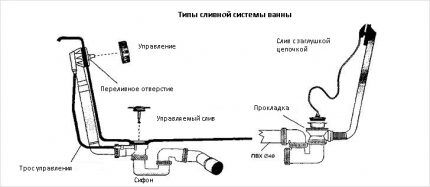
How to assemble and connect a siphon?
To connect to the bathroom sewer, as with any other plumbing fixture, it is necessary to assemble the siphon. Devices are sold in kits, where all the parts are scattered.
Installing the simplest type of bath siphon involves a number of standard steps:
To know how to assemble any bath siphon model, you need to study the assembly diagram. It is identical for all types.
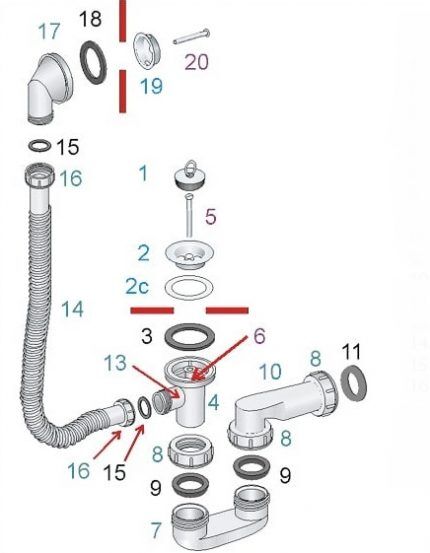
The assembly technology is as follows:
- The new siphon should be unpacked and the quality of the threaded connections checked. Chips and burrs are unacceptable. Before assembly, you need to lay out the parts in the order in which they will be connected later.
- The plug is attached to the overflow cover using a chain.
- Install a protective grill and a flexible rubber gasket onto the drain hole.
- A gasket is inserted into the upper part of the outlet pipe, then the pipe is pressed with force against the body of the bathtub so that the gasket takes the desired position and fits as tightly as possible.
- With the other hand, insert the connecting screw into the grille and secure it with a nut using a wide screwdriver.
- A plastic coupling nut is placed on the pipe. A conical rubber seal is installed under it, with the wider side facing the nut.
- Insert the pipe into the elbow and tighten the nut until it stops.
- A conical gasket is inserted into the coupling nut and the elbow is connected to the adapter. Using an adapter, the height of the siphon can be adjusted.
- Insert the gasket into the opposite nut of the adapter and connect the latter to the sewer outlet.
- The corrugation is attached to the overflow outlet through a flat or cone-shaped gasket and a coupling nut.
- Connect the corrugation to the overflow pipe using another nut with a gasket through the bathtub body.
- A gasket is fixed to the top of the overflow pipe.
No extra parts are included in the kit. When something remains after assembly, this indicates that some point was missed. If the siphon connections are not tight, leaks may occur. To prevent this, coat the joints with sealant.
In the process of connecting a semi-automatic siphon, a knob is installed, with the help of which the drain plug is controlled. The lamb is placed on the overflow hole by connecting a pre-corrugated pipe to it from the back of the bowl:
You can strengthen the threaded connection by winding tow or silicone tape. Paste is applied over the winding and the parts are tightened.

There should only be 1 seal per connection. Playing it safe by installing two gaskets leads to the opposite effect - the tightness of the joints is broken. Trim nuts and spacers should not be under-tightened, but too much tightening can damage the parts. It is better to tighten the nuts not with a wrench, but by hand.
There are also other articles on our website that describe in detail the process of connecting siphons to various plumbing fixtures:
- Siphon for washbasin: types, selection criteria + assembly rules
- Installing a siphon in the kitchen: how to assemble and install the device + diagrams and installation example
- Siphon for shower tray: design, purpose, installation features
- Siphon for washing: design, purpose, do-it-yourself installation features
- Siphon for a shower cabin with a low tray: types, selection rules, assembly and installation
Features of the assembly of a semi-automatic siphon
Assembly of a semi-automatic siphon is complicated by the presence of additional parts. At the top of the tubular structure is a stainless steel control rod. It is secured with 3 screws of the same material. The aerator is also located here.
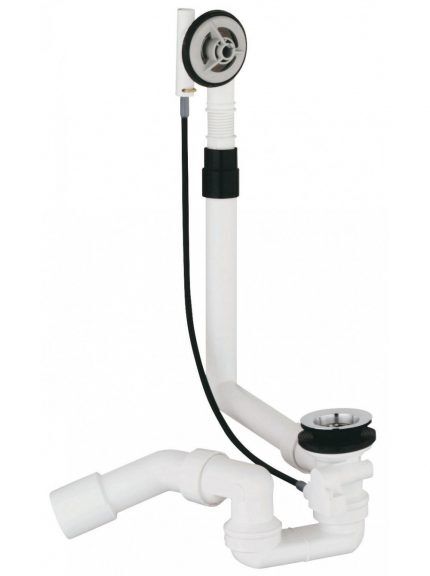
Its installation requires a minimum of space. Only the siphon head is visible from above. Water is supplied from the side using a threaded connection.
The tubular semi-automatic siphon has good throughput and a reliable water seal.A high-quality device is designed in such a way that water never flows down the wall of the bathroom.
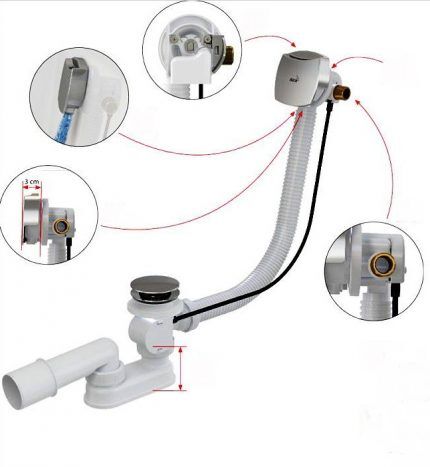
Assembly is carried out according to the following scheme:
- The manifold pipe is connected to the central overflow, pushing the pipe all the way through. The gasket at the joint is already installed, so there is no need to insert anything additional.
- A metal filter is also mounted on the overflow, having previously installed a double seal on the drain.
- Flat-shaped metal caps are connected to the movable adjustment cable, and then secured to the drain hole. The assembly is connected to the overflow using a bolted connection.
The joints must be equipped with appropriate gaskets - the side ones with an ordinary thin seal, and the central one with a “butterfly” gasket.
Checking the reliability of connections
After installing the siphon, it is necessary to perform a control check of all joints. To do this, fill the bathtub with water to ensure that the drain neck is connected correctly. If there is no leak in this place, then no errors were made during installation.
The remaining connections are checked for reliability by removing the plug from the drain. If liquid leakage is detected at any point, the bath is completely emptied of water. After this, the joint is disassembled and reassembled, paying special attention to the position of the gaskets and nuts.
According to professionals, the cause of a leak is most often a misalignment of the nut connection or its insufficient tightening.
Some useful installation tips
Before assembling and installing the drainage device, you need to check the level of the bathtub, the diameter and position of the drain pipe. Then you should read the instructions to take into account all possible nuances.
When installing the device on an old metal or modern acrylic bathtub, check the drain holes. If any roughness is found on them, they are eliminated using emery cloth.
If the drain is rough, it is impossible to ensure that the siphon fits tightly to it. Before final tightening of the device, you should check the correct assembly; gaskets require special attention. They often move, so it is better to apply a special sealant to them.
The correct slope of the pipe also ensures normal operation of the drain. The drain pipe must be directed directly to the collector. If the siphon is equipped with several inlets for branching the drain into the collector, but they are not intended to be used, they should be plugged with a special nut.
When purchasing a siphon, its important characteristic is the quality of the material, and if it is plastic, then the main thing here is the wall thickness and processing technology. The denser the walls of the drain device, the better it will resist stress.
The presence of cracks, even disguised ones, is unacceptable on a cast iron drain. If such defects are found, it must be replaced. The surface of the brass siphon must be absolutely smooth, otherwise it will have to be cleaned frequently.
To avoid leaks, seals on the drain are changed on average once every six months, and those installed between the pipes - every 3 months. To prevent scale deposits on the walls, every few months it is advisable to rinse the device with hot water with an additive in the form of citric acid.
If chemical cleaners are not contraindicated for the material, then you can use “Mr. Muscle”, “Ruff”, “Phlox” and the like.
Conclusions and useful video on the topic
Author's master class on installing a siphon:
You will save time spent on piping the bathroom by viewing this material:
A properly installed siphon is a guarantee of comfort and peace of mind. Haste when installing it yourself is inappropriate. If, even after reading the detailed instructions, there are still unclear points, it is better to contact professional plumbers.
If you have personal experience installing a bathroom siphon, please share your knowledge with our readers. Maybe you also have your own editing secrets? Write your comments and ask questions in the block below the article.


I had tubular siphons in my old apartment. They were short-lived and had to be replaced quite often. When a private house was recently built, I already installed corrugated ones here. They are stronger and even fit better initially. In theory they should be much more durable. But, as they say, everything needs to be tested in practice. Plus, a lot can depend on the manufacturer.
And I think that tubular siphons are the best. Yes, they need to be changed more often, yes, they are less durable, and so on, but if something happens, it is easiest to return items accidentally washed away by the jet. And we must not forget that at the same time it is the cheapest of the presented and generally existing siphons. Of course, it is unlikely to be suitable for a hidden version, but in our ordinary apartments only a tubular one is needed.
Which is the cheapest?
If you need an inexpensive bath siphon, I recommend considering Russian and Ukrainian-made options. This is an acceptable build quality of siphons at an adequate cost.
Here are some simple, inexpensive and practical options:
1. Bath siphon Orio A-60089 - made in Russia, wet water seal without membrane, has an overflow;
2. Bath siphon Water House SV 01 - made in Ukraine, wet water seal without membrane, has an overflow;
3. Bath siphon SoloPlast P-0110 - made in Ukraine, wet water seal without membrane, has an overflow.
The cost of these models is about 6 dollars.
Hello, I'm thinking of asking a question. They installed a bathtub and a flat siphon for me. Now the drain grate is always immersed in drain water, is this normal, or do you need to tear off the tiles and lift the bathtub a centimeter or two up so that when it is not in use, the water drains completely and the grate is dry?