Rules for arranging an autonomous water supply system for a private house from a well
Is your private home equipped with an autonomous water source and do you want to organize water supply for your private home from a well? Agree that having completely independent communications is very convenient. Do you have no practical experience in arranging a water supply system and do you doubt your own abilities?
We will help you cope with the task. After all, a person can live for more than a month without food, but without water he cannot live even three days. Therefore, organizing an uninterrupted supply of water from a well is a top priority in your diary.
Useful recommendations for arranging a water supply system, collected from our article, will come to your aid.
Also here you will find step-by-step instructions with colorful photographs and detailed diagrams. To make it easier to perceive information, we have selected a video about independently organizing an autonomous water supply system from a well.
The content of the article:
Water for autonomous water supply
First of all, it’s worth figuring out what kind of water is suitable for an autonomous water supply device.
If you imagine everything simply and easily, then there are three types of groundwater.
- Verkhovodka. Something that has managed to seep into the soil, but has not yet become a stable aquifer. The weakest water quality. It’s easy to recognize - the water level fluctuates greatly depending on the season. Not suitable for drinking water supply.
- Groundwater. More stable aquifers. The depth ranges from several meters from the surface to several tens. They are mainly used for autonomous water supply.
- Artesian water. The deepest and oldest water carriers. The depth of occurrence can exceed a hundred meters. Water is most often suitable for drinking purposes, but may be too hard and saturated with various minerals.
Water obtained from an autonomous source must undergo a cycle of comprehensive studies at the SES or another accredited water analysis organizations.
Based on the results of the analyzes, conclusions are drawn about the possibility of its use as drinking or technical.

The organization that carried out the water analysis can recommend the optimal treatment scheme if the technical option can, after filtration, acquire a drinking category.
Types of wells for private water supply
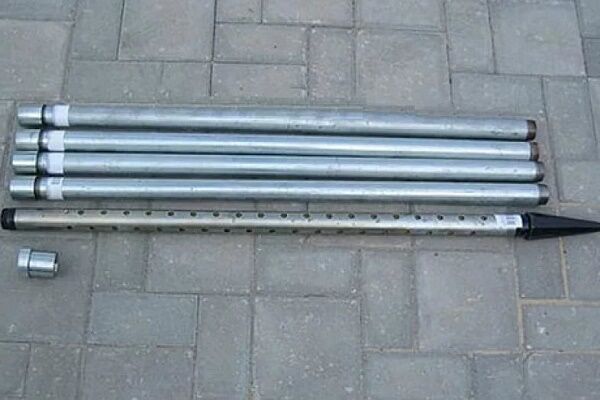
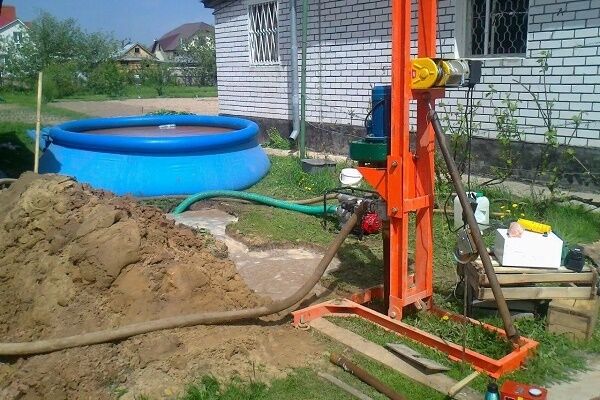
The undrinkable water is quite suitable for watering the garden, cleaning and similar needs. It is easier and cheaper to obtain it by installing a needle well, also called Abyssinian well. It is a column of thick-walled VGP pipes Ø from 25 to 40 mm.

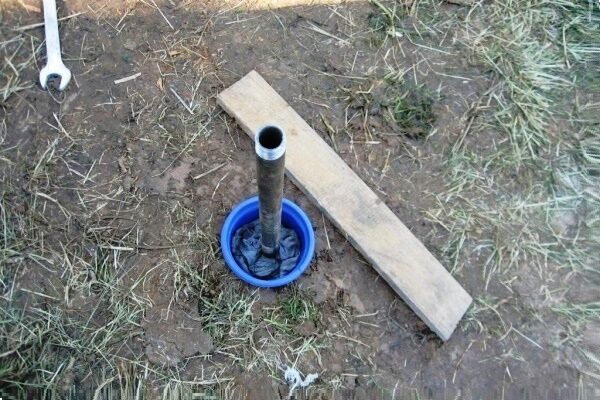
The first link of the column is equipped with a tip and a filter located directly in the walls of the water-gas pipe. The Abyssinian well is not drilled, but driven into the ground using a heavy borehole, which is attached to a cable thrown over a block.
This is the cheapest and easiest way to obtain water for temporary water supply. For summer residents who need exclusively technical water and only in the summer.
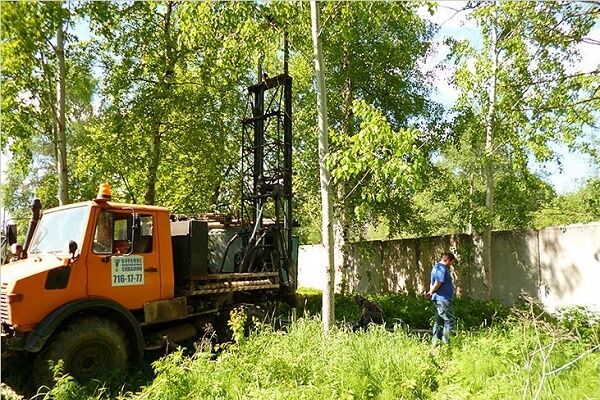
Sand wells can supply water for both technical and drinking purposes. It all depends on the specific hydrogeological situation in the suburban area.
If the water carrier covers a layer of waterproof soil on top, then the water may well be potable.
Aquitard soils that prevent the penetration of water prevent the penetration of domestic wastewater. If the sand containing water does not have natural protection in the form of loam or hard sandy loam, its drinking purpose will most likely have to be forgotten.
The walls of the well are reinforced with a column of steel casing pipes connected to each other by couplings or welds. Recently, polymer casing has been actively used, in demand by private owners due to its affordable price and corrosion resistance.
The design of a well in sand provides for the installation of a filter that prevents gravel and large sand suspension from penetrating into the wellbore.

Working part well filter should protrude beyond the aquifer at the top and bottom by at least 50 cm. That is, its length must be equal to the sum of the thickness of the aquifer and at least 1 m of reserve.
The diameter of the filter should be 50 mm smaller than the diameter of the casing so that it can be freely immersed and removed from the shaft for cleaning or repair.
Wells whose trunk is buried in rocky limestone can do without a filter and partially without casing. These are the deepest water intake workings, extracting water from cracks in the bedrock.
They last longer than their counterparts buried in sand. They are not characterized by the process of siltation, because There is no clay suspension or small grains of sand in the thickness of the water-bearing soils.

The casing of artesian wells is arranged according to the telescopic principle. Each underlying tier of the structure should be 50 mm narrower than the previous one.
At a depth of more than 100 m, it is permissible to use asbestos-cement pipes or drill a well without casing at all, if there is no need to strengthen the rock walls of the hydraulic structure.
If an artesian well penetrates more than 10 m of fractured rock containing groundwater, then a filter is installed. Its working part must cover the entire thickness supplying water.

Subtleties of arranging a water supply system
The process of setting up an automated system water supply from well directly into the house to satisfy household and economic needs can be divided into several stages. Let's look at each of them in more detail.
Stage #1 - choosing the right location
The first step is to decide on the location of the well. Once upon a time, they preferred to drill them directly under the house - kitchens were often located in the basement and such a solution seemed convenient.
But the fact is that with such an arrangement it is problematic flush the well if necessary. And if it fails, then drilling a new one is completely impossible. So the best place for a well is somewhere outside, although not very far.
We must take into account sanitary standards. The water intake point should be no closer than 20 meters from the cesspool or septic tank in clayey soils: loam, sandy loam.
The presence of sand, capable of passing and “absorbing” household waste, increases the specified distance to 50 meters.

It should be remembered that the further the water intake point is from the water collection point, the more funds will be spent on water supply installation. For summer residents laying summer water supply on their site, the distance from the source is not very interesting.
Those who love permanent residence outside the city should take this into account. After all, to build a stationary water supply system you will need to dig a trench.
The Abyssinian well and small wells should not be located closer than 5 m to the foundation. By extracting underground water, they will at the same time drag particles of loose soil and gradually wash away the rock.
Over time, the process of such weakening can lead to subsidence and deformation of the foundation. But deep wells have virtually no effect on the properties of the underlying rocks.
Stage #2 - defining the general scheme
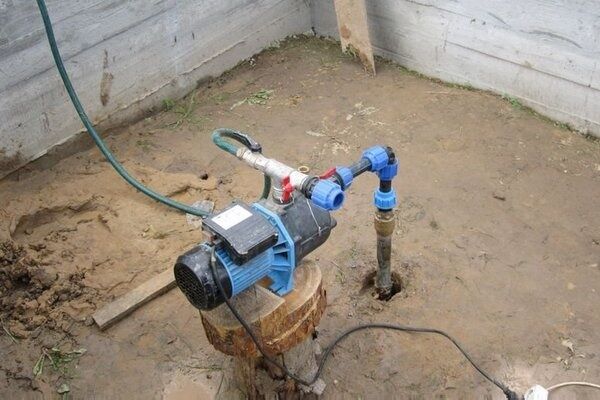
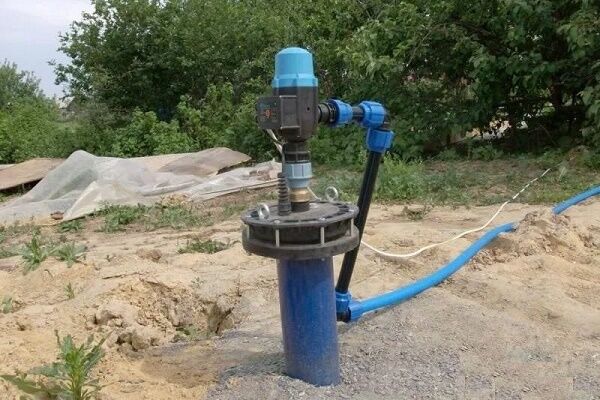
Structurally, the whole scheme looks simple. The main element is the pump. It lifts water from the depths. Can be located directly in the well (submersible type) or work on the surface (surface pump type). The first option ensures water intake from a greater depth.

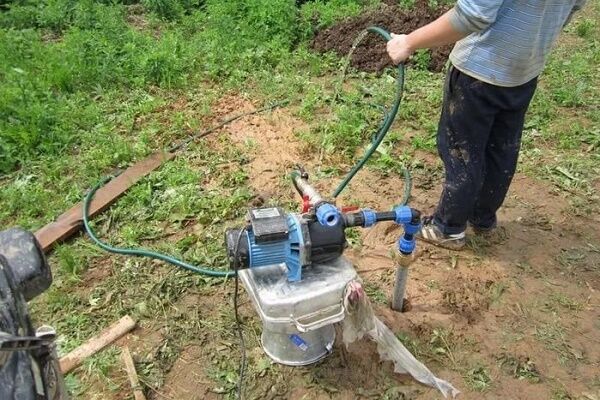
The second one is more convenient to install and maintain; it is preferable during long seasonal breaks (at a summer cottage, for example). But the surface pump does not provide lifting from depths greater than 8 meters.
Here you should also take into account the distance along horizontal sections on the surface - 10 meters of water transportation in the horizon is equal to a meter of rise. By the way, another reason not to move the well too far from the house.
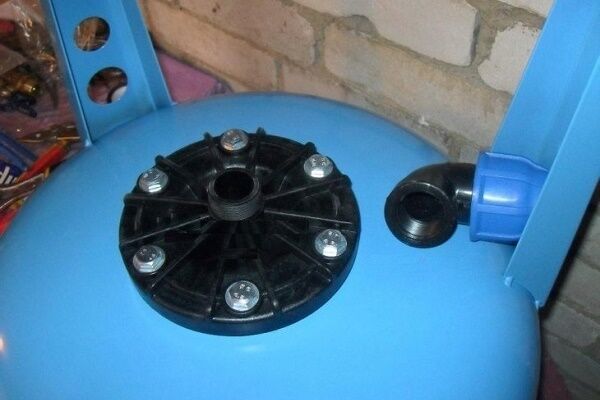
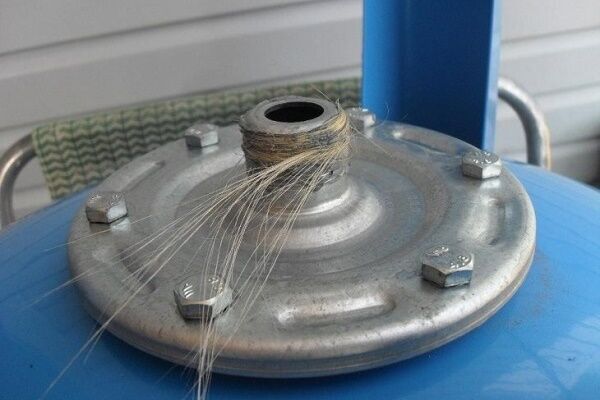
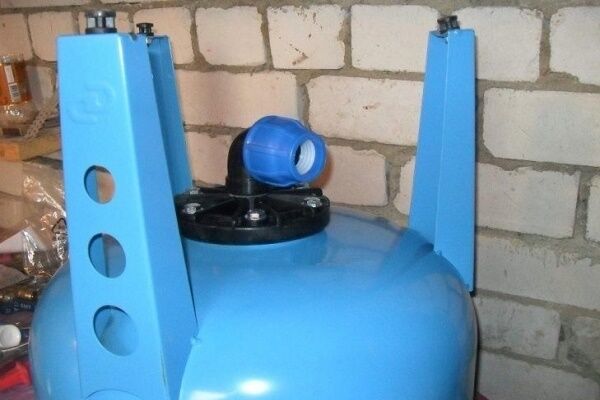
Next, the water enters hydraulic accumulator reservoir. It is a steel or plastic tank. It contains a rubber container into which air is pumped.
This compressible volume creates pressure in the system and displaces water to the points of analysis - water, as you know, is not compressible, but air has this property.
Automation monitors pressure differences. When the pressure drops below a preset level, it turns on the pump, and when it reaches it, it turns off. This creates a stable pressure in the system and a normal supply of water to the points of analysis.
The power and volume of the hydraulic accumulator (and pump) are selected with a small margin, based on the peak flow rate.That is, all points are added: toilet, sink, shower, and so on. If there is seasonal watering, then it is also taken into account in the calculation.

In addition to the pump and accumulator, the set includes check valve, preventing the flow of water back into the well, a safety valve that relieves pressure, various sensors and relays, shut-off valves and filters.
Sand slant filters are mandatory and prevent sand from entering the system. But fine filters need to be selected based on the composition of the produced water.
All lines of the autonomous water supply network must be cut off by shut-off valves. It is desirable that the connections be made collapsible - using the so-called “American ones”.
But in general, the final configuration of the entire circuit varies based on specific tasks. But the basis of the pump and accumulator always remains the same.

Stage #3 - layout and arrangement of equipment
When installing water supply from a well with your own hands, the placement of equipment most often causes difficulties. There are many options here.
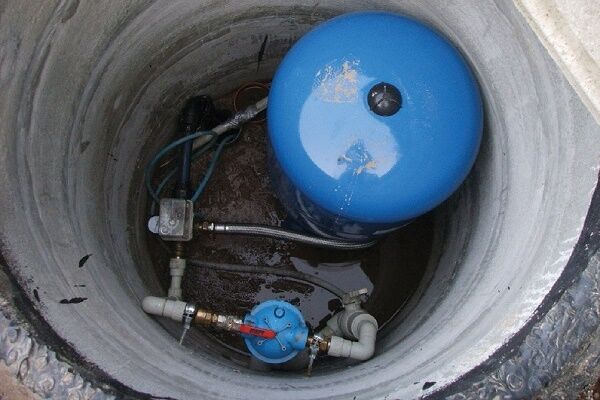
It is worth recognizing as the most rational caisson device — a special well near the well, where all the mechanisms are located. It turns out that the equipment is located directly at the water intake point and the costs of transportation along the horizon are minimal.
The second plus is silence in the house. The pumping station is a rather noisy device, so placing it outside the perimeter of the residential area is justified.

A caisson is a reinforced and insulated pit with an insulated ceiling, buried to a depth below the calculated freezing point.
This prevents freezing of the caisson - the fact is that the temperature on the ground at this depth is approximately constant all year round and is always above zero.
So, with normal insulation of the walls and the head of the caisson, there is no risk of a temperature drop. In such cases, ground-based structures perform much worse.

If it is not possible to build a caisson, then all the equipment can be placed in the house.
It would be good if a separate room was allocated for these purposes.

If it is not possible to allocate a separate isolated area for such purposes, you can use the bathroom for this purpose.
But if there is no space there, then you can take a closer look at the cabinets under the sink in the kitchen.

They are often placed under the stairs or in a closet; a basement or even a cellar is well suited for such purposes - this type of equipment is not so bulky and unpretentious.
The main thing here is not the installation location, but its correctness. And the location itself does not affect the quality of work at all. For ease of access - yes. But not to work.

Stage #4 - pipe laying features
It is better to take plastic or HDPE pipes for the installation of the entire system. They are lightweight, durable, reliable. They are not afraid of corrosion, and no bacterial plaque forms on the inner surface.
They withstand water hammer and can withstand the freezing of water inside them. Although, of course, it’s better not to let it come to this. They are easy to bend and cut. Laying directly into the ground is allowed.

In areas outside the house, pipes are laid at a depth below the freezing point. As a last resort, there is a special low-temperature heating cable, which is passed into the pipe and connected to the electrical network.
It prevents the water inside the line from freezing even in severe frosts. But this is an extra waste of electricity - it is much simpler and more efficient to simply lay the pipe a little deeper.

It is better to introduce the water supply from the well into the house at a depth, underground. If this is not possible and you have to run the pipe into the house through the base, then this area is subject to mandatory insulation.
Moreover, the insulation should begin even below the freezing level.

Already in the house, installation can be done in any way: PVC pipes, copper, steel, and so on - whatever is more convenient and simpler for you.
The main thing is that it is reliable and sound.

Many questions are raised by the location of sensors and their range, rules for installing shut-off and safety valves.
Conclusions and useful video on the topic
The best help to explain such dark places is the video below.
Just remember the principle: always take all parameters with a reserve.
You can build a water supply system from a well with your own hands if you follow the instructions in collections of construction and technological rules.
If you have serious doubts about your abilities, then it is better to invite specialists. And although this option will cost more than doing it yourself, you will be pleased with the result. Moreover, you can save energy and personal time.
Do you have experience in constructing a well and laying a water pipeline yourself? Or have you encountered certain difficulties in constructing a water supply system? Please share your experience in the comments to our article.


I also thought about drilling a water well separately from the house, but the builders dissuaded me. At the same time, a large cellar-basement was provided in the house. The well was drilled right there, and the necessary equipment was installed there. Otherwise, everything was done as described. To operate the bathhouse, just in case, they made a separate well; if anything happens, it will be a backup source of water.
The author of the article speaks out against placing a well in the basement of a house, but I think differently. This is exactly the option in our house and it is convenient.
Before drilling a well, the basement should be deepened (if necessary) so that you can work comfortably and further service the equipment. We have a self-drilled well in our basement. The aquifer is located at a depth of 6.5 m. In the well there is a check valve on a plastic pipe, above the well there is a pumping station, the pipe distribution from the basement to the house is made of metal-plastic pipes. This option is convenient and requires minimal maintenance effort.
In addition to the listed pumps, there is a third one - INJECTION pumps. The pump itself is located on the surface. The depth of the well is 20 m. The main disadvantage is two pipes lowered into the well, at the end of which there is an injector. For more details, see the Internet.