Hydraulic accumulators for water supply: principle of operation, types, how to choose the right one
A modern autonomous water supply must be equipped with a container for storing a certain amount of water.Of course, the simplest version of such a device is a plastic or metal tank installed somewhere in the attic.
However, hydraulic accumulators for water supply are confidently replacing conventional storage tanks, since they are more convenient and have a better effect on the condition of the system.
The article we have proposed describes in detail the types of hydraulic accumulators and provides the rules for selection. We conveyed in detail how the equipment is installed and adjusted. The recommendations we provide will ensure trouble-free operation of the device and extend its service life.
The content of the article:
Operating principle of a typical hydraulic tank
A hydraulic accumulator, also known as a hydraulic tank, also known as an accumulator or pressure tank, are different names for the same device.
On the outside it is really a metal tank, and on the inside the container is divided into two parts by a special rubber gasket, which is sometimes called a membrane.
The gasket is firmly fixed at the neck of the tank, where the hole for water inlet is located. There is another hole on the opposite side of the container; it is intended for air.
A regular nipple is installed here. Why is all this done? The membrane divides the hydraulic tank into two compartments. On one side of this gasket there is water, and on the other there is air under a certain pressure.
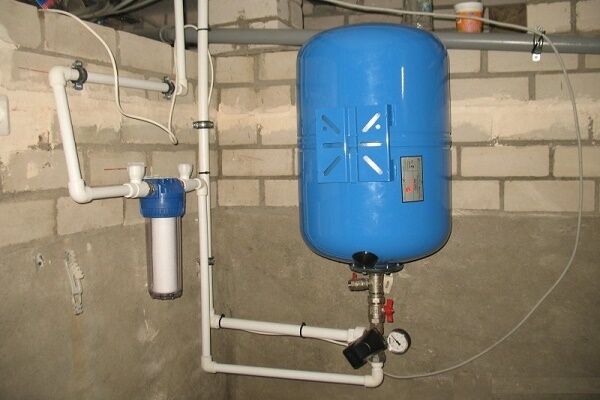
A pressure gauge is used to measure the pressure in the accumulator. Some models are additionally equipped with a filter to prevent dirt from getting inside. The membrane material is special rubber. It is not only elastic, but also safe for human health.

When connecting the hydraulic tank to plumbing system water from such a device comes with a stable pressure, which improves the quality of tap water and provides the necessary conditions for the functioning of household appliances.

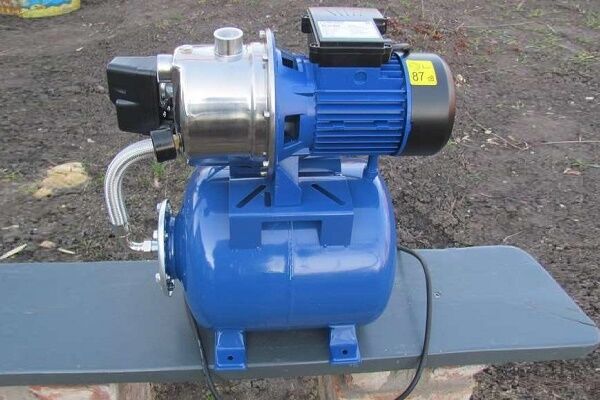
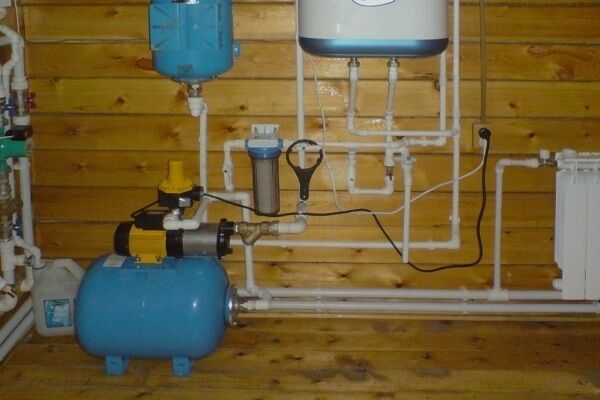
For example, for the normal operation of automatic washing machines, hydromassage devices and other similar equipment, certain indicators are required pressure in the water supply. Almost always, hydraulic accumulators are equipped with a special regulating device - a pressure switch.
This device can be configured so that it turns on and off the flow of water into the hydraulic tank depending on the air pressure. It works like this: as water is drawn from the device, the pressure in its air chamber decreases.
When it reaches the minimum mark, the pressure switch automatically turns on pumping equipmentto replenish the water volume. As a result, the pressure in the hydraulic tank increases again. When the maximum set pressure value is reached, the relay turns off the flow of water to the accumulator.

This system allows you to significantly reduce the number of pump starts/stops, and this extends the service life of the equipment.If the pump were connected directly to the house water supply, the number of on and off cycles would be significantly higher.
The presence of such a tank in the water supply system ensures the stability of its operation, as well as protection from possible water hammer.
In addition, there is always a certain supply of water inside the accumulator, which can be very useful, for example, if the pump breaks down. Understanding the operating principles of a hydraulic accumulator allows you to select a suitable device and ensure its correct installation and maintenance.
Types of hydraulic accumulator tanks
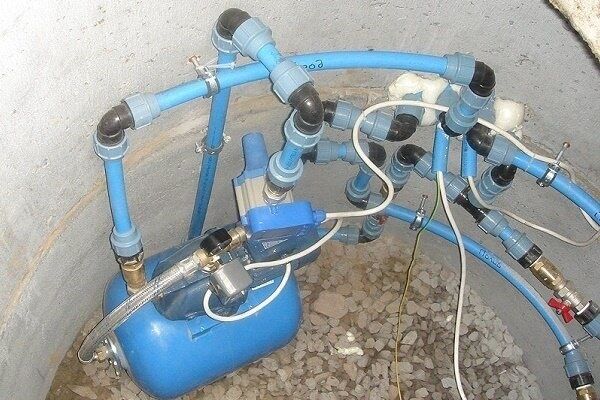
Hydraulic accumulators differ in the type of installation: they are horizontal and vertical. Vertical hydraulic accumulators are good because it is easier to find a suitable place for their installation.
Both vertical and horizontal versions are equipped with a nipple. Along with the water, a certain amount of air also enters the device. It gradually accumulates inside and “eats” part of the volume of the hydraulic tank. In order for the device to work properly, it is necessary to bleed this air from time to time through this very nipple.

Hydraulic accumulators that are installed vertically have a nipple that is designed specifically for these purposes. Just press it and wait until the air leaves the device. With horizontal tanks everything is a little more complicated. In addition to the nipple for bleeding air from the container, a shut-off valve is installed, as well as a drain to the sewer.
All this applies to models capable of accumulating a liquid volume of more than 50 liters. If the capacity of the model is smaller, then there are no special devices for removing air from the membrane cavity, regardless of the type of installation.
But the air still needs to be removed from them. To do this, water is periodically drained from the accumulator and then the container is refilled with water.
Before starting the procedure, turn off the power supply to the pressure switch and pump, or the entire pumping station, if the hydraulic tank is part of such a device. After that, you just need to open the nearest faucet.
The water is drained until the container is empty. Next, the tap is closed, power is supplied to the pressure switch and the pump, and water will fill the accumulator capacity automatically.

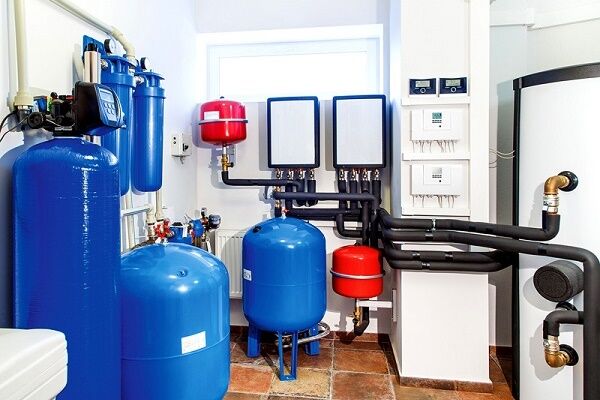
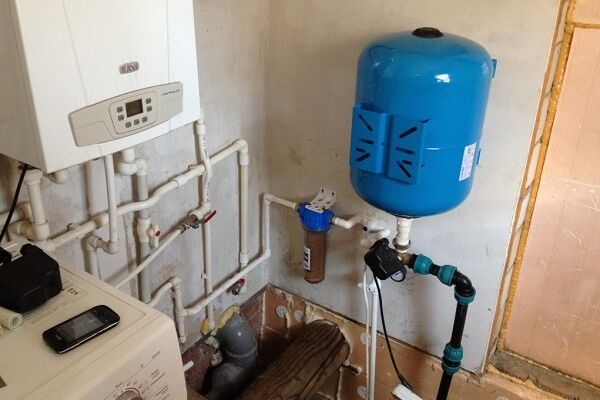
Typically, tanks intended for autonomous engineering systems differ in color: blue and red. This is an extremely simple classification: if the hydraulic tank is blue, then it is intended for cold water supply systems, and if it is red, it is intended for installation in a heating circuit.
If the manufacturer has not designated its products with one of these colors, then the purpose of the device should be clarified in the technical data sheet of the product. In addition to color, these two types of accumulator differ mainly in the characteristics of the material used in the manufacture of the membrane.
In both cases, it is high quality rubber intended for contact with food. But the blue containers contain membranes designed for contact with cold water, and the red ones - with hot water.

Blue devices can withstand higher pressure than red containers. It is not recommended to use hydraulic accumulators intended for hot water systems for cold water and vice versa. Improper operating conditions will lead to rapid wear of the membrane, and the hydraulic tank will have to be repaired or even completely replaced.
How to choose a suitable hydraulic tank?
One of the most important indicators when choosing a hydraulic accumulator is the amount of water it can hold. To do this, you can use the following formula:

And from this table you can take the value of the correction factor depending on the pump power:

For domestic needs, a device with a capacity of about 25-50 liters is usually sufficient. Of course, the calculated value rarely coincides with the actual volumes of typical models of hydraulic accumulators.
In this case, simply take a tank with a slightly larger volume.For example, if the formula calculates the value of 32.5 liters, then you can safely purchase a tank with a capacity of 35 liters.
It should be remembered that the external dimensions of the tank and the volume of water that it can hold are different numbers. Usually water takes up about a third of the total accumulator volume. From the formula it becomes clear that the more powerful the pump is used for autonomous water supply in the house, the more capacious hydraulic tank should be purchased.
Frequent power outages in the area where the house is located is a good reason to choose a larger tank. Thus, the family will have a small supply of water at its disposal.
However, you should not be zealous and choose a hydraulic accumulator that is too large. In such a device, water will be replaced too slowly, and this will lead to a deterioration in its quality.

That is why the calculations take into account the maximum volume of water that passes through the water supply system. Another important point relates to foreign-made models. Such devices cannot always be easily connected to water supply systems in Russia or neighboring countries.
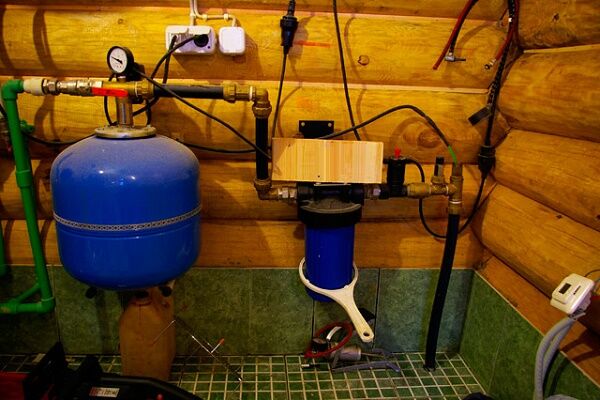
Installation and adjustment
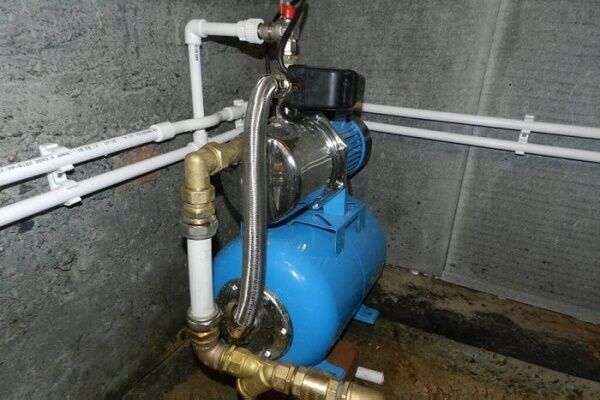
The installation of a hydraulic accumulator is subject to more stringent requirements than when installing a conventional storage tank. The fact is that the storage tank installed in the attic is static, but the hydraulic tank is in dynamic motion: water enters and is taken from the tank, the membrane stretches and contracts, etc.
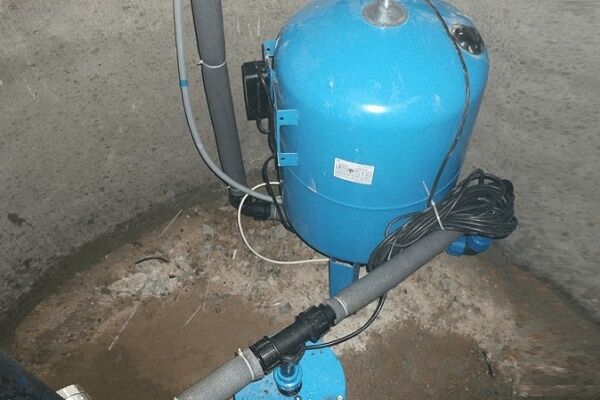
To prevent vibration from being transmitted to the water supply system and surrounding objects, the hydraulic accumulator is installed on a flat and solid base, using shock-absorbing rubber pads.
The location in which the hydraulic tank is installed must be sufficiently spacious and accessible. Such devices require periodic adjustment, testing and maintenance.
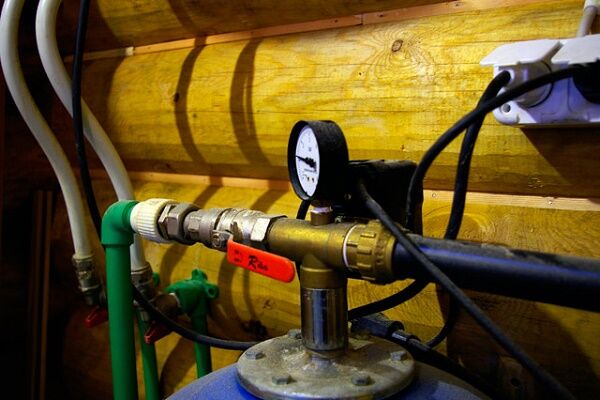
Before installation, you need to find out what pressure should be in the empty accumulator. The nominal value of this indicator is usually 1.5 bar. This is the pressure set by the manufacturer. However, over time, some of the air may escape from the container.

Therefore, you should measure the pressure using a pressure gauge, and then pump up the air or bleed it if the pressure is excessive. It also wouldn’t hurt to clarify the value of the normal air pressure in an empty hydraulic tank using the technical data sheet of the product. Since the spool has standard dimensions, almost any pressure gauge is suitable for measurements.
If for some reason the hydraulic accumulator is not equipped with a measuring device, you can take a car pressure gauge. The main thing is that it is serviceable and accurate enough. A scale with graduations of 0.5 bar or less is required. Electronic devices can also be used for such measurements.
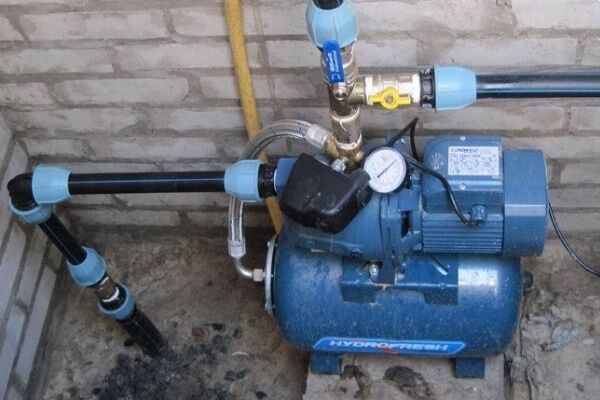
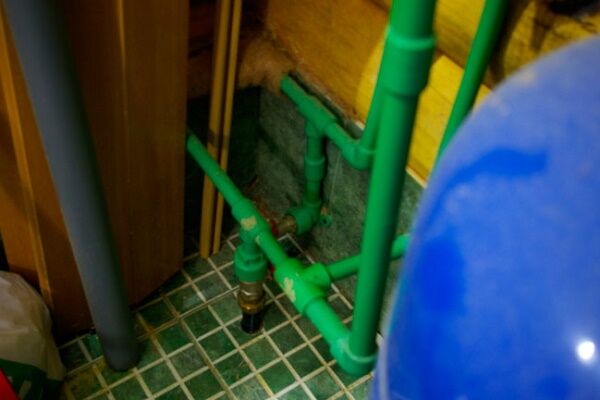
TO water pipes connection is made using flexible adapters. It should be remembered that the diameter of the adapters must correspond to the size of the water supply pipes; narrowing is unacceptable. Before filling the tank with water, all air must be removed from the membrane.

The first time, water is pumped inside as slowly as possible, in a thin stream with low pressure. This is necessary so as not to damage the membrane, which may have caked or become slightly deformed during storage in the warehouse.
Such nuances may seem small, but they can significantly affect the condition of the hydraulic tank. An important point is also setting the pressure in the container.
After the accumulator is filled with water, you need to measure the air pressure again. The less air in the hydraulic tank, the lower its pressure, the greater the volume of water that can be pumped into it.But the less air, the lower the operating pressure of water at the outlet of the accumulator.
It is allowed to reduce the air pressure in the device to a level of 1 bar if there is a need to create additional water volume for storage. However, this will reduce the water pressure in the system. The owner of the device will have to choose between good pressure and the ability to pump a large volume of water into the tank.
In any case, the minimum air pressure must be 1 bar. If there is not enough air in the tank, the membrane insert filled with water will stretch and may touch the metal walls of the hydraulic tank. Such contact is unacceptable, since under its influence the rubber will begin to deteriorate, the accumulator will break, and the membrane will have to be replaced.
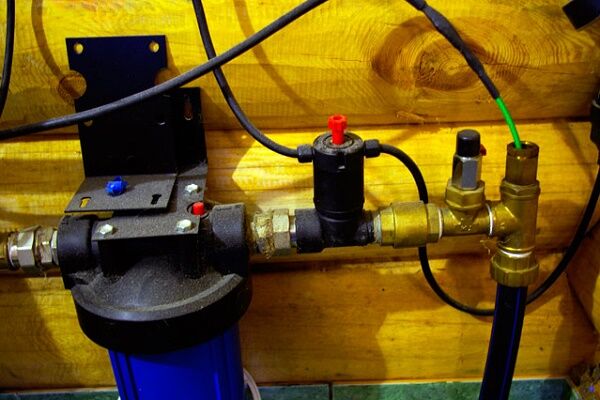
After the hydraulic tank is filled, configured and connected to the water supply system, you can configure the pressure switch.It is usually supplied with instructions detailing the procedure.
Under the device housing cover there are two adjustment springs. A large spring, designated P, allows you to set the minimum pressure at which the relay turns on the pump and begins pumping water into the accumulator.
Using a small spring, designated as P, the difference between the upper and lower pressure is set, i.e. cut-off and cut-on pressure. As water is drawn from the hydraulic tank, the pressure changes.
When it reaches the lower mark, the relay contacts will close and the pump will turn on. When setting up the pressure switch, you will have to fill the accumulator a couple of times and then empty it.
Typically the difference between cut-in and cut-out pressure is about two bar. The hydraulic tank's data sheet indicates the maximum pressure for which the device is designed, but there is no point in trying to pump it up to capacity.
When operating at extreme levels, the elements of the device wear out faster. In progress pressure switch settings One important point should be taken into account - the difference between the shut-off pressure and the air pressure in the accumulator should be about 10%.
Recommendations for use
After hydraulic accumulator installed, it must be properly maintained. About once a month you should check the pressure switch settings and adjust them if necessary. In addition, you need to check the condition of the housing, the integrity of the membrane and the tightness of the connections.
The most common failure in hydraulic tanks is diaphragm rupture. Constant cycles of tension and compression eventually lead to damage to this element.Sudden changes in pressure gauge readings usually indicate that the membrane has ruptured and water is entering the “air” compartment of the accumulator.
To make sure there is a breakdown, you just need to bleed all the air from the device. If water follows it from the nipple, then the membrane definitely needs to be replaced.
Fortunately, these repairs are relatively easy to make. To do this you need:
- Disconnect the hydraulic tank from the water supply and power supply.
- Unscrew the bolts that hold the neck of the device.
- Remove the damaged membrane.
- Install a new membrane.
- Reassemble the device in reverse order.
- Install and connect the hydraulic tank.
Upon completion of the repair, the pressure settings in the tank and pressure switch should be checked and adjusted. The connecting bolts must be tightened evenly to prevent the new membrane from warping and to prevent its edge from sliding inside the hydraulic tank housing.

To do this, install the bolts in the sockets, and then alternately make literally a couple of turns of the first bolt, move on to the next, etc. Then the membrane will be pressed against the body equally along the entire circumference. A common mistake made by beginners in repairing a hydraulic accumulator is the incorrect use of sealing agents.
The installation site of the membrane does not need to be treated with a sealant; on the contrary, the presence of such substances can damage it. The new membrane must be exactly the same as the old one both in volume and configuration.It is better to first disassemble the hydraulic accumulator, and then, armed with a damaged membrane as a sample, go to the store for a new element.
Conclusions and useful video on the topic
This video describes in detail the operating principle of a hydraulic accumulator:
To calculate the volume of a hydraulic accumulator, you can use special calculator programs. One such option is presented in the following video:
Replacing the hydraulic tank membrane is not a very complicated process. It is discussed in detail in this video:
The hydraulic accumulator is an important part of a modern autonomous water supply system. Of course, this device is more complex and more expensive than a conventional storage tank.
But all costs are fully recouped, since with a hydraulic tank, the quality of tap water is better, and the operating life of the pumping equipment increases significantly. Finally, it is simply convenient, because the water supply always has a stable water pressure, which is taken care of by reliable automation.
Please write comments in the block form below. Ask questions about points of interest in the information provided, share useful information, post photographs and tips. Perhaps your recommendations will be useful to site visitors.


My mother lives in the village. Water is supplied to the house, but the pressure is very low. If in winter it’s even less so, then in summer, when everything is watered, the water stops “running” completely. I bought her a pumping station. One of the components of the pumping station is a hydraulic accumulator. The pressure normalized. After that, there was always water, with good pressure, even when the neighbors had no water at all. After a year of use, the membrane broke. I didn’t know what it was then.As a result, I disassembled the hydraulic tank, took out the membrane, bought exactly the same one in a store for pennies and put it back, as written here.
One very frosty morning, the membrane in my tank decided not to withstand the air pressure and neatly burst, scaring all family members. I can’t imagine why this happened, I blame it on the poor quality of the rubber itself. As luck would have it, the tank is large, 75 liters, and is not cheap. Of course, it was not possible to repair the old one, since the tank was cracked, apparently from water hammer, so I had to buy a new one. In general, I was afraid for the quality, so I chose the more expensive one. It's been a month - no incidents so far.