Check valve for a pumping station: what is it for and how to install it
When installing an autonomous water supply system, you have to carefully select not only the pump, but also a variety of protective pipeline fittings.Among the important devices, one of the most important places is occupied by a check valve for a pumping station, which helps maintain stable pressure in the hydraulic system.
It prevents premature wear of pumping equipment and prevents operational failures.
The content of the article:
Types and purpose of check valves
The dimensions of the check valve are small, but without this little detail the pressure in the water supply system will be impossible to support. It belongs to the category of pipeline fittings whose main task is to prevent a reverse change in the flow of water in the pipes of the water supply system.
Household pumping equipment is not designed for its movement in an abnormal direction.

On the market there is pumping station models, in the package of which manufacturers include a check valve. Such options are supplied with a suction hose with a built-in check valve. But in most cases, you have to purchase this fittings yourself.
Such valves are installed both on the suction line and at the entrance to the internal water supply system immediately after the pump with a hydraulic accumulator or in front of the pumping station.
Depending on the installation location in the water supply system diagram, check valves are divided into:
- Bottom. They prevent the reverse movement of water raised from the source when the pumping equipment is turned off. They create conditions for operating the unit without constant filling with water before starting it and the suction line.
- Pipeline. These include axial and valve varieties. Prevents a drop in the operating pressure in the system.
If there is no check valve at the end of the suction pipe of the pumping station, then when the pump stops, water will begin to flow back under the influence of gravity. As a result, air pockets will form in the line, and under “dry running” conditions, the seals will begin to collapse. As a result, water will penetrate into the electric pump and cause it to burn out.

Most modern pumps are protected against such processes. But water for starting will have to be poured into them after each stop of the unit.
In some pump models, it is possible that the impeller spins up completely, which can lead to its failure. Installation of this fittings on the liquid intake line from the source is mandatory, otherwise no electronic protection will help the water pumping unit.

With a pipeline check valve the situation is somewhat different. Here it no longer protects the pump, but the water distribution system inside the house.By locking the water in the pipes, preventing it from returning back to the accumulator, the check valve helps maintain the required value in the system working pressure. Without it, water will rush back into the storage tank, causing it to work abnormally.
Check valves increase the efficiency and reliability of the pumping station, while protecting the pump, plumbing and water system from water hammer. Overall, it is an indispensable device. But the water has to expend effort to open the valve, which reduces the pressure of the flow after its passage by 0.1–0.3 atm.
Bottom check valve
Bottom types of check valves are installed at the inlet of the water pumping line. They are used to equip surface pumping systems to protect against pressure drop.

By design specifics bottom check valves are divided into:
- Spring. Their working locking mechanism consists of a spring and a disk, which, when the spring contracts under water pressure, moves along the body of the device and allows flow to pass.
- Casement. The main organ consists of one or two transverse valves that open under the pressure of pumped water and return to their place when it stops.
Based on the method of attachment to the end of the suction hose or pipe, bottom valves are divided into coupling and flange valves. In tandem with household pumping units, the coupling type is most often used.


It is recommended to install a strainer in front of the bottom check valve. He must prevent the penetration of biological contaminants and solid particles that have an abrasive effect into the pumping system.
The device must be installed in the direction indicated by the arrow on the housing. The distance from the bottom of the water intake shaft to the check valve must be at least 0.5 - 1.0 m, depending on the class of the unit and the manufacturer’s recommendations. Between the water surface in a well or borehole and the valve there must be a water thickness of at least 0.3 m.
Pump systems with submersible pump equipped with a check valve without a filter, because they are equipped with built-in cleaning devices to protect the functional “filling” from friction. The check valve in this case is installed in front of the supply pipe immediately after the pumping unit. Used to prevent pressure drop in the network.

Pressure support check valve
There are several designs of check valves for pipelines with a general operating principle. All of them must ensure unidirectional movement of the working fluid, for which they have a locking mechanism inside.It opens in the direction of the flow, without impeding it, and if there is an attempt to reverse the flow of water, it immediately closes.

A typical check valve consists of:
- housings;
- shut-off and control element (working body);
- springs (some models do not have them).
The energy of the pressure of water flowing in the forward direction presses the locking element away from the seat, thereby creating a working window for the unhindered movement of liquid. And when the current changes to reverse, this gate, under the action of a spring and water pressure, returns to its original location, blocking the pipeline.
Products of this type of pipe fittings differ in design, the materials used for stamping, and the method of fastening to pipes. At the same time, almost all types of check valves can be used when installing pumping stations, but this is not always practical or advisable.
Design varieties of products
The shut-off element can move parallel, perpendicular and at an angle to the axis of the pipeline. Most often, with dry pipes, it sinks into the seat under its own weight. The device provides normal water pressure, preventing the reverse flow of water supplied to the water supply.
Therefore, when installing certain models of check valves, it is necessary to monitor not only the flow direction arrow, but also the correct location of the cover, where the guide for the moving shut-off part is located.

The internal lock in the check valve can be designed as:
- a spool consisting of a rod and locking plates;
- solid or divided into two disc flaps;
- ball with a spring mechanism and sealing gaskets.
In valves with a diameter greater than 400 mm, the disc hits the body quite hard when returning to the seat, which inevitably leads to damage to the device. To avoid premature wear of the valves, such valves are equipped with hydraulic dampers, which make the disk move smoothly.
However, such shockless check valves are not used in everyday life. There are simpler and cheaper analogues on sale.
If you need a small check valve, then you should choose either a ball or double-leaf model. In the first case, a small ball moves inside along and back to the movement of water, and in the second, the pipe is blocked by two halves of the disk attached to one rod. The body of both products is small-sized due to the absence of a moving spool inside with a wide movement step.
There are also non-return type designs with forced opening/closing of the shutter. In this case, the flow is controlled using mechanical or manual devices. However, such check valves are not used in everyday life with pumping stations. It is simply not needed for pumps.
Classification by type of fastening
In addition to design differences in the operating element, check valves used for installations with pumping stations, they also differ in the method of fastening. The choice here depends on the material of the pipelines and the technology of their connection.

Based on the method of connection to pipes, check valves are divided into:
- Couplings.
- Flanged.
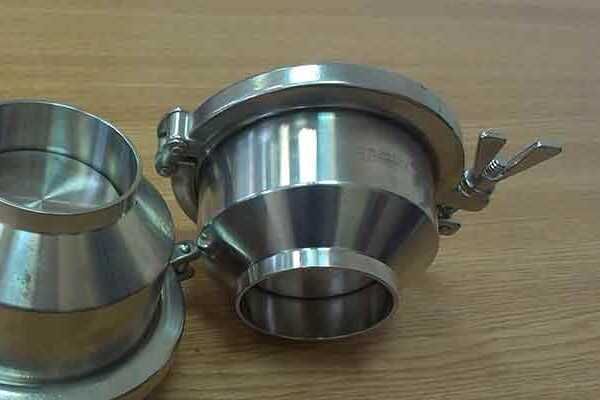
- Wafer.
- Welded (for welding).
The first type is connected to pipelines through a threaded transition, and the second is connected using flanges with seals. Wafer check valves do not have their own fastenings at all; they are fixed between the flanges of other water supply elements using long pins.
The welded version is more intended for use in pipelines through which aggressive media are pumped. They are not installed with pumping stations. Wafer-mounted check valves are available only in disc or double-leaf versions.
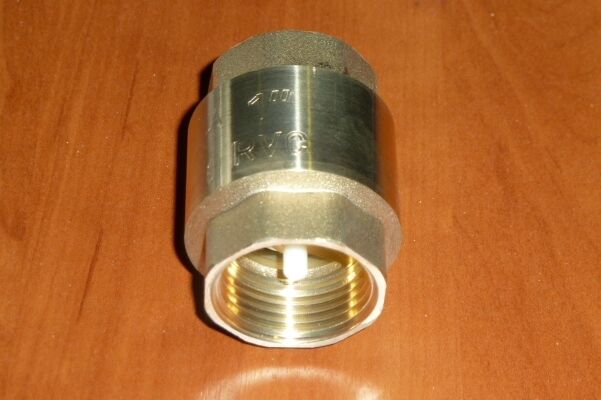
For water supply systems Most often, check valves with a lift-spring locking mechanism and a coupling connection are selected.They are easier to install and dismantle, as well as repair them by replacing the spring, which is the weakest link in this pipe fitting.

Variations in material of manufacture
The check valve body can be:
- bronze;
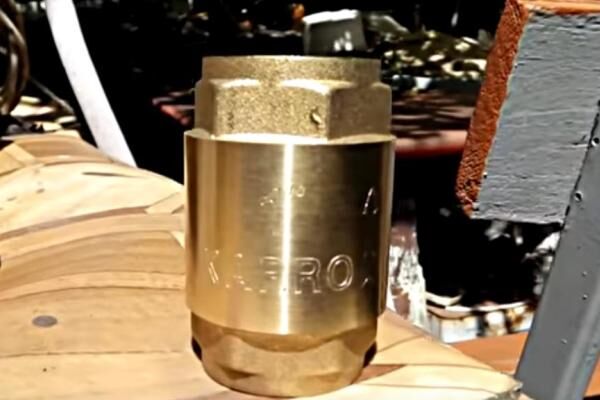
- brass;
- cast iron;
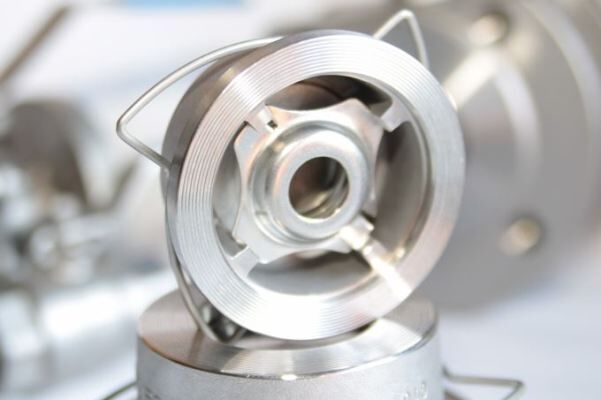
- stainless steel;
- plastic.
The most durable models are made from stainless steel; they are least susceptible to corrosion processes. Check valves made from cast iron are bulky, so they are rarely seen in everyday life. They are mainly used on pipes with a large cross-section. Such pipes are not connected to household pumping stations.
The most popular products are made of brass. This metal is relatively cheap, does not rust and is optimally suited to all types of pipes. Plastic products should be taken only for low-pressure lines and polypropylene pipelines.

The working locking element is made of:
- stainless steel;
- aluminum;
- plastics.
In principle, all these materials are equally good. Locking parts are small in size and are always made of high strength and durability. Breakdowns most often occur in the spring mechanism. Therefore, the springs in the vast majority of models are made of stainless steel, which is famous for its anti-corrosion characteristics and reliability.
In stores you can also find combination check valves, the bodies and covers of which are made of different materials.Each manufacturer strives to reduce the cost of its products and offer the market some new product. Fortunately, all fittings are tested; you just need to require a certificate of conformity to the relevant norms and standards.
To achieve tightness of the valve when lowering it into the seat, seals made of rubber, plastics and hard metal alloys are used in various combinations.
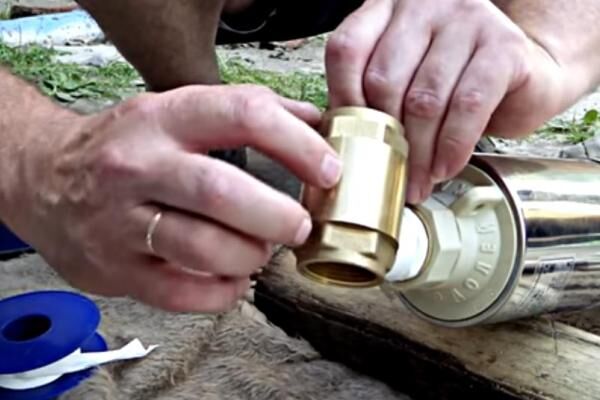
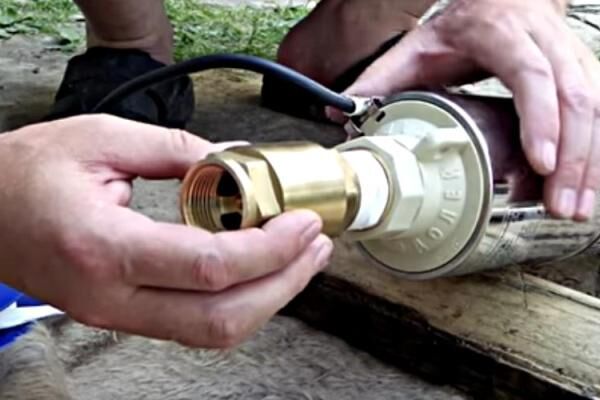
Installation of valves with a pumping station
When choosing a check valve, it is necessary to take into account its nominal pressure, flow capacity and bore diameter. All this data is contained in the technical passport.
You can do the installation yourself, following the instructions for the pumping station. The manufacturer must indicate in it the recommended locations for installing all the necessary fittings.
Option for installing OK on a submersible centrifugal pump:
The main thing here is to find out the presence/absence of a check valve in the pumping station block.If it is already a standard element of the water supply installation, then there is no need to install this additional fittings.
In this case, constipation will only reduce the throughput capabilities of the pipes, and there will be no benefit from it. It’s not worth spending money and time on installing an unnecessary element, which will also create even minor difficulties in the flow of water.

If the design of the water supply system assumes the possibility of emptying the pressure line or operating the pump in reverse mode, then the upper check valve cannot be installed after the water pressure unit. He simply will not allow such actions, blocking the flow of water to the water pumping unit.
The installation sequence of the “valve + valve” combination depends on the pump starting technology. There are models that are initially designed to be launched on a closed valve. In these cases, the check valve must be installed after the shut-off valve.
Manufacturers recommend installing a reverse lock in the “lower” position in all cases together with a mesh coarse filter. The water must first be purified from sand. The internal parts of the system will wear out faster from contact with abrasive particles.
It’s better to immediately take a reverse lock with a removable or non-removable mesh. It will protect the device from sand, and you won’t have to install an additional filter.
When choosing an installation point for a check valve, you must consider:
- direction of water flow;
- availability of fittings for subsequent repair and maintenance;
- restrictions on the strict horizontal or vertical installation of certain types of check valves;
- the presence of sand in the water, which can lead to clogging.
Spring check valves with a lifting shut-off element are least susceptible to contamination. The fastest and easiest way to install pipe fittings is with a wafer type connection. But more often, inexpensive analogues with flange or coupling mounting are chosen for water supply systems in private homes.

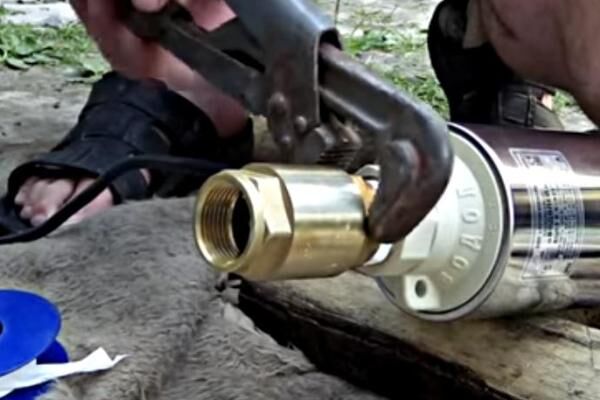
When installing a check valve, it is important to install it correctly. The spool axis must be located strictly in a vertical position. And when installing a rotary product, the axis of rotation of the “flap” should always be above the center line of the water flow.
The arrow on its body allows you to control the direction of water flow and the correct location of the check valve. It is difficult not to notice it, and even more difficult to make a mistake with installing the locking device in the desired position.
Conclusions and useful video on the topic
Video #1. All about the technology of installing a check valve for water:
Video #2. Overview of backflow blocking valves:
Video #3. Which check valve option is preferable for a cottage water supply system:
The use of check valves simplifies the operation of pumping stations and reduces the risk of accidents in the water supply system. You should not skimp on this small but important product.
Manufacturers now offer many options for this type of fittings of different sizes, methods of locking and type of fastening.For any water supply system and type of pump it is easy to choose the optimal solution.
We'd love to hear your opinion. Those wishing to clarify complex technical issues, share experiences, or point out deficiencies in the material can leave comments in the block below.


The problem with a check valve is that when it fails, it begins to leak water. And it’s quite difficult to keep track of this. But it is possible. You should turn off the water everywhere and check the pressure level in the system; if it drops slowly, then there is a possibility that the check valve has failed. It is inexpensive, and it makes sense to buy an all-metal one.
Very useful videos; without them, my father and I would have been racking our brains for a very long time over installing the check valve. In fact, it turned out that it is much easier to install than we thought. We installed it as shown in the video, everything works without any problems. Now you don’t have to worry about unplanned equipment breakdown, since the valve will not allow water to go back into the workings when pumping is stopped, and the filter will not allow grains of sand and debris accidentally falling into the wellbore to penetrate into the working parts of the pumping unit.
Remember, when installing a bottom OK on an external pump in a well, it consumes 2 m of water column. That is, if you have a water surface at 7m, then by setting it to OK you will not be able to pump water. The pump simply will not raise 7+2=9m of water column. Therefore, either bury the caisson lower, by 2m. Or use OK with adjustable lifting of the shut-off membrane (by the cord).