Toilet float: device, adjustment rules and replacement example
Over time, outdated plumbing fixtures are replaced by new, more comfortable and functional ones, but some details remain the same, practically without changing their purpose.
For example, one of the most important elements of the flush cistern - the toilet float - continues to perform its main function of adjusting the water level, although it has also undergone external changes.
Agree, understanding the structure of the float mechanism is useful to any home handyman. Calling a plumber at the slightest problem with the toilet is not the best option. Moreover, most valve malfunctions can be eliminated independently.
We suggest understanding the design and operating principle of different types of floats. Detailed instructions will help you adjust the mechanism and restore the toilet flush system.
The content of the article:
Place of the float in the design of the cistern
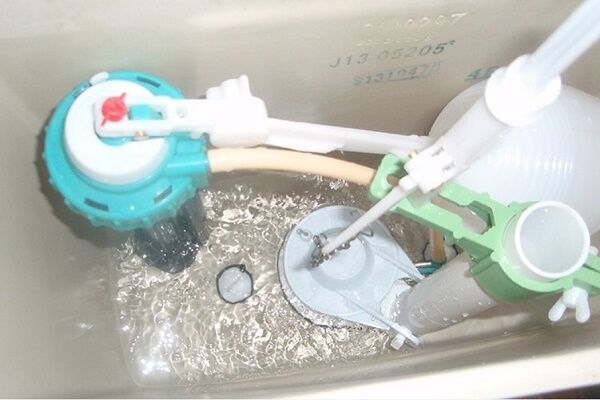
The float mechanism itself is just a small part with a simple device, but complete with other parts tank fittings it performs a significant mission - it is responsible for flushing. More precisely, it is an intermediary between two internal systems: bulk and drain.
To understand what role is assigned to this simple device, let’s figure out how the toilet flush cistern works.
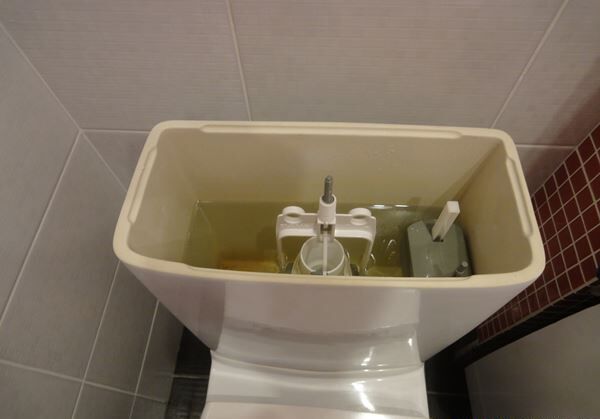
We will not consider elements of a built-in installation or retro models suspended from the wall, but will focus on the most popular solutions - cisterns, which are part of compact toilets and are installed on the back shelf of the bowl.

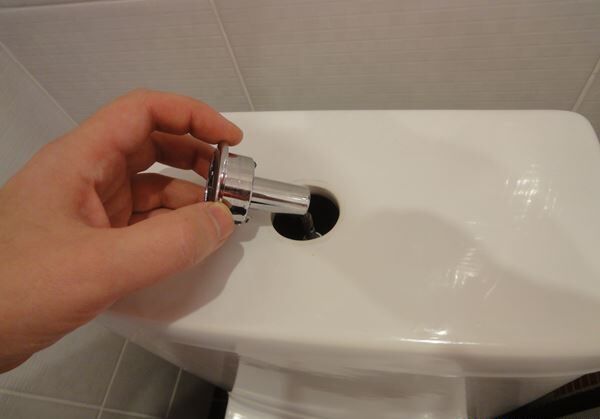
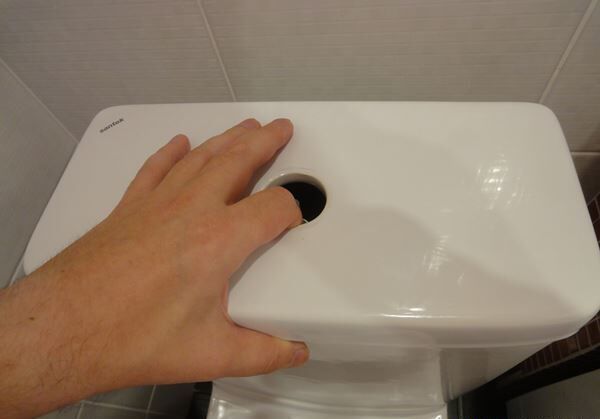
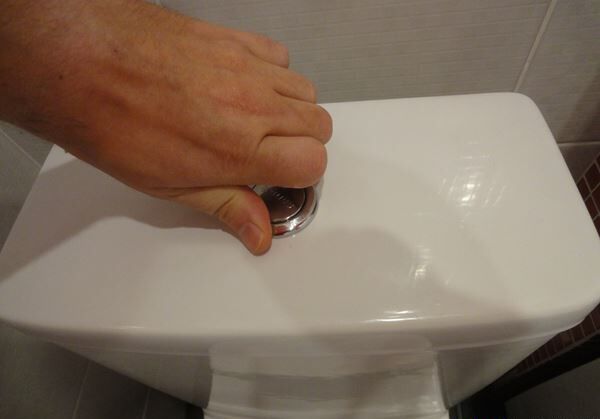
Externally, it is a faience (porcelain, plastic) tank, closed on top with a lid with a hole for a control lever, which is increasingly being replaced by a button (single or double). In addition to this hole, there are two more: for the flow of water from the cold water system and for draining liquid from the tank into the toilet bowl.
The fittings are installed inside the tank - a collapsible system of plastic, metal and rubber parts. The configuration, dimensions, and materials used to manufacture the elements differ from one manufacturer to another. In addition, there is several types of mechanisms.
However, they are all united by a common principle of operation: water flows into the tank through the inlet hole (through a flexible pipe connected to the cold water pipe) in the required volume (on average 4.5-6 liters).
Along with the level of water filling the tank, the float also rises. When the liquid level reaches the desired level, the float device blocks the flow of water. This state persists until flushing.
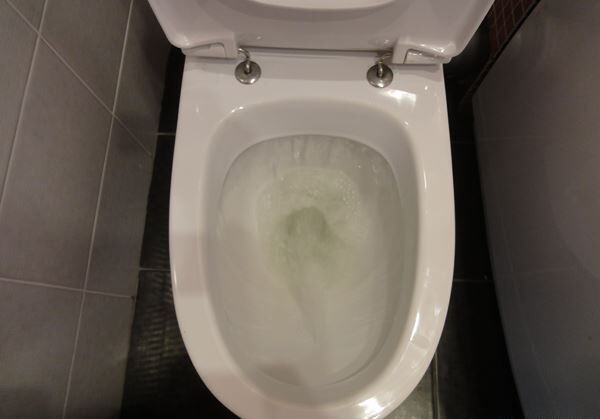
During the flushing process, other elements of the system are activated. A button (or lever) moves a rod, to the end of which a membrane (or gasket) is attached. Drain valve opens and water rushes into the toilet.
The function of the float is obvious - adjusting the volume of water entering the tank. If the mechanism fails, water will flow continuously, and the apartment will be saved from flooding by another important element of the system - the overflow.
Types of float devices
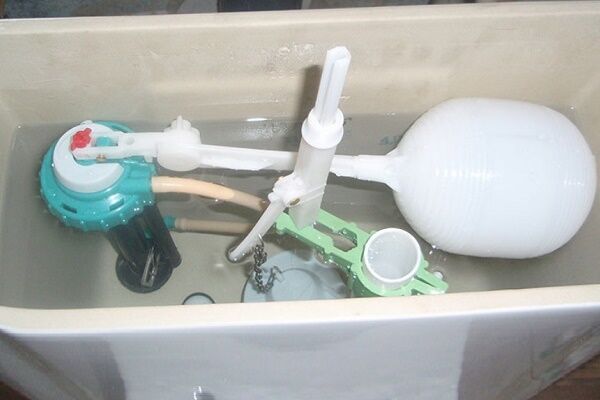
The type of float in the cistern of a compact toilet depends on the design of the fittings: in old-style devices there are plastic balls or cylinders floating on the surface of the water, in new modifications these are moving elements that slide vertically and resemble a glass.
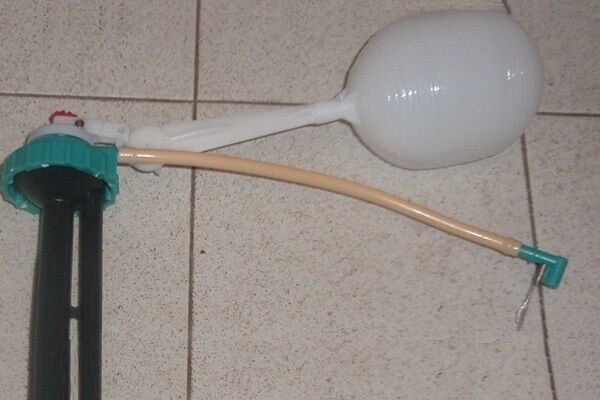
The spherical float is also called a “rocker arm”. Indeed, the thick wire on which the ball is attached is shaped like a household item that has become rare.

The principle of operation of an essentially primitive float is quite simple: when flushed, it sinks to the bottom of the tank and, through a rod (the same wire), opens the inlet valve.
Water enters, fills the tank, and the float rises up. At a certain point, it reaches the required level (the volume of liquid can be adjusted manually) and blocks the flow of water. The inlet valve closes until flushing occurs again and the float falls to the bottom.
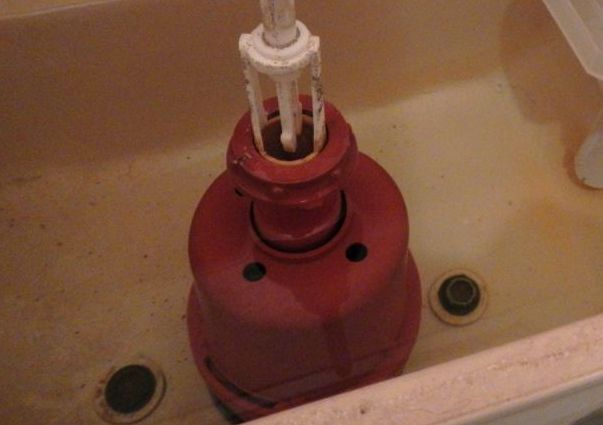
The modern appearance of the float device vaguely resembles a spherical model. This is a plastic part attached to a vertical rod, which, like an elevator, moves up and down and is also responsible for the timely blocking of the intake valve.

The advantage of the improved model is more precise adjustment of the level of water entering the tank. The rod along which the float moves is similar to a ruler with divisions, where notches are made for ease of adjustment.
It is believed that designs with a spherical float are noisier. In fact, the noise level does not depend on the type of float mechanism, but on the method of water supply.
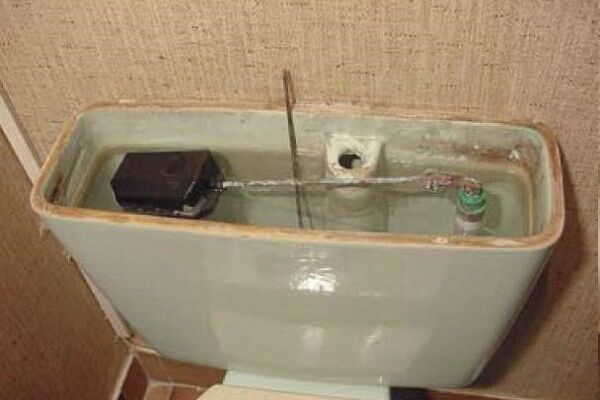
With an upper side connection, it is poured from above (a flexible hose is connected to the hole in the upper part), which is why the noise is created. In tanks with bottom supply, water flows quietly, and if there is noise, it is only due to a malfunction of the fittings.
Brief installation instructions
Sometimes it is necessary to repair, replace or simply install a new float model - separately or as part of a valve block. Let's consider all the solutions in order. Installation of new spare parts is easiest, since there is no need to disassemble old mechanisms, and the tank and the parts themselves are in perfect condition.
Option #1 – installation of a spherical model
Let us immediately make a reservation that it is necessary to install a new spherical-type device in the only case - if the old element fails. It is unlikely that a new toilet model is equipped with a fill/flush system with this type of float.
A plastic ball or other shaped part can be purchased separately, since the advantage of the outdated mechanism is that the “rocker arm” is easy to install or change without replacing the rod-shaped water drainage system.

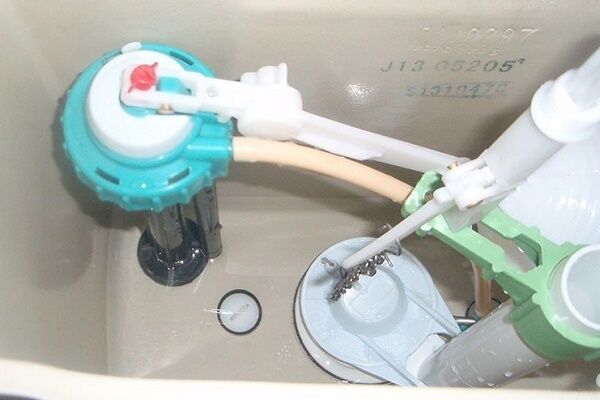
The float is usually sold with a metal holder and a fill valve. The latter is inserted into the water inlet hole (located in the upper part of the tank, on the left or right) and fixed, the “yoke” is positioned horizontally.
Approximately in the middle part, it is attached to the “pear” - a rod-type exhaust valve. When pouring liquid into the tank, the plastic ball should lie freely on the surface of the water.
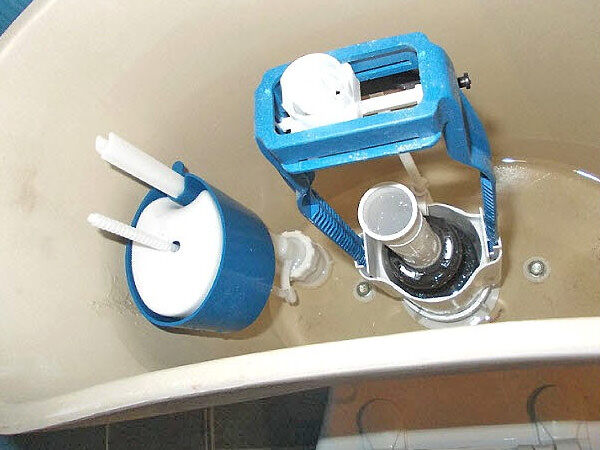
Option #2 – glass-shaped installation
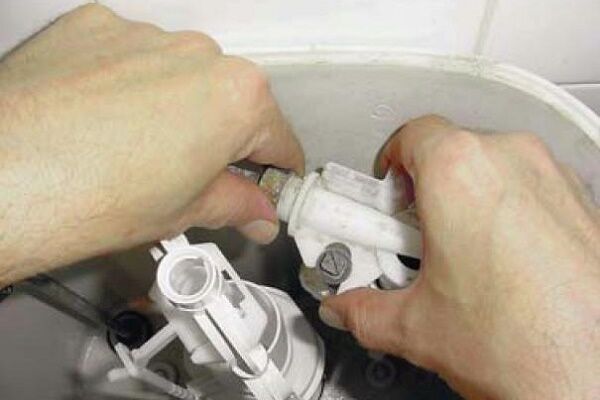
Kits designed for containers with bottom connections are usually fixed in the tank even before it is installed in its rightful place - the toilet shelf. This is necessary since both valves - drain and inlet - are located at the bottom of the tank, and during installation, the parts must be tightened and tightened on both sides.
If the tank is already installed, this will be difficult to deal with.

First, install a larger drain mechanism, making sure to use the gaskets and washers that come with the kit. Align the device along the axis and tighten the nut from the outside. It is important that the O-ring seals tightly in the hole area.
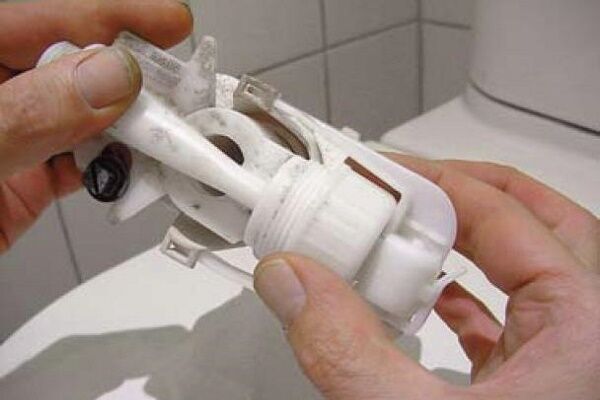
Then, using the same scheme, the filling valve with a float device is fixed. It is usually allowed for the parts to touch each other or the walls of the tank, but it is better to try to secure them strictly vertically.
Particular attention should be paid to sealing the junctions of devices and openings. It is necessary to use all seals, washers and gaskets that are recommended by the manufacturer and supplied with the kit, with the exception of spare parts. If difficulties arise, just look at the installation instructions.
The float device is replaced using the same scheme, only before installing a new one it is necessary to dismantle the old one. For repairs it will be necessary disassemble the cistern toilet.
Manual float adjustment
Let's move on to information that often worries owners of both old models and new units.Let's try to figure out how to independently adjust the float in the toilet in order to raise/lower the water level in the tank.
A larger volume of water is needed if what is available in the container is not enough for a high-quality flush, and they reduce the amount of water collected if they want to save money.
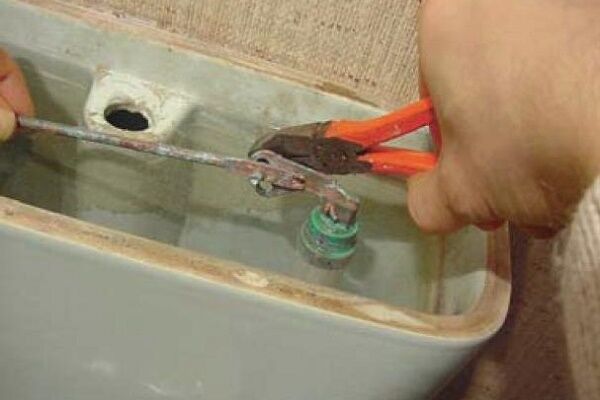
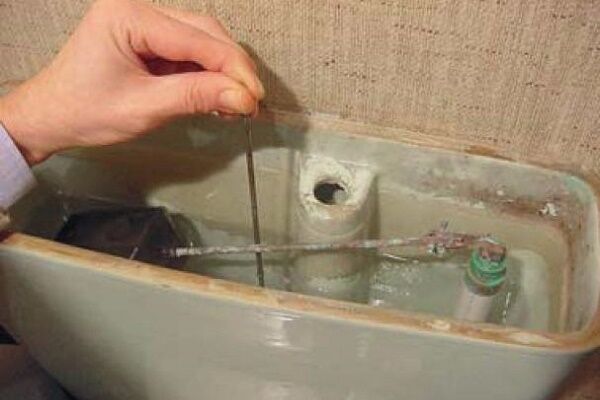
Process adjustments different for different models. The outdated “yoke” can be adjusted in a very simple way, without even turning off the water. We remove the tank lid, find the float holder wire and simply bend it.

Due to the bend, the inlet valve blocking device is activated earlier, therefore, the volume of water entering the reservoir is also reduced.
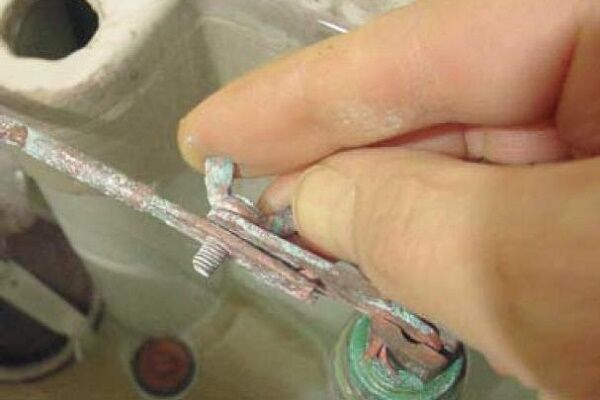
If the float holder is assembled from two rigid metal strips connected with a bolt, the adjustment process is somewhat more complicated:
If the lever is not metal, but plastic, you cannot bend it - you will break it. Such devices are usually equipped with a screw or “ratchet” to change the shape of the lever. You just need to twist the screw or move the element on the ratchet.
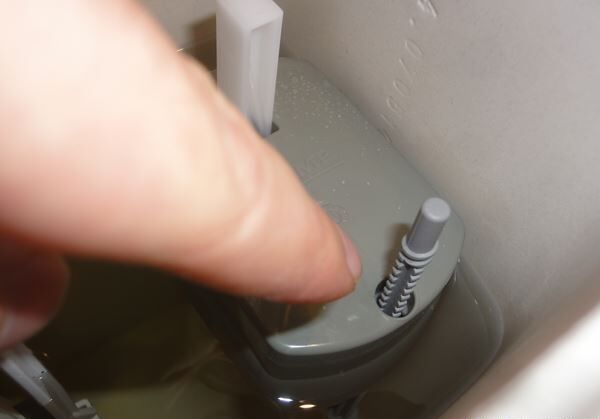
Adjusting glass-type plastic fittings will take a little longer. The task is to move the float on the “sliders” (plastic vertical elements that support it) up or down, depending on the planned increase/decrease in the flush volume.
Very often one of the “sliders” (or both) is equipped with a scale from which you can determine the exact height of the water level. Manufacturers print correspondence tables in the instructions, from which you can see what height the water level will be when choosing a particular division on the scale.
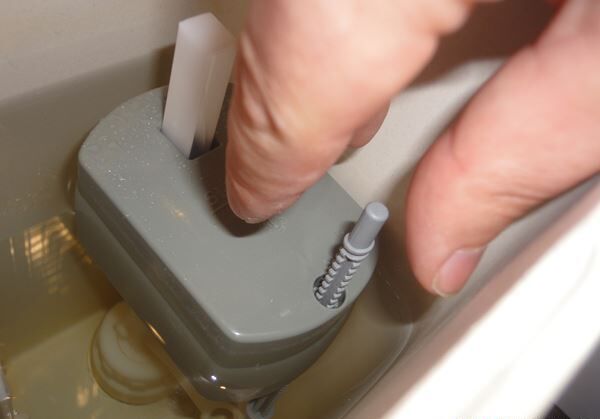
To simplify the adjustment procedure, some manufacturers equip the design with a special screw. Let's look at how to use it using a photo gallery.
In the same way, if necessary, you can increase the volume of water entering the tank. As you can see, the procedure is very easy and does not require special knowledge.
Repair of valve faults
Troubles usually happen unexpectedly, when there is no way to call a specialist or seek help from more knowledgeable people, so you always need to be prepared to act independently.
Float mechanism failures may Destroy the work of the cistern, and flushing it with water from buckets every time is an uninteresting task. Let's figure out how to quickly change or repair the float in the toilet if it has become unusable.
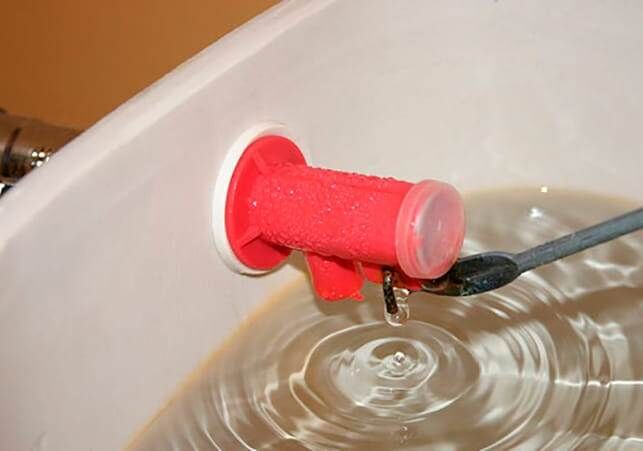
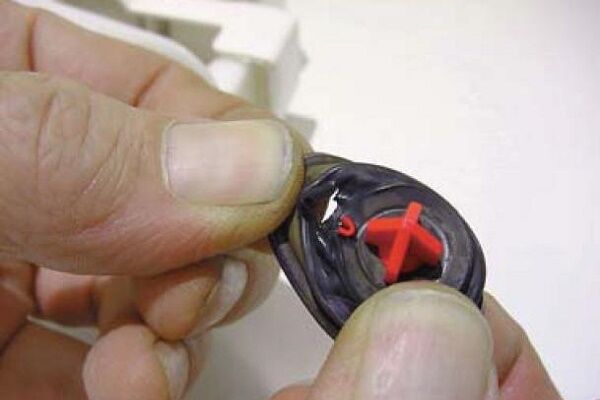
Violation of the tightness of the plastic ball
When the old float wears out, a crack may appear, which over time will turn into a hole. Liquid will begin to flow through the hole into the plastic ball, and it will no longer be able to float up and block the inlet valve. A problem arises - constant leak water in the toilet. Water losses quickly turn into financial costs.
Let's find out how to avoid this:
- turn off the water;
- remove the float;
- wipe it dry;
- cover the crack with waterproof sealant;
- dry;
- fix the float in the tank;
- We check his work.
There is no point in repairing a float with a large hole or completely leaky plastic; in this case, we rush to the store and purchase a new part to replace it.
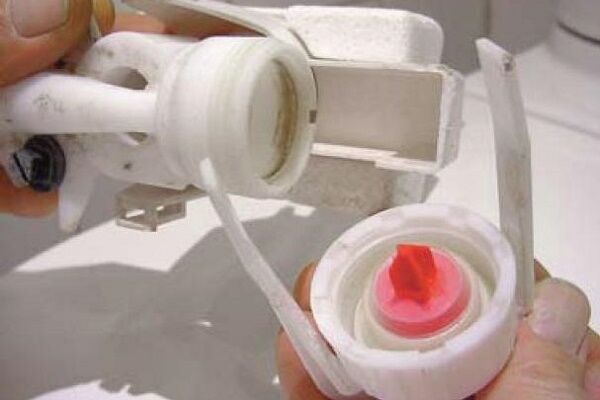
If the float valve fills with water due to a ruptured membrane or a crack in the valve, this sealing device must be replaced:
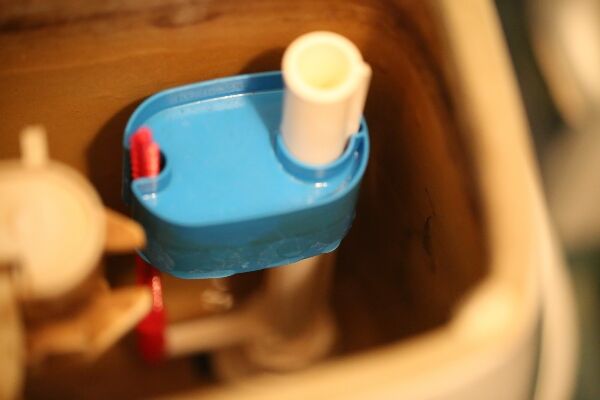
Skewed float structure
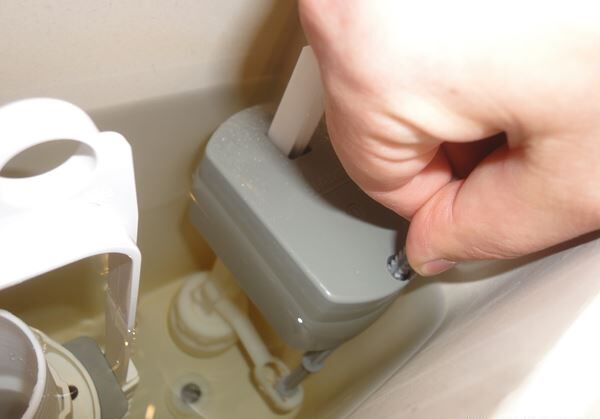
Due to wear of the rubber (silicone) seals or due to poor water quality, the glass-type float device may become misaligned.
Does the plastic float “stick” with each release of water or does it even stop moving up and down relative to the guide “sliders”. Depending on its position, either the flow of water into the tank stops, or, conversely, it it's constantly pouring, flowing straight into the sewer.

First, try cleaning the mechanism without disassembling the entire structure. Perhaps the movement of the float is slowed down by debris that has fallen into the water.If this does not help, you will have to turn off the water, remove the tank, and then the float block. The drainage device may not be touched.
Then we carry out diagnostics and act on the results: we correct the position of the float and install it in place or completely change the block responsible for the water inlet.
Most often, breakdowns associated with changes in the position of the structure are corrected quickly, while it is better not to repair worn-out devices, but to replace them with new ones.
Conclusions and useful video on the topic
A few useful tips will help you quickly cope with replacing, installing or adjusting a new float.
Briefly about the structure of the toilet and cistern:
Installation of fittings:
Water level adjustment:
The float mechanism is not such a complex device that you need to invite a specialist to replace, adjust or install it every time. You can perform the simplest procedures yourself using simple instructions.
In order to repair and replace the float as rarely as possible, you need to monitor the water quality - for example, install filters.
Do you have anything to add or have questions about the design and repair of the float mechanism? Please leave comments on the publication. The contact form is located in the lower block.


Unfortunately, the quality of our water and pipes leaves much to be desired. And the shut-off valve is not always able to retain the water collected in the tank; it often begins to leak. Here it is important to adjust the position of the valve relative to the drain cup so that excess water goes into the toilet, and not through the technological hole in the tank. Otherwise, such an oversight is fraught with flooding of the neighbors below and costly repairs.
Now there are so many drain fittings on the market that one listing would take a couple of pages. Usually, instructions are attached to the fittings, if the products are not completely left, where everything is described in sufficient detail. If this is difficult for you, call a plumber. The new fittings work very well, but then our water will ruin any one. The drain cup is always located below the technological holes.
Dear users, please tell me: how much can a toilet float (old model) cost, and how much can it cost to replace it (i.e. installation work)?
Today a neighbor (a very poor pensioner) invited a plumber to repair the tank - water flows continuously. He said it needs to change. I took 500 rubles from her, brought the float and installed it. She says she's been fiddling around for half an hour. In short, there was no change from 500 hundred rubles? Is this a reasonable price? And in general, where can you find out the tariffs for plumbing repair work in your apartment?
I think that the price of 500 rubles in this case is quite fair, at least in our city.
Look - the cost of the float is about 150-200 rubles. + the work of the master himself. I understand that this can be a lot of money for a pensioner, but these are the realities of the services market. In larger cities, plumbers charge 500 rubles just for a call. and even more!
I have a glass type float. After flushing, sometimes (once every 7-8 flushes) it does not go down and water does not collect. What can you do?
In your case, you need to set the optimal water level at which the float will work constantly.It may also be that the regulating mechanism is damaged, so after a certain number of flushes the float stops working. There are two options: repair the mechanism or buy a new float.
just unscrew the nut in the tank on the float a little until everything is ok.
The float needs to be attached well, but it is plastic and sometimes it unwinds and the water gurgles terribly
The most accessible article! For my understanding)) The toilet started acting up and it so happened that I had to figure it out myself. It turned out that the membrane had broken. I went online to ask the price and was shocked. Can such a small rubber thing really cost 700-900 rubles? At a time when on Belarusian sites there are only 23 rubles. I'm even afraid to go to the store.
Today I bought a float for 180 rubles, there was also 220, a complete set of everything in the tank from 500 rubles