How to disassemble a toilet cistern: instructions on working with various structures
A toilet tank is a sealed container into which tap water flows in order to flush at the right time.Thanks to its extremely simple design, you can easily repair this plumbing fixture yourself. And for this you need to know how to properly disassemble and reassemble. Do you agree?
We will tell you in great detail how to disassemble a toilet flush cistern, in what order the container is dismantled and the functional mechanisms are removed from it. Let us indicate in which situations it is necessary to remove it, and in which it is enough to perform actions without disassembling.
The article presented for your review lists typical malfunctions and cases requiring mandatory intervention. We have looked at repair options for old and new models. For visual perception, the information was supplemented with photo collections, diagrams, and videos.
The content of the article:
Dismantling and disassembling the cistern
There is a water supply and level control system in each toilet tank. Modern toilets are equipped with mechanisms of a rather complex design.
Apartment owners use (and dismantle, if necessary, repairs) both outdated models and technically advanced ones. The disassembly process can be carried out directly on site - without removing the tank or after dismantling the latter. Which option will be used depends on various factors.
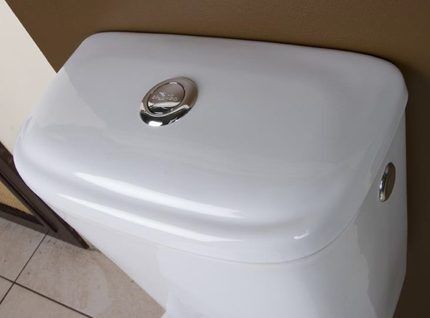
Usually dismantling is carried out for the purpose complete replacement of the tank together with the mechanism for a more advanced model. The storage tank must also be removed in case of water leakage at the connection points with the toilet. For example, due to wear of sealing gaskets, breakage of fastening bolts, and the appearance of microcracks in the housing.
Let's look at how the toilet tank is removed in any of these situations.
Removing the water reservoir on the toilet
The classic design involves fastening the toilet cistern with just two studs or bolts (d = 5-7 mm). Typically, metal (bronze, brass, steel) studs with double-sided threads for nuts are used as fasteners.
Steel fasteners were used on older models. The service life of steel fasteners is relatively short. Sometimes such pins “burn out” from rust after a year of using the device.
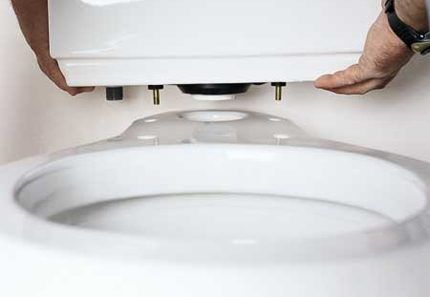
Fastening to the base of the toilet is usually done through two holes (or through 3) made in the bottom of the tank. The same two holes, in the same axes, are on the rear extension shelf of the device.
Fastening pins are passed through the aligned holes, gaskets are put on them on both sides and tightened with nuts.The cavities of the tank and toilet bowl are united by a common pipe, insulated at the junction with a rubber sealing ring.
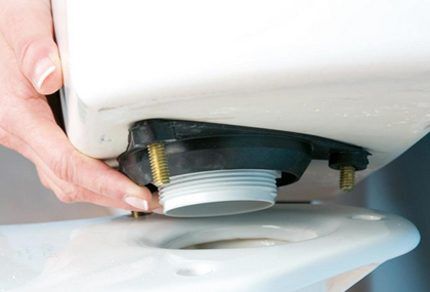
The problem of how to remove the tank from the attached toilet shelf is solved as follows:
- Close the centralized water supply valve.
- Disconnect the water supply hose.
- Empty the storage tank by pressing the drain button.
- Unscrew the drain button head and remove the top cap of the tank.
- Collect the remaining moisture inside the tank with a sponge.
- Unscrew the nuts on the mounting studs (on the bolts) under the attached shelf.
Now all that remains is to carefully lift the tank, separating it from the installation site (possibly with some effort, because sometimes the gasket sticks) and then move it to the place where you plan to perform further work.
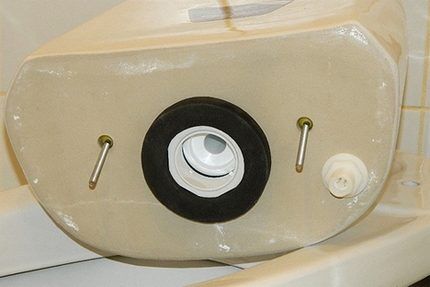
Next, we’ll find out how to quickly disassemble drain mechanism, equipping all types of flush plumbing devices.
Disassembling the drain mechanism
Modern models in the mid-price segment usually use a push-button mechanism for double water flush (3/6 liters).One press of any button switches on the operating mode drain and fill modules. You can come across a variety of versions of such mechanisms.
However, the assembly configuration for them is the same:
- head with buttons and threaded part for the valve mechanism;
- valve mechanism with lower threaded part;
- sealing gasket;
- valve mechanism fastening nut.
When the top cover is removed, the head with the buttons will already be twisted. All that remains is to remove the sealing gasket from the fastening nut. The gasket (rubber ring) has a pentagon-shaped or circular inner area.
The fastening nut has the same shape along the outer border (not always). When assembled, the sealing rubber ring is placed on the nut. It is removed and the nut is unscrewed. The released mechanism can be easily removed. The filling system is attached using the same method.
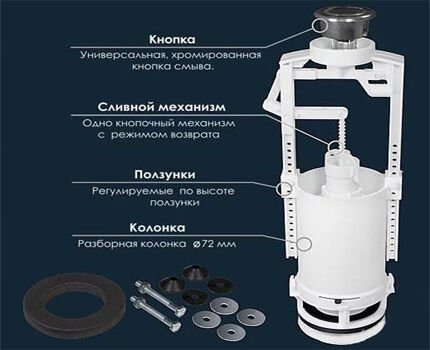
The material used for making the fittings is plastic. If repairs are necessary, the mechanism is disassembled, but it is easier to buy a new one to replace it.
The video will tell you in detail how to properly disassemble the tank to care for the fittings:
Removing the tank cover
Again, returning to modern toilet models, it should be noted that users are often faced with the problem of how to remove the lids on such models?
Indeed, these designs are somewhat different from outdated toilets in that they are made more technically, including the fastening of the lid.But in general, the principle remains the same - the cover is pressed with a nut included in the valve mechanism kit.
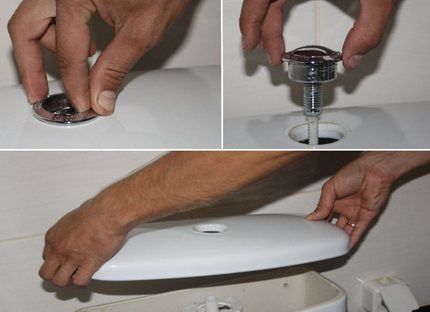
On new models, heads with buttons, single-button and double-button, act as a clamping nut.
To remove the one-button fastener and remove the cover, follow these steps:
- The button is pressed as if draining water and held in this position.
- Carefully turn the head with the button counterclockwise.
- Finally, turn the head with the button out of the valve mechanism bushing.
The threaded connection may differ on different models. There is a wide-field external bushing thread, as in the picture below, and there is also an internal bushing thread for a small diameter rod.
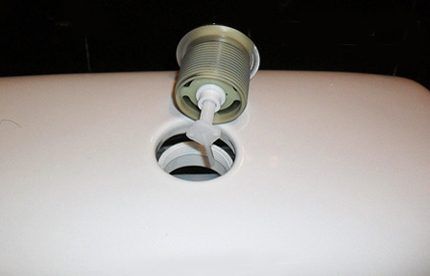
Along with single control buttons, the head of which simply unscrews, there are designs that are more difficult to disassemble, made with latches. Often this solution has two-button mechanisms.
The video tutorial clearly demonstrates the procedure for removing the reservoir cap:
Disassembling a tank with two buttons
On toilet cisterns, where a flush mechanism with two buttons is installed, there are different fastening methods. With this configuration, it is sometimes impossible to simply unscrew the head with the buttons.
In such situations, the disassembly technology is as follows:
- You only need to press one of the buttons (small) into the head body.
- On the opened inner wall, a small groove will open in the lower part.
- Using a screwdriver, carefully press the retainer through this groove.
- Remove one button (large) from the case and then the other in the same way.
- Unscrew the fixing screw located under the buttons.
After these operations, the tank lid with two buttons can be removed without any difficulty.
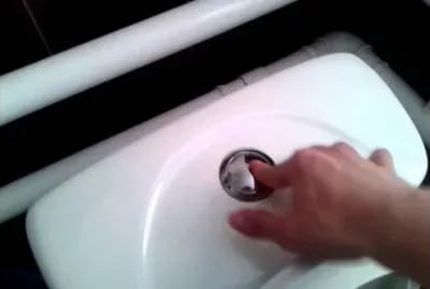
There are also tank designs where, first of all, you need to unscrew the decorative nickel-plated washer, then turn the lid 90 degrees - that is, install it across the container. In this position, press out the fixing brackets located inside the button head bowl. After these manipulations, the cover is completely freed from the fasteners.
Having successfully completed the procedure for releasing the tank from the lid, you need to find out the reason water incontinence and troubleshoot.
Removing an old toilet cistern
A number of outdated toilet models are still in use. It is necessary to repair battered products more often due to significant wear of their components. But the owners of such structures do not have to think much about how to repair or remove toilet cistern, due to the most simplified design.
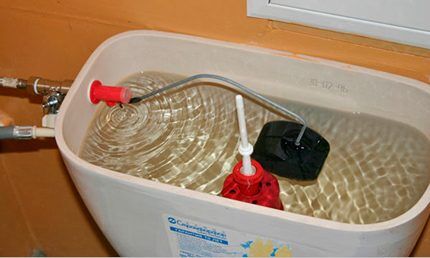
So, to dismantle the same cover, it is enough to twist the handle on the drain mechanism rod and unscrew the plastic (or metal) washer nut.
Under the lid inside the tank there is a float mechanism for collecting water and a lever-valve drain mechanism. The valve system of such a mechanism is usually attached to the tank through two additional holes in the bottom.
The tank itself of the old design is removed in the same way as is done with new models. It is necessary to unscrew the two bolted connections in the area of the bottom of the tank.
The passage area for water from the storage tank to the bowl on old toilets is isolated with an ellipsoidal sealing ring. Often in older systems there are overflow tubes secured at the bottom of the tank with a plastic nut.
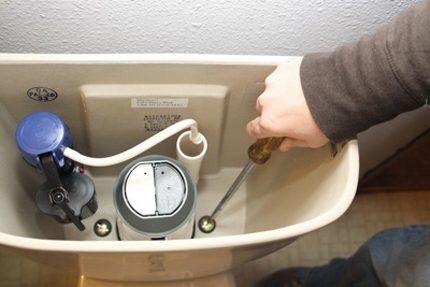
To dismantle the lever-valve drain mechanism, you will need to unscrew two more bolted connections that secure the drain mechanism's rocker arm. The water supply module is dismantled by unscrewing just one nut from the outside of the tank body.
First, you need to disconnect the water supply hose from the storage valve. It should be noted: there are models of tanks with water release levers embedded in the side wall.On such devices, the toilet lid is not secured at all - it simply lies, resting on the walls of the body.
Repair without disassembling plumbing
A common reason for conducting tank repair with the side handle, it is the device that triggers the drain mechanism that fails. To repair the handle, the tank is not removed from its seat, and the function is restored by replacement.
Handle replacement work is carried out in the following order:
Having successfully completed the steps to dismantle the broken device, we proceed to install a new handle:
Malfunctions are a reason to disassemble the tank
Typical malfunctions that force disassembly are often:
- leakage during flushing in the area of the gasket at the connection between the tank and the toilet bowl;
- leakage in the places where the storage tank is attached to the toilet shelf;
- dysfunction of the drain mechanism;
- dysfunction of the water collection mechanism.
Leakage problems are often eliminated by simply tightening the fastening nuts. The functionality of the drain and set mechanisms may be impaired due to insufficient water pressure in the centralized system. Therefore, before you start disassembling, you should make sure that there are no other possibilities for eliminating defects.
Defects in functional fittings
If there is an involuntary flow of water from the tank into the toilet bowl, most likely the lock ring is defective. It needs to be replaced. The same effect can be observed when the closing mode of the mechanism does not work. A possible reason is that the control button is stuck.
Insufficient filling of the container with water indicates some defects in the dial module. Often the cause is the displacement of the float on the limit bar or its contact with other parts of the mechanism (the wall of the tank).
If the tank is not filled with water in the normal manner, perform the following steps:
After replacing the fittings with a new set, it is necessary to configure it; step-by-step instructions for its implementation are given in one of popular articles our site.
A complete lack of drainage is possible due to a non-working dial module or drainage mechanism.
A few practical tips will help you cope with self-adjustment of fittings.
Rules for caring for plumbing fixtures
When disassembling plumbing fixtures, each user should remember the principles of ceramic care. This has a direct bearing on repair work.
Ceramic products are resistant to chemicals, but are easily damaged by cleaning with metal mesh, abrasives and other similar substances. Cleaning household plumbing after repairs should be done with soft substances and materials.
Conclusions and useful video on the topic
All problems associated with the tank and how to fix them are demonstrated in the following video:
Instruction before performing work related to repairing household appliances with your own hands is voluntary. However, extra information never hurts in any endeavor. The more information there is about a specific object, the simpler and easier it is to perform all actions.
Disassembling modern toilets, despite the simplicity of the steps, also does not exclude reference to the instructions.
Would you like to tell us about how you repaired a flush cistern yourself? Do you have information worth sharing with site visitors? Please leave comments in the block below.


The most important thing when installing or dismantling is to remember to drain the water from the tank). Otherwise, nothing complicated, as long as there are suitable keys. It’s better, of course, to have a 10-mm socket on hand, but you can easily get the job done with a horn one. I had to do this work when the cuff began to leak between the tank and the pedestal. There was no exit. I had to remove the top and coat it with sealant.
For a long time there was an old Soviet toilet, it had to be repaired regularly, and it was not difficult. It was possible to understand the design and easily fix the breakdown. Since a new modern toilet was installed, it has become impossible to repair it - most often, a breakdown requires replacing the entire filling at once. Fortunately, it is standard, inexpensive and can be replaced on your own.
Thanks for the old stuff. Finally I found out how to remove the cover with a two-button system. Otherwise, I tried to unscrew something with my fingers)))
But I didn’t figure out how to remove the bottom gasket. It didn’t unscrew, maybe it’s on the latches?