How to make a beautiful and durable table for a gazebo with your own hands: step-by-step instructions, photos
Each, even the simplest gazebo, should look cozy and have a minimum set of necessary pieces of furniture.For a comfortable stay, there are ready-made garden kits. But, having basic knowledge and skills in carpentry, you can independently make benches and a table for a gazebo.
The content of the article:
Examples of gazebo tables
A gazebo requires a well-organized space. It should have furniture for family dinners, meetings with friends, or a romantic dinner. When choosing the shape and design of furniture, you need to think through many nuances.
First of all, the set should be as compact, functional and, of course, beautiful as possible. Most often this is a table made of wood. Therefore, it is necessary to take into account some points:
- gazebo area;
- type of structure (open, closed, collapsible);
- how many people will need to be accommodated at the same time;
- its shape and size;
- the material from which the furniture will be made.
The table in the gazebo is the most used part of the furniture set, so it must be durable, comfortable, and level.
We must not forget about atmospheric phenomena: wind, rain, snow, scorching sun, temperature changes. It is necessary to provide convenient passages between the wall of the gazebo and the back of the benches. If you make a gazebo table with your own hands, you can save a lot.
Instead of bulky benches, the gazebo is often equipped with light folding chairs. When staying at the dacha is rare, folding furniture would be the best option.It is easy to take out, spread out, and, in the absence of the owners, assemble and hide.
How to build a gazebo:
- DIY gazebos made of wood
- How to build a comfortable metal gazebo with your own hands
- We build a gazebo from polycarbonate with our own hands
- How to make a gazebo from a profile pipe with your own hands
- We make a gazebo from scrap materials with our own hands
- We build a modern gazebo with a barbecue for the dacha with our own hands
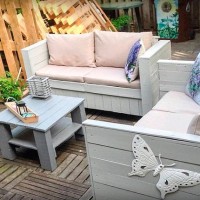
- How to make a beautiful gazebo from pallets
- Do-it-yourself gazebo with a pitched roof
- DIY hexagonal gazebo
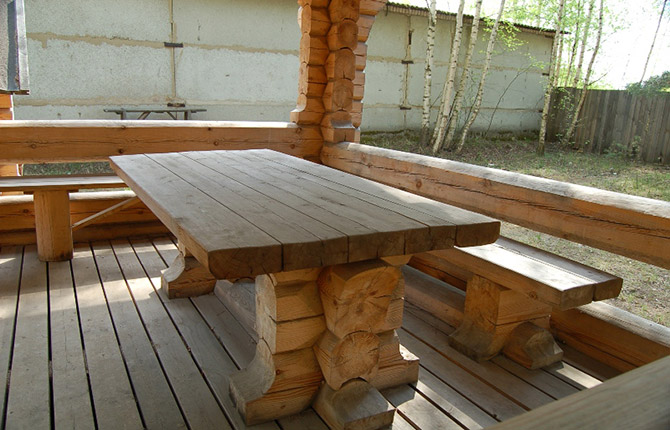
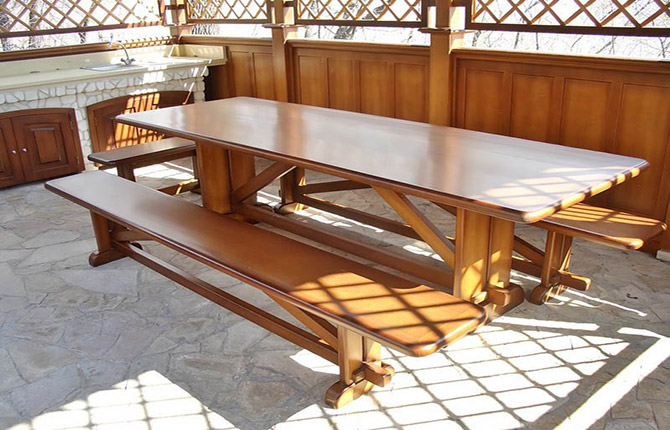
Made of wood
A wooden table and bench will fit perfectly into the space of the gazebo and fulfill their intended purpose. When choosing a material, special attention should be paid to its quality. You should only buy well-dried boards. The lumber must be smooth, without damage, fungus or traces of insects. This will allow you to complete the assembly quickly and without problems.
Conifers have a beautiful wood grain. They are easy to process, but release resin, which can ruin a tablecloth or clothing. In this case, the tar should be burned out and filled with putty made from glue and small sawdust. After drying, sand the surface with fine sandpaper.
The best option is hardwood material: birch, ash, larch, as well as cherry and pear. The furniture is durable and strong, with a noble texture. But this type of wood is hard and difficult to process. In addition, the shade changes over time.
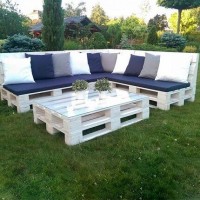
It is not necessary to buy new wood. You can make a designer table from scrap materials, using old boards, bars, and scraps. Another option is to use pallets. They are first disassembled, planed and polished.
Any material requires treatment with an antiseptic and a protective compound, which will ensure the preservation of the wood texture and extend its service life. This is especially important if the table will always be outdoors. A similar procedure can be carried out before installation or after assembly. All cuts made during fitting must be processed; the ends of the material must be protected from moisture penetration into the capillaries.
Round
Tables in appearance can be rectangular, square, hexagonal. Depending on the type of construction, there are stationary, folding or transformers. Their dimensions and shape depend on the area of the gazebo. So the round one looks original, visually expands the space, creates a relaxed atmosphere, and helps overcome the psychological barrier. The selected table design should not be discordant with the shape of the gazebo and the overall style.
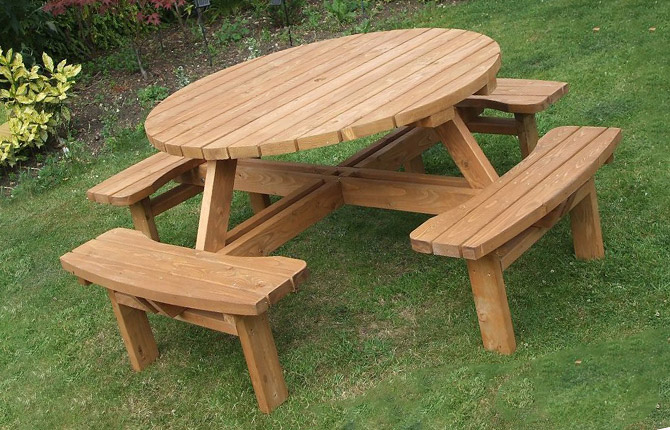
The tabletop can be located on one massive stand with a cross below. The seats are also arranged in a circle. The table has the traditional four legs attached to the corners. The most comfortable and stable design is one central support or three legs fastened with crossbars. There are folding round models. They transform into a flat product. They are convenient to transport, store, and, if necessary, move to another place.
Healthy: DIY furniture from pallets
Hexagonal
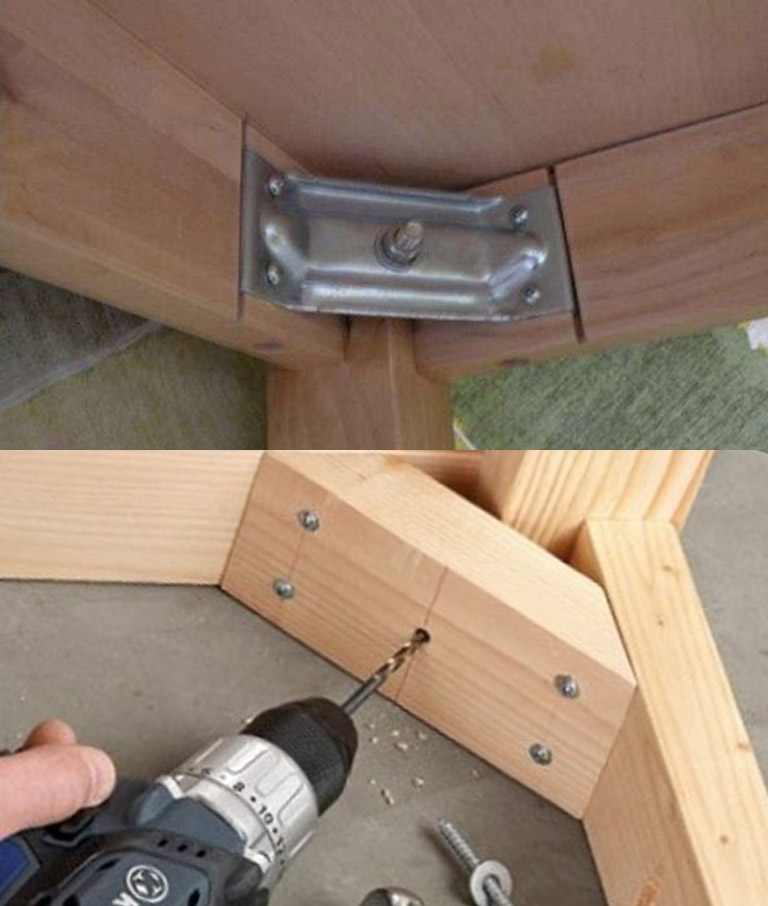
Such a table will decorate the gazebo, will look good in a building with strict, pointed elements, and will allow everyone present to feel independent and free. The supporting structure can be made in the same way as for a round table. Three beams in the form of an asterisk are secured to the base cover with steel corners.A hexagon cut from a board is installed in the center.
Next, fill the sectors between the bars. The planks begin to be laid in the center, moving towards the edges. To do this, the lining is first sawn into pieces of the required length, the ends are cut at an angle of 30°. The prepared parts are fastened with nails to the beam through a protruding chamfer.
Next, the tabletop is treated with stain. Apply several layers of varnish, with intermediate sanding. The assembly of such a structure is quite labor-intensive. But for a real master this work will not pose any particular difficulties.
Mosaic
The table can be diversified by cutting or slightly rounding the corners with an electric jigsaw. Scratches and cracks can be covered with wood putty. The tabletop is decorated with wood painting, burning, artificial aging, decoupage, and tiled or mosaiced. You can make a mosaic yourself by assembling a pattern from pieces of colored plexiglass. In the classic version, individual pieces are applied to the glue.
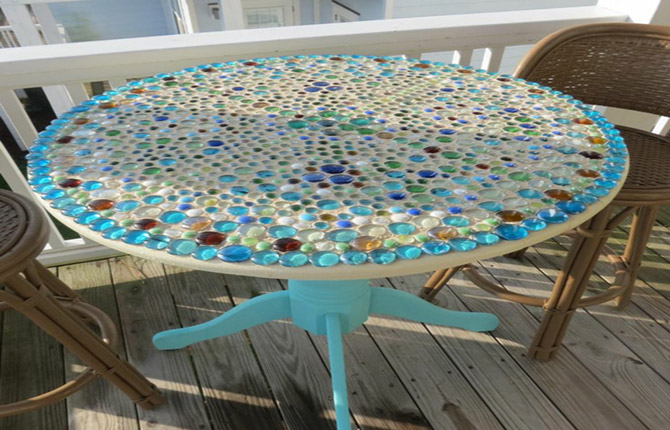
There are ready-made ornaments assembled on a self-adhesive base. Waterproof chipboard is used as a base for the mosaic. For ease of drawing, the slab is marked into sectors, maintaining symmetry. Individual fragments are laid out according to the pattern, making the seams as narrow as possible. After the glue has dried, apply grout, immediately removing excess with a damp cloth. The process is quite painstaking, but the gazebo table turns out to be original, beautiful and reliable.
With metal structure
The base for the table and benches in the gazebo can be made of metal. Metal profiles, corners, stainless steel, aluminum alloy, cast iron, aluminum pipes are suitable for this. The structure of the underframe can be welded.If for some reason welding cannot be used, then long and short bolts, hex nuts, and brackets for fastening the tabletop will be needed for the connection.
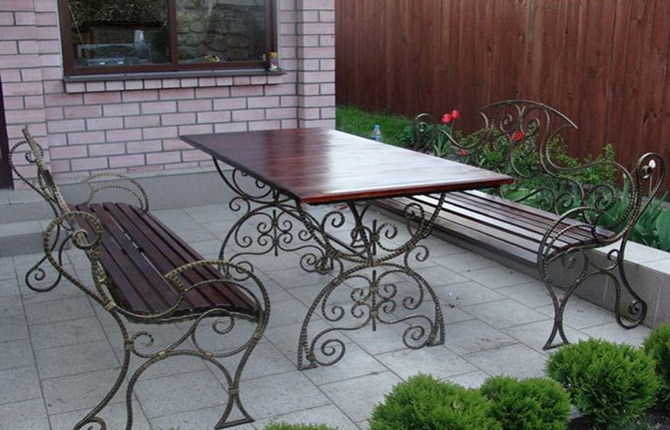
Garden furniture can be forged. Its appearance will transform even the most unsightly area and is suitable for a gazebo of any type and style. Such designs look elegant and light, but in fact they are quite heavy. Such furniture is durable, reliable, and lasts for decades. With proper care, it is not afraid of corrosion and is resistant to water and sun.
For you: DIY folding stool
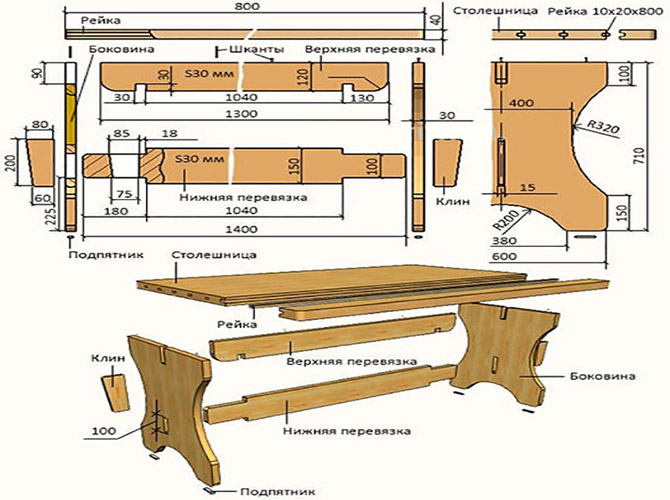
Drawing with dimensions
To make a gazebo table with your own hands, you need to decide what it will be like: general appearance, size, material. Not forgetting that, first of all, the structure must be strong and stable. First you need to calculate the exact parameters of the tabletop, based on the area of the gazebo. Then make a basic sketch on a sheet of paper and apply all the dimensions. Suitable drawings can be found on the Internet by substituting your dimensions.
Construction material and tools
If the gazebo is wooden, it is best to also make the table from wood. However, there are no strict rules here. Combinations of wood with plastic, metal, bricks are possible. And yet the tabletop and legs are made of wood.
To make them, you will need a tongue-and-groove or unedged board (140x40 mm, length 1200 mm). In specialized stores and carpentry workshops you can purchase ready-made panels for tabletops. Bars with a section of 60x40 mm, length 700 mm. Wood for legs and lintels, nails, screws (length - 70 mm, Ø - 8–10 mm).
To build a gazebo table with your own hands, you need the following tools:
- hacksaw or jigsaw;
- drill or screwdriver;
- plane, chisel, hammer;
- milling and grinding machines;
- cutters, drills of different diameters;
- tape measure, square;
- sandpaper, paint brushes.
- clamps, glue.
- protective gloves.

You will need finishing products: impregnation, antiseptic, stain, primer, varnish, paint.
Step by step construction process
Step-by-step instructions for making a gazebo table.
- Sawing boards to specified sizes.
- Preparation of bars.
- Making a base for a tabletop (frame).
- Making legs.
- Processing of all wooden parts (planing, sanding).
- Assembling the table top on bars using self-tapping screws and dowels.
- Installing the tabletop on the frame.
- Installation of legs.
- Fixation of the entire structure.
- Re-processing of wood.
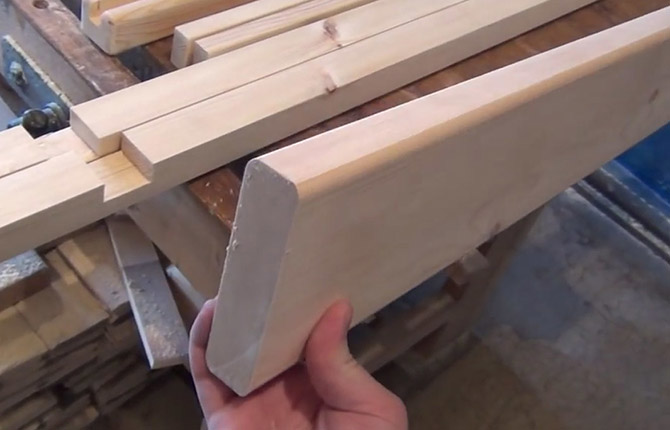
Preparing the boards
For a table in a gazebo you need dry wood, otherwise the tree may “lead” due to temperature changes. After purchase, the boards are dried in the sun, then sanded, as wet wood clogs the sanding wheel.
If necessary, they can be planed. A particularly important point is the application of a composition with protective properties to the wood. Treatment is carried out before and after installation. At the same stage, you should prepare at least two transverse slats or bars for assembling the tabletop.
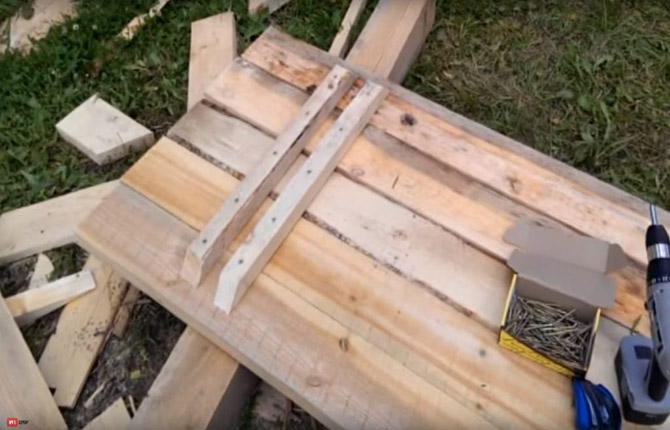
Making a countertop
Prepared boards are marked by size and cut into pieces. All parts must be straight, identical in width, then the tabletop will have no gaps. They are laid out on a flat surface, face down.
Guide bars are placed on top, which will connect the individual parts to each other. Self-tapping screws and dowels are used as fasteners. They hold up quite well and do not disturb the appearance. This will make the lid strong and prevent it from becoming loose.
In a closed gazebo, the top of the table can be made of laminated chipboard. This material is not afraid of water or temperature changes. Open cuts are protected with a special PVC trim. Plastic countertops are popular. But they are short-lived, afraid of direct sunlight, and cannot withstand heavy loads.
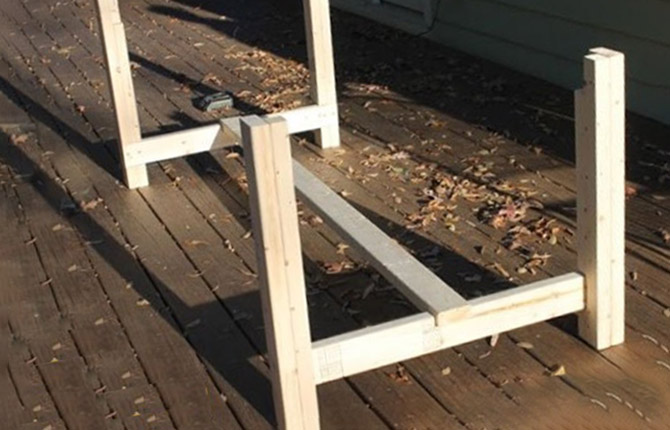
Making and attaching legs to the tabletop
Depending on the model, the table may have one central leg. Two, located parallel, in the form of an inverted letter "T". Usually they are fastened together with a crossbar. The base for small round tables is often three legs, the classic version is four legs.
The rectangular frame of the upper frame is made of thick and durable boards. They are connected end to end. The size of the box should be smaller than the lid. For the legs you will need bars of the same cross-section, preferably square. The optimal table height is 80 cm. The legs are fixed at the corners of the frame using metal corners and self-tapping screws. Next, a tabletop is installed on the frame and secured with self-tapping screws.
The base can be made of brick, concrete, metal pipe. It all depends on what shape and how many legs you need. If necessary, they are fixed in the ground using cement mortar.
The solution hardens over several days. But it is possible to deepen or level the finished structure only in the first two hours. Therefore, it is better to install it correctly right away. Wooden blocks buried in the ground or mortar can be protected from rotting with special rubber-bitumen mastic.
Strengthening the legs with a board
You can add the necessary rigidity to a wooden structure with a drawer structure. The drawer is a frame made of boards to which the table legs are attached in the upper part.The table top is also attached to it.
The drawbar performs not only a mechanical function, rigidly fastening all the parts into one whole. This is also a decorative effect that affects the aesthetics of furniture and its visual perception. An ordinary, simple table is held together with a straight board. In curved products of complex shapes, curved drawers are used. Dzar boards can also be decorated with carved ornaments.
To make the table in the gazebo stable, additional fasteners are used. These are legs - horizontal parts (lintels) connecting the legs of furniture in its lower part.
Depending on the design of the table, they can be made from a simple straight board, carved or round shapes. In common practice, pairs of legs connected by bridges are secured to each other by a central tie piece. Such a structure turns out to be unusually strong and reliable.
Final finishing and sanding
After assembling and installing all additional fasteners, the corners are processed again and the table top is sanded. You can leave a beautiful pattern of planed wood. If you want to give it a special color, it is covered with stain. A good finishing method is firing.
The effect is achieved using a hair dryer, gas torch or blowtorch. The desired shade can be achieved by applying the stain in two or three layers. Next comes treatment with an antiseptic or a solution of hot drying oil. To save varnish, antiseptic is used as a primer.
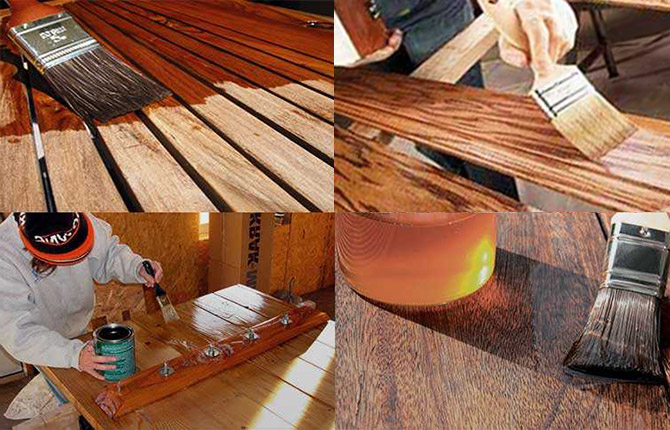
After the primer has dried well, all wooden parts are varnished. Dry again, sand with fine sandpaper, and apply the next layer of varnish. The procedure is repeated several times until the surface is smooth, almost mirror-like. Here, yacht varnish or any other wood varnish is used.
You can buy a ready-made table with benches. But, having basic knowledge of carpentry and connecting your imagination and the Internet, you can independently make not only high-quality, but original, distinctive furniture for the gazebo.
We also read: How to make a comfortable hanging chair
Share your own experience in making a gazebo table. Were there any difficulties during the work process? Leave your comment, repost the article on social networks, bookmark it.


As an alternative to the stupid plastic bouncing table, a killer of liquids, I made a wooden table into the gazebo. The length is chosen according to the length of the gazebo, the width of the table allows you to sit comfortably without resting against the wall. Boards for the tabletop (pine 40x150) were glued and twisted on 4 M6 pins. The nuts are closed with plugs made from a shovel handle, set on glue.
Everything else is attached with wood grouse and the fastenings are hidden with the same plugs on the glue. I did not try to make the surface of the tabletop flat, but without steps between the boards and as smooth as possible. I didn't varnish it, I sanded it and painted it. A total of 5 layers of semi-matte, transparent glaze. The structure of the wood is tactile, the layer of glaze can be no more than 0.2 mm, which is what I wanted. The table is stable. Trial operation showed that everything is fine. The height of 83 cm, which was confusing at first, turned out to be ideal at second glance.
I'm not a practitioner, I'm just getting ready. In my opinion, it is easier to make a tabletop with a gap along the boards. Bevel them along the adjacent sides and that’s it. And if you need a solid canvas, it’s easier to take a piece of glued board. For example, I keep toying with the idea of building a round table.
It seems to me that there is no need to complicate the production process. After all, this is an outdoor table and gaps, if they arise, will, in principle, not impair the performance properties. And if you want to make it without gaps, then it’s easier to take a floorboard with a lock, let it dry, then glue it and it won’t go anywhere. But if we talk about a table for the interior, then the requirements are higher and will have to be more complicated. Although on the other hand I like simple but cleverly made things.