Tank for a summer shower: tips for choosing a ready-made model + how to build a homemade one
Do you want to build a summer shower in your summer cottage? Agree that cooling off on a hot day is simply necessary.What actually makes such a shower an integral part of the economy of a private house, cottage and garden plot. But you don’t know how to build such a structure and what components you will need?
We will tell you how to choose a tank for a summer shower and install it correctly - the article discusses the options for containers used for these purposes. A step-by-step process for making a shower is also proposed, including the nuances of preparing the tank for use as a shower storage tank with subsequent installation above the cabin structure.
To help the home craftsman, we have selected visual photographic materials with options for tanks for a shower cabin and an informative video with practical recommendations for making a homemade shower for taking water treatments.
The content of the article:
Types of containers for summer showers
Practice construction of summer showers shows the predominant use of two types of storage tanks in structures:
- metal;
- plastic.
Both types are popular among summer residents due to their budget cost.
Type #1 - metal tanks
Metal products can be made from various types of metal. For example, tanks for summer showers are made from stainless steel, galvanized steel, and carbon steel. There are examples of the production of drives made of aluminum.

Since the main criterion for the operation of round, square, flat tanks for summer showers is the factor of protection against corrosion, preference is given to metals that can withstand this process.
Here the winning options are:
- galvanizing;
- stainless steel;
- aluminum.
Aluminum and stainless steel water storage tanks are more expensive from a financial point of view.
The most affordable option is a galvanized storage tank. However, metal coated with a layer of zinc and thus protected from corrosion, in the event of physical damage to the protective coating, sharply loses its properties.

Carbon steel is more susceptible to corrosion than other metals. Therefore, shower containers made from such metals are usually additionally painted. A special enamel is used for these purposes, which has pronounced properties of moisture rejection.
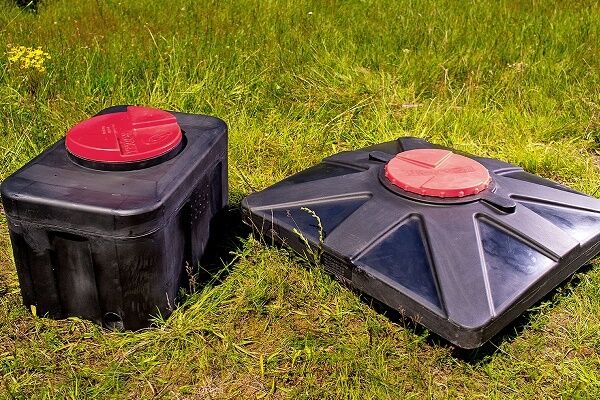
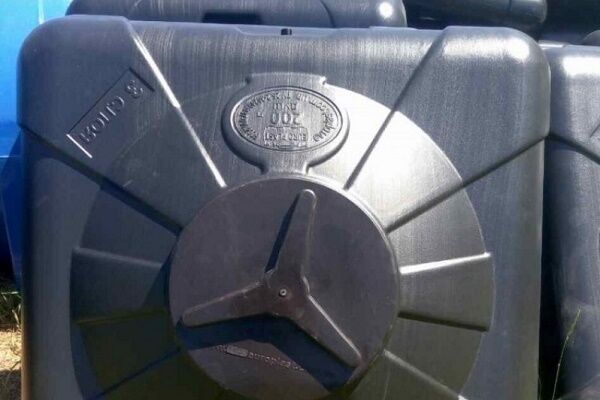
Type #2 - plastic shower tanks
Tanks for summer showers, the material of which is plastic, have become widespread in farms for various purposes.
The structure of the material - polyvinyl chloride, consists of chemicals that, in principle, do not corrode. An additional advantage of polymer shower tanks is their light weight.
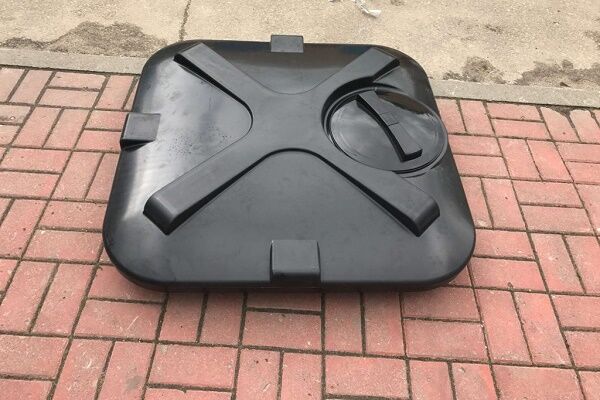
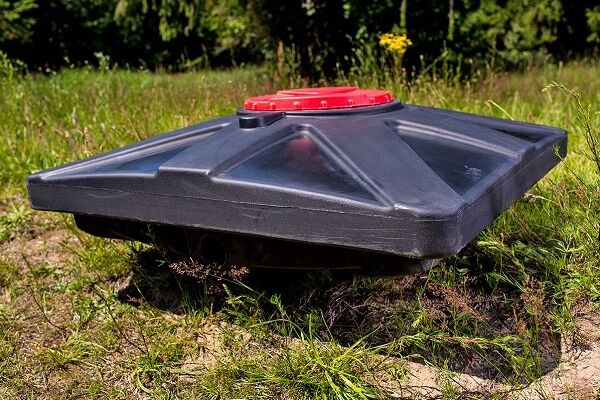
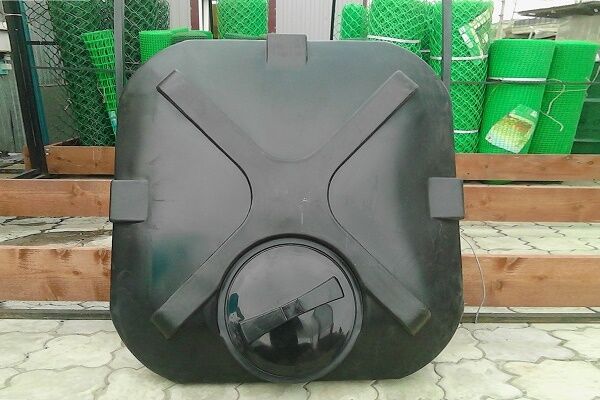
This plastic material greatly simplifies the production of drives in terms of the variety of their geometric shapes. Flat tank designs for summer showers are often made on the basis of polyvinyl chloride.
The only drawback noted for this type of material is the difficulty of obtaining a dark color of the structure. Light-colored plastic reflects the sun's rays, thereby reducing the efficiency of water heating.

Meanwhile, in practice, electric heating elements are often introduced into the design of the tank. Taking into account this modification, flat polyvinyl chloride tanks are better suited for showers than others.
Release plastic water tanks in a wide range regarding water capacity values. The volume of products varies from 50 to 500 liters.
Homemade shower tank
Owners of private houses and garden plots began to buy ready-made (factory) products relatively recently. Before tanks appeared on the market in the quantity and assortment that is available now, shower containers were traditionally made independently.
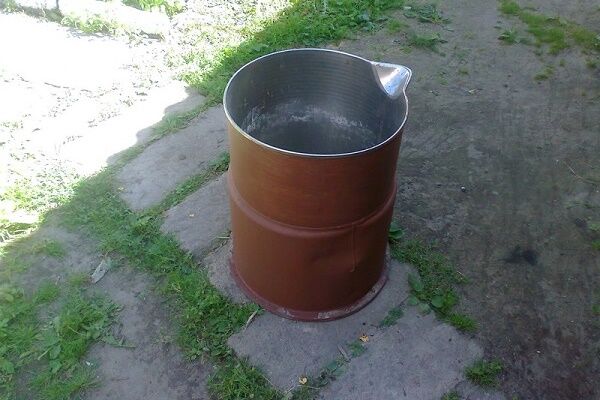
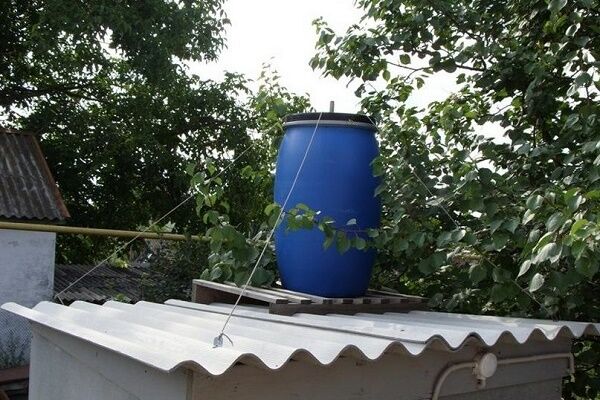
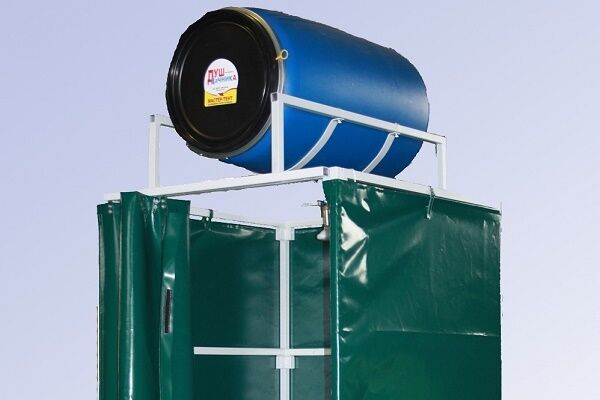
In the manufacture of a tank for a summer shower, metal barrels are most often used - containers for liquid products with a capacity of at least 100 liters:
Stage #1 - nuances of material selection
As a rule, the basis of the design was a technical metal barrel containing 50-200 liters of liquid.
Thin-walled metal barrels are used in large quantities for transporting chemical products and fuels and lubricants. As the contents are emptied, such containers often remain unused.
But summer residents and private property owners quickly found a use for bulk containers, using them as a shower water storage tank. By the way, it is now possible to find barrels of the same capacity made of plastic.
Making a practical shower tank from a former fuel container is not difficult at all. It is much more difficult to wash the container from the remnants of the chemical contents that remain inside.
A variety of methods are used to clean the interior area of chemicals. Steam, anneal, wash with gasoline, kerosene, soda and rinse thoroughly with water.
The tank prepared in this way is installed and successfully used for a long time.

The barrel has the shape of a cylinder, and this is its disadvantage in terms of design manipulations.
Flat tanks are more convenient for shower construction, as opposed to cylindrical tanks. They are easier to place on top of the shower stall and easier to secure. The task of installing a tank-cylinder is somewhat more complicated.
Stage #2 - preparing and equipping the shower tank
It is logical to describe the unique instructions for the manufacture and installation of tanks of different shapes for showers with one example. The manufacturing and installation technology is almost identical. The only exceptions may be certain minor points.
So:
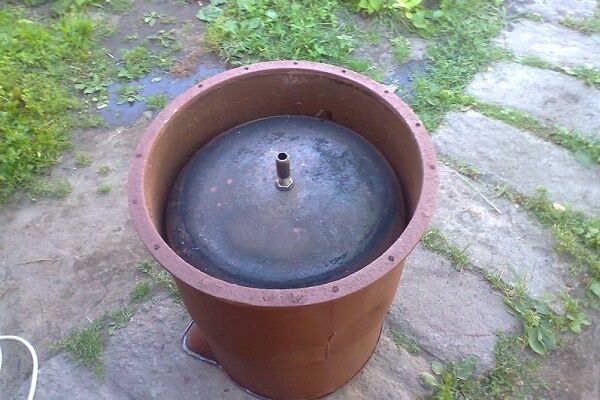
- Take a prepared metal barrel - 100-200 liters.
- The installation position of the barrel is determined - vertical, horizontal.
- A hole is cut out in the upper area for filling with water.
- A hole is cut out at the bottom for the shut-off valve.
The tank is ready for installation, but it needs to be equipped before it is in full condition ball valve, and also add a watering can to the valve - a water divider. Shut-off valves can be used in different designs.
But it is advisable to use taps with linear adjustment of liquid flow. Smooth adjustment of water flow means economical consumption and more convenience for the user.

The tap is mounted on the barrel of the summer shower, inserting it into the previously made hole in the bottom. It is necessary to equip the valve inlet pipe with rigid support washers and thick rubber gaskets.
On each side of the barrel wall, at the point where the tap is installed, place one washer and one gasket. Tighten the valve fastening nut inside the barrel tightly onto the thread.
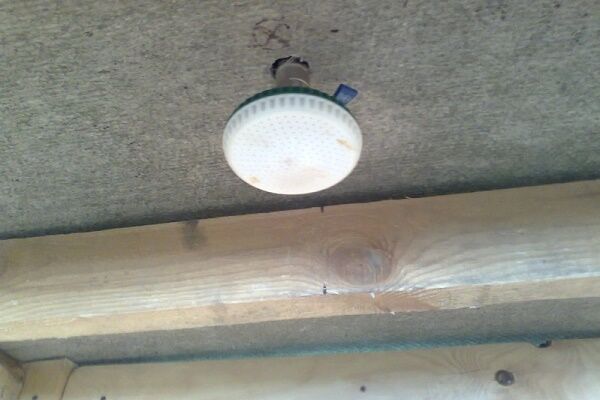
After installing the control valve on the barrel of the summer shower, you can immediately add a watering can to it. It is wise to make the shower head a quick-removable element and not attach it rigidly to the valve.
The practice of operating summer shower cabins shows rapid contamination of the holes in the shower head. There is a need for frequent cleaning. If the structure is quick-removable, cleaning will not take much time.
Stage #3 - installation of the tank above the cabin
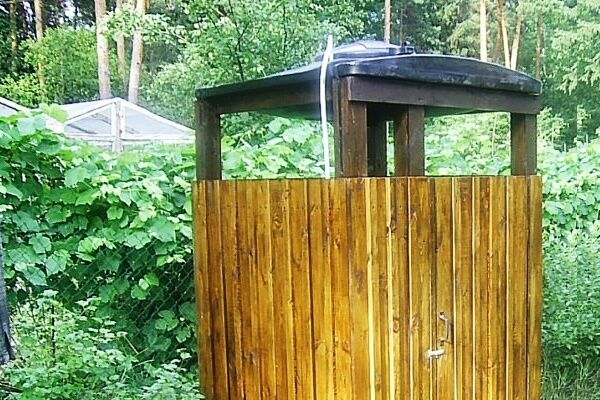
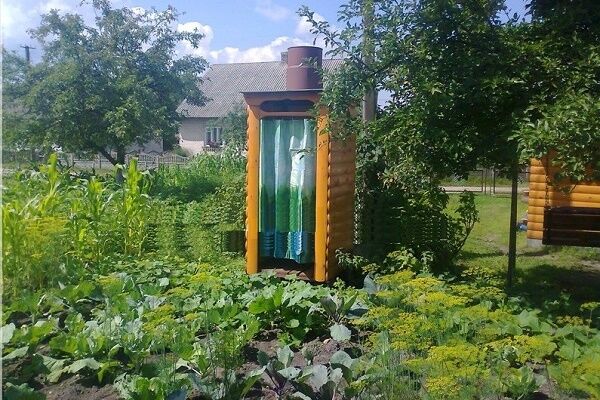
Having completed all the operations for manufacturing and equipping the storage tank with fittings, they begin to install it above the shower stall. The traditional place for installing a tank for an outdoor shower is the upper beams of the shower cabin frame.
But if the cabin structure has a good margin of safety, you can mount a metal “landing” for the tank at the top. However, on wooden cabin It makes more sense to mount wooden supports.

The cylindrical water storage tank can be installed horizontally across horizontal beams or along them.
The first design involves installation directly on the beams, followed by installation of fixing shoes under the walls of the barrel. These stop elements are made in the shape of triangles, one of the sides of which (along the hypotenuse) is tightly adjacent to the wall of the tank.
The second design differs in that the cylindrical tank is placed in the opening between the beams to a depth of no more than 1/3 of the height of the barrel in a horizontal position.
In this case, tension bars are inserted flush with the end parts of the cylindrical container, perpendicular to the beams. For this option, beams and tie bars must be calculated taking into account double the load.
Vertical installation of a cylindrical shower tank involves making a small platform at the top of the shower stall.
The platform can be made of boards, but it is better to use perpendicular inserts with bars between two beams. The bars (4-6 pieces) are inserted with a gap equal to their cross-section. Fasten them to the beams securely and conveniently using metal corners.
Features of installing a flat tank
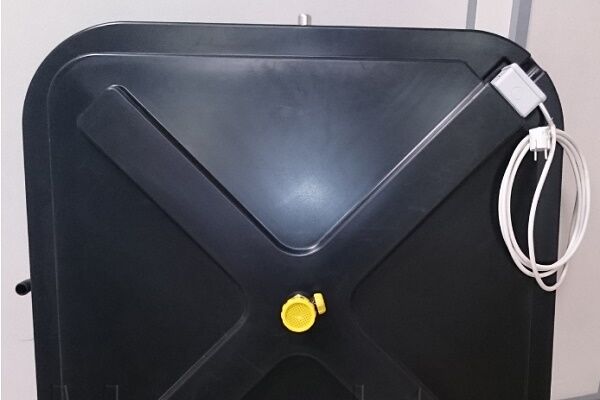
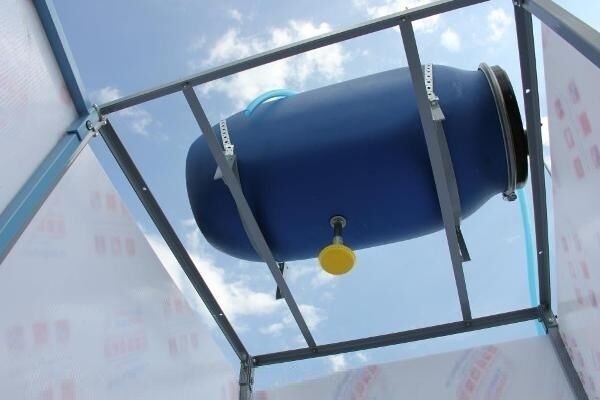
A flat tank made of polyvinyl chloride, purchased in a store, is much easier to install than cylindrical containers.
There are design solutions where a flat container is simply placed on top of the summer shower cabin and left in this position without any fastenings.
As a rule, this option is relevant for assembling shower cabins for temporary use - for the summer season.

When there is a need to mount flat tanks for summer shower structures, one of the options for reliable fastening seems to be the following:
- A flat tank is selected according to the dimensions (width, depth) of the cabin.
- Placed on top flush with the lines of the frame bars.
- At the corners of the frame, where the tank adjoins it, corners are attached.
- The corners (metal) are fastened overlapping the tank body.
It is also possible to install a flat tank and secure it above the shower stall in the “edge” position. This installation method is possible for a summer shower, the cabin of which has modest dimensions.
Installing a flat storage tank “on the edge” allows you to equip a small-sized shower stall with an impressively sized tank. The main thing is to correctly calculate all the loads so that the wind does not inadvertently drop the structure.
It is recommended to carry out such installation in a place protected from the wind, but with open access to sunlight. The storage tank is inserted in the edge-on position between the beams and lowered until it stops against the limiting elements.
Restrictors can be made from metal corners or strips. They are attached to the frame beams. To fix the top of the tank, thrust bars are installed.

By the way, it is easy to stretch a transparent plastic film over the persistent beams, thus creating a kind of greenhouse. The sun's rays will pass freely through the polyethylene and will effectively heat the water in the tank.
At the same time, due to the space closed by the film, an atmosphere of heated air will form around the container. It will additionally heat the water in the tank for a summer shower.
About heating water in a summer shower
It is clear that, in most cases, owners of summer shower cabins expect to receive water heating from solar energy.
But, depending on the area, solar energy is not always available in sufficient quantities to heat to a comfortable temperature.
Therefore, autonomous heating systems using electricity often become part of shower cabin designs. How is this done in practice?
Let's figure it out:
- The storage tank is equipped with a heating element.
- The shower cabin is complemented by a heating element control cabinet.
- Necessary precautions are taken.
The heating elements, as a rule, are TENs designed to operate while immersed in water.
For example, it is quite acceptable to use heating elements from modern washing machines. Moreover, it is advisable to create a group of two electric heaters, where one is working, the second is a backup.
To heat water to a comfortable (37-40°C) temperature inside a flat shower tank, one heater with a power of 1-2 kW is sufficient.

The electrical power supply circuit of the heating element must be thought through thoroughly and carried out in accordance with all electrical installation rules.
That is, in addition to high-quality wiring, the circuit must contain components such as RCD, automatic switch, heating element limit temperature sensor and water temperature measurement sensor.
It is recommended to supplement the electrical heating circuits with a presence sensor, which will automatically turn off the power supply the moment a person is under the watering can.
Almost all industrial models of tanks for summer showers are available with holes for installing electric heaters. In homemade containers, it is also easy to prepare the installation site for the heating element.
Installation of heaters is carried out similarly to installation of a shut-off valve. The heater is inserted from the inside into the hole until the limiting plate stops against the wall of the tank.
From the outside, a paronite gasket is placed on the terminal, followed by a metal washer, and then the fastening nut is screwed on.

The limit temperature sensor cylinder is mounted directly on the heater tube. For example, they press it with a metal clamp.It is advisable to install a water temperature sensor inside the tank at the liquid outlet to the shut-off valve.
Detailed instructions for building a heated summer shower are described in this article.
Conclusions and useful video on the topic
Overview of the configuration and testing of the plastic tank:
Tanks of summer shower cabins in their modern modification can no longer be considered as simple barrels for water. In fact, these are technically advanced devices that contain not only autonomous heating functions, but also water flow and filling controllers, disinfecting devices and other paraphernalia.
This means that the manufacture and installation of water storage tanks is often not inferior to other technical devices in terms of the complexity of the work.
Do you have experience making a country shower? Or still have questions on the topic? Please share your opinion, leave comments and add photos of your homemade products. The communication block is located below.


I bought a dacha without a bathhouse. Over time, of course, I plan to build it, but for now there is neither free money nor opportunity. But I need to wash somewhere, so I’m considering a summer shower as a temporary (for a couple of years) option. Since the option is temporary, I want it to be as cheap as possible.
I have plastic barrels, I think they are quite suitable, but what can I make a frame out of? I would like something more reliable - metal, but I don’t have anything suitable at hand. Does the wooden one hold up normally or does it need to be strengthened with something?
A normal wooden frame made of 100 x 100 mm timber with a bandage will support a barrel of up to 200 liters. And you probably don’t need more for a country shower. The fact that the barrel is plastic is good; it is noticeably easier to install.
In principle, there is nothing complicated about putting together a frame from wooden beams. I think this goodness will be found in the economy of a country house. I will attach a photo of my implementation, the assembly principle is visible there, there is no point in drawing a detailed diagram.
You have a barrel, but you will also need other parts:
1. First of all, a 2500 W heating element, the cost is about 8 dollars;
2. Instead of a clamp on the barrel, you can use steel wire for sealing, and the clamp costs $8;
3. The water level sensor is made free of charge from a transparent tube;
4. The hose and fitting for the fill can be found in the garage;
5. Automatic machine for 10A - 2 dollars;
6. A watering can with a tap, a plug and a cable can be found on the farm.
The point here is to find 100x100 beams cheaply, about $40 is enough, even if you buy it at a construction store. You can make the casing out of whatever you want. Total: 58 dollars, you can add another 20 for consumables, then it will be 78 dollars.