We build a modern gazebo with a barbecue for the dacha with our own hands
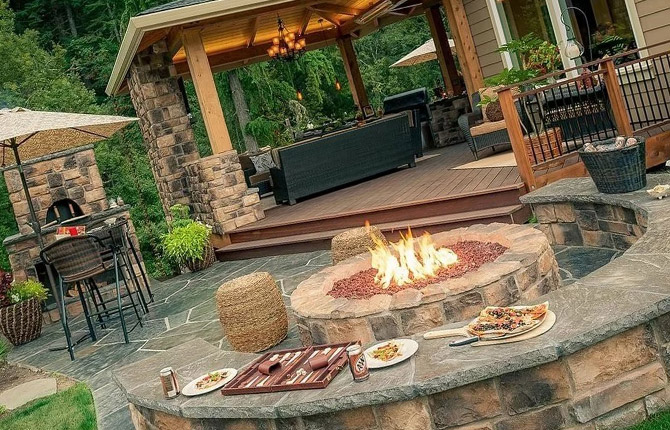
A vacation or a day off outside the city is not just about growing vegetable beds or caring for the garden.No less attractive is the idea of building a gazebo with a barbecue, so that in the evening there will be a place to gather in the fresh air, and not in a stuffy room at home.
The content of the article:
Where to place the gazebo: choosing a location
At first glance, choosing a site for a gazebo is not so important. If desired, a covered building can be installed at least in front of the entrance to the house. But in most cases, a gazebo with a barbecue is made with your own hands in the backyard of a building, preferably on the leeward side.
The grill is always a source of odors. Fumes and smoke eat into any objects, so it is advisable to choose a place somewhat away from the windows of the house to build a gazebo with your own hands.
Cooking meat, vegetables on open coals or a barbecue will require a fairly large number of kitchen utensils, water and food. But you can’t carry half of the kitchen utensils into the gazebo, so it’s nice if somewhere nearby there is a summer kitchen with everything you need, a refrigerator, running water.
The third point is the requirements for the site itself for building a gazebo with further barbecue equipment:
- presence of a foundation;
- hard coating;
- the presence of a stationary chimney directly above the barbecue.
In addition, if the structure of the gazebo is closed or semi-closed, then you will additionally need to make a ventilation window in the roof.On the one hand, it will help to ventilate the space inside the gazebo, on the other hand, you can avoid water condensation on metal parts and wooden cladding of walls or roofs.
Material
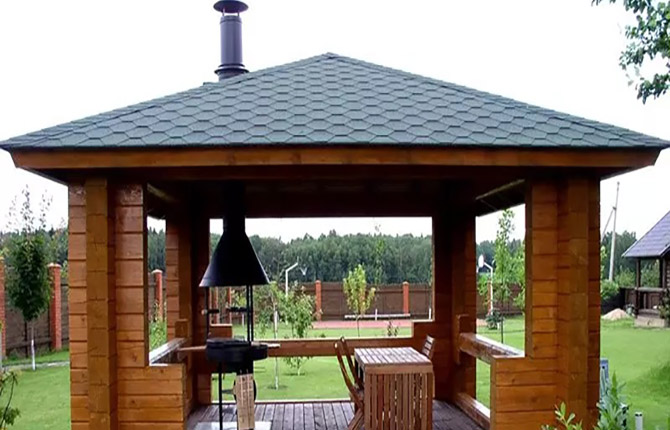
Most projects are developed specifically as a full-fledged place for summer recreation. Something between a summer kitchen and an open garden gazebo. The dimensions of the interior, taking into account the further installation of a barbecue or barbecue, cannot be less than 3x4 m. Therefore, mainly metal and stone are used.
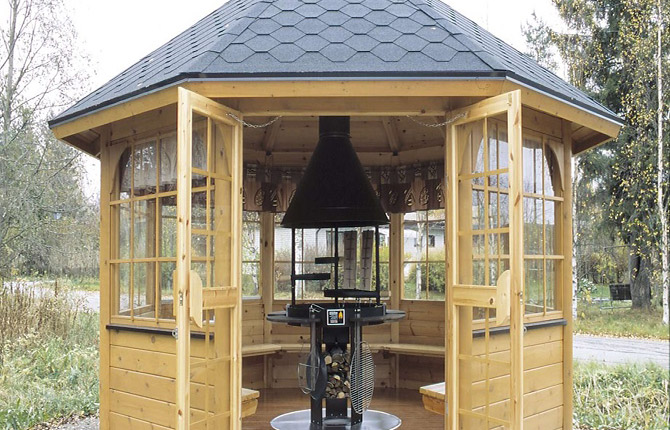
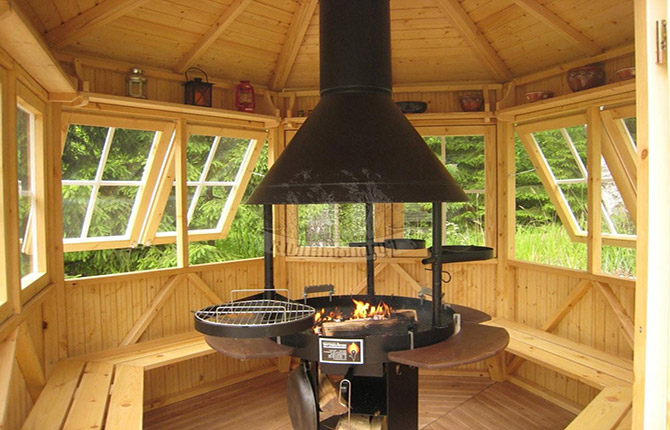
Although there are Finnish projects of closed gazebos with a central location of the stove, it also serves as a barbecue, but more often than a barbecue.
Tree
For construction, edged boards, OSB boards and timber are used. It is planned to build the gazebo entirely from timber, but its individual parts will need to be made from rubble stone and reinforced concrete.
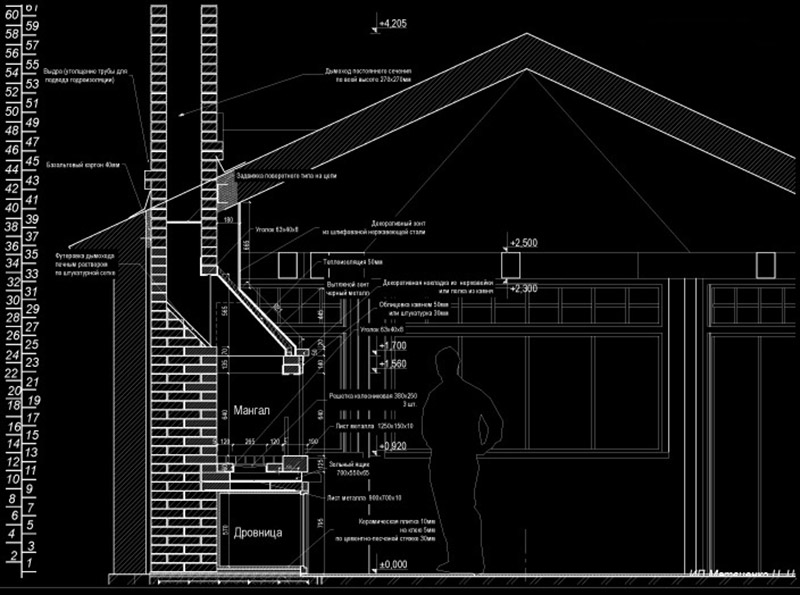
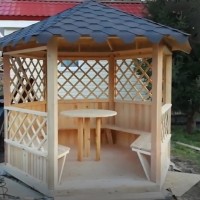
The gazebo project can be studied in the drawing below.
The box is assembled from separate pieces of timber (including spliced ones), reinforced with corners and struts. The vertical posts, lower and upper trims are made of 90x90 mm timber. Inch planks were used for the roof frame. The slopes are covered with clapboard, slate is laid on top - for a gazebo with a flammable barbecue or barbecue, this is the best solution.
The barbecue corner is made of hollow bricks.
The place to install a barbecue grill or brick oven must be chosen so that the wind blows into the inner corner where the firebox will be located, and not from the outside. Otherwise, the wood will not burn well.
Healthy: DIY gazebos made of wood. How to make a 3 by 4 gazebo with your own hands
We build a wooden gazebo in stages
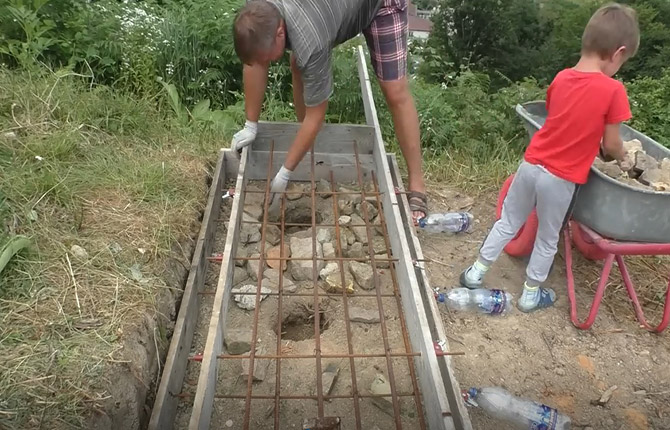
First of all, you need to fill the foundation for the stove or metal grill.To do this, we fill the area with gravel and place a box of boards on top to fit the size of the foundation.
We load reinforcement inside, crushed rubble stone, and fill everything with concrete mixture.
While the barbecue platform is gaining strength, you need to make supports for the lower timber frame of the gazebo. To do this, you need to drill six holes with a drill.
Next, lay the film inside, install wooden formwork and reinforcement on top, and pour concrete. At the same time, align the columns in height.
The next step is to assemble the lower frame from the timber.

For this:
- We cut the timber blanks to size. At the joints we make cuts in half a beam.
- We lay them on posts and assemble them into a frame shape. At the junction points we stuff metal scarves for reinforcement.
- We install internal jumpers and also reinforce them with gussets.
- We align the lower trim to the horizon using shims and fasten it using steel angles, self-tapping screws and metal wire to the embedded reinforcement of the supports.
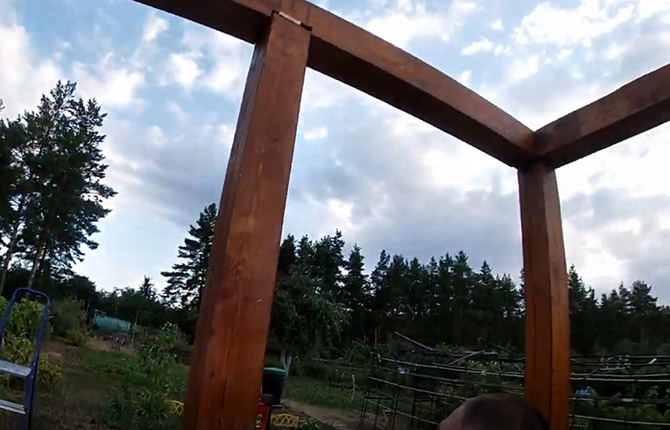
Next we install the vertical supports. You will need 7 of them. We align each rack vertically and fix it to the lower frame using temporary struts or supports.
The next step is to lay, level and secure the beams of the top trim with cross members. To prevent the wooden frame of the gazebo from deforming, you need to temporarily reinforce it with boards stuffed diagonally.
By this time, the foundation for the barbecue has gained primary strength, and you can lay out the brick corner of the gazebo.
The upper beam frame will simultaneously serve as a mauerlat, so both ends of the beam must be secured to the brickwork using anchor pins.
All that remains is to make the roof of the gazebo.Initially, a ridge beam or bench 406 cm long is cut out of a 150x150 mm beam. 60 cm supports are stuffed from the bottom of the future ridge, after which they are placed on the ceiling beams.
The rafters are assembled in pairs from two 200 cm boards. You will need 4 packages of rafter legs, which are simply laid on the ridge. For small slopes, the rafters will need to be cut and adjusted individually to size.
All that remains is to fill the sheathing, lay the slate, and install the grill or cauldron. It will be necessary to make a chimney and hood above the brazier. To do this, you will have to buy a ready-made unit for saunas.
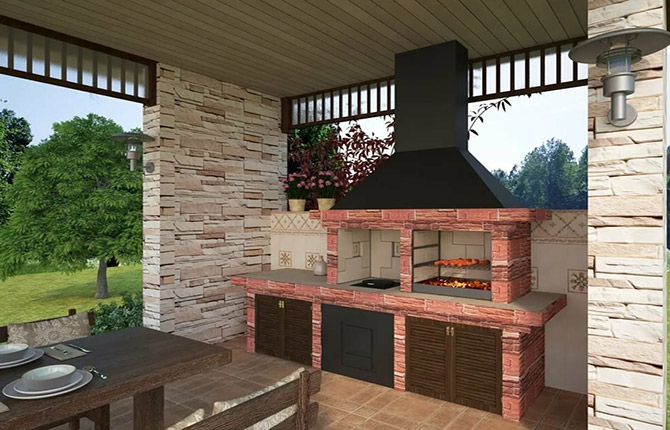
Brick
Building a brick gazebo is more difficult than a wooden or metal one. You can’t just build walls and roof supports. Red brick has one feature - baked clay absorbs fumes, fats, and the smell of burnt coal and firewood well.
Therefore, gazebos with a “kitchen” under one roof are built either from rubble stone, or the walls are covered with tiles.
Therefore, if the gazebo is often used for relaxation and home gatherings, then the grill or barbecue area is moved outside the comfort zone.
Otherwise, the rancid smell of old fat, which cannot be gotten rid of, will ruin your entire vacation.
White brick cannot be used to build gazebos with a brazier or next to a barbecue area. Carbon dioxide and carbon monoxide destroy the lime of the stone. The masonry will simply crumble in a couple of years.
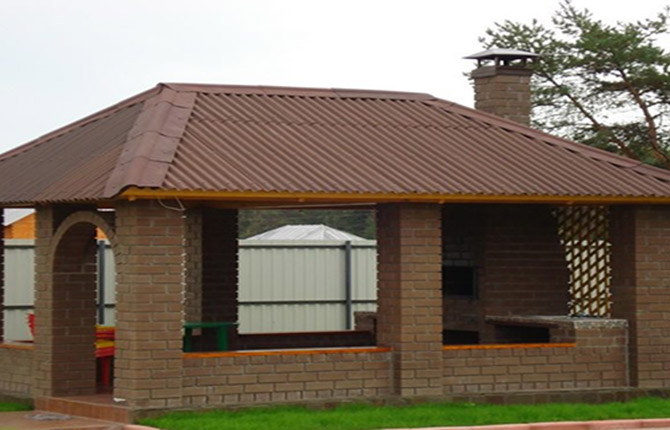
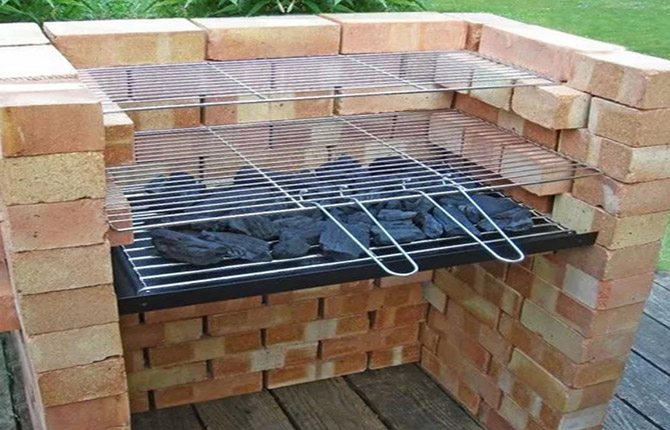
We build a brick gazebo in stages
If the barbecue is not used too often, 1-2 times a week, then you can build a small brick gazebo with enhanced exhaust for flue gases and soot, and place the barbecue itself on the open side of the building.
If a brick building has at least 2 full walls (the most common model), a full, shallow foundation will be required. Otherwise, the brickwork will not survive even one winter.
First, you need to clear the site, mark the contours of the trench around the perimeter and dig it to a depth of at least 50 cm. The top layer of soil is removed to the depth of the plant roots. The bottom of the trench and the site itself must be covered with sand, gravel, and a thick plastic film must be laid.
Before pouring concrete, vertical metal posts are driven into the corners of the site. Despite the fact that according to the design the gazebo is made of brick, it will have a metal frame. Few do-it-yourselfers know how to lay brick supports and walls up to 3 meters high. Therefore, the basis of the gazebo will be posts welded from the complex angles of two profiled pipes 70x30 mm.
The distance between horizontal pipes is usually 30-40 cm. Since a significant part of the roof will rest on the piping, it is necessary to strengthen the structure by installing vertical jumpers. Distance 15-20 cm.
Next, you need to fill the site with concrete and wait the required 5-7 days, not forgetting to paint the racks, and temporarily cover the screed with film (so that there are no cracks.
The next step is to make the top trim of the racks. To do this, two horizontal corrugated pipes 50x20 mm are welded to each of the four vertical posts. Only after this can you lay out the posts and fencing of the gazebo with regular or hollow bricks.
The floor in the gazebo is tiled. Now the most important thing is that after assembling the brick barbecue and installing the chimney (attached to the top trim made of corrugated pipe), all brick surfaces inside the gazebo must be tiled with decorative tiles.
At least once a season (or even once a month), tiles and ceramics will need to be washed to remove soot and grease. It is best to make ceiling cladding from fire-resistant material or use lining impregnated with chromium salts.
It is best to make the roof the old fashioned way from boards and timber impregnated with bioprotection against bark beetles, and do not forget to treat it with a fire-resistant stain.
A smoke-proof cap and a mesh are installed on the sections of the chimney to block the escape of sparks and hot ash. Then ondulin can be used as a roofing covering. It is easier to install, does not make noise in the rain, and is not afraid of dampness or moisture. In addition, ondulin does not require vapor barrier or wind protection. It can be applied to wooden sheathing in the same way as asbestos-cement slate.
If you do not burn coal and pine wood in the barbecue, then the likelihood of the coating catching fire is almost zero. But once every 10 years it is recommended to paint ondulin with a special protective composition. Thanks to this, the original color of the roof is restored, the design of the gazebo is improved, and additional protection from burning coals in the barbecue appears.
You can often find recommendations to make a barbecue inside a gazebo with a brick chimney. This solution has 3 major drawbacks:
- It will be necessary to increase the thickness of the foundation under the grill-stove.
- The brick warms up slowly, so draft in the pipe will appear after 30 minutes in summer and 2 hours in winter. For comparison, with a steel pipe, even in cold weather, a barbecue lights up in 20 minutes.
- To build a chimney, a master stove maker is required. You can do it yourself, but the result is not guaranteed.
All of the above will increase the cost of building a brick gazebo with barbecue.Therefore, for a summerhouse, a more preferable option would be to purchase a ready-made project with a brick, a cast-iron hearth, a barbecue, a barbecue and a cast-iron chimney. You just need to assemble all the parts according to the instructions for the project.
Article for you: We make a gazebo from scrap materials with our own hands.
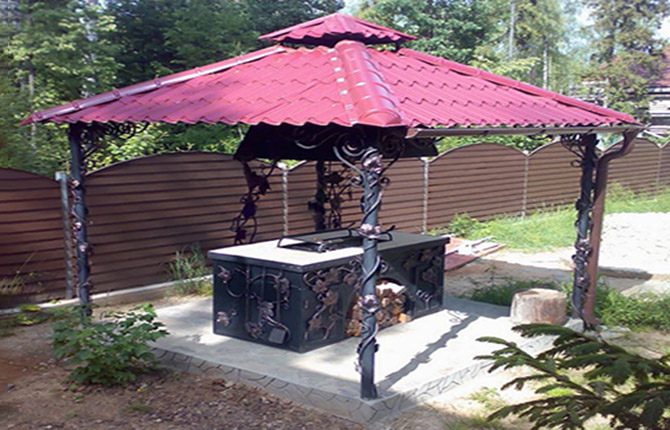
Forged construction
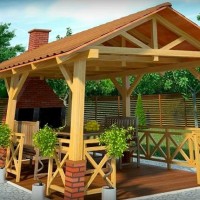
Metal is best for any awning or gazebo with a fire pit. The use of forged metal makes it possible to give the building an elegant look, smooth out the design and enhance the design.
One of the options for such a gazebo is shown above.
Construction begins with the manufacture of a slab foundation:
- The site for the construction of the building is cleared of vegetation and roots. Next you need to dig a rectangular pit 30 cm deep.
- In the corners, using a hand drill, holes with a diameter of 220 mm are drilled, to a depth of 60-70 cm from the level of the bottom of the pit.
- A layer of gravel is poured into the bottom of each pit and an asbestos-cement pipe 200x600 mm is driven in. The remaining space between the walls is filled with sand.
- A steel support (2-inch pipe) is installed in each corner, leveled vertically, first filled with crushed stone, then filled with concrete.
- Formwork 10-15 cm high is installed around the pit, the bottom is covered with film, reinforcement is laid and concrete is poured.
After a week, the formwork is removed.
The next step is to make the top frame of the gazebo. To do this, use a 40x40 mm square pipe or a corner. In addition, diagonal braces from corrugated pipe are welded into the harness. They will be needed in the future for attaching the chimney hood above the barbecue.
Next, you need to cut and install the rafters of the future gazebo roof; they are made from a 50x20 mm pipe.At the top point you will need to weld a square to attach the chimney and canopy.
The lower part of the chimney hood is secured with clamps to the diagonals.
In addition, the roof frame will need to be reinforced with additional corrugated pipe lining. Separate sections of pipe are welded between corner “rafters” made of metal profiles. This will increase the rigidity of the rafters and slopes.
Forged “snakes” and “vines”, corner curls can be made from aluminum or copper busbar. The metals are quite soft and easy to cold forge. After forging, the parts must be coated with bitumen varnish.
Mandatory elements of the gazebo are a drainage gutter and a drainpipe for draining rainwater. Moreover, the gutter is installed only in front of the entrance to the gazebo; the remaining 3 roof slopes do not have a drainage area.
This is one of the best professional designs of small gazebos, designed exclusively to protect the grill area from bad weather.
This will come in handy: How to build a comfortable metal gazebo with your own hands.
Choosing a grill for a gazebo
Due to habit, most owners of newly built gazebos choose the classic model in the form of a steel box with a barbecue grill or guides for skewers.
But, in addition to the “classics”, there are many interesting models of barbecues, specially designed for cooking meat and vegetables under a canopy or in a gazebo.
The main requirement for a barbecue grill or barbecue roaster is the ability to “keep” a stable heat. The temperature of the coals will not decrease, and the fuel will not burn out in 10-15 minutes only with limited air access.
If at least one side wall of the box is open, the grill will burn out in a matter of minutes, heat the air in the gazebo, and the meat and vegetables will burn, but remain raw inside.
Collapsible
A classic version of a “mobile” barbecue. The front and rear walls are hinged, the two side walls are simply removed from the mount. In addition, the box can be removed along with the prepared products and transferred to the table inside the gazebo.
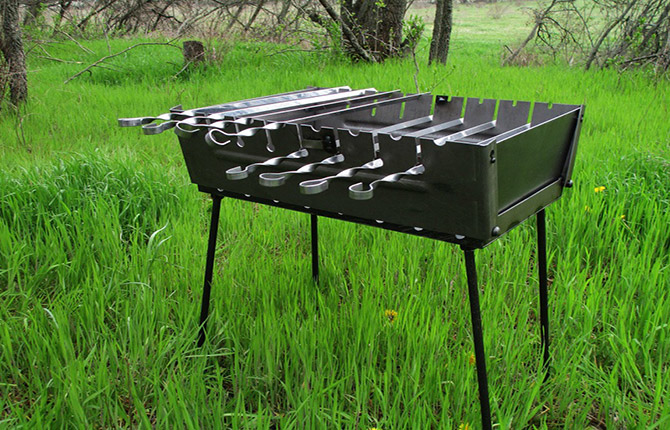
Of all the advantages of a collapsible barbecue, the main one is the ability to carry it. The box can be easily folded and stored in a barn, or taken by car to a garage or apartment.
The only significant drawback is the lack of side handles, which could be used to move the fireplace, for example, from the gazebo to the street. When hot, you will have to use gloves to carry the hot box.
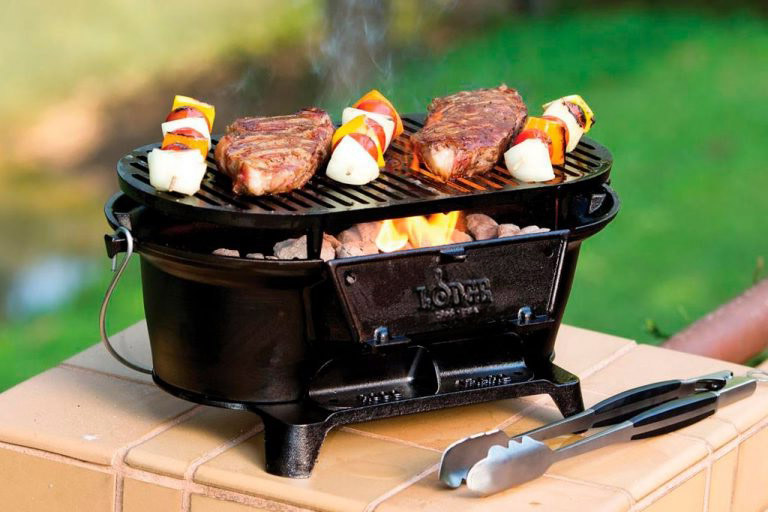
Cast iron
In fact, the model below is one of the best. Good casting quality, interesting design.
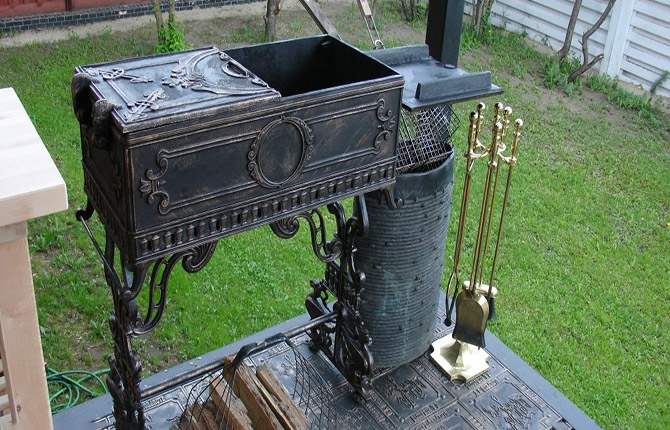
Braziers made of cast iron do not burn, and with proper care they never rust, as often happens with inexpensive steel braziers. For many models, the firebox is divided into 2 compartments. One can burn coal, and for a long time; one filling of 5 kg of charcoal briquette is enough for up to 10 hours.
The second compartment is used directly for preparing food. That is, it can be used as a stove to heat up yesterday’s portion of kebab or simply heat the food space.
Disadvantages of a cast iron brazier:
- Huge weight, about three times heavier than steel boxes.
- Cast iron does not withstand impacts. If you try to pour water on a flaming flame or simply drop a cast-iron box on a stone floor, the metal will crack like porcelain.
- Some models of cast iron grills (usually inexpensive Chinese ones) emit an unpleasant odor during the process of roasting food over coals, which easily penetrates into the food.
Experts explain that this burns the protective coating. Therefore, if you buy a barbecue for a gazebo, then it is best to have the simplest one, without decoration or paint.
Desktop
Essentially, this is the same steel frying pan, only rectangular in shape, with a compartment for charcoal briquettes and a frame-stand for skewers.
Tabletop braziers were widely used 120-150 years ago to serve hot fried meat to the table. It is very convenient for a small company in a gazebo, when several servings of hot food can be transferred from the cooking area to the table.
Another plus is that desktop models are easier to maintain. But for a large company in a gazebo, the possibilities of a portable barbecue will not be enough. Therefore, it makes sense to purchase such a roaster only as an addition to the main stove.
Stone oven
Despite all the advantages, managing a barbecue installed inside a stone firebox is quite difficult. You need to get used to each brick stove in order to be able to properly regulate the draft, heat, and prevent the coals from burning out too quickly.
A brick stove is easy to use if it was built by a master stove maker. Homemade fireboxes, as a rule, smoke heavily before the chimney heats up, and in addition, if you do not turn off the scraper in time, then all the heat inside the gazebo will be blown out into the grill pipe in a matter of minutes.
This is interesting: How to make a gazebo from a profile pipe with your own hands.
Grill oven or cast iron Dutch oven
The modern roaster or universal stove for cooking food over coals appeared relatively recently. Around the same time as the fashion for Finnish winter gazebos, in which a cast-iron brazier was a mandatory attribute. Used for heating and cooking roasts.
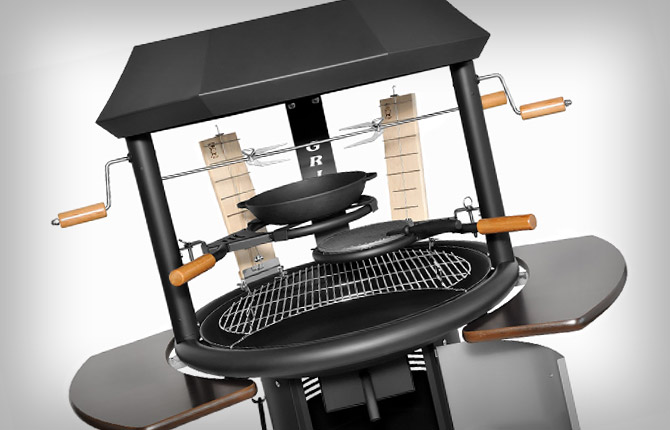
A modern Finnish cast iron roaster is a real work of art. You can cook all kinds of dishes on such a stove; it is no different from a stone stove, but working with it is much more convenient.
With proper handling, such a roaster will last 50-60 years, while any other models, including stone stoves, last up to a maximum of 30 years.
The only negative is that the brazier is best suited for Finnish design gazebos due to the specific location of the chimney. But it can also be used in a regular gazebo if the chimney is built correctly.
Disposable grill
By design, it is a simple metal tray with charcoal briquettes, sealed on top with a steel grate. Weight up to 2 kg, depending on the size of the tray. You can take this grill to your dacha or fishing. All that is required is to light the coal with a special burner, and you can fry vegetables and kebabs on the grill, just like on a regular grill.
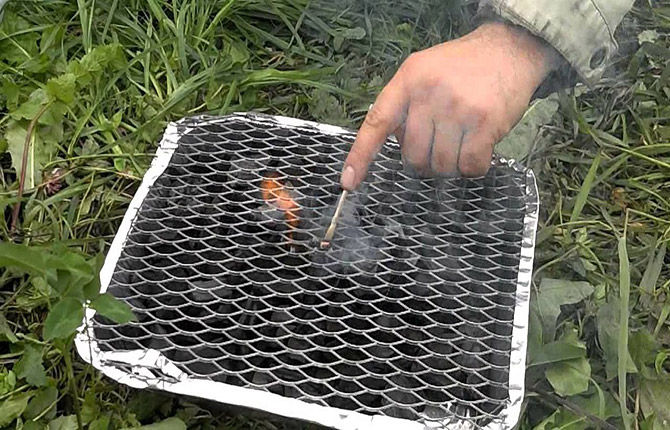
You can place it directly on the ground or on a fireproof thermal insulation sheet. It is very convenient when relaxing in gazebos that are not equipped with barbecues and chimneys.
Useful: DIY gas grill.
Mini barbecue oven
It is designed a little more complicated than a disposable barbecue. Essentially, this is the same small-sized tray for coals, but made of cast iron, with a folding grate. The dimensions of the mini barbecue oven allow you to cook a maximum of one or two servings of food. But, unlike full-size designs, such a roaster easily fits in a small bag and can be used for cooking in any gazebo, and even on the balcony of an apartment.
There are also mini-ovens made of stainless steel, usually slightly larger in size and always foldable.This type of barbecue grill is popular with anyone who frequently travels outdoors, moves frequently, or works outdoors.
It is not difficult to build a gazebo with a barbecue. There are quite a few projects; often a standard building is simply remodeled, a corner for the stove is added, and a chimney is installed. It is much more difficult to choose a grill. Often, instead of ready-made models of a brazier, gazebo owners make their own version, for example, from a cylinder or a cast iron box.
Tell us about your experience building a gazebo with a barbecue. What stove options do you think are best for relaxing and cooking? Write in the comments!


For barbecue, a cast iron cauldron with a double grate is best. Just be sure to be 70-150 kg heavy. It takes a long time to heat it up, then in addition to the meat you can also cook shish kebab, shurpa, pilaf, everything stays warm and doesn’t go sour until the middle of the next day.
The portable barbecue is absolutely classy. We always take it with us fishing. In the evening we fried kebabs, washed out the smell, and early in the morning we went fishing with a fishing rod. At lunchtime, you can still warm up the meat.