Do-it-yourself gazebo with a pitched roof: diagrams, step-by-step instructions
The construction of a simple gazebo with a pitched roof is accessible to almost anyone who is at least somewhat familiar with the rules for assembling such structures and knows how to use modern carpentry tools. The process will not take much time if you have a drawing on hand, an estimate has been calculated and all the necessary materials have been purchased.
The content of the article:
Advantages of pitched roofs
The first acquaintance with flat roofs with one slope causes slight bewilderment. The gazebo does not look very presentable, and the simple design is clearly inferior to gable or hip roofs.
But further use of the gazebo only confirms the correctness of the decision in favor of a pitched roof:
- Any roofing covering can be used, except clay and bitumen tiles.
- A simple design of rafters and sheathing for a shed roof.
- If you correctly orient the gazebo on the ground, the ramp can be hidden from the sun's rays. If you rotate the building 180O, then, on the contrary, make the roof very hot.
- Saving on the installation of gutters.
The main advantage is that a pitched roof very rarely leaks in the rain. This has always distinguished the gazebo from buildings with gable, hip and hip roofs.
Another plus that few people pay attention to when choosing a roof design. With single-pitched models, there is almost never condensation on the parts of the under-roof space. Even steel supports and struts never rust due to good ventilation.In gable structures, condensation and moisture control have always required regular painting of rafters and racks.
Healthy: DIY gazebos made of wood. How to make a 3 by 4 gazebo with your own hands
Preparatory stage
Construction begins with the selection of a site on the site, the design or layout of the future gazebo. You will also need to select the material for the main frame, roof and roofing.
The easiest way is to build a gazebo with your own hands from lumber: boards, timber, lining. For vertical posts you will need a beam of 150x150 mm, for piping - 50x50 mm. All other parts of the frame will be made of edged boards, lining, slats. All wooden parts must be planed in advance, treated with bioprotection, and dried under a canopy in the shade to avoid cracks.
If the building is needed for temporary rest during work, for example, during the construction of a house, then you can build a gazebo with your own hands from scraps of lumber, slate and sheet metal. Lean gazebos for long evening gatherings with a barbecue are built according to a capital scheme with a foundation and an additional podium (platform).
It would be right to draw up step-by-step instructions for assembling a gazebo. This will make it possible to make an estimate in advance and calculate the number of metal fasteners with a corner, “butterflies”, threaded rods, spacers before the construction of the frame begins. In addition, you will need oil varnish, paint, and roofing.
The tools you will need are:
- table saw;
- grinder with circles;
- belt sander;
- building level;
- carpentry kit: saw, hammer, nails, squares, tape measure.
In addition, you will need a table or carpentry workbench on which you can cut blanks for the gazebo frame. In the process of assembling the frame of the gazebo, you will have to do a lot of sanding and cutting of wood. It is strictly forbidden to saw or plane on the knee. Otherwise, the amount of defects will double, and the frame itself may not turn out to be completely even.
You will also need a shovel, cinder block, cement, sand, crushed stone, and pieces of glass roofing felt.
Gazebo schemes
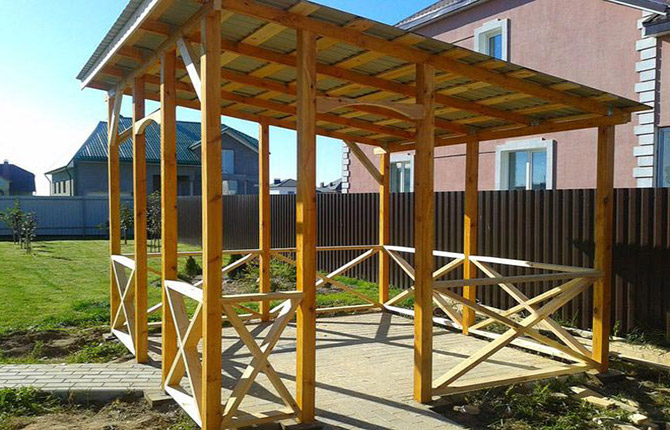
Next, you need to choose the design of the frame and roof. Depending on the structure, gazebos can be open or closed. Constructions of the first type include those in which the front or one of the side walls is completely open, without any supports, cladding or fencing.
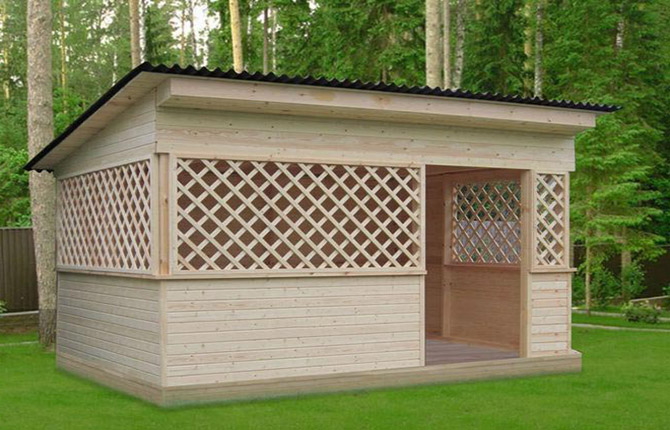
They are always closed with fencing, sometimes with quite dense wall cladding. Such designs are sometimes called winter ones.
If you plan to build a summer version of a universal gazebo, then an open structure is best suited. It is more convenient to use and does not require regular maintenance of fences. Such gazebos are very popular among dacha owners. It can be used as a shed for storing everything from a car to building materials, firewood and new crops.
Closed models provide more comfort in spring and late autumn. For example, in rainy and windy weather it is better to sit in a closed gazebo.
Useful: How to make a gazebo from a profile pipe with your own hands.
Features of a pitched roof
Traditionally, to form the roof slope, the front supports were made higher than for the rear pair.
Since a pitched roof with sheathing always created horizontal pressure on the front supports, to enhance the rigidity of the structure, both racks were connected by a transverse beam and several struts.This made it possible to use thinner and lighter slats or boards for lathing and counter-battens.
Thus, the angle of inclination of the pitched roof could be made quite large, up to 30O. This is important if you plan to build a gazebo in an area with a lot of snow in winter.
With the advent of completely open (Italian) gazebos, the lean-to base for the sheathing began to be made from heavier, more massive timber. The slope angle of the pitched roof decreased to 5-10O, but the shadow area increased.
There is no need to use a horizontal cross member. The rigidity of the gazebo frame is ensured by the deep installation of massive supports into the ground and the thickened timber used on the ceiling.
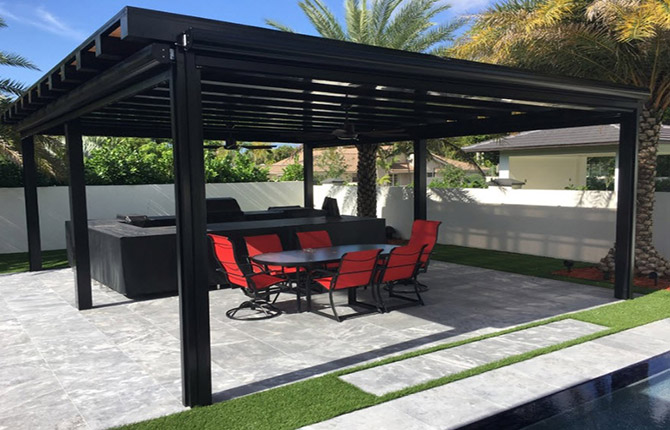
This type of shed roof is only recommended for hot areas that receive rain rather than snow in the winter.
Interesting: DIY gable roof for a gazebo
Do-it-yourself lean-to gazebo made of timber
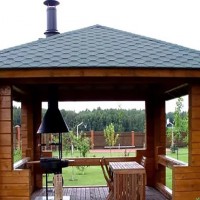
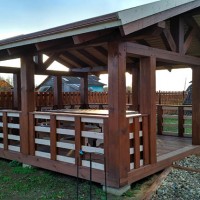
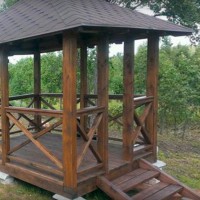
For construction, a classic closed-type project with a podium, fencing, a pitched roof and a roof made of painted profiled sheet metal was chosen.
The planned size of the building is 3x4 m. One of the side walls and the back side of the gazebo is covered with OSB. As a result, the structure is rigid and strong enough to last 10-15 years without repair.
Making the foundation
The gazebo will be installed on poles made of cinder block. This is the cheapest and most reliable option for bulky wooden buildings. The site must be delineated (marked dimensions) and the entire fertile layer, plant roots and soil must be dug out to a depth of 10 cm. All this must be removed from the site.
Next, in the corners of the rectangular contour, as well as in the middle of the sides and in the center, square pits of 60x60 cm with a depth of 15 cm are dug. Gravel and sand are poured into the bottom of the pits, and a liquid sand-cement mixture is poured onto the cushion.
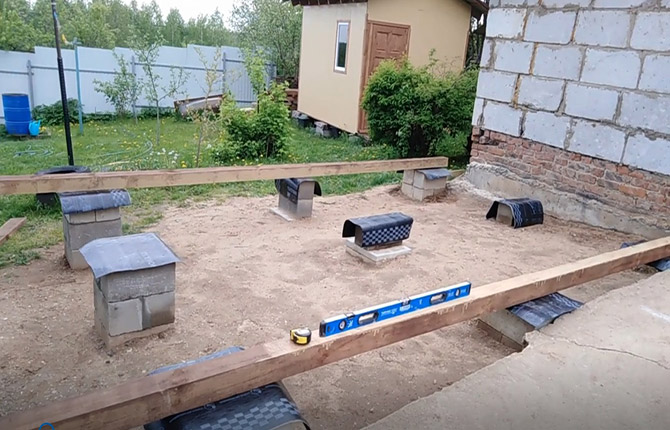
Cinder blocks are laid in pairs on the not yet hardened base. The total height of the column above the ground level should be 35-37 cm. Until the solution has set, you need to adjust the height of the columns. To do this, several painting cords are pulled between the outer supports, the highest ones are pushed down with gentle blows with a hammer. As a result, the heads of all columns should be located in the same plane.
After leveling, the site is covered with a mixture of sand and gravel screenings, and pieces of glass roofing felt are glued onto the heads of the supports with molten resin.
Bottom harness
The next stage is tying the lower tier of the gazebo to the columnar supports. For the bottom trim, a beam with a section of 100x100 mm is used. Since it bears the entire load, you can take more massive material, for example, if you plan to install a brick barbecue stove in the gazebo.
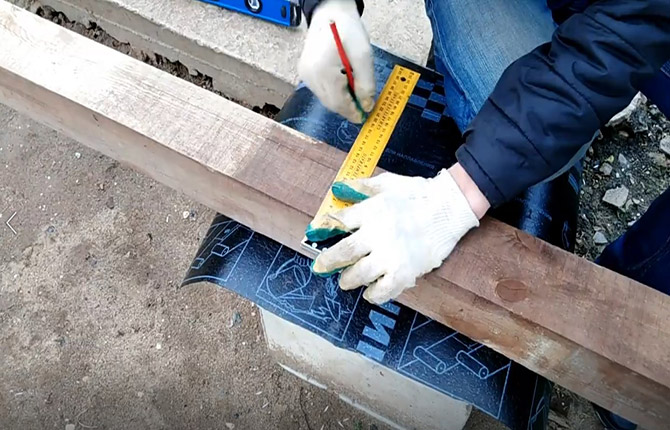
Initially, for each side you need to mark the beams along the length, and then file the ends for a corner connection into a “half-joint”. Next, you will need to lay out the blanks on pillars around the perimeter, without connecting at the corners for now. Using a small amount of masonry mortar, you need to level the position of each beam according to the horizon level, and then fix each beam by placing a bend weighing 15-20 kg on top of it.
Now you need to secure the parts of the lower trim to the surface of the posts. Using a carpenter's hammer or a drill with a 15 mm drill bit, we drill holes through the wood until the tool rests on the cinder block.
Next, you will need a powerful electric drill with a 12 mm drill. A hole is drilled in the cinder block to a depth of 15 cm. On the surface of the timber you need a hole of 25 mm to a depth of 15 mm. This is necessary to hide the nut in the body of the beam.
To fix the timber frame, galvanized steel pins M12, 20 cm long, are used. We apply masonry glue to the fasteners and carefully screw them into the drilled hole to the full length.
After all the pins have been wrapped, you need to wait 6-7 hours for the glue to harden. Only after this can you carefully place the washers and tighten the nuts.
Before tightening the nuts, you need to pour 5-7 ml (a couple of tablespoons) of drying oil into the hole with the studs. After two or three days, after drying, it will lock the thread and cover the wood, thereby protecting the joint from moisture.
It is recommended to open the entire harness with protective varnish, oil paint or just drying oil. In the corners of the strapping, the timber can be additionally knocked down with nails, having previously dipped them in drying oil or varnish.

To process nails and fill under studs, it is best to use the cheapest varieties of drying oil or weld it for the gazebo yourself. To do this, you will need approximately 1-1.5 liters of old sunflower oil (can be rancid).
Cook for 7-8 hours over low heat. The result is a viscous, dark-colored liquid. It is used to process all joints and fasteners in the gazebo. Over time, homemade drying oil acquires the consistency of half-dried glue. Ideal for protecting parts of a pitched roof and the foundation of a gazebo from moisture.
Interesting: How to build a comfortable metal gazebo with your own hands.
Flooring
Before installing the frame, it is necessary to lay the boards of the future floor.Since logs are not used in the construction of the gazebo, an edged board of fifty, 150 mm wide, is used for the flooring.
The board is laid on the floor of the gazebo with a small gap (0.5-1.0 mm), this is necessary in order to compensate for the expansion of the wood when humidity changes.
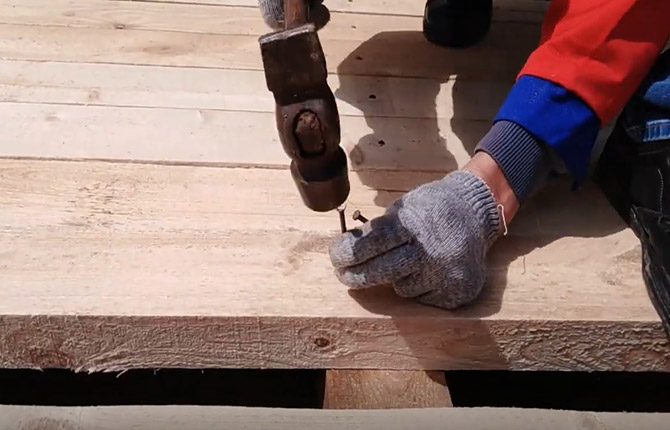
Nails are driven into the boards using the carpentry method: at different angles, making sure to dip the fasteners in homemade drying oil. Even if the floor in the gazebo is not painted, the nails will not rust, the floorboards will not rise, and there will be no squeaking.
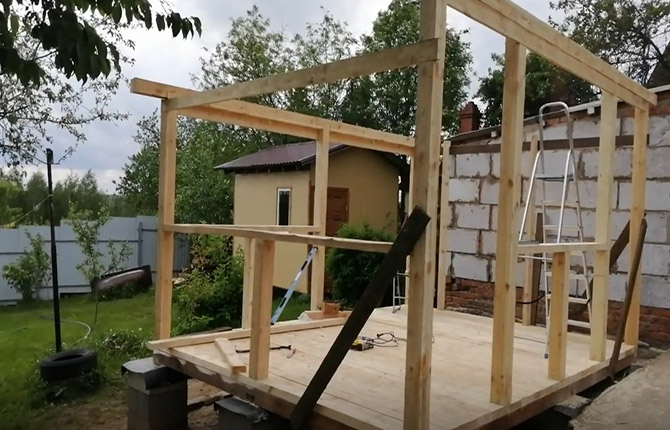
Frame assembly
After the floor is assembled and primed at least once with polyurethane or acrylic varnish, you can proceed to installing vertical posts and top trim.
First you need to mark and cut seven permanent vertical supports and one temporary:
- three for the back of the gazebo;
- four, taking into account the entrance and window, for the front part of the building;
- one temporary one will be used to assemble the frame of the pitched roof.
Three pieces are cut out of 100x100 mm timber, 220 cm long, four facade posts are 250-270 cm long. The temporary support is made of two 20 mm boards, 220 cm long, knocked together in a package.
In addition, you will need to cut three horizontal crossbars of 290 cm, 180 cm and 150 cm from a fifty-fifty board. They will be used to arrange the gazebo fencing.
For you: We build a modern gazebo with a barbecue for the dacha with our own hands.
Installation of supports
The reliability of a pitched roof directly depends on the accuracy of the installation of vertical supports. This scheme does not have paired rafters, which can be used to level and balance the surface. Any error in height will make the pitched roof either “humpbacked” or with a hole in the center of the slope.
The supports are installed first on the rear side - the extreme left and right, each separately. First, you need to nail a couple of strips or pieces of 120-150 cm slabs to the bottom trim. After installing the vertical support at an angle, grab it to the flooring with a pair of nails and, after vertical alignment, fix it with strut strips.
After installing (with struts) all vertical supports, the beam of the upper trim of the rear side is laid. Immediately after laying, another beam is installed on top, but for the rafters of a pitched roof.
The supports for the front side are assembled in a similar way, including laying the support beam for the pitched roof.
Now you need to align the rear side racks with the front ones. It's like trying to make two sheets of plywood placed vertically parallel. The task is not easy: fitting the frame alone, like installing a pitched roof, will take a lot of time. At least one, or preferably two, assistants are required.
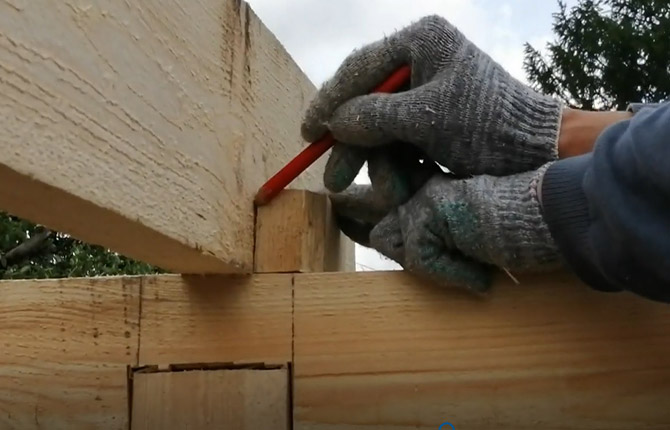
First you need to cut one horizontal cross member between the rear corners and the front corners. Each beam is immediately nailed to the rear (with one nail); on the front post, the end is simply inserted into a groove cut in the vertical front post. Next, using a tape measure and a building level, you need to adjust the position of the posts, and then hammer a second nail into the crossbar, but this time on the front post of the gazebo.
After alignment, the length of both crossbars must match to the nearest millimeter, otherwise the shed roof will end up sloping towards the higher side of the gazebo.
If the gazebo is larger than 3x4 m, or if the pitched roof is made in two tiers, in addition to the side crossbars, you will need to sew on the “beams” of the ceiling.
After assembling the frame, all joints, corner and linear, need to be reinforced with metal plates and corners. This must be done throughout the entire structure of the gazebo and always before installing the rafters of the pitched roof. It is clear that the entire tree needs to be varnished.
For the first treatment, varnish is used, diluted with a double portion of solvent to the state of “water”. It will penetrate deeply into the pores of the wood and make the frame of the gazebo insensitive to air humidity. The second treatment is carried out with varnish of normal consistency, but after installing the pitched roof.
Roof assembly
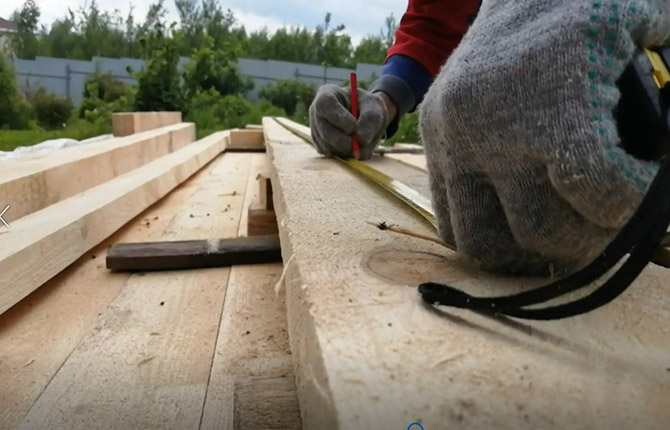
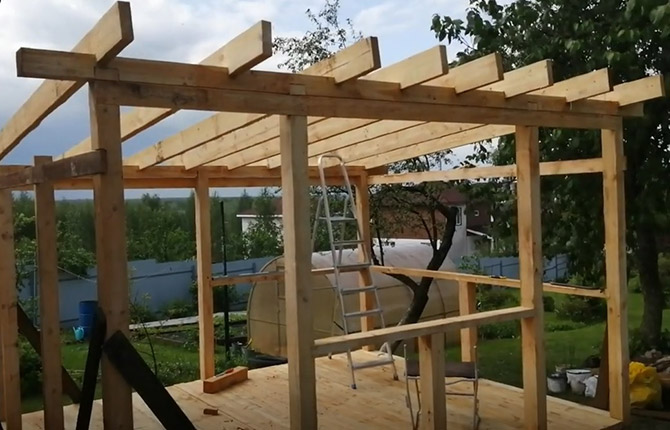
Now the main thing is to correctly cut the rafters for a pitched roof. Since the roof frame is made according to the classical scheme, you just need to select eight blanks from a 30-40 mm board, or thicker, 4 m long.
At first glance, for a pitched roof you can choose a thinner piece, for example, an inch. But in this case, you will have to install supports and immediately hem the ceiling with crossbars. So thick rafters for a pitched roof are a more profitable solution.
The transverse size of the pitched roof will be 0.5 m larger from the facade and rear of the gazebo. This supply is necessary for arranging roof overhangs.
Next, you need to select a couple of boards, the smoothest and straightest. These will be the outermost side rafters of the pitched roof - the left and right extremes. We lift both pieces up and place them in their places, without any cuts for now.
Visually determining how level the rafters are is quite difficult. This is important; if you don’t check it, the overhang of a pitched roof will turn out slanted. Therefore, we stretch the painting cord between the ends of the rafters (from the front side), adjust the position of the boards so that it becomes parallel to the beam of the upper frame.
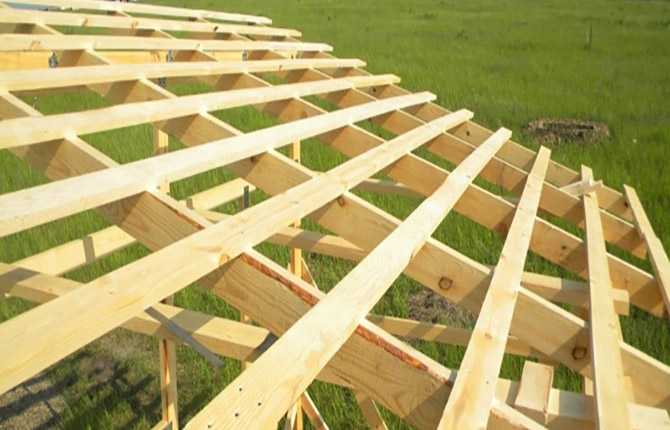
We immediately mark the places where the grooves were cut on the rafters. We cut out and fasten the blanks, re-tension the painting cord between the ends. Now we lift all the rafters one by one onto the roof, mark the places where the cuts are made along the cord, cut them out and put them in place. The result will be an even rafter frame of a pitched roof.
The next step is to sew sheathing boards onto the rafters. You can even use unedged lumber 20-25 mm thick and 150 mm wide. The length of the sheathing for this type of pitched roof should be up to 4.5 m. That is, overhangs of 25 cm are obtained on the sides. This is enough for a gazebo.
After laying the sheathing, geotextiles or roofing felt are laid. This is necessary to protect the sheathing and rafters of the pitched roof from condensation. 40x40 mm slats are sewn over the protection and the roof is laid. For example, metal tiles or corrugated sheets.
If there is a barbecue or stove in the gazebo, then this is the best option for a pitched roof. Ondulin in a gazebo lasts for 10-15 years; for bitumen shingles, the base of a pitched roof will need to be additionally sewn up completely with sheets of waterproof plywood.
Useful: Do-it-yourself lean-to wooden shed for a summer residence
Results
A gazebo with a pitched roof can be considered the simplest option, available for construction by almost all summer residents and lovers of country holidays. All that is required of the worker is to carefully follow the procedure and not skimp on materials.
Article for you: We make a gazebo from scrap materials with our own hands.
Tell us about your experience building gazebos. How can a pitched roof compete with a gable roof? Write a comment, repost the article via social networks and save it to bookmarks, this will help the development of our site!


The gazebo seems fine, but the material is clearly too much. I would put more spacers and struts and you can use a non-fifty, ordinary or even unedged board. The pitched roof is used for extensions to the house, and the rest for barns, bathhouses on the outskirts, where there is a lot of wind.
Probably the floor in the gazebo should have been made flush with the asphalt.