How to build an all-season chicken coop for 20 chickens with your own hands: step-by-step instructions
For a small country farm, a chicken coop for 20 chickens would be optimal. It's not much, but enough for one family.If you stock up on materials in advance, choose a location and plan the work, you can build a poultry house with your own hands in 3-4 days.
The content of the article:
What should a chicken coop be like for 20 chickens - requirements
The size of the room should be chosen depending on how the house will be used. If you buy grown chickens, then raise them to adult chickens for meat, then a poultry house with a structure of 6-7 m will be enough2, calculated according to the standard rate of 3-4 heads per square. But such a scheme is beneficial only for poultry houses with a number of chickens of 100 or more.
For a home poultry house, reproduction is more profitable, that is, independent selection of the breed and its improvement. Therefore, at the dacha they keep at least 2-3 breeds in the poultry house. Be sure to make sections for laying hens and pens for growing young animals. Then raising poultry fully pays off and gives a small profit, even if there are only 20 birds in the chicken coop.
In this case, the poultry house must meet the following conditions:
- Dimensions are calculated based on two chickens per square area.
- Availability of nets and perches for floor maintenance in the poultry house.
- 2 large blocks should be allocated for laying hens and birds hatching eggs.
The main condition is that the ceiling height must be at least 2 m, otherwise it will be difficult to ensure good ventilation and low humidity levels.High-quality food, warmth (but not more than 20OC), good ventilation and safe sanitation ensure rapid growth and freedom from disease in chickens.
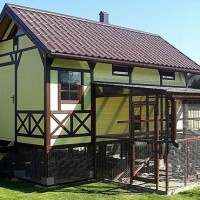
Therefore, it is better to make a chicken coop for 20 birds of a full-size type, on a foundation with a canopy and an aviary for walking birds.
Selecting drawings
A chicken coop for 20 heads is already a fairly large building. You can choose a standard layout for the future poultry house or come up with your own.
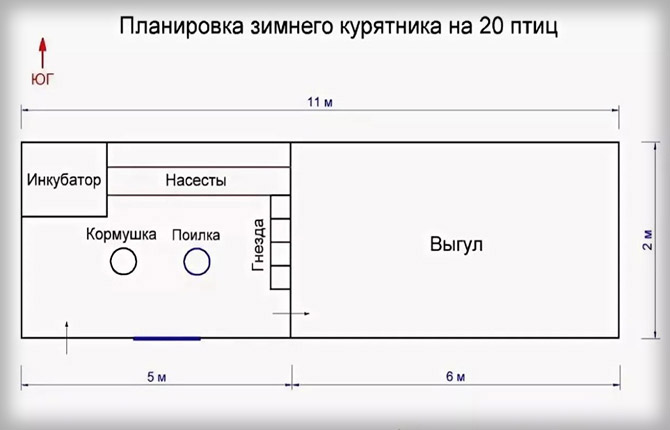
The main thing in the process of tying the poultry house to the ground is to position the box so that the incubator area “looks” to the south; the pen for the young animals, on the contrary, is closer to the exit or to the ventilation.
You can use the prototype dimensions below to develop your own drawings.
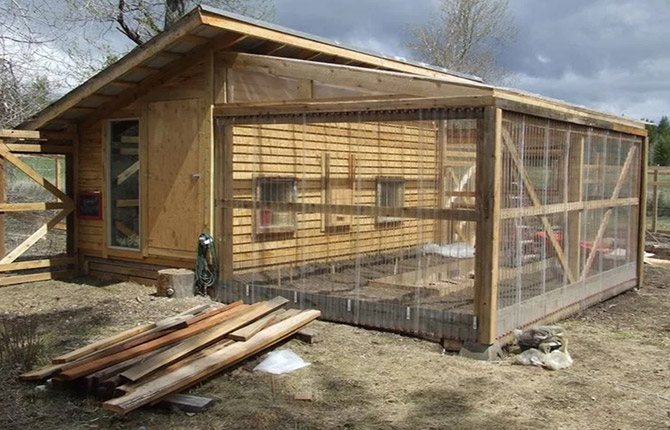
You can use one of the most popular designs of Canadian frame poultry houses. They are designed for year-round keeping of birds, the design is quite well protected from cold and winds.
For poultry houses it is not necessary to maintain +20 inside in winterOC. Optimal temperature 11-14OC. Heating is used only in severe frost, usually in late autumn and winter. In spring there is already enough solar heat, but the chickens have to be heated separately or moved into the house.
What is the best material to make a chicken coop from?
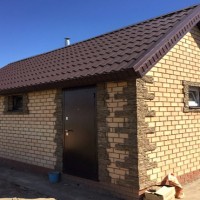
A poultry house for 20 chickens in 9 out of 10 cases is built using a frame structure. Only in areas with abnormally severe frosts can chicken coops be built from brick and gas blocks. But this is an exception to the rule, since it is known from practice that in poultry houses made of aerated concrete (not foam concrete) or pressed cement particle board, birds develop poorly and often get sick.
Before building a chicken coop for 20 chickens with your own hands, the material must lie under a canopy for a couple of years in order to completely get rid of gas-forming agents and gases.
The chicken coop box is assembled from pine beams and boards, the walls are lined with plywood, and insulated with modern materials. The floor and ceiling are covered with tongue and groove boards. The foundation is columnar made of brick, asbestos-cement pipes or cast concrete into formwork.

Article: How to build a warm winter chicken coop at your dacha with your own hands
Step-by-step construction instructions
Since housing for chickens will be built mainly from wooden beams and boards, you need to rent a good table saw and plane. You will also need a screwdriver with a couple of spare batteries, a laser level and an electric hammer. Most fasteners are done with nails, and it can be physically difficult to hammer in with a regular hammer if you are not used to it.
In addition, building a winter chicken coop for 20 chickens is easier if you have at least a couple of assistants of any qualifications.
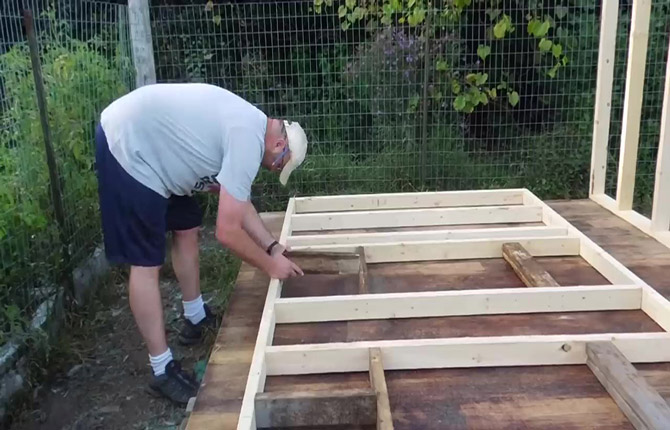
Working with the foundation
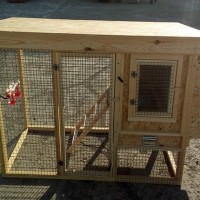
The base of the future chicken coop is assembled from a two-inch board, 15-17 cm wide. The dimensions of the box are 2.5x6 m. The boards are pre-cut and treated with a stain, then with a fire retardant. After drying, the wood is impregnated with drying oil or oil varnish. All processing must be done before assembling the base.
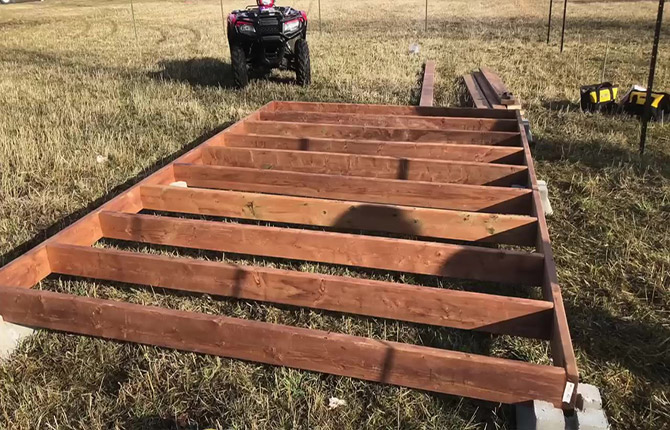
The box is installed on concrete supports. The chicken coop turns out to be quite high, with a large windage, so it is best to use ready-made stands for assembling a fence made of concrete casting.
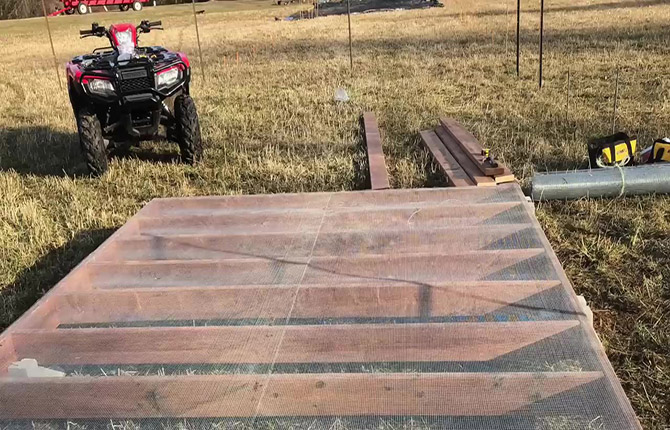
The next step is to sew a thin steel mesh onto the wooden base, with a cell size of no more than 5 mm. Steel will protect the floor of the chicken coop, chickens and chicks from mice, rats and predatory ferrets.
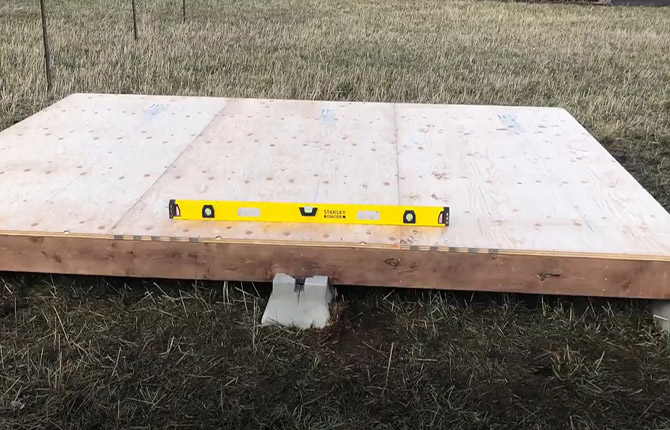
Now the base needs to be completely covered with plywood; the recommended sheet thickness for the floor of the chicken coop is 16-18 mm. You can also fill a tongue and groove board, but plywood turns out to be more resistant. The floor in the chicken coop is made of either oak or plywood, otherwise the chickens will “rakes” it to holes.
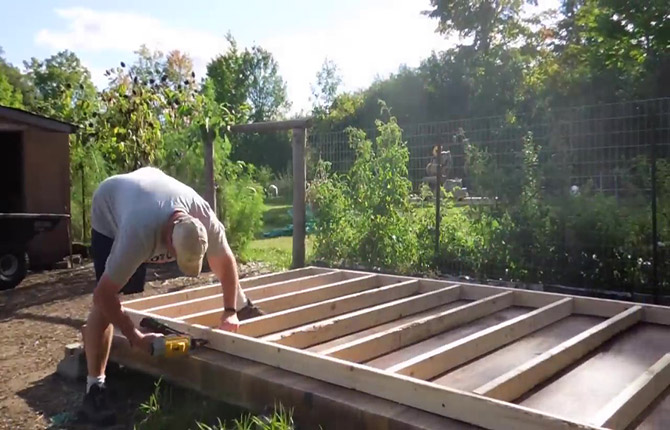
Assembly of the structure
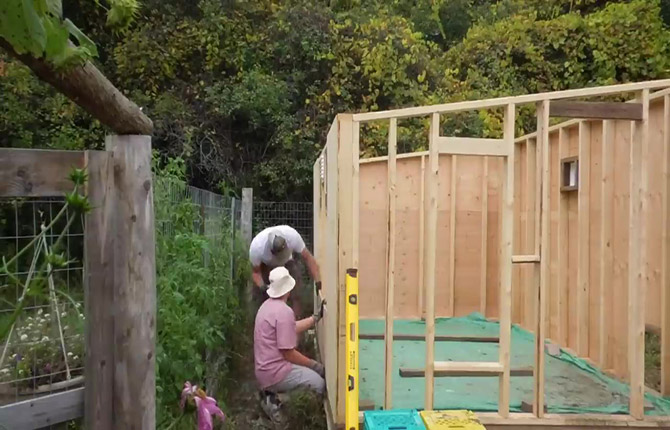
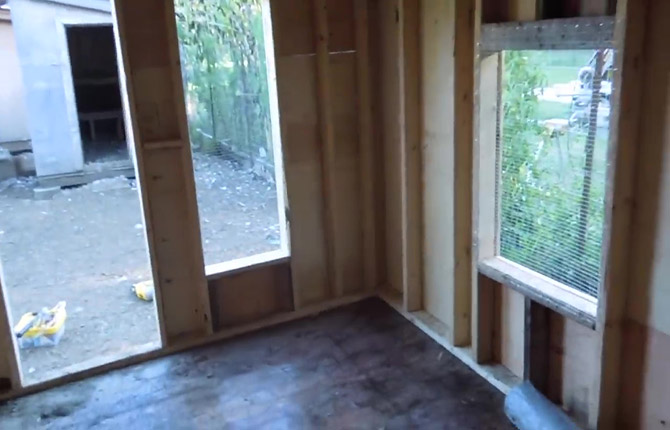
The next step is to assemble the walls of the chicken coop. The technology is simple. Initially, a rectangular outline of the future wall is laid out of timber on a ready-made foundation. The length of the rectangle is equal to the longitudinal dimension of the foundation, the width is selected depending on its future location.
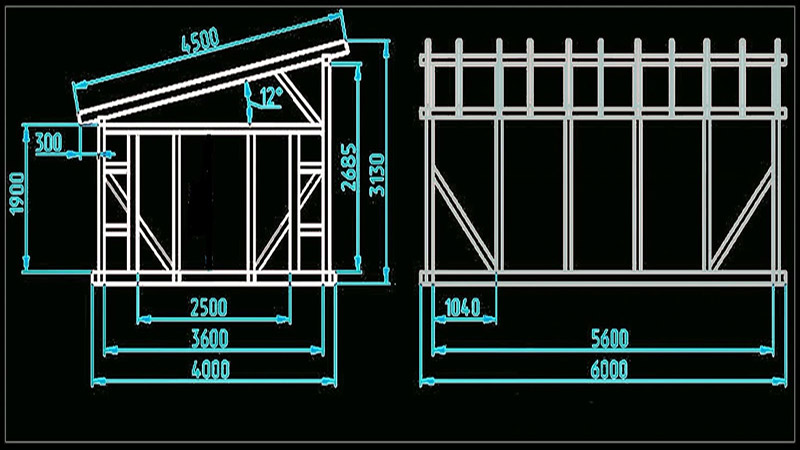
The right wall of the chicken coop should be 210 cm high, from it further to the right a canopy for chickens will be assembled.
The left wall is made 180 cm high. Horizontal lintels under the windows are cut into the frame immediately.
The side walls of the chicken coop must be immediately sloped.
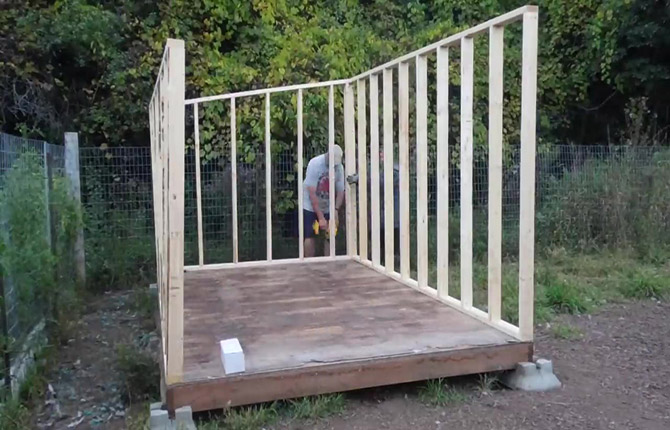
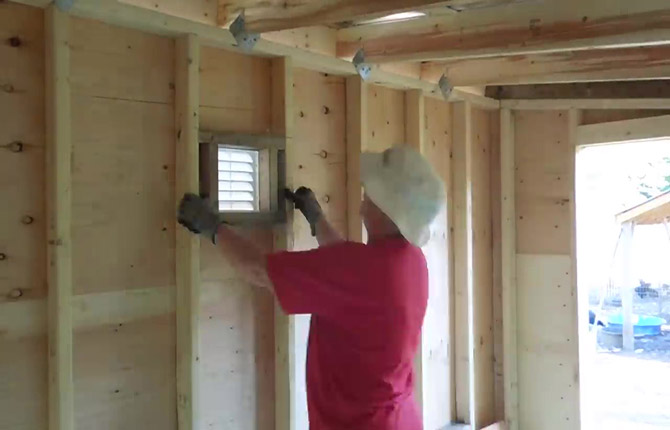
One of them has a frame cut into it under the window (for ventilation).
In this chicken coop project, a whole window is installed instead of a traditional ventilation pipe or hatch. This is important, since the volume of the chicken coop is quite large; 20 chickens need to be provided with fresh air.
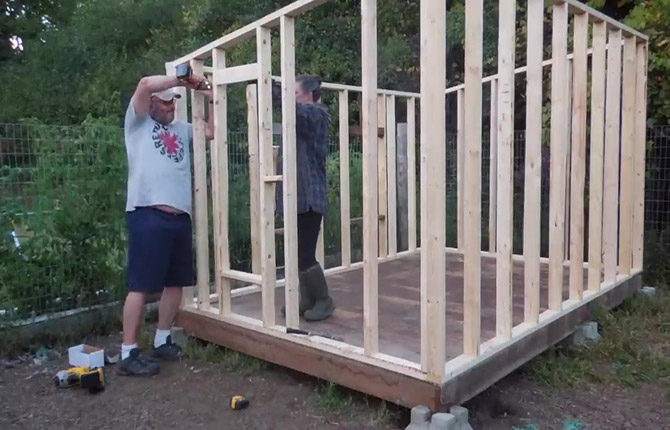
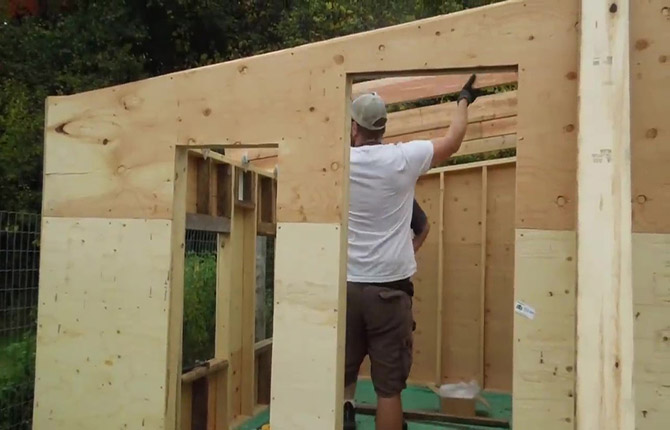
Wall cladding, roof and canopy
Next, the almost finished frame of the chicken coop needs to be lined with plywood. In the place reserved for laying hens, a frame under the window is immediately cut into the wall.
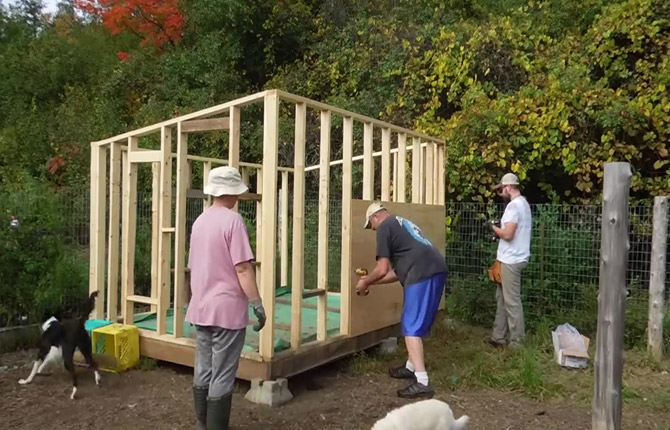
A couple more window openings are made on the opposite side of the chicken coop.
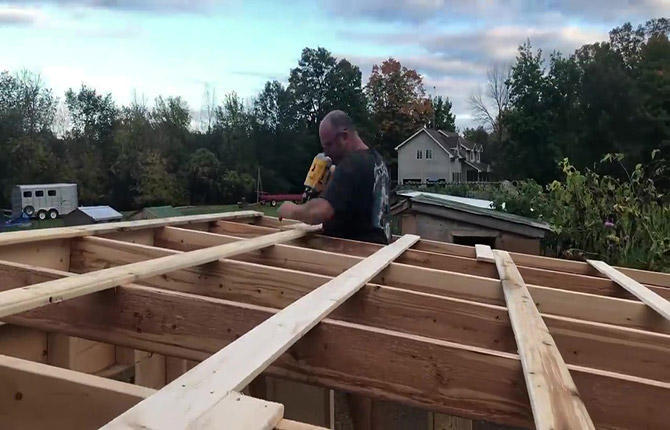
Now you need to lay the roof rafters.
The sheathing is sewn on, the foil polyethylene foam is stretched and the roofing is laid.
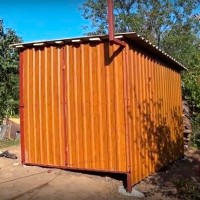
The right, higher wall of the chicken coop is used as a support for a large canopy. It is assembled from a board, knocked into a frame and sewn up with a strip.The canopy is located on the north side of the poultry house, but due to the fact that the roof is highly raised above ground level, there will be enough light for the chickens.

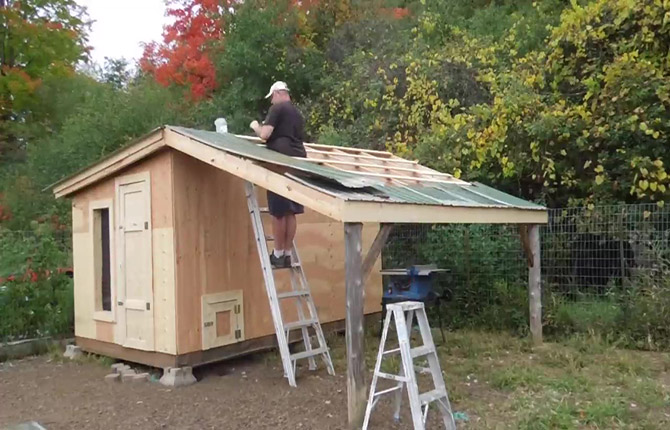
As a roofing covering for a canopy, you can use old ondulin, roofing felt or sheets of metal tiles. The chicken coop has no fencing or mesh, so the chickens roam throughout the entire area. A canopy is needed only as temporary protection from rain. Free-range chickens are generally not afraid of the rattling sound of metal tiles due to the impact of droplets.
Article for you: Hood in the chicken coop
Insulation for winter
If the chicken coop is planned to be used in winter, then the walls on the inside are covered with fabric lining. Thanks to the frame structure, there are air niches inside the walls that retain heat well. Some owners put on a laminate underlay for the winter. In early spring, the cladding is removed.
Thick knitted fabric works best. Entire canopies are sewn from it, which are used to cover the ceiling, walls, and, if necessary, fence off the territory of the young chickens so that the young chickens are warmer.
Fabric insulation absorbs condensation and water vapor, so it is periodically taken out into the cold or into the sun to “dry”. This makes it possible to protect the plywood walls of the chicken coop from condensing moisture.
Arrangement of the chicken coop inside
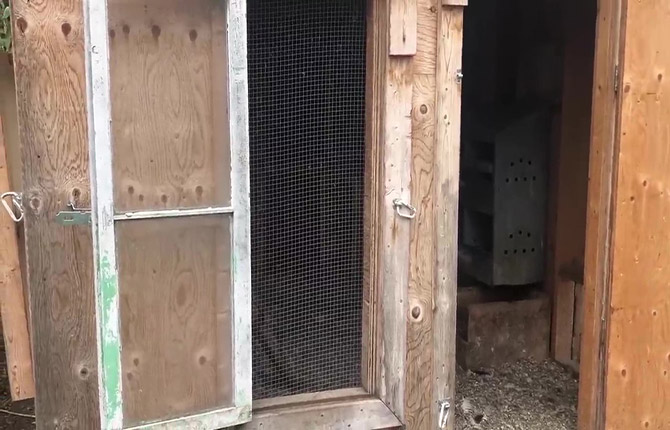
The first step is to make the windows and doors. All window openings in the summer, including the main ventilation window, are covered with a plastic mesh with a mesh size of 1-1.5 cm.
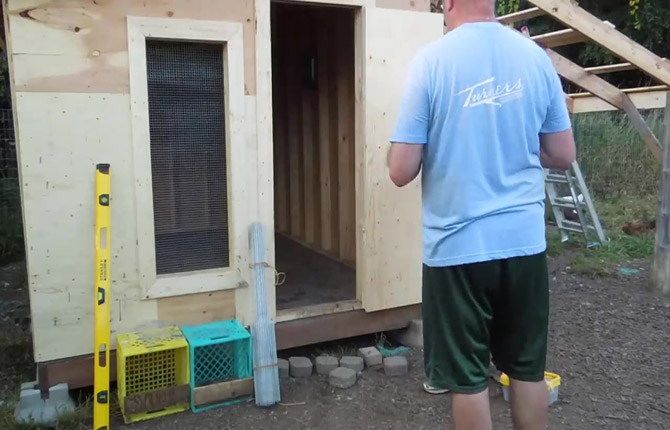
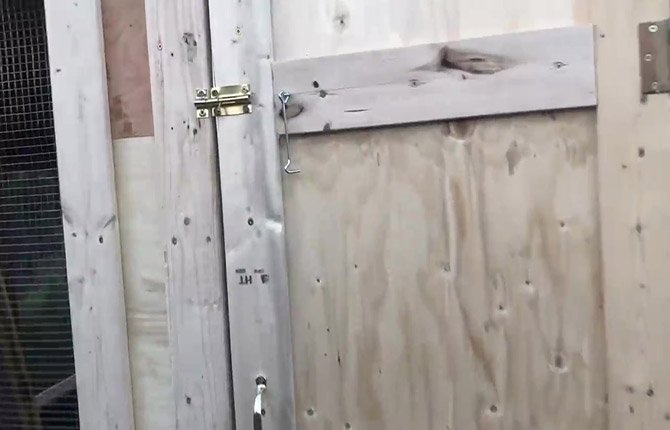
A latch and a hook are hung on the door, with the help of which the sash is fixed in the open position. This is important so that the door does not open from gusts of wind and does not frighten (beat) the chickens.
The next step is to make cages for the chickens.To do this, under the far wall of the chicken coop between the supports, 2 boxes are nailed across the entire width.
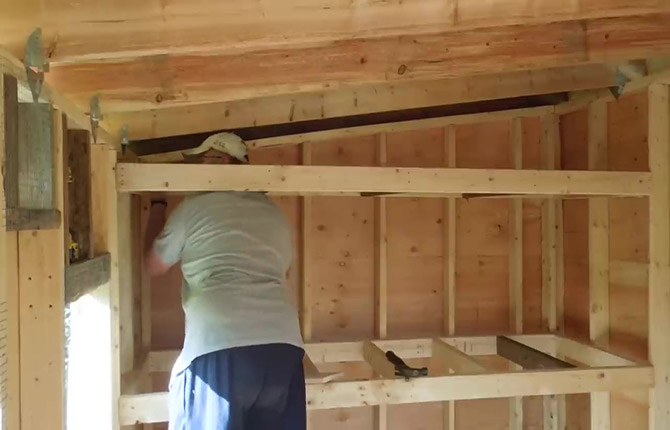
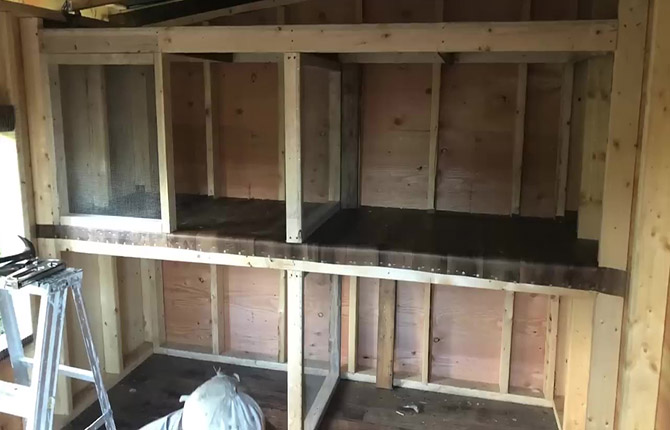
The bottom and the floor underneath are covered with plywood and PVC film, vertical partitions are cut between the horizontal boxes and doors are hung. The walls and door leaves are covered with ordinary plastic mesh.
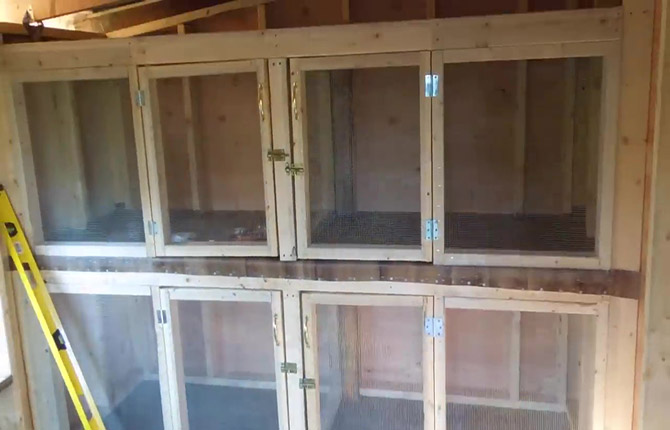
The resulting cages for chickens with hatched chicks.
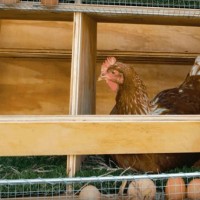
From chopped thick branches you can make a convenient perch for a chicken coop. The top strip is stuffed through a strip of rubber directly onto the window frame. It doesn't bother the chickens. It turns out to be an interesting design - you can grab the perch with your hand by the bottom rail, lift it and fix it under the ceiling with a hook.
In this position, it is easier to remove dirty sawdust from under the chickens; the sawdust layer with sand always becomes thick and is not always easy to sweep out even with a broom. And the lifting version of the perch simplifies cleaning.
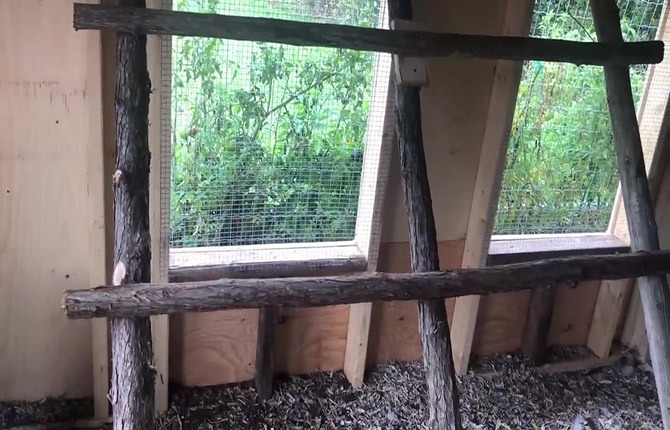
It is easier for chickens to cling to unbarked wood with their paws than to smooth, sanded poles. The perch is installed directly above the window - this is an important detail for any chicken coop. The air flow will dry out the chicken droppings that collect under the roost.

Opposite the perch, a plywood shield and a support beam are placed on the wall of the chicken coop. This is necessary to secure plastic baskets and boxes in which nests for chickens will be equipped.

Ventilation
In summer mode, ventilation is provided by two ventilation windows embedded in the side walls of the chicken coop almost under the ceiling.
In addition, in summer the windows under the perch and the large ventilation door are open.
In winter, the main door is covered and tightened from the inside with a fabric cape. This way it is easy to block small drafts. The two windows under the perch are covered with glass; they are not needed for ventilation in winter.Only two small windows under the roof provide ventilation. In warm weather, you can open the door and hatch for chickens.
Heating a chicken coop in winter
Each chicken coop owner chooses his own method of heating the poultry house. Since the chicken coop is completely wooden, the air can only be heated with an electric heater, preferably with a closed spiral or ceramic heating element. There is no talk of any potbelly stove or solar fuel stove. A small accident is enough for the chicken coop to burn down along with the chickens.
DIY heating
Most often, chicken coop owners try to heat the room with two fan heaters with a capacity of 1.1 kW/h, for a total of 2.2 kW/h. The installation diagram of fan heaters is selected experimentally. For this chicken coop project, the optimal solution would be to install one device in the corner between the door and windows. The second fan heater is installed between the cages and the window.
The first flow of heat will shield the cold entering through the cracks in the doors, the second will heat the cages with chickens and chickens.
The advantage of this scheme is that fan heaters can be used in any weather, even the windiest. In addition, chicken coop owners often use them to ventilate the premises during the day after sanitation, when the chickens are not in the house.
The second do-it-yourself heating option is directional infrared ceiling heaters. They turn on only for a short period of time, for 20-25 minutes, with pauses of 30-40 minutes. This scheme is considered the safest for chickens and chicks, as well as wooden chicken coop structures. But in this case, a connection to an electronic control board with an outside air temperature sensor is required.
You cannot turn on the infrared heater constantly (for example, at night). For effective heat dissipation inside the chicken coop, the distance from the spiral to the heated surface must be at least 2.5-3 m. That is, the height of the chicken coop ceilings is not enough.
In winter, with increasing frost, the control board turns on the heater more often, and there are fewer pauses between turns on.
Heating with infrared lamp
Often the use of a fan heater in a chicken coop is limited due to severe burnout of air oxygen. In addition, the efficiency of such heaters is too low, and the energy consumption is enormous.
Therefore, as an alternative method, red lamps with 100-150 W reflectors are used. They heat only a limited area of the floor, perch or cage where the chickens are. That is, there is no need to heat the entire chicken coop room.
The red lamp is considered absolutely safe for chickens. If it burns out, the flask remains intact and can be replaced quite quickly.
Heating with low temperature heaters
A relatively new type of heater. It is essentially a spiral sealed into a ceramic tile. The surface of the device heats up to a temperature of 50-60OC. Power of one panel – up to 400 W. That is, installing 2-3 panels can ensure safe heating of the chicken coop for several years of operation.
It works silently, chickens do not react in any way to the heater installed next to their nest or roosting area.
The amount of work involved in building a chicken coop for 20 chickens with your own hands is approximately the same as when constructing a barn or outbuilding.But two dozen chickens is already a large flock, so the poultry house has to be built according to all the rules, with ventilation, heating and space for the birds to walk.
Tell us about your experience in building chicken coops - what problems did you have to solve during their construction?


In my opinion, attached chicken coops are more profitable, the large box heat consumption is too high, and if you attach it, you can save money. There should also be a sanitary box in the chicken coop; modern chickens often get sick and are difficult to treat.
The chicken coop is cool, it is not clear for only one breed or for several. I have three and they all sit in their own departments. But it’s okay, I liked the roost, it was a good idea.