Hood for bathrooms and toilets: the subtleties of creating a project and the nuances of arranging the system
An effective hood for the bathroom and toilet is not just an aesthetic component, but also equipment that helps maintain a comfortable and healthy microclimate in the room.
The performance characteristics of ventilation should ensure the creation of conditions close to natural. If this is not the case, then you will soon have to deal with fungi on the walls and other problems. Agree, the prospect is not pleasant.
We suggest you figure out how to correctly draw up a bathroom ventilation project and calculate the power of the system. In addition, in the article we outlined important points that should be taken into account when locating exhaust openings, installing air ducts and a fan.
The content of the article:
Ventilation system design
The creation of any hood begins with writing technical specifications. This will allow you to correctly assess the situation and understand how to proceed further.
When preparing technical specifications, the following are taken into account:
- location toilet, bathroom, other premises, engineering objects that may affect the creation procedure and the efficiency of the hood;
- volume of roomswhere ventilation is needed;
- sealing level entire housing, bathroom, toilet.
The last point is also important and cannot be ignored, since modern doors and windows lead to disruption of natural air exchange.And a correct assessment of the situation will help to identify this and select equipment that can solve the problem.
Step #1 - Determine the required air volume
There will be a healthy microclimate in the room if you don’t just use any separate element in the form of a ventilation hole or fan, but equip a full-fledged system based on the laws of physics.
At the stage of creating technical specifications, a number of important nuances are taken into account. For example, how many people can be in the bathroom at the same time.
This is relevant for situations where the specified room is unusually large and full of various equipment. Which, for example, could be a multi-person or a hot tub. The reason is that the more people there are in a room, the more polluted the air becomes.
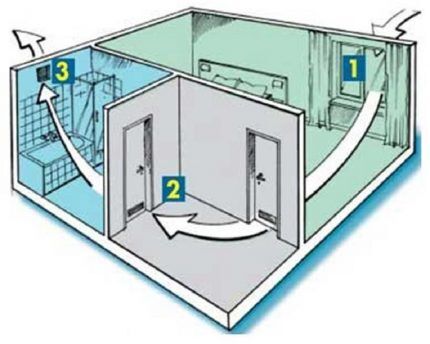
In addition, when writing technical specifications, the requirements that must be observed when creating ventilation are clarified. So these include the volumes of air necessary for the normal functioning of the premises.
Air exchange rates:
- bath - not less than 25 cubic meters. m of clean air every hour;
- toilet - from 50 cubic meters m every 60 minutes;
- combined room - per hour from 50 cubic meters. m;
- the room where the bidet or sink is located, - not less than 25 cubic meters. m.
If the bathroom is equipped with a Jacuzzi or shower, the standard is at least 75 cubic meters. m, and every hour. In non-standardly equipped bathrooms, the volume of air passing every hour should exceed 150 cubic meters. m.
All of the above standards are minimum acceptable and do not always ensure the maintenance of an optimal microclimate. Therefore, they are often adjusted upward.
It is advisable to do this at the preparation stage, but in many cases the error can be corrected after you start using ventilation. Although in the latter case, financial losses are inevitable.
Step #2 - calculation of basic parameters
An important indicator is the rate of renewal of indoor air volume. Since it will help to purchase the appropriate equipment or configure it correctly. The average statistical value of this parameter is a change of 4-8 volumes of air per hour.
When choosing a ventilation method and the necessary equipment, you should take into account the speed of movement of air masses - it should not exceed 0.3 m/sec. If it is larger, then there is a high probability of drafts, which negatively affects the comfort and health of users.
An important point is the temperature of the supplied air.
In winter it should be:
- bath and combined toilet — about +25°С;
- private toilet room - about +18°С.
Humidity should always be between 50-65%, since deviations in any direction will lead to the microclimate being considered unhealthy.
Step #3 - calculate system power
The result of drawing up the technical specifications is the calculation of acceptable exhaust power.
What is the formula used for:
L=n*V,
Where
- L — required fan power indicator;
- n — this is the air exchange rate;
- V - volume of bathroom, toilet.
Although this calculation is the simplest, it allows us to identify the main parameters of the system.
At the design stage it is necessary to decide type of ventilation system.
There are two options:
- Natural. The most accessible and low-cost method, but today it is becoming less and less relevant, since air exchange is impaired due to the tightness of housing, especially in winter. For this reason, the hood becomes ineffective.
- Forced. Requires large investments, since it is assumed that additional equipment will be used, for example, at least 1 special exhaust fan.
The efficiency of the second option is several times higher than natural air replacement.
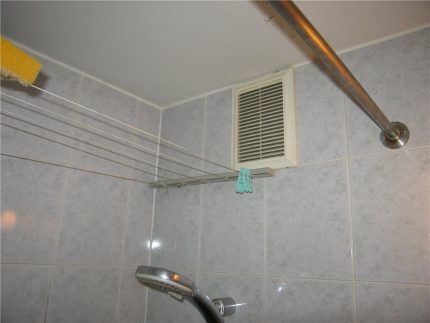
Forced ventilation is also divided into three types:
- exhaust - in this case, the contaminated air masses are discharged into a special shaft or outside, an example of arrangement - wall valve installation;
- inlet - provides for the creation of air flows that displace the old one;
- mixed - combines the main features of the two options described above; this solution is more often used in cottages and private houses, using air handling units.
And also during the preparation of technical specifications, it is necessary to determine whether the hood will be ductless or ducted.
An example of the first is the ventilation system in most Soviet apartments, when there was a shaft between the bathroom and the toilet, that is, no additional devices are required to remove polluted air there.
Channels will have to be laid in housing with a non-standard layout, where there are no ventilation shafts nearby, and, accordingly, there is no way to remove exhaust air outside the housing. This method should be used as a last resort as it is expensive and labor intensive.
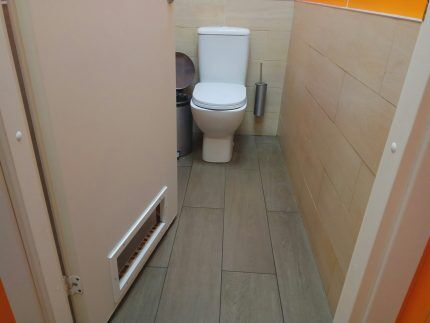
The noise level of the fans should also be taken into account if such are used. This figure should not exceed a moderate 35 dB.
The technical task is considered completed when all the necessary information about the future system has been collected. The presence of any “white spots” is not allowed, as this may affect the effectiveness of ventilation.
Step #4 - completing the ventilation design
An important feature of the technical specifications described above is that the information collected during its preparation often allows one to obtain all the necessary information.
And this makes it possible to do without drawing up a project, but this feature mainly concerns simple cases when there is no need to lay out channels.
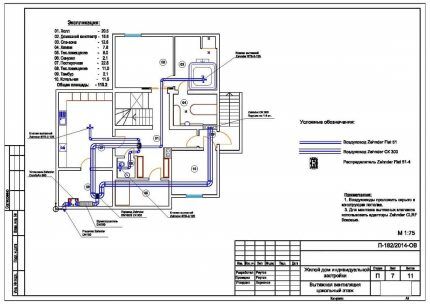
That is, having all the information, it will be enough to create a simple diagram of where the individual elements of the system’s design will be located and which ones.
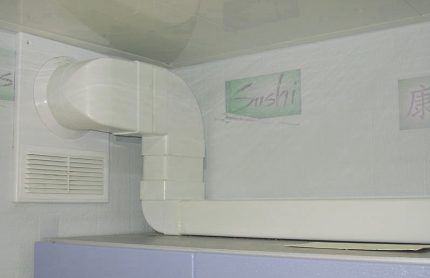
If the case is complicated and you have to lay channels, then the project will be needed, but it will be better when specialists do this work.
Because this type of ventilation is quite expensive, and even minor flaws can lead to ineffectiveness of the entire system and the accumulation of polluted air in the premises.
The full scope of design consists of the following stages:
- Calculation of the required volume of air exchange. This procedure is carried out during the process of drawing up technical specifications.
- Development of a circuit diagram with calculation of air duct cross-section (pipes bringing air out), sound pressure in the system (noise). In most cases, this is not difficult, since all that is required is to purchase a fan whose operating sound does not exceed a moderate 35 dB.
- Preparation of drawings.
- Preparation of documentation for related work. For example, in electricity. That is, it is necessary to determine where the fan is connected to the network and the control method.
Designing ventilation in a toilet or bathroom must be done during a similar procedure for the entire house so that it becomes an organic and effective part of it.
Recommendations for arrangement
You can do the work on arranging the hood on your own, but if you doubt your own capabilities, it is better to invite a specialist. Next, we will consider the main points that should be given special attention.
Ventilation hole locations
First you need to determine the location where the ventilation hole will be located. What to do is quite simple: in most apartments, for this you need to find out the location of a special shaft, and in a private house, you can organize the removal of polluted air outside it almost anywhere.
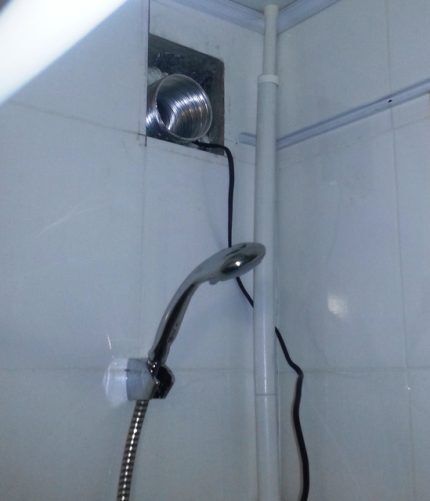
You should only make a hole for the air duct yourself when the wall is brick. If it is concrete, then it is better to use the services of a specialist who will perform so-called diamond drilling. It is necessary to remove debris and dust from the resulting hole.
Subtleties of air duct selection
The installed air duct should be placed with a slope of 5-10° towards the street. This is necessary for condensate drainage. The outer part of the air duct should be insulated, which will eliminate problems in cold weather.
For transporting polluted air, it is better to choose plastic pipes. The reason is that this material is durable, especially in difficult conditions, and its smooth surface does not create friction when moving air masses, which makes this procedure less expensive and noisy.
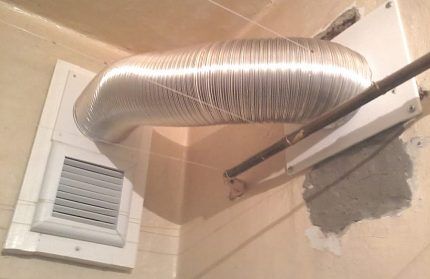
Corrugated boxes are the best option when you need to make connections in hard-to-reach places.
Requirements for the fan
If you plan to use a fan, then it is better to power it from a box designed to illuminate the bathroom or toilet. To do this, you just need to buy a switch with one additional button.
The fan itself should be at least splash-proof, and better yet, water-proof. But even such hood models should be installed away from water sources, which will reduce the likelihood of it getting on the electrical appliance.
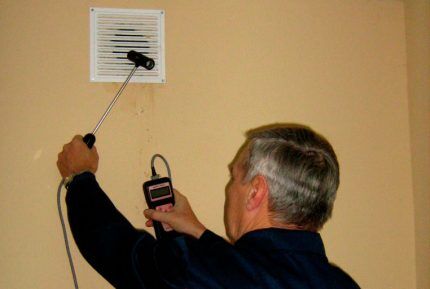
It is better to install a hood during renovations in an apartment or house.
Drilling procedures for subsequent installation will lead to damage, cracks of tiles and other design elements. Which cannot be disguised.
Conclusions and useful video on the topic
The first video will help you understand the principle of operation of the ventilation system.
The following video material will allow you to deepen your knowledge on the topic, which will allow you to better cope with the design.
Ventilation systems designed for toilets and bathrooms, for a moderate investment, increase living comfort and help establish a healthy microclimate.
To get the expected result from installing a hood, you need to understand the essence of the issue and do everything correctly.When there is no desire or opportunity to delve into every little detail, it is better to use the services of specialists.
Do you have personal experience in designing and installing hoods in bathrooms and toilets? Do you want to share your accumulated knowledge or ask questions on the topic? Please leave comments and participate in discussions - the feedback form is located below.


A fan was installed at the dacha, since our toilet is combined with a shower. The room itself is small, and there are no windows, so ventilation is really necessary so that fungus does not develop and the room is fresh. The fan also removes unpleasant odors in the toilet. This is important because many people live in the house. It is turned on by a button, quite noisy, but not particularly disturbing.
Our kitchen is separated from the toilet by a wall. Guests, coming to us for the first time, do not immediately understand that there is a bathroom opposite them. Drilling the wall to install the pipe for the hood was not difficult, since I have an old hammer drill. Only here there are some subtleties. You only need to drill with a crown when the hole is drilled with a drill. This makes it easier to hold the device and it does not move away from the intended place. And I used a more powerful hood. To reduce noise and smell, I lined the partition with penofol.
Sergei. If in an apartment building “the hood was turned up more powerful,” it means that you pumped your air to the neighbors, which entails punishment.