Ventilation in a chicken coop in winter with your own hands: the best schemes and subtleties of arrangement
Poultry can provide seven eggs and tasty dietary meat, but this is subject to its proper maintenance. With the approach of cold weather, in order to maintain healthy livestock, it is necessary to take care of maintaining a comfortable microclimate in the poultry house. Even if you didn’t have time to prepare in the summer, high-quality ventilation in the chicken coop in the winter with your own hands is quite possible.
But how to arrange it correctly, how to take care of every little detail and not miss important details? We will now try to tell you about this in detail.
The content of the article:
Types of ventilation for a chicken coop
The air exchange of a poultry house can be organized in one or several ways. People often confuse systems for different reasons, so initially, you should figure out what belongs to what, so as not to get confused later in deciphering schemes and definitions.
So, ventilation is divided into:
- the method of air circulation - natural (based on physical natural laws) and artificial (also forced, organized using various devices that require energy, in particular fans);
- purpose - exhaust, supply, supply and exhaust;
- location - zonal or general exchange.
It should be noted right away that regardless of the rooms or buildings in which the ventilation system is organized, the equipment, devices and materials used in its design, as well as the diagrams, may be the same.
But each variety has its pros and cons. Therefore, taking them into account, it is necessary to select the ventilation network for its operating conditions.
Let's look at the different options in more detail, but first let's look at what requirements are imposed.
Natural ventilation of the chicken coop
As mentioned above, this method works based on physical laws. Warm air always rushes upward, and cold air, on the contrary, downwards.
By variety it is divided into:
- Unorganized - with the implementation of the air exchange process through the window and cracks.
- Organized - air is removed and flows through special channel structures.
The system cannot be based only on air removal; as much air comes out, so much of it must enter. That is, the influx of air masses must appear from somewhere.
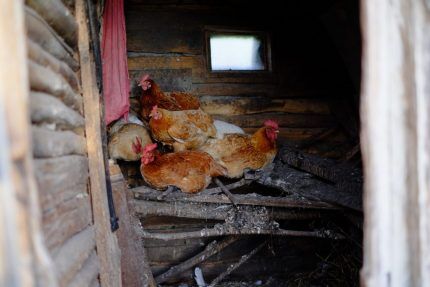
In chicken coops, these are cracks in the structure, a window vent, a door, and so on. However, if the chicken coop is completely built, the standard inflow will not be enough, as well as the output of waste materials. It feels stuffy in the room. Therefore, further we will discuss the organized option.
The problem is solved by inserting valve-type ducted exhaust and supply devices into the roof/walls of the poultry house. Exhaust, according to the logic of physical laws, are always installed above the supply.
To organize a natural air exchange system, ventilation duct structures are designed vertically.
The main difference between natural draft and forced ventilation is that this ventilation can be installed in any chicken coop in winter, since the scheme does not involve electricity and complex arrangement processes, which also reduces its cost from both an installation and operational point of view.
But there are also disadvantages. It is completely dependent on the climatic conditions outside. That is, when the air temperature outside exceeds that in the room, the draft occurs in the opposite direction and, again, in stagnant weather, air exchange is minimal.
This is not of particular importance in small poultry houses; the existing circulation is usually quite sufficient, but in the case of large poultry farms, it is recommended to use a forced circuit.
Natural exhaust ventilation of the chicken coop
Exhaust ventilation can be installed without additional supply structures, but it must be organized. The air exits through equipped duct openings in the wall or roof of the room. A suitable chicken coop area is approximately 10 square meters.
The positive qualities of this option include the simplicity of the arrangement, very good air circulation, and the possibility of increasing efficiency by adding some elements.
However, there are also disadvantages. You won’t be able to regulate the incoming and outgoing air this way; the cold will penetrate into the room and, of course, this system is suitable for very small poultry houses.
The system is simple to manufacture; it functions due to the difference in temperature conditions inside and outside the room. All you have to do is make sure you have a hood.
The role of the inflow will be performed by a door and/or a window. Of course, the control is manual. The hood will be located right under the ceiling, but no closer than 15 cm to it and on the wall opposite the self-organized inflow, or it will be located in the roof structure. We are considering option 1, since it is easier to organize in winter.
You will need a 90 angle elbow0 and a pipe 110 mm in diameter. We take the structure through the elbow into the drilled hole to the street and then install an insulated vertical section with an elevation of 1-1.5 m above the roof level.
The joints at the location of the corner element should be foamed with mounting foam, and the pipe itself should be fixed on the external wall using clamps. A deflector must be placed on the outer head of the pipe.
Arrangement of supply and exhaust ventilation
So, you have a room of approximately 12 square meters. This system suits you as the most optimal for small poultry houses. Let's consider the simplest assembly option.
Stage No. 1 – ventilation design
Before installing ventilation, you need to carefully think through everything, draw a diagram of the future structure, decide on the exit point of the pipeline, and develop dimensional nuances taking into account the dimensions of your chicken coop and its design features.
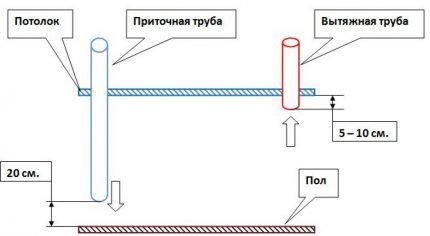
You can bring both pipes through the roof, as in the diagram below, or through the walls. Installation is possible at any time of the year.
Stage No. 2 – preparation of materials and tools
It is best to do this in advance, so that later in the middle of installation you do not encounter the fact that you cannot find this or that part in stores.
You will need the following materials:
- pipes 2 pcs. — length 2 m, diameter 20 cm. It is best to choose one with a round cross-section, as they create the most favorable circulation;
- insulation for pipes. You can use any suitable for outdoor installation. It is also recommended to install a box around the pipe so that the insulation fits tightly. But if this is not possible, simply fix the material tightly;
- knees - 900;
- clamps or other devices with which you can fix the pipe itself;
- deflector;
- ventilation grilles 2 pcs.;
- polyurethane foam.
The set of necessary tools depends on individual factors.The main thing is that you can easily make 2 round holes in the walls of your chicken coop and screw both the grates and the pipe itself with something.
You will definitely need a hacksaw or grinder, self-tapping screws (the purpose depends on the material of the structure), a drill or a hammer drill.
Stage No. 3 - install the exhaust pipe
The air duct, which will remove exhaust air from the room, is installed above the perch near the ceiling, but no closer than 15 cm to it.
First, we make a hole of a suitable diameter and through it we lead a pipe of the required length with a corner element to the street.
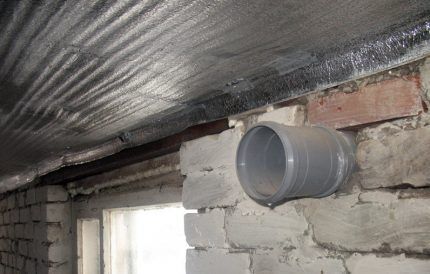
The exhaust pipe extends beyond the roof at 120-170 cm.
On the street side, in the knee, experienced chicken owners advise making a small through hole. Its diameter should be approximately 5 mm and it will serve to remove condensate.
A deflector is installed on the head of the pipe.
Stage No. 4 – install the supply pipe
It should be placed on the opposite wall. To do this, we also first mark the location of the future pipe and drill a hole in the wall. Exit to the street is carried out through the knee.
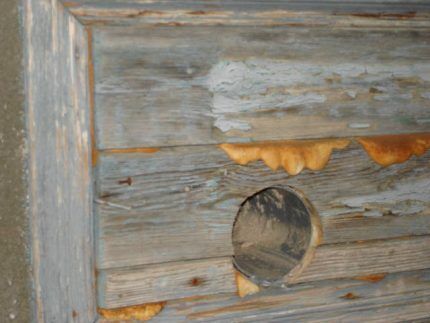
The supply pipe for the poultry house is installed no lower than 30 cm to the floor and no less than 50 cm from the height of the exhaust pipe.
It should be noted that with a gable roof of the chicken coop, it should not be higher than the horizon of the roof canopy, and with a flat roof with a slope it should be 30-40 cm from the canopy.
Stage No. 5 – fixation of pipes
In general, each pipe should be fixed immediately after installation. They must be securely fixed. This will help prevent them from falling. To do this, use clamps, some kind of homemade structure, or you can even use hangers, which are used when installing a plasterboard frame.
Some people make only 1 attachment point closer to the roof near the rafters, but if possible, it’s better to play it safe and make 2-3 in different places, directly in the wall of the chicken coop.
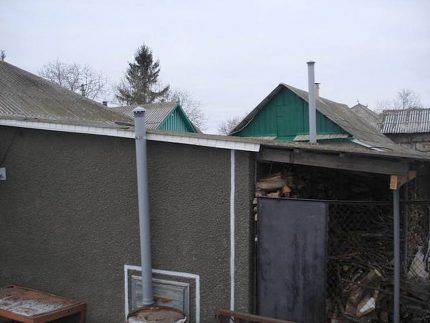
Ventilation grilles are installed on the internal sections of the pipes, and deflectors are installed on the ends on the street side. Dampers will help prevent pipes from clogging and precipitation getting into them.
Stage No. 6 - pipe insulation
First of all, you should blow out the cracks and holes around the pipes with foam. For pipe insulation A huge number of different methods are used.
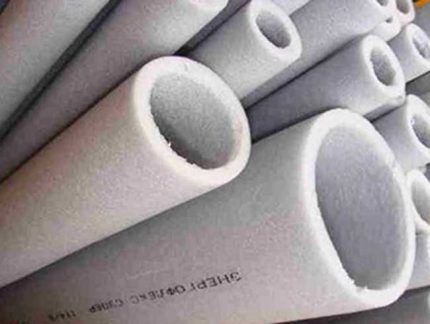
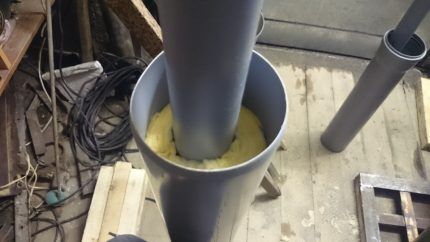
A very interesting method of pipe insulation is based on the “pipe-in-pipe” principle. In order to implement the idea, a pipe of larger diameter is taken.
It should be put on prepared for ventilation. Next, insulation is hammered into a pipe of larger diameter, very tightly.
However, pipe insulation can also be done with a homemade casing. Typically, this is a wooden structure. made from boards. The shape of the section does not play a special role here.
Insulation is carried out either at the stage of pipe installation, or after installation, depending on the chosen method.
Forced ventilation of the chicken coop
Forced ventilation is all the same channel scans of supply and exhaust types, however, to increase air exchange, a fan is used and, if necessary or at will, additional devices, such as filters, heaters, humidifiers and so on.
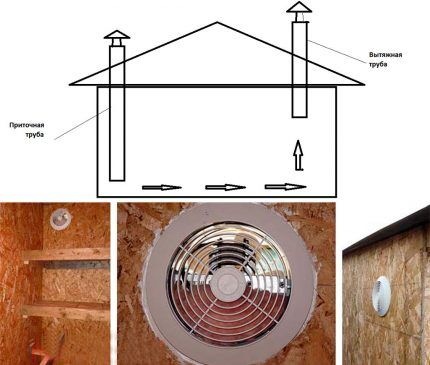
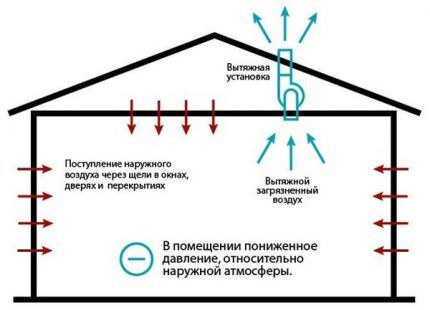
The functionality of this type of ventilation is based on the difference in the recorded pressure indicators from the street side and inside the poultry house.
Conventionally, it can be divided into:
- Working with reduced pressure, that is, with vacuum (exhaust). This is when the air leaves the poultry house creating a vacuum and passively sucking in the outside air.
- Operating on excess pressure, which is often found in systems of old poultry farms (supply).This is when air is pumped in excess quantities and is subjected to various processes before this - heating, cleaning, and so on.
- Performing air exchange at equal pressure when both supply and exhaust (combined) are equipped with ventilation devices.
- Forced ventilation has many advantages. In particular, this is the possibility of high-quality air exchange in any area, with any density of birds (which is important in winter) and in any weather outside.
At the same time, you can arrange a more precise adjustment of air exchange to your engineering calculations, thanks to the selection of equipment power.
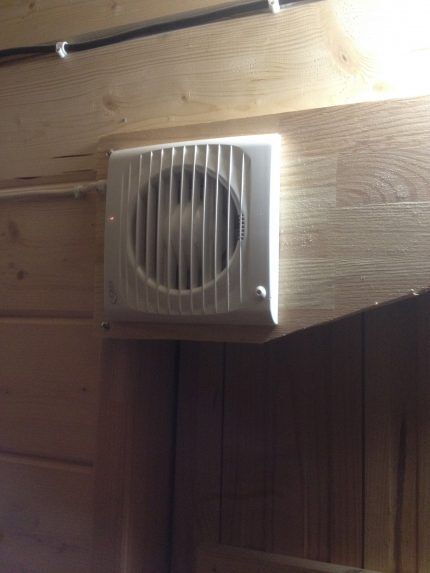
There are, of course, disadvantages. Among them are more expensive equipment, complicated installation, however, if you understand the scheme, any person can handle it - the cost of paying for electricity, the labor required to maintain the system.
Fans and methods of their location
The first definition you will encounter when installing an artificial ventilation system is a fan.
The main types of this unit used in arranging the air duct system:
- Axial - the most common type, characterized by high efficiency and the simplest structural assembly.
- Diagonal - somewhat similar in design to axial ones, but their main difference is that they send air flow in a diagonal direction, which significantly reduces their noise during operation.
- Diametral - have blades with an upward curve. They have high aerodynamic abilities and, as a rule, are rarely used for chicken coops.
- Direct flow - they do not have “wings”, for this they are also called bladeless. Their advantage is the ability to pump large volumes of oxygen and precise flow direction.
- Once-through turbines force air through specially designed frames. Such devices pump large volumes of oxygen and allow the flow to be directed in the desired direction.
You'll also hear terms like duct And roof fans. But everything is simple here. Duct units are installed in air ducts, and roof units are installed in roof structures.
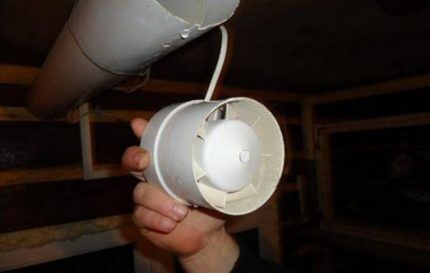
Unfortunately, it is best to provide artificial ventilation in the summer, and even better - at the design stage of the building. Moreover, it will be necessary to install holes in the main walls and electrical wiring. Although simple schemes in stagnant, maximally “dry” winter weather are quite feasible to implement.
The geometric location system can be of several types. Let's talk about the types of forced in brief and later in more detail about some specific schemes.
Roof ventilation - when exhaust ventilation ducts are installed in the ceilings of the roof or the end area of the room, and exhaust ventilation ducts are installed in the walls and roof (there may be one option).
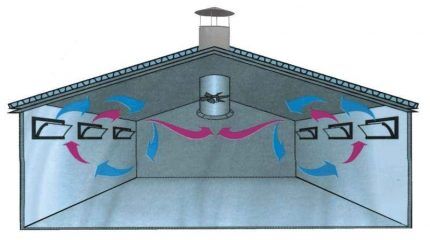
Cross ventilation involves placing fans on one side of the house to exhaust exhaust air. And the influx comes from the opposite side through valves. It is necessary to have an automatic control station that allows you to control and set the speed of fan rotation. The devices usually have low power.
This option is installed in poultry houses with several floors, but it is not popular, since in winter it is necessary to use all the fans to achieve optimal microclimate parameters, otherwise “dead” zones are created, and in summer this arrangement does not allow the room to be properly ventilated.
Longitudinal is similar in principle to transverse, however, fans are installed at the end area of the room when air exchange along the building is necessary. Units of higher power are used here than in transverse ones.
Tunnel ventilation differs from longitudinal ventilation in that the louvres are located on the wall opposite the fans. In other words, the air in it moves as if through a tunnel. The basis of the system’s functionality is convection cooling of air masses, formed due to the high speed of flow moving at the level of the birds.
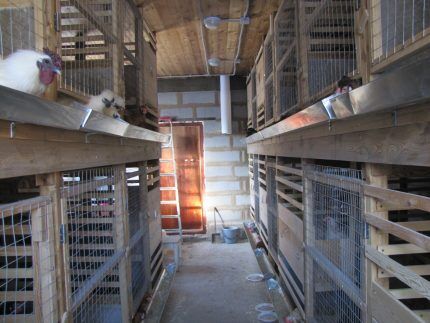
There are many schemes, you just need to make a choice and take into account that it is best to think about ventilation of a large poultry house when developing it, that is, designing it, excluding the simplest options.
For now, we will consider only the simplest, because other types are established in large poultry farms.
The simplest ventilation
Don't think that all schemes are complicated. For small chicken coops you can use the simplest options. The main thing is that they can provide air exchange with a calculation of 6 m3 for every kg of weight of chickens available. Of course, it is not necessary to carry out approximately, ideally accurate calculations.
The principle of constructing a duct system is the same as in the case of natural supply and exhaust ventilation. Two opposing pipes are also installed at different levels. The only thing is that there is a fan in the design.
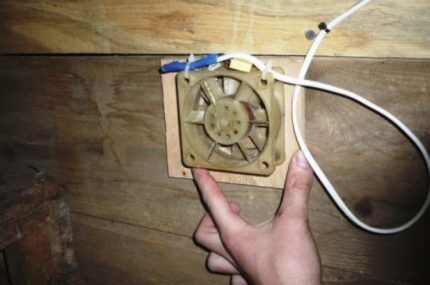
The system is equipped with a switch. Moreover, it is best not to connect it to lighting, as many do, in order to be able to control the system at any time. In principle, it is enough to turn on the fan for only 3-4 hours a day.
Additionally, if desired, the system is equipped with humidity and temperature sensors. This provides the simplest automation of the process.
And of course, do not forget to equip the vertical heads ventilation ducts deflectors. This is mandatory for any type of ventilation arrangement.
Selection of materials and additional devices
Mechanical ventilation schemes of different types may contain various devices, with a purpose that is not always clear to the average farmer.
Let's look at some of them.
- Filters. Devices that trap debris and/or harmful airborne particles entering from the street. Or they also help clean the air coming out of the chicken coop.
- Heating elements. Everything is clear here.These are devices that contribute to the possibility of increasing the temperature in the poultry house mechanically.
- Recuperator - mixes the air from outside and from the room, forming a homogeneous warm mass.
- Noise absorption - devices or structures that help eliminate or reduce the noise produced by fans. Typically installed on large farms and factories.
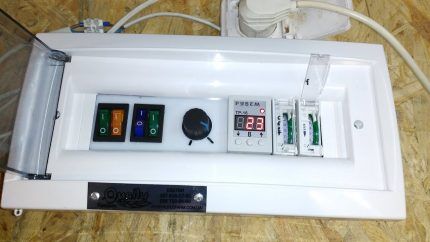
- Automatic control system - manages all automated processes.
These are just the basic elements that are most often used for ventilating rooms with chickens and other poultry.
At very large enterprises, other high-tech devices may be present.
As for the choice of materials, it is necessary to approach the issue responsibly, since the durability of your structure and the frequency of repairs depend on their quality.
Air ducts - features of choice
It is very important to choose the right ducts.
The main selection criteria include:
- tightness and strength;
- the possibility of installing thermal insulation and, preferably, sound insulation;
- absolutely smooth internal structure.
Air ducts can be plastic or metal.
Metal pipes made of galvanized or stainless steel are quite strong and durable in use. But they are usually used for large objects.
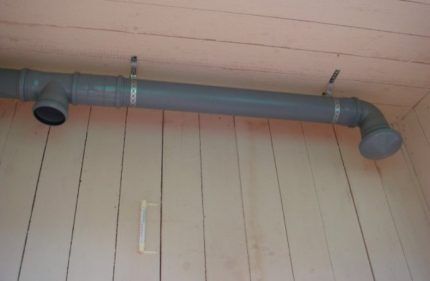
As for plastic pipes, their low cost and ease of installation are advantageous specifically for equipping poultry houses. They are made from durable polypropylene mass.
They do not rust, look quite aesthetically pleasing and, in addition, provide good air flow and better sound insulation compared to metal ones.
You can read more about the types of air ducts for ventilation and the features of their installation in this material.
Nuances of arrangement in winter
In winter, depending on the weather, you can arrange almost any method of air exchange in the house. It is also possible to arrange both ventilation in the chicken coop in winter according to a scheme without electricity, and with its use.
The main thing is that when using power tools and when installing electrical wiring on forced systems, follow safety precautions for working in a damp environment. And besides, when installing roof-type structures, be careful when working at height.
In addition, it is very important to place the chickens somewhere during installation so that they do not breathe dust during the installation of holes for devices and do not freeze from drafts.
When planning the ventilation system, it is very important to consider that the supply ventilation is a cooler. The exhaust and supply pipes are located as far apart as possible, as a rule, on surfaces opposite to each other.
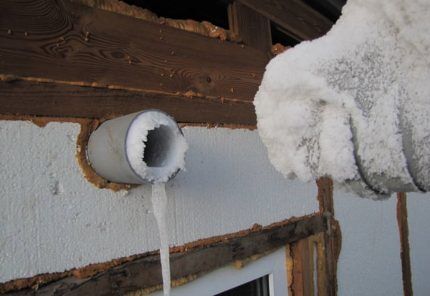
Another very important nuance - do not forget to periodically check the draft and inspect/clean the entire ventilation system.
In addition, not a single, even the most effective ventilation will cope if you do not clean the chicken coop of droppings as necessary and change the litter with fresh ones.
Conclusions and useful video on the topic
Video No. 1. One of the options for arranging chicken coop ventilation:
Video No. 2. Ventilation in a chicken coop made of plastic pipes:
Thus, we examined different schemes for effective winter ventilation in a chicken coop with our own hands. Some of them are available for installation in any case, others should be chosen based on the design possibilities of installation in a particular building and specifically during the cold season of the year, everything is individual here. But you can certainly install simple natural exhaust/inflow mechanisms.
Have you ever had to deal with arranging ventilation in a chicken coop? Please tell our readers how ventilation works in your poultry house. Share your experience or ask questions about the topic in the comments.


