How to make a chimney for a fireplace: rules for constructing a smoke channel and comparison of designs
The proper functioning of the fireplace depends not only on the installation of the firebox, but also on the competent design and installation of the chimney.Everything is important: from calculations of the pipe cross-section to the nuances of thermal insulation. Only a high-quality chimney will best suit its purpose.
Do you want to build a chimney duct, but don’t know which pipe to choose and how to install it? We will help you deal with this problem - in the article we looked in detail at how to make a chimney for a fireplace, paying attention to the pros and cons of pipes made of various materials.
They also provided important requirements for arranging fireplaces and drawing up a project. The article material was supplemented with detailed instructions for installing a chimney, providing it with step-by-step photos.
The content of the article:
Design features of the chimney
The purpose of the fireplace chimney, as well as the main function of the chimneys of stoves or boilers, is to discharge fuel combustion products out into the atmosphere. Gases along with soot flow from the furnace into the chimney under the influence of draft.
The correct formation of a chimney consists in choosing and constructing a structure in which a minimum of soot remains on the walls of the pipe, and the draft prevents the flow of gases into the room.
Chimneys made of different materials have their own characteristics and may differ in design. For example, a traditional brick chimney consists of the following parts.

When choosing a material, it is necessary to take into account the temperature of the gases: in the furnace it is higher, at the outlet it is lower, but even at the highest point it can reach +100 ° C. The creation of draft is based on the temperature difference - hot air is replaced by cold air.
Also important are indicators such as the height and internal diameter of the chimney - they are calculated when drawing up the project.

No matter how hard you try, it is impossible to build a chimney that does not need cleaning. Even in a properly assembled ceramic chimney, soot accumulates over time, making it difficult for gases to escape. That's why chimney cleaning needs to be done regularly. This is usually done during the period when the fireplace is idle.
In addition, it is necessary to monitor the integrity of the connections and the internal surface: cracks, potholes or protrusions that may appear over time prevent the normal circulation of hot air.
Norms and rules for installing a fireplace
Let's look at excerpts from SNiP 2.01.01-82, which may be useful when constructing a chimney for a fireplace yourself.
The chimney and ventilation duct have different purposes, so you cannot combine them or use one instead of the other. Only one heating device with an open combustion type can be connected to one chimney (the same applies to the stove).
If two fireplaces are located on the same floor, then they can be connected to one smoke exhaust duct, but it must be equipped with a cut-out made in the form of a transverse wall at a height of 75 cm or more.
For concrete and brick chimneys, the minimum channel cross-section dimensions are indicated. For example, if the power does not exceed 3.5 kW, the smallest cross-section is 14 cm x 14 cm (for a round cross-section - diameter 16 cm), if the power is higher than 5.2 kW - from 14 cm x 27 cm (for a round cross-section - diameter from 22 cm).
The draft characteristics depend on the height of the chimney. The minimum permissible size is 5 m from the grate to the extreme point of the outer section of the pipe. If the height is insufficient and the channel cross-section is chosen incorrectly, you may encounter the problem of reverse thrust.

The thickness of the walls of brick structures is not less than 12 cm, the thickness of concrete smoke exhaust channels is from 6 cm. The bases of chimneys must be equipped with windows with doors for cleaning. To facilitate cleaning work when constructing a brick pipe, there should be no concessions or recesses on the inside that provoke the accumulation of soot.
If it is necessary to remove the pipe (for example, bypassing the beam), inclined (up to 30 degrees) and horizontal (up to 1 m in length) sections of the same diameter as the main channel are possible.

The floor, walls and ceiling at the junction of the fireplace must be protected with fireproof materials - metal sheets, asbestos cardboard, plaster.
When a brick or concrete chimney passes through the ceiling, the gap should leave at least 13 cm (the same applies to thermally insulated pipes); for ceramic structures, the norm increases to 25 cm.
Professionals insist on installing a chimney not in the outer wall of the house, but in the internal load-bearing wall, explaining this due to the harsh Russian winters. When installing it in an external wall (as a last resort), you should carefully protect the structure from freezing by thickening the masonry or installing thermal insulation made of fireproof materials.
Types of chimneys for fireplaces
Analysis of different types of smoke exhaust ducts allows you to find out which chimney is best for a home fireplace. Structures may differ both in design and material of manufacture, with the second factor being decisive.
Therefore, when choosing a scheme, you need to start from the material, but the choice of material for construction depends on regulatory requirements and the wishes of the home owners.
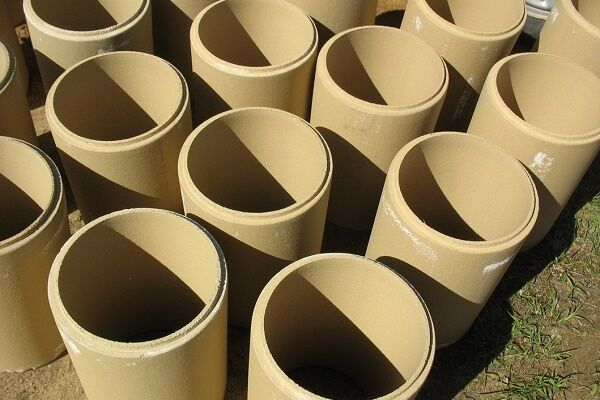
Option #1 – ceramic
If funds allow, this is the first option you should consider. Manufacturers, using popular schemes for constructing fireplaces, have thought about manufacturing all kinds of parts, so you can purchase a ready-made kit for construction.
Of course, the number of parts may vary, depending on the shape and size of the structure.

What other positive features do ceramic chimneys have:
- perfectly smooth surface of the inner walls;
- fast heating and slow cooling;
- resistance to temperatures up to +900-1000 °C;
- compactness compared to other designs;
- service life up to 50 years.
The disadvantages include significant weight, due to which it is necessary to arrange an installation site or a special foundation.
Also, many are confused by the high cost of blocks and services for their installation. Indeed, when installing parts, you must be careful, use special glue and, at the last stage, use a finish made of heat-resistant materials.
When choosing, it is better to focus on reputable brands: Hart, Tona, Ecoosmose, Schiedel, Effe2.
Option #2 – brick
Brick is a traditional, one might even say ancient, material. Over the centuries, many technologies for constructing various types of stoves and fireplaces have been invented, and today it is possible to use the best of them.

The masonry mortar is also important, the main purpose of which is to ensure a tight, airtight connection between the bricks. Regular cement mortar is not suitable.It is necessary to mix a solution of sand, cement and lime (5:2:1), which can withstand high temperatures and does not crack or crumble prematurely.
When doing masonry, you should ensure that the mortar from the seams does not protrude into the interior. The smoothness of the pipe is one of the main conditions for long-term and trouble-free operation. Read more about brick chimneys below.
Option #3 – steel
If the temperature of the gases in the smoke exhaust duct does not exceed + 400 °C, steel chimneys can be used. Modern pipes made of heat-resistant, anti-corrosion steel are lighter than their ceramic counterparts and are suitable for almost all modifications of fireplaces and stoves. There is no need to build additional platforms or foundations for metal pipes.

Installing and connecting steel parts is easier than building brickwork or installing fragile ceramics. They can be inserted inside old brick chimneys, producing a liner.
Conventionally, steel chimneys are divided into 2 categories:
- simple "hot" type, without thermal insulation;
- sandwich pipes, consisting of three layers - thermal insulation is inserted between two layers of metal.
There are special requirements for heat-insulating material. It should not emit products hazardous to human life during heating, have minimal thermal conductivity and not burn. In construction markets you can purchase ready-made sets of sandwich parts and assemble a sandwich chimney with your own hands. Or you can place an order for a private project.
The cost of the chimney cannot be called budgetary, but it justifies itself.
Option #4 – glass
A beautiful glass chimney is attractive not only in appearance. It is made of durable tempered glass, which is inert to chemical influences that are typical for combustion products.
In addition, perfectly smooth walls prevent soot from settling in large quantities, resulting in the chimney having to be cleaned much less frequently.

The disadvantages of glass are additional requirements for insulation and insulation, special assembly technology (difficulty in creating airtight connections), and the possibility of condensation.
If we compare expensive glass and ceramic chimneys, the latter will win both in terms of technical characteristics and overall performance.
After looking at a review of pipes made from various materials, you still can’t decide which is best for you? Then we advise you to look at our other article, in which we provided important selection criteria chimney pipe, which should be guided in specific conditions.
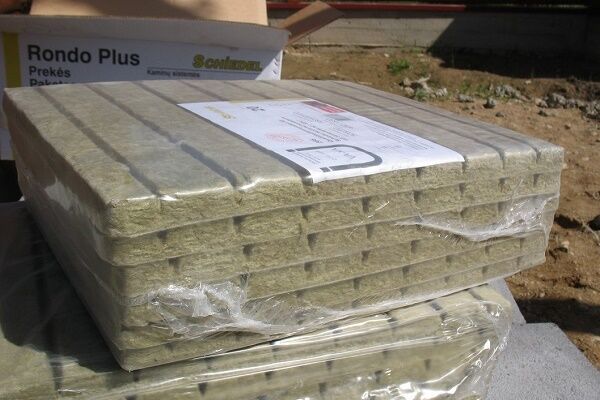
Construction of a ceramic smoke channel
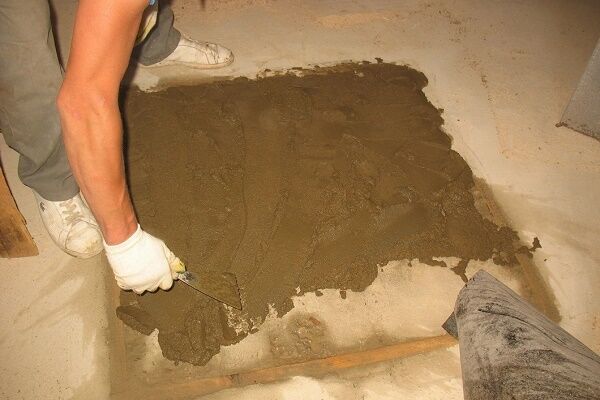
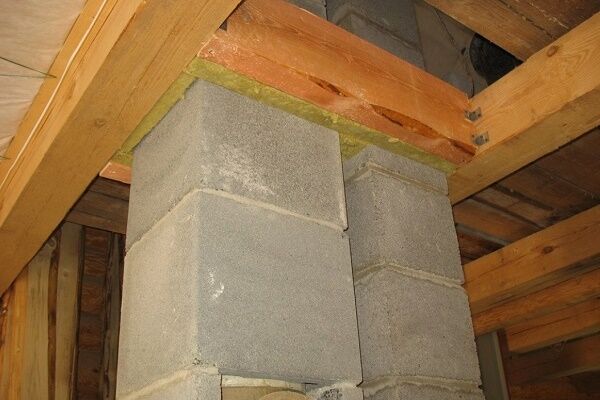
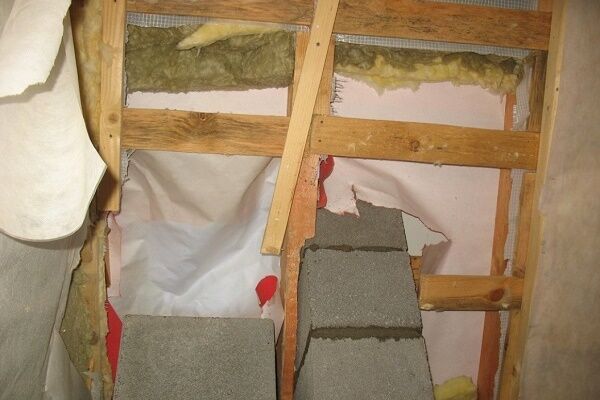
The most reliable and safe option for installing a chimney in a wooden house is a construction made of ceramic blocks. Its outer side practically does not heat up, which means there will be no problems with passage through the ceilings.
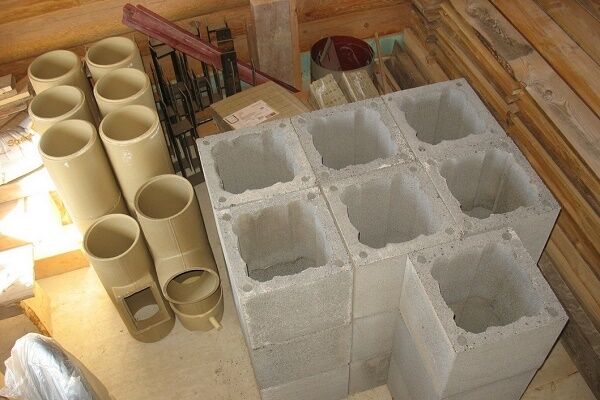
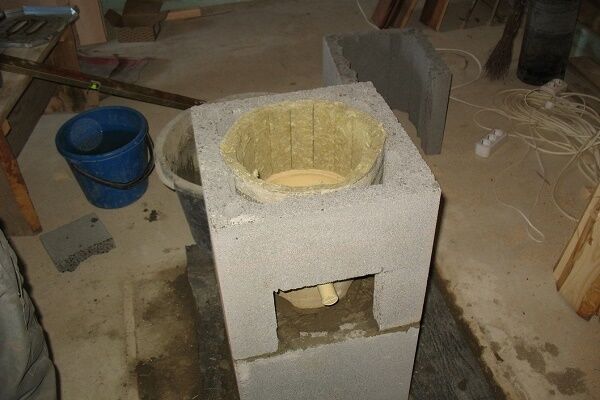
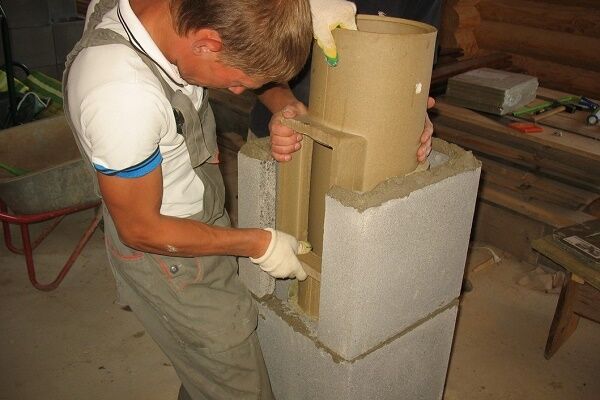
Let's consider the sequence of assembling a smoke channel from components of the German brand Schiedel Rondo Plus:
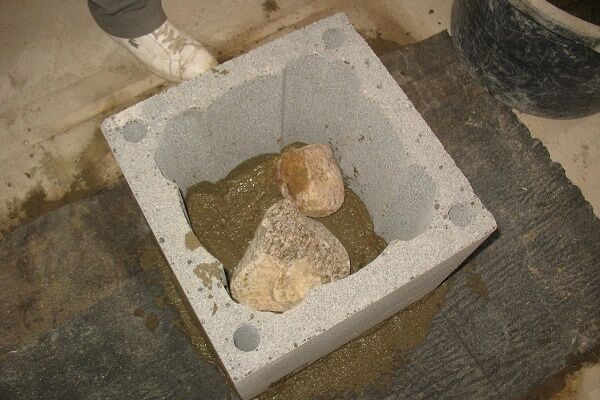
Let’s immediately make a reservation that the main one is constructed from ceramic modules, i.e. a separate pipe for which a separate foundation is arranged.
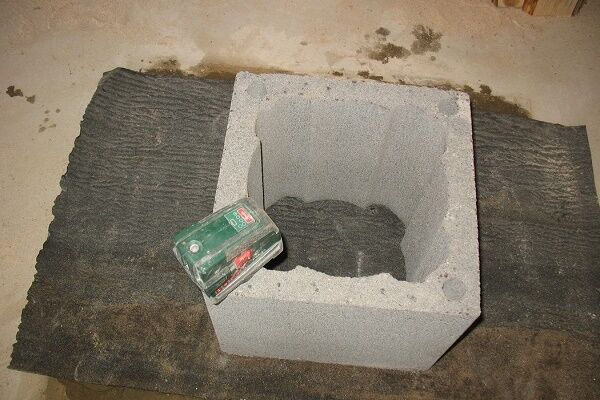
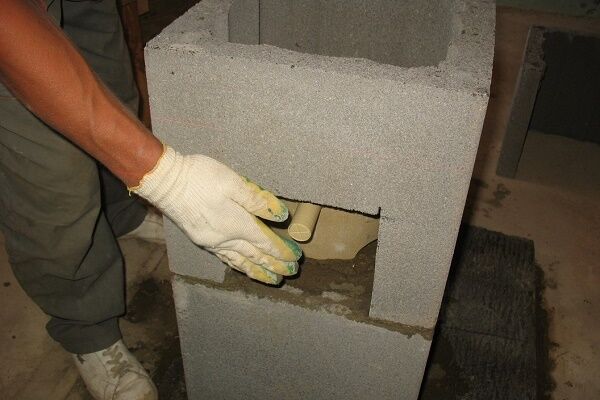
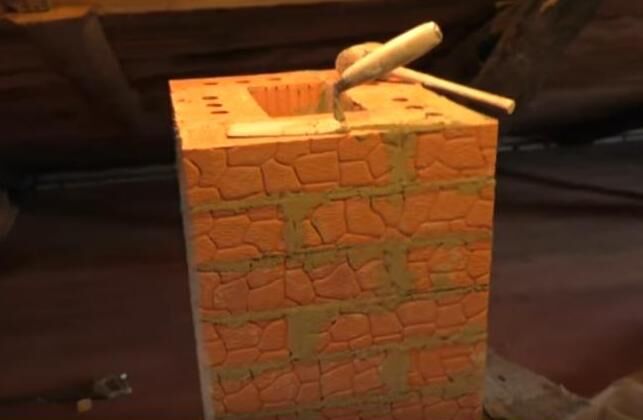
All technological holes are cut out along the construction site. Cutting is done with a regular grinder with a diamond blade.
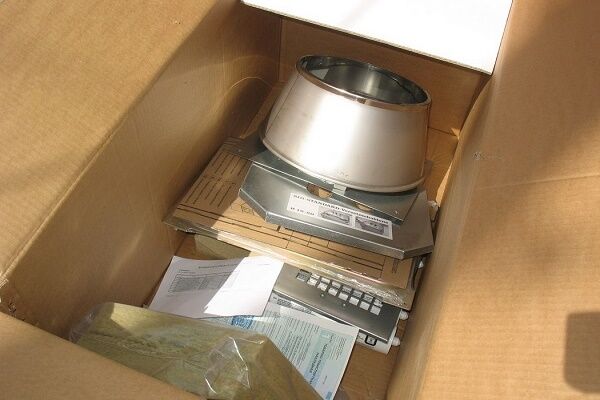
To make geometrically accurate holes, the ceramic chimney kit includes a template. Further:
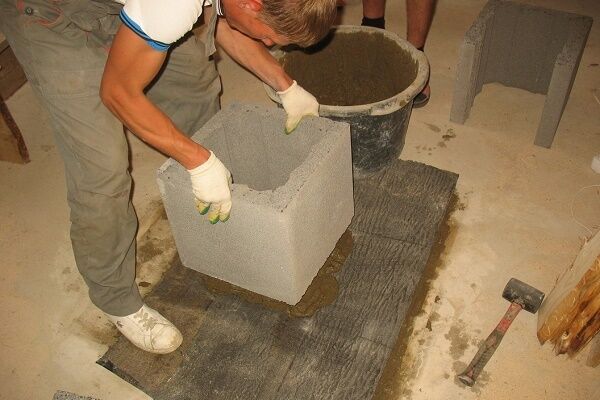
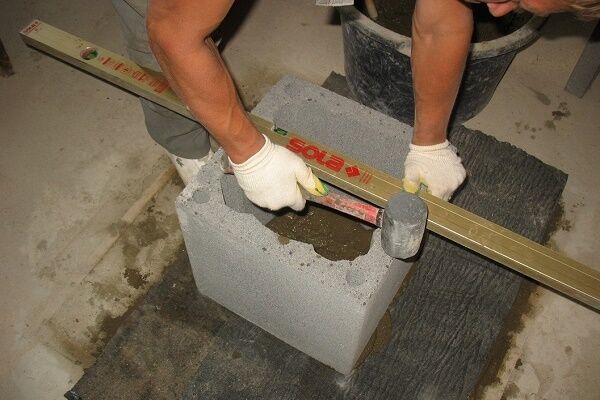
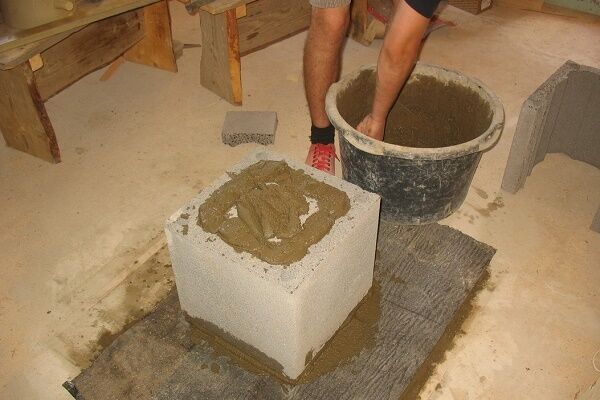
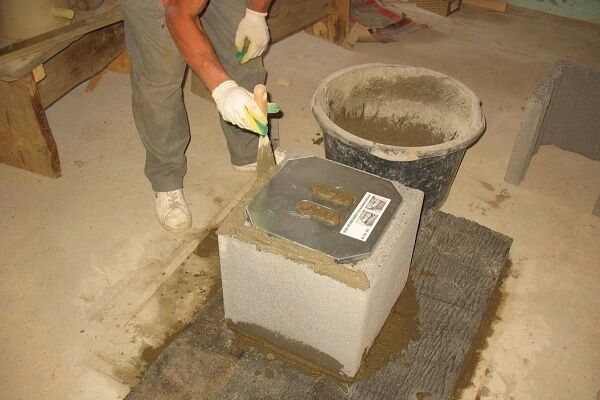
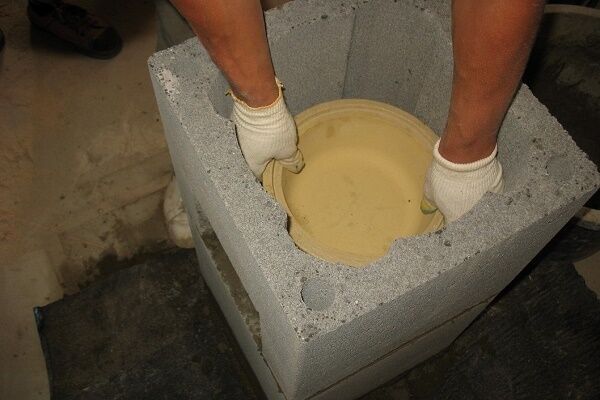
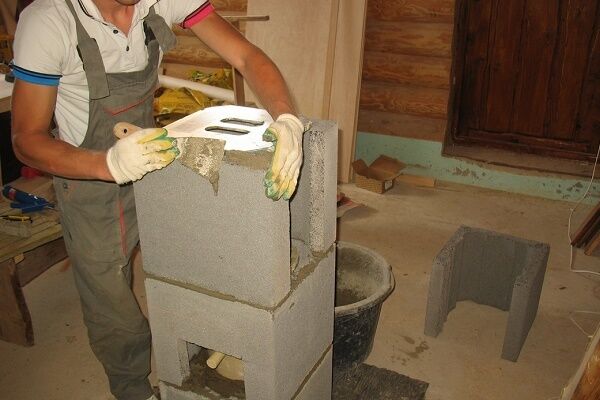
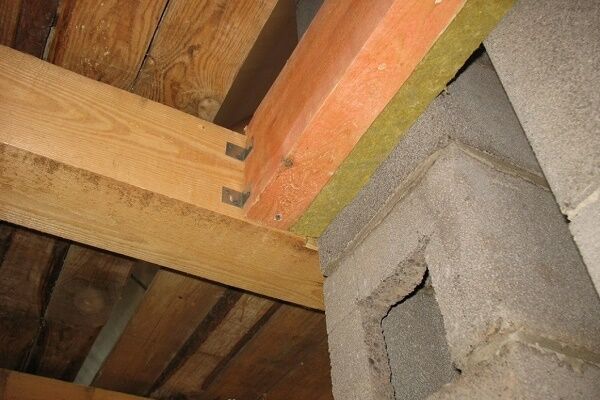
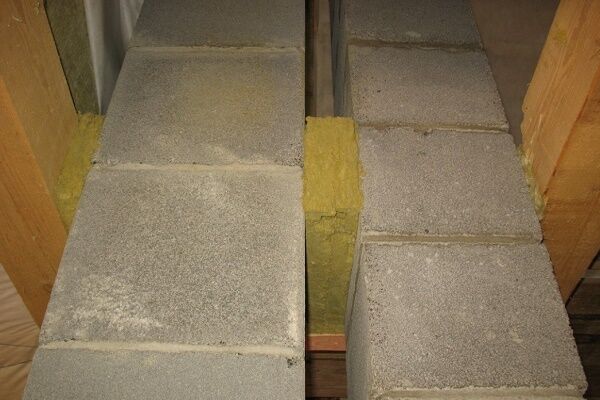
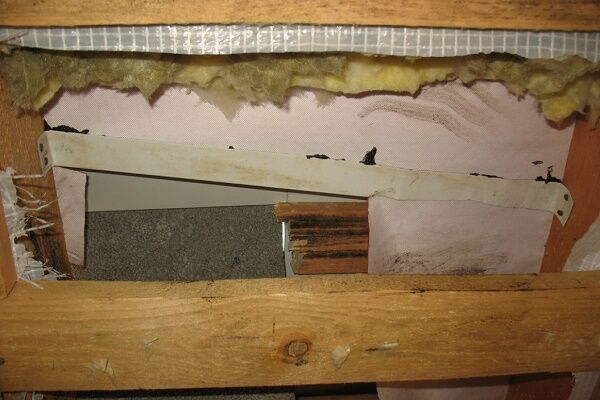
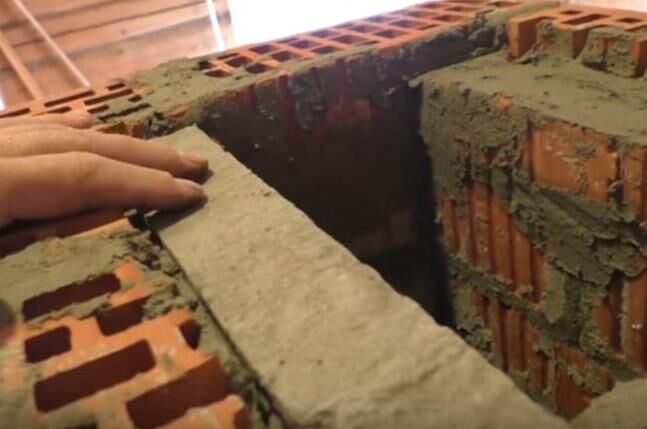
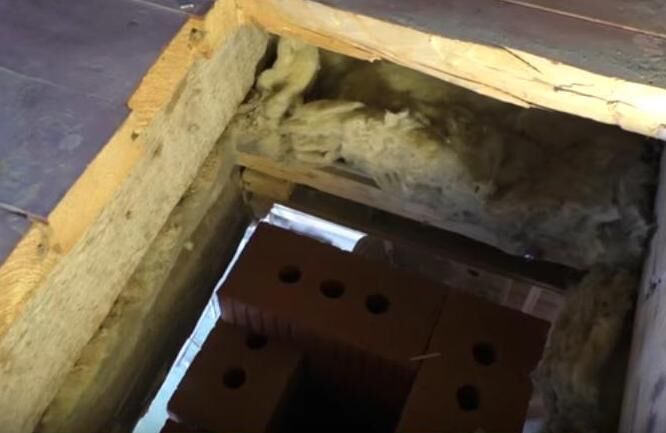
The ceramic chimney is assembled in a standard manner: modules are built up one after another. However, it is worth paying attention to the specifics of passages through the attic floor and through the roof.
In our example, the chimney and ventilation riser are located next to each other, which is why we had to slightly trim the rafters:
We also have another article on our website containing step-by-step instructions on construction of a ceramic chimney, its fastening and decoration of the outer part.
Construction of a brick chimney
Regardless of the material used, when building a chimney, it is necessary to comply with the rules and regulations. If you incorrectly calculate the diameter or height of the pipe, select a brick that does not meet the standards, or forget about thermal insulation in a cold zone, the result may be disappointing.
Recommendations for drafting a project
There are two options for building a brick chimney:
- with rectangular section – using only bricks;
- with round section – with external lining with chimney bricks and internal ceramic (asbestos-cement, steel) pipe.
The first option is common, but not desirable. The design with internal corners is inferior to the cylindrical shape in terms of the quality of smoke removal. In a rectangular chimney, soot accumulates faster and is more difficult to clean, so if possible, it is better to choose a combined design
Modern asbestos cement is no more harmful than slate or asphalt, so you should not be afraid to use pipes. However, there is one nuance that manifests itself with insufficient insulation - the rapid absorption of condensate. It is clear that a pipe with a damaged structure will not last long, which is why ceramics are becoming more and more popular.

To accurately calculate the internal diameter of a brick or ceramic chimney for a fireplace, it is better to consult with specialists: the height of the pipe, its direction, number of turns, material of manufacture, volume and temperature of exhaust gases, type of fuel, fuel combustion rate, etc. are taken into account.
However, there are several general rules that should not be overlooked. Let's assume that for cylindrical chimneys the standard proportion in relation to the firebox is 1:10.

It is also believed that the cross-section of the chimney should exceed the diameter of the blower. When calculating the height, it is necessary to focus on the height of the building (including the roof), the type of roof, and the location of neighboring buildings.
If a horizontal section is planned in the design, then its length should not exceed 1 m. This requirement is explained by the natural movement of heated gases vertically, which means that most of the soot will be deposited precisely on the walls of the horizontal section - the most difficult to clean.
Structural nuances of construction
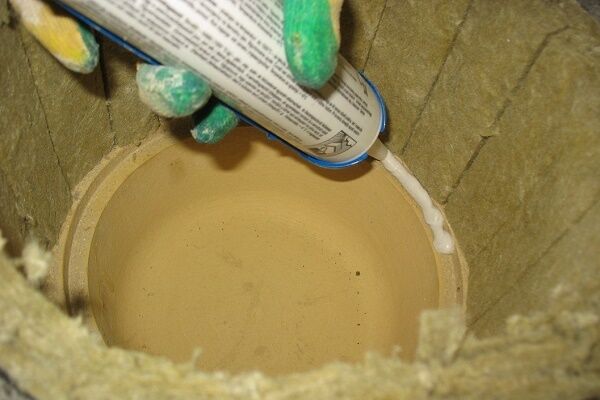
One of the distinctive aspects of brickwork is the creation of layer-by-layer patterns. At the same time, the composition of the adhesive for connecting the ceramic pipe and mortar is selected to create a sealed brick structure.
It is important that during the heating process the seams do not deform and do not change the shape of the pipe. The inner surface should be as smooth as possible, without protrusions or notches.

In addition to reducing adapters, other shaped parts are used - inspection holes with doors, tees, corner elements.
To prepare old chimneys that have not been used for a long time, cleaning alone is not enough. For effective operation, a sleeve is required - an insert of a metal pipe of round cross-section.The brick walls of the chimney and the steel should not touch; a gap should be left between them.
A mandatory step is thermal insulation. It allows, on the one hand, to increase the rate of heating of the pipe, and on the other, to reduce or eliminate the formation of condensate. Also, chimney insulation material acts as a barrier against the heating of flammable materials located in the vicinity of the chimney (although according to the rules this should not be the case).
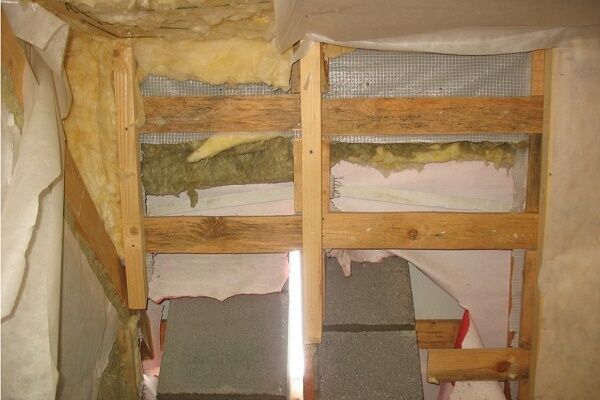
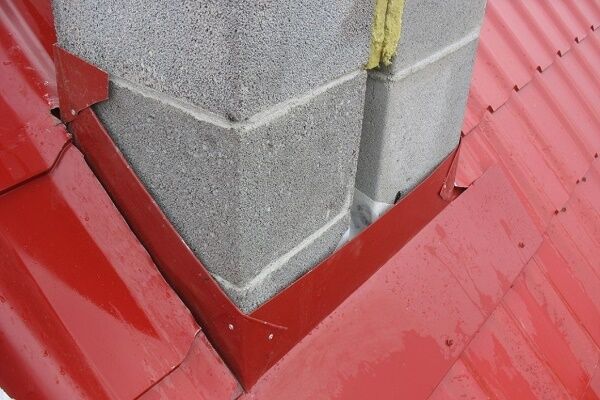
Particular attention should be paid to the design of the passage through the ceiling and roof, the construction of which involves wood.

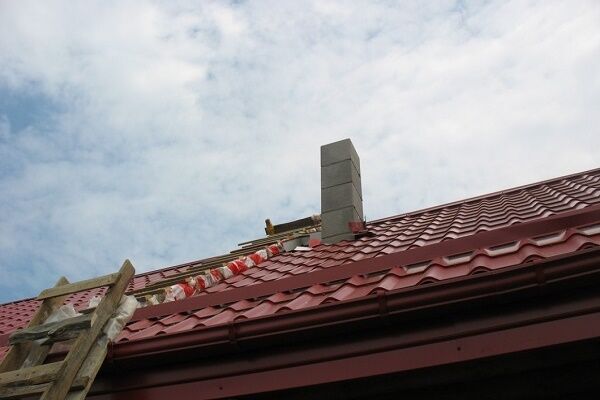
It is also necessary to finish the outer part of the pipe extending over the roof. To protect against debris and precipitation, “houses”, stylized weather vanes, deflectors.
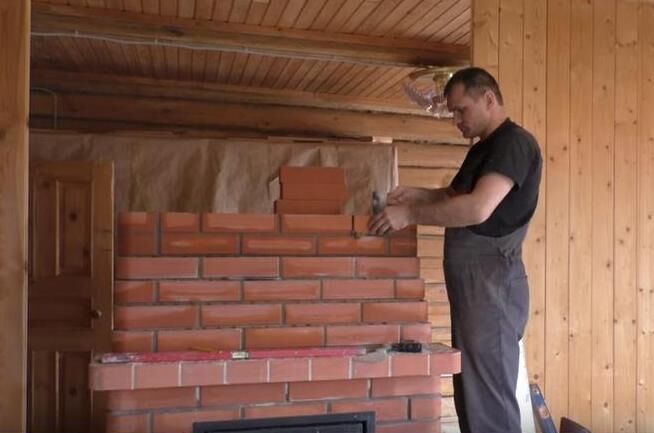
Step-by-step instructions for laying a chimney
The prepared project is a guide to action: it contains a masonry diagram, an estimate, and a list of construction activities. Laying a brick chimney is the final part of building a fireplace.
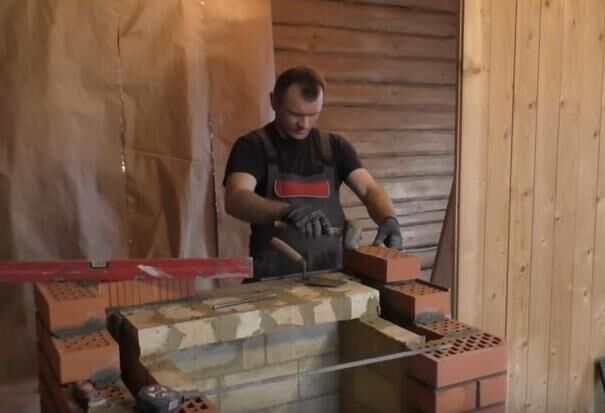
Step 1 – preparation of materials and tools. To prepare the solution you will need sand, cement, lime (or special clay), and a container; for masonry construction - jointing, trowel, hammer, level.
Step 2 – preparation of the solution. Craftsmen usually know special secrets on how to make the solution more elastic and non-cracking. For example, add a little lime to it. The consistency of the mass should resemble sour cream, be thick, but easy to separate.
Step 3 – masonry.The ready-made order makes the work easier - each row must be laid according to the diagrams. If a ceramic or steel pipe will pass inside the brick body, this must also be taken into account when choosing the layout and section size.
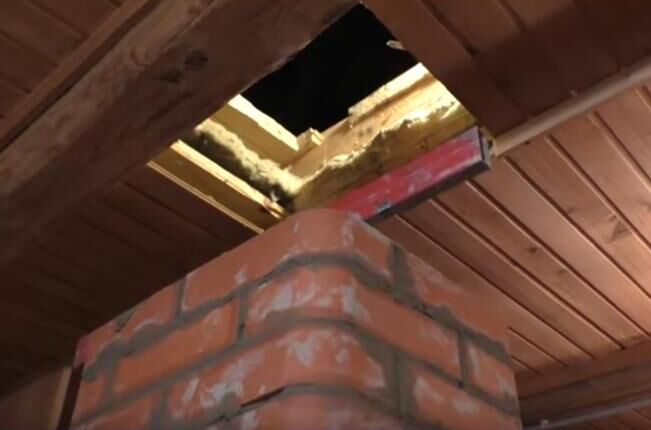
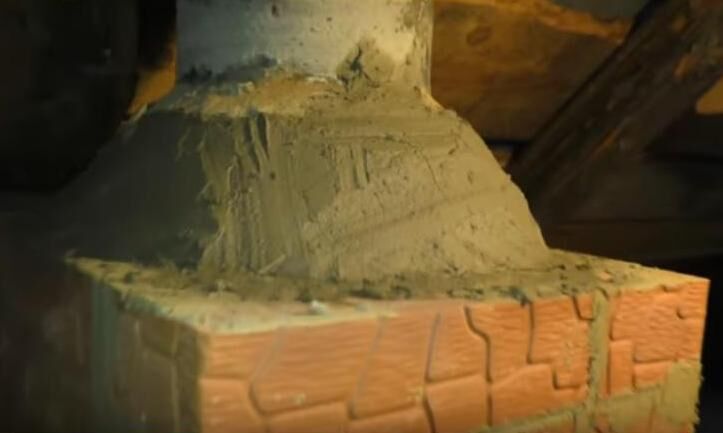
Step 4 - fluff. This element - the expansion of the pipe - is installed when passing through the ceiling. The brick is shifted ¼ towards the outer edge.

Step 5 – laying a section in the attic. For unheated rooms, thermal insulation is required. The passage through the roof is equipped with the help of another extension - an otter. It protects the attic from precipitation.
Step 6 – design of the outer pipe and head. If necessary, install spark arrester, a deflector (for adjusting traction), above it there is a ridge canopy or a cap (umbrella). You can buy ready-made heads at the construction market.
Some tips from stove and fireplace experts:
Throughout the entire masonry, two points are important: that the tube stands strictly vertically and that its inner surface is perfectly smooth. The sleeve guarantees smoothness.
Conclusions and useful video on the topic
The videos are useful for those who want to build a fireplace themselves and avoid making mistakes when designing and installing a chimney.
Even more information about sandwich chimneys:
Arrangement of a brick pipe on the roof:
Assembly of modular ceramic pipe:
Building a chimney for a fireplace is an exciting activity, but it will bring practical benefits only if the installation standards and rules are followed..
If you find it difficult to choose a material or pipe design, we recommend turning to experienced stove makers who know many secrets of high-quality fireplace construction.
Have you decided to build a chimney for your fireplace yourself, but in the process of studying the information you still have some unclear points? Ask our experts and other site visitors for advice - we will try to clarify complex issues.
Or maybe you have practical experience in installing chimneys and want to point out some inaccuracies or shortcomings in the material presented? Or do you want to supplement the material with useful tips from a professional? Please write to us about this in the comments block.


Wonderful video of installing a ceramic chimney, but WRONG. They could at least just download a training video, where at least the correct editing is shown. These are the kind of builders we have - yesterday's school losers with a keen sense of easy money. And so in LITERALLY everything!
I once watched a video where one construction worker was talking about the beauty and benefits of copper water supply pipes, without mentioning such a problem as condensation, and then, without hesitation, he began to push the VVG electric cable directly THROUGH and UNDER these pipes and not in the pipe, not in cable duct, but in an open way (open wiring in itself is not at all criminal and can even look beautiful, but it must be done CORRECTLY!) and this in a wooden house. To celebrate, not forgetting to remind him of his coolness and the number of customers in line, he posted this nonsense on the Internet without a shadow of a doubt. A word of warning to future owners.
I would not advise anyone to build a chimney on their own unless they have any construction experience and understanding of how a fireplace works. Your life depends on the chimney, and its installation must be approached responsibly.Ideally, you need to find experienced stove makers who will do everything for you so that problems do not arise later. It’s better not to skimp on such things and invite a really good master.
Well, about life - this is an exaggeration, but the normal functioning of a fireplace without a properly made chimney is impossible. And not everyone can do it on their own.
The difficulty of installing a fireplace chimney has been greatly exaggerated. Especially if it is a standard vertical brick outlet, without any complex leads or coaxial cables. All that remains is to correctly calculate the cross section and then simply follow the standard instructions.
The removal of a stove chimney is much more difficult, especially if the configuration is changed. Then, yes, careful calculations are simply necessary, and here you cannot do without an experienced stove maker.
I recently watched a video about the consequences of assembling a chimney by “experienced stove makers.” Creepy. In our little house there is a reinforced concrete rule - if you want to do it well, DO IT YOURSELF.
Good afternoon, please tell me how realistic it is to insert a capsule into an existing fireplace. The house is old, we built a fireplace, everything was fine, periodically I call the stove guy to clean the chimney. Yesterday a neighbor complained about the presence of smoke in his apartment. Despite the fact that there was no smoke in my apartment. The house is 3 floors, I live on the 2nd floor. At one time, it was built wisely; each resident had his own chimney. I understand that the house is old, perhaps cracks have formed in the well, how could this be eliminated in order to enjoy winter evenings by the fireplace. I would be grateful for your answer.