DIY decorative bridge for the garden: ideas, photos, step-by-step manufacturing instructions
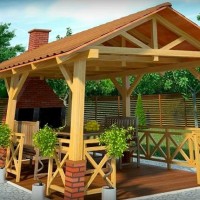
You can place a decorative bridge in different places on your property.This original object, decorating the landscape, is made of wood, metal, and stone. Simple designs are available to create with your own hands.
The content of the article:
Design of bridges for the garden
Any type of decorative bridge installed on a site must fit organically into the landscape.
Types of structures
There are several types of original decorative objects:
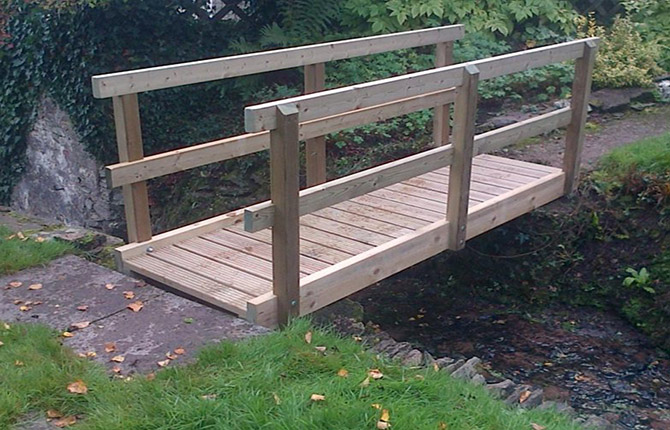
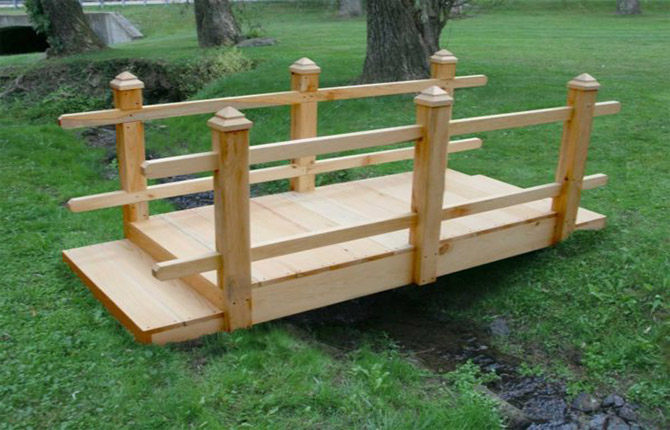
- Straight decking. These are the easiest decorative structures to make, mostly wooden, although you can cast even slabs and install them on the site. A transition made from laid metal or wooden guides to which the dies are fixed is suitable.

- Often straight bridges are equipped with railings to ensure safety. If you make handrails from wooden blocks, you can quickly assemble such a convenient structure with your own hands. The beams should be sanded first so as not to cause hand injuries when moving.
- To add expressiveness to a decorative composition created from a simple model of a crossing, for example, over a dry pebble stream, and to enhance the charm in the evening, lanterns are installed.
- Step bridges. More often they are direct decorative transitions, which have steps for convenience. This technique makes it easier to move, as it does not create high drops.
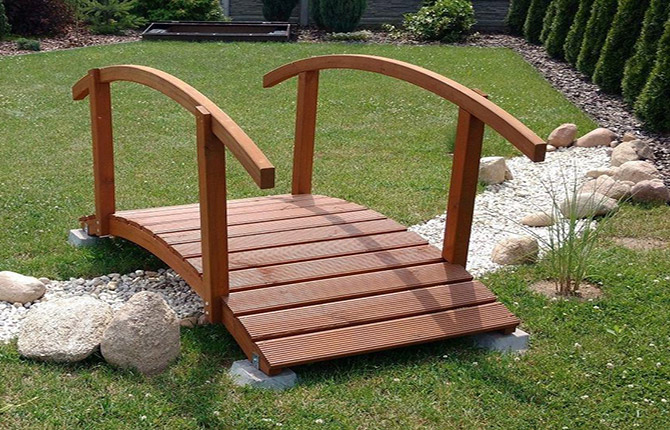
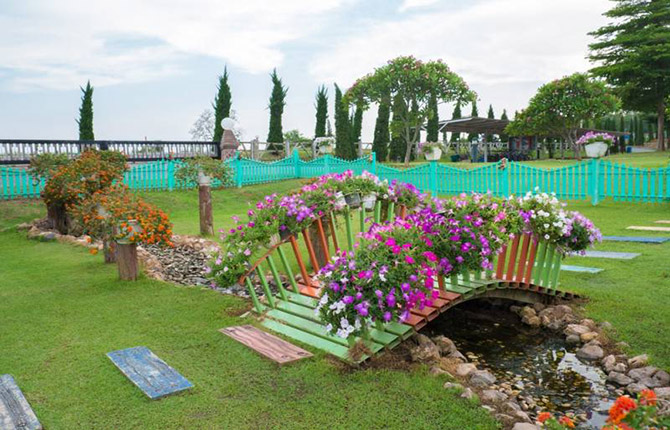
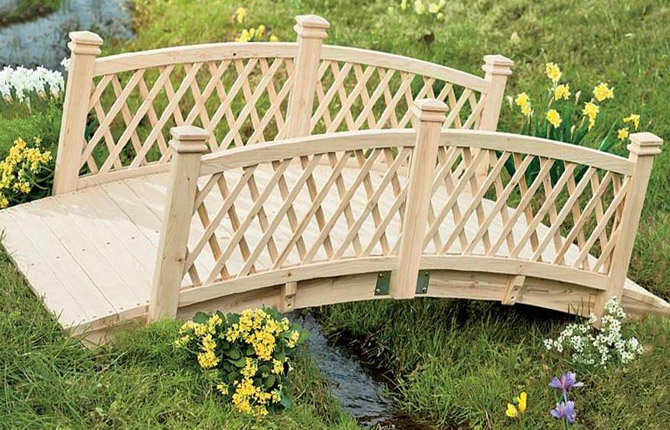
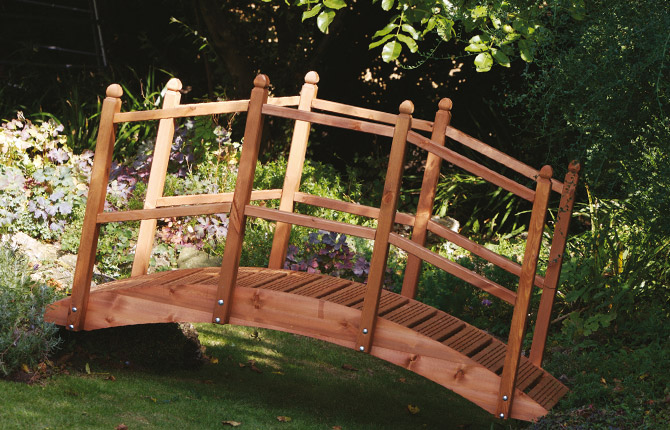
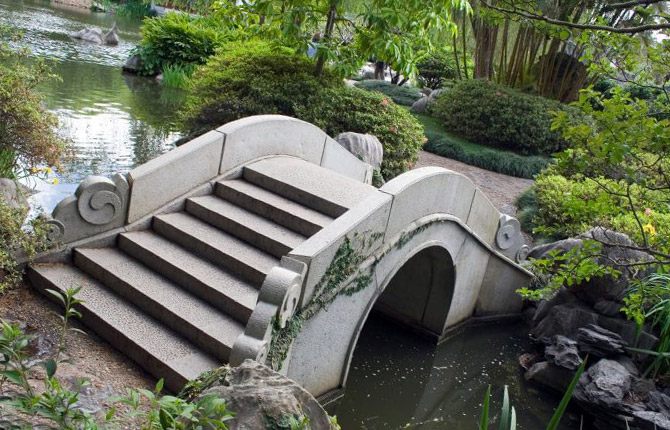
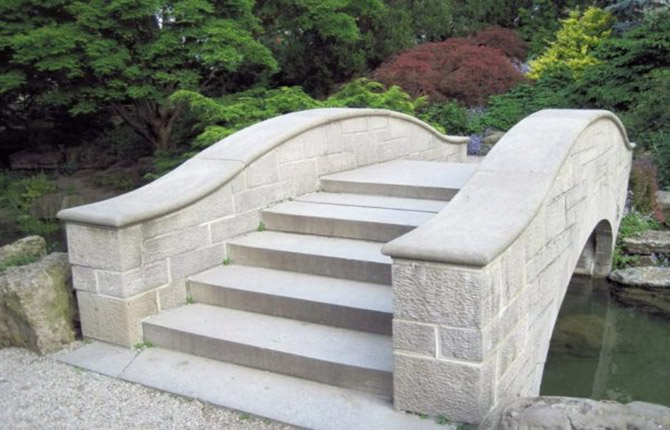
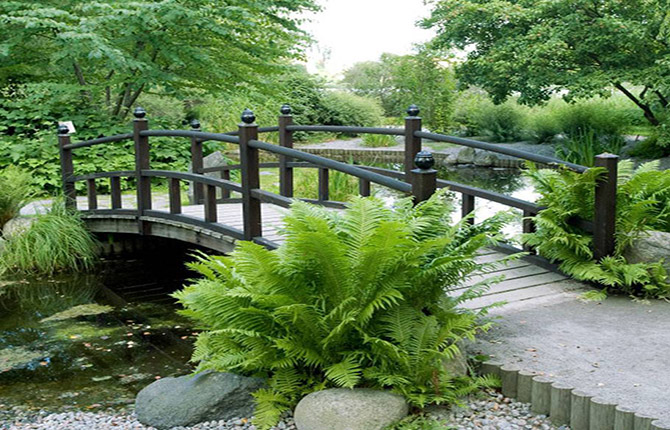
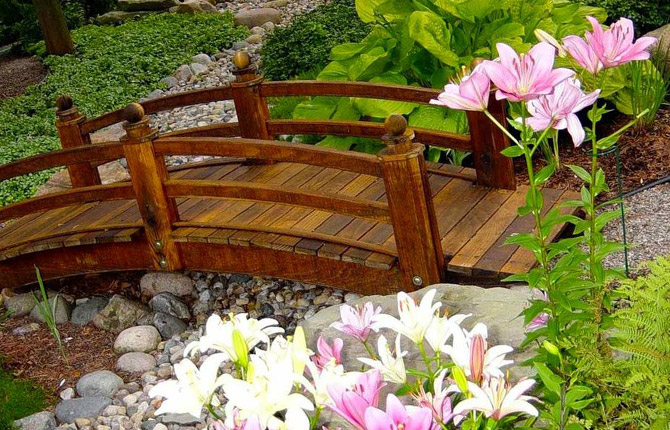
- Arched bridges.Even a slight bend of the supporting beams gives them a lightness and elegant appearance. Such varieties look good, for example, over an artificial dry stone stream.
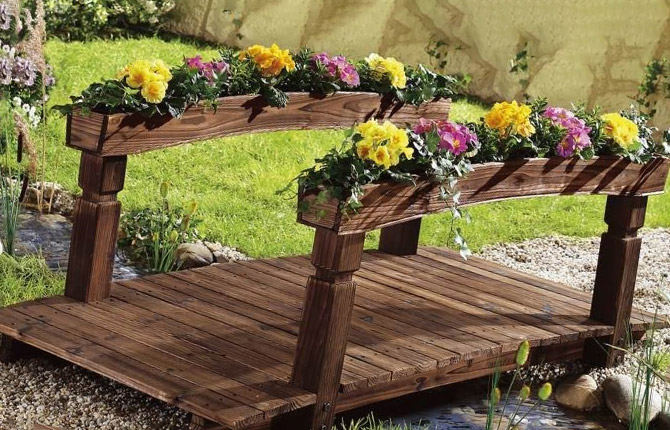
- If you attach pots on the railing where flowering hanging plants are planted, you get a bright accent. Such a bridge becomes the main decorative decoration of the site.
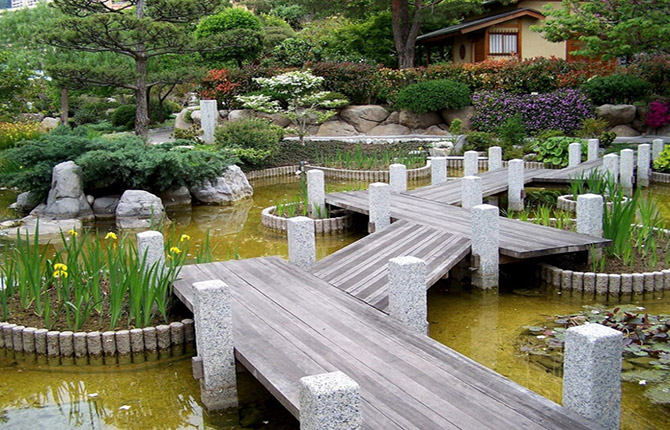
- Zigzag shape. Such a bridge for a summer house allows you to equip a vast area, giving it an unusual look. Individual modules are laid, fixed to supports, creating a zigzag line that facilitates access to several objects on the site at once.
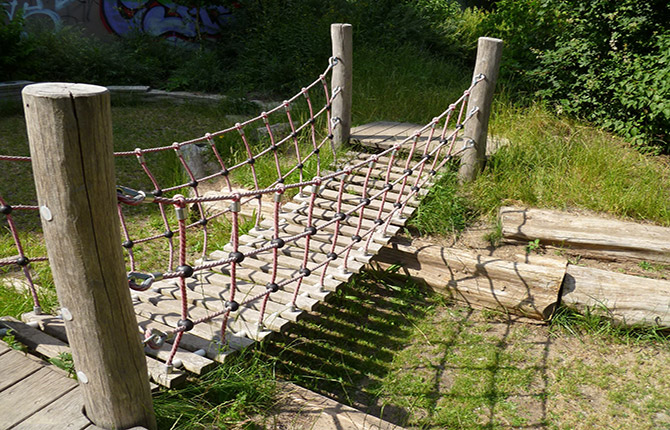
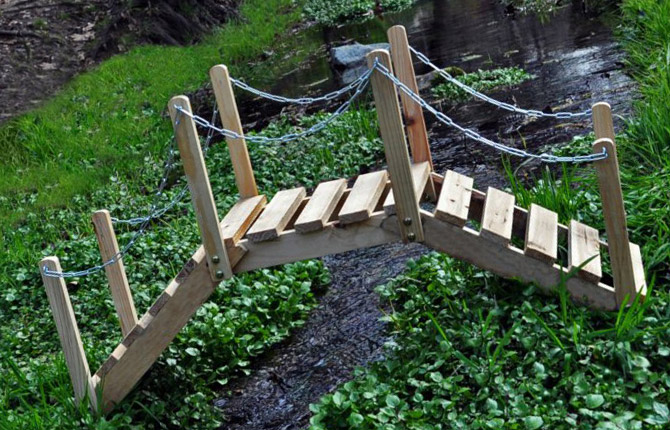
- Suspension bridges. An original decorative garden crossing through rough terrain of this type is constructed from ropes stretched between supports. The flooring is fixed to them. Handrails are often made of rope.
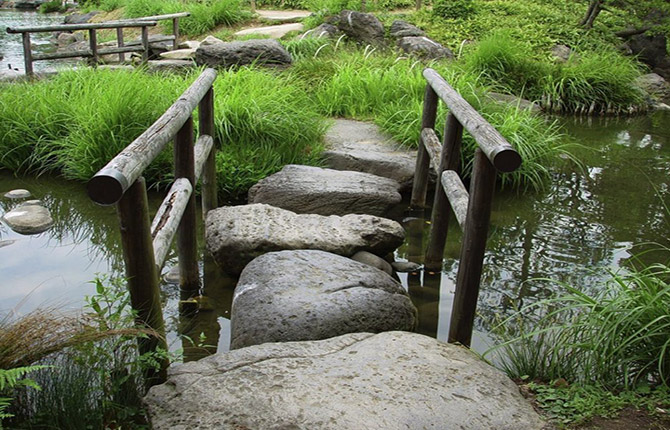
- Step by step crossing. This type is presented in separate fragments. These may be large boulders marking a stream crossing. Movement requires caution, as you have to step from one module to another. For safety, strong railings are installed on the sides.

Interesting: How to make a beautiful dry stream in your country house with your own hands.
Design of garden bridges depending on material
The decorative characteristics of crossings and passages arranged in the garden depend on the material.
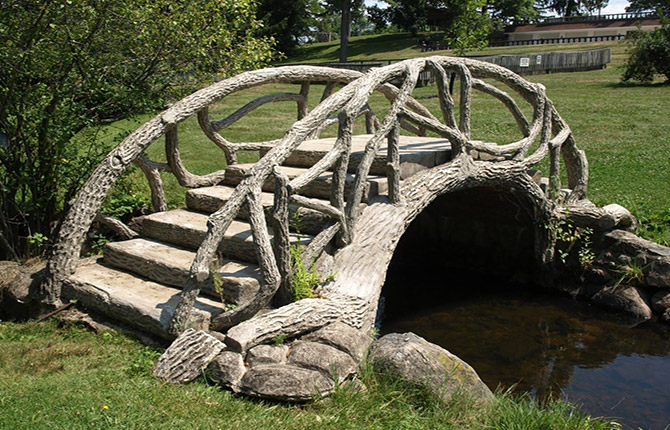
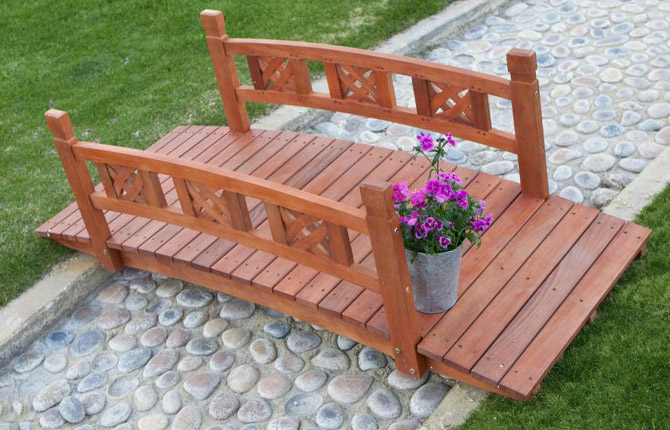
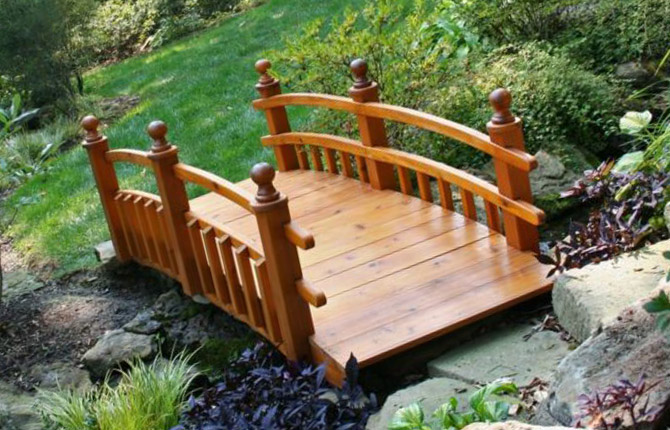
Tree
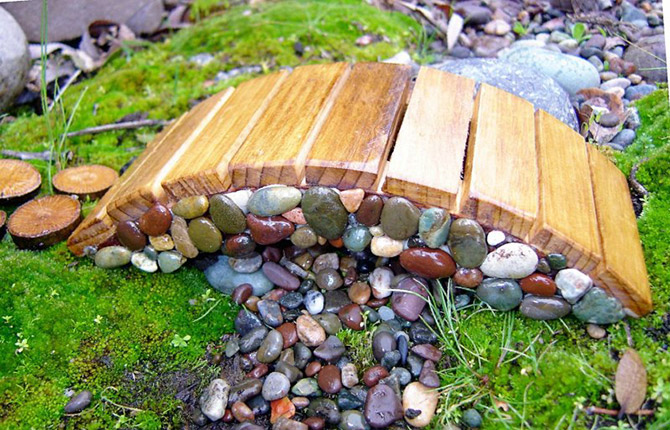
Wooden bridges attract with their beautiful texture and ease of processing. This results in a variety of forms. It is necessary to provide a protective coating to prevent the rapid destruction of the material that is not resistant to moisture.
A few examples:
- Even simple types of bridges with openwork decorative railings become a decoration of the landscape.
- A small bridge of a simple shape, made of wood, will allow you to ennoble a shady corner if you install it near flower beds symbolizing the shores.
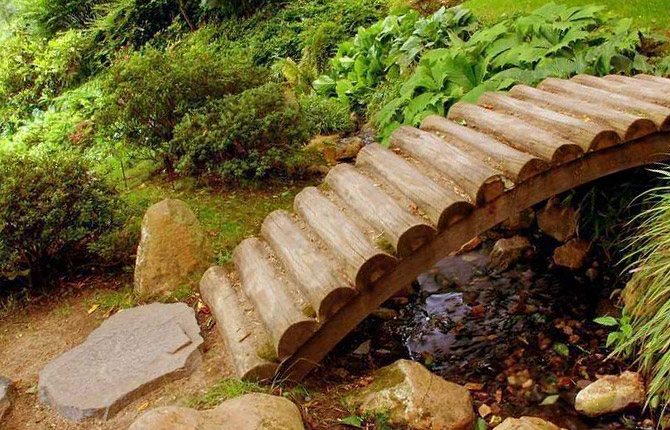
- A bridge spanning a shallow stream, with half logs used for its flooring, will fit well.
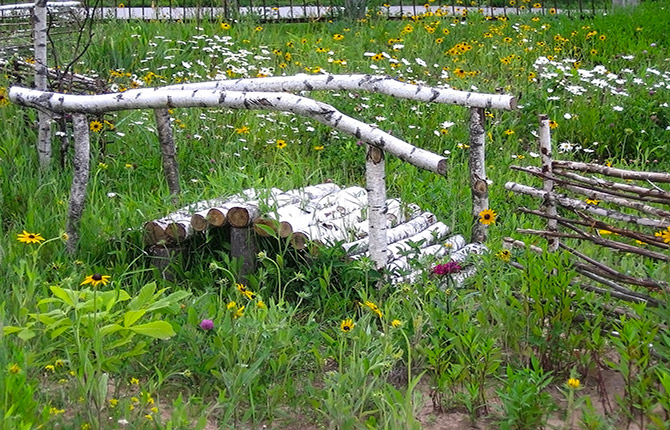
- A charming decorative viaduct is obtained if medium-thick birch trunks are used to make it. It is important to preserve birch bark, which creates the impression of a cozy natural corner. Such a bridge will fit well into the shady space created by overgrown vegetation, and will also serve as a crossing over the resulting ravine. When working, you will not need to carry out labor-intensive operations, and the result will please you with an interesting shape.
- Such accessible material as flexible willow branches will be useful in the construction of a decorative crossing. No special skills are required to work with them. The basic flooring can be made from slats mounted on guide bars. Fix to them, observing the required intervals, vertical supports that are braided with branches. The result is an openwork design that well emphasizes the surrounding natural color.
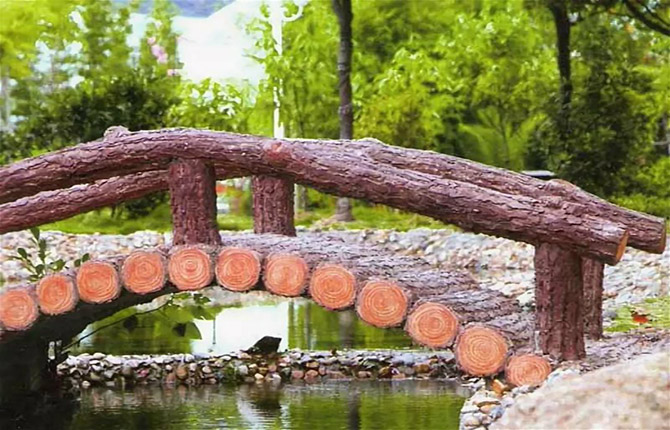
- If there are trees growing on the property next to a pond, an interesting option would be a durable bridge made of logs. Such a decorative object becomes part of a space filled with freshness, emphasizing the charm of natural intonations.

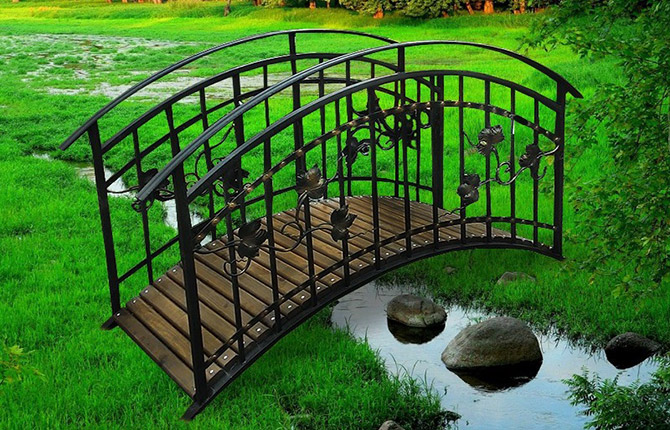
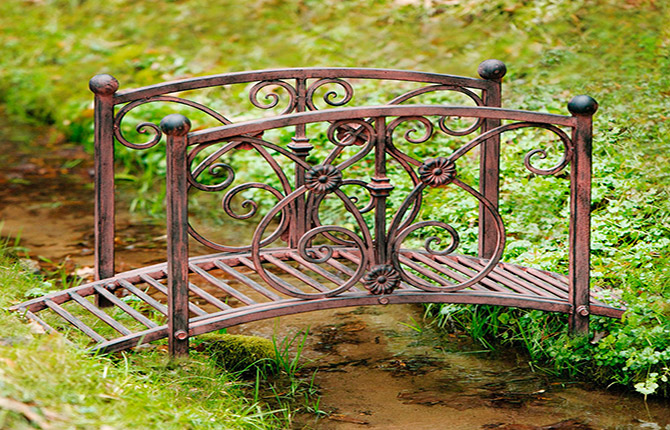
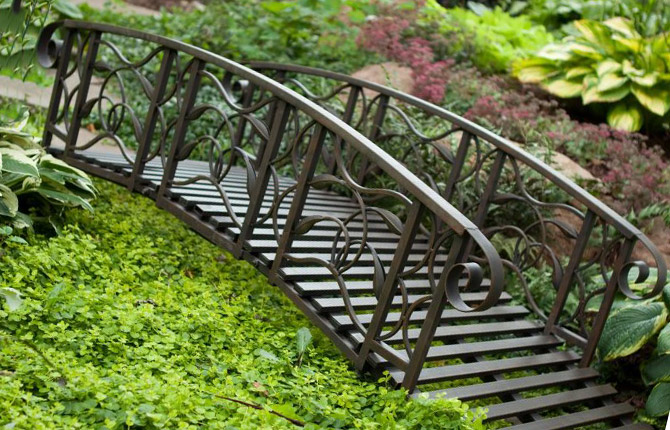
Metal
More durable bridges made of metal have an attractive decorative appearance. They last a long time if anti-corrosion protection is provided.
Some options:
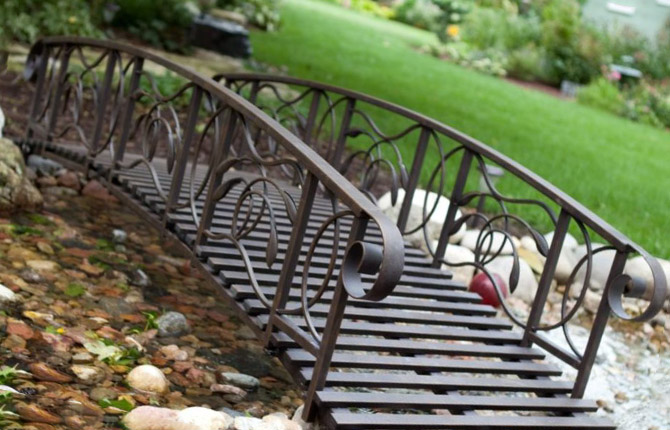
- A bridge made entirely of metal fits original into any landscape. The charm is enhanced by openwork railings.
- You can install crossings with metal profile flooring. It will last a long time without losing its decorative characteristics.
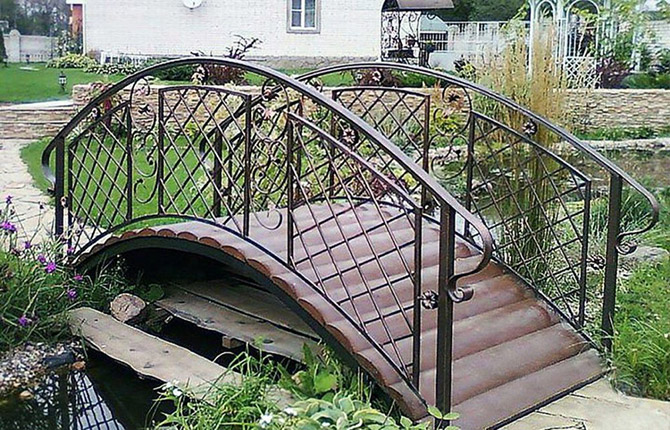
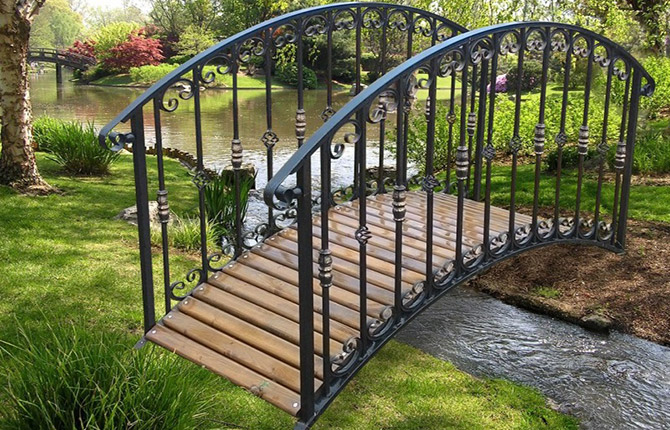
- Since metal decks become very hot in the sun, they are often made of wood. Forged railings go well with this material.
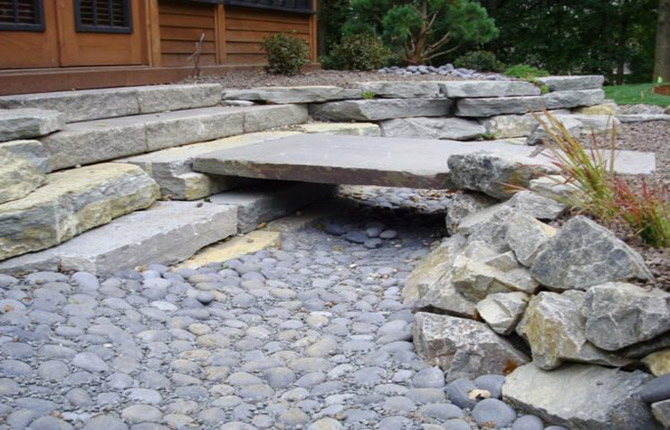
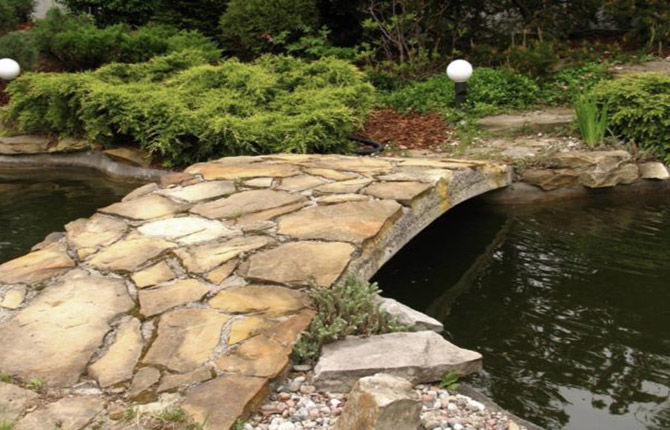
Stone
The stone bridge is distinguished by its strength and durability. When creating it in the garden, different ideas are used. In any case, such an object becomes a decoration of the site.
Some varieties:
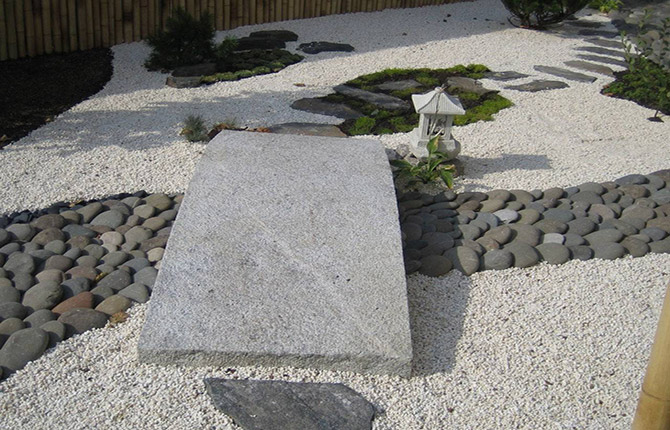
- The stone slab will fit well into the design, for which a dry decorative stream is made from large pebbles. The banks are boulders of various shapes.
- You can build a bridge across a pond on a concrete base, lining it with stone tiles.
- An interesting design is demonstrated by a decorative passage made of several layers of stones across a garden stream. The support is provided by several boulders placed near the shore.
- Flat elongated stones, laid vertically on an arched base, become a decorative part of the landscape. At the same time, a convenient bridge is created across a shallow ravine.


Concrete
The construction of a durable concrete viaduct requires a lot of effort, but the result will delight you with durability and interesting decor. The advantages of concrete include the plasticity of this material. After installing the formwork, you can cast the desired bridge configuration. This takes into account the large weight of the structure.
A few ideas:
- An arched type of crossing over a stream, made of concrete, does not require additional decor. The result is an original art object.
- The most accessible type of crossing is a concrete slab. It is laid in a designated place, for example, over a rocky decorative stream, providing a durable flooring.
- A concrete slab equipped with low railings enhances the charm of a neatly trimmed lawn located next to a decorative pond.
- The beautifully shaped stepped bridge fits perfectly into the green corner, giving it a feeling of comfort and tranquility.
- You can lay out the bridge from pre-cast individual concrete blocks.

Other ideas
The combination of materials makes the decorative crossings created on the site through relief irregularities unusual.
Several variants:
- If you plan to improve a dry stream laid out from beautiful smoothed stones, make the base of a humpbacked bridge from the same material. Sanded wooden dies are fixed on top of the cement and coated with protective varnish.
- An original decorative nuance is added by the chains used for handrails. They are secured to vertical strips that are attached to the base of the flooring.
- Common varieties include arranging durable metal railings along the edges of a wooden ramp. Their elegant openwork enhances the charm of the surrounding landscape.
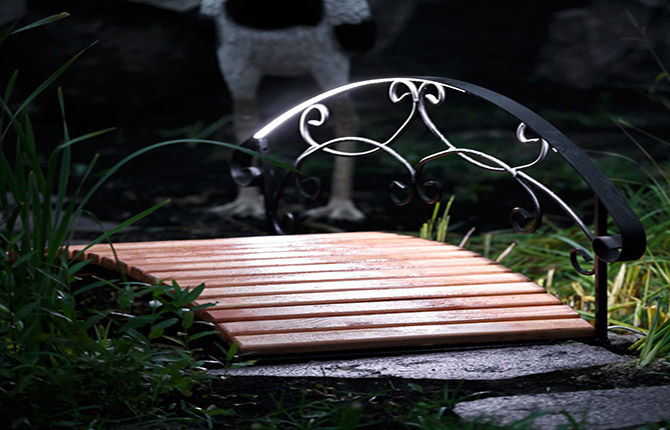
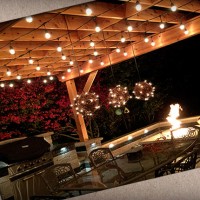
- The arched bridge, which has LED lighting on the wrought iron lace railings located on one side, acquires original decorative intonations. It provides an unusual, fantasy-like appearance of this object in the dark. The charm of the flooring is enhanced by light-colored pine planks. The railings are coated with a special paint that protects the metal from corrosion. The flooring will require moisture-proof impregnation.
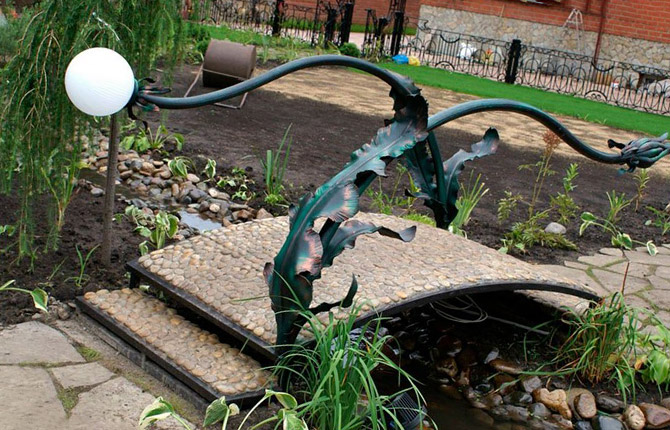
- For a stepped type of crossing over a pond, paved with stone, an original technique is to install forged railings, reminiscent of the curved stem of a fantastic flower. On one side, the bud replaces the round lampshade, providing evening lighting.
Basic styles
If the landscape of a site is being developed based on the rules for creating a particular style, then when choosing walkways, its features are taken into account.
A few examples:
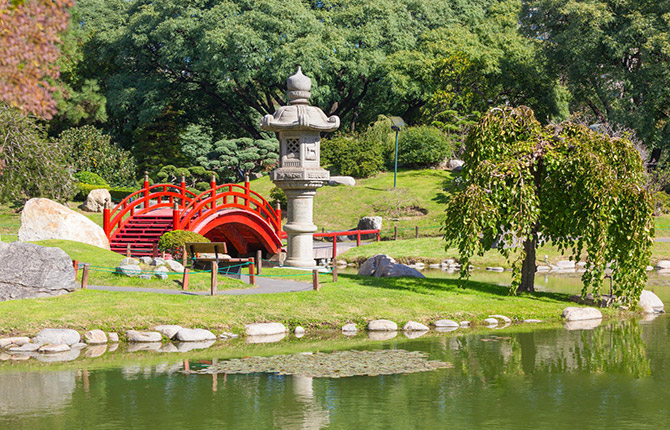
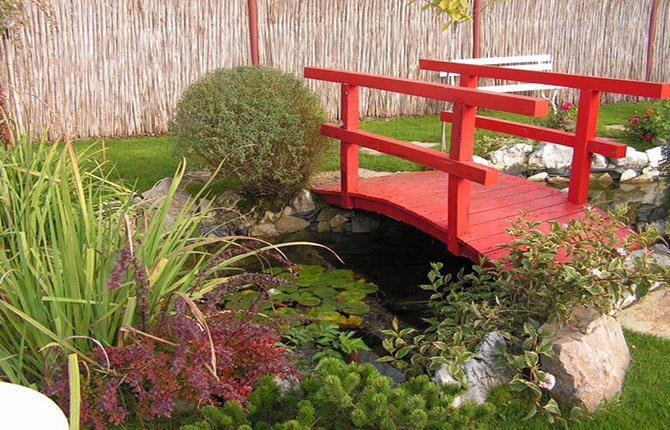
- The gardens, arranged with elements of Japanese style, are admirable. In such a space, all the parts that make up the composition are harmoniously combined. They create a refined atmosphere that is pleasant to contemplate and thought-provoking. The basic elements of such a landscape include a pond, large stones, and many beautiful plants. An elegant arched bridge fits well, standing out due to not only its shape, but also its bright shade.
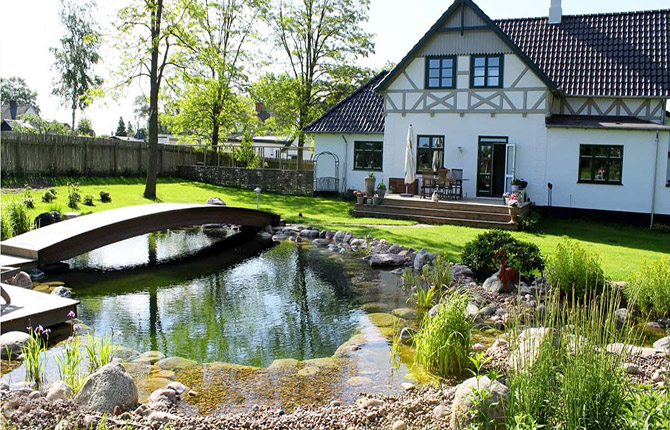
- Connoisseurs of restraint and elegance should arrange a garden with elements of prim English style. It is characterized by a large number of flowering plants. There must be a well-groomed emerald lawn, comfortable paths, a pond, and various hedges. An elegant bridge spans the pond with its banks overgrown with plants.
- Laconic, close to nature, not accepting synthetic decor, the Scandinavian style allows you to make the yard very cozy. Characteristics include coniferous and deciduous plantings and the presence of stones. The bridges spanning the pond are of a simple shape. Often there are no railings on them.
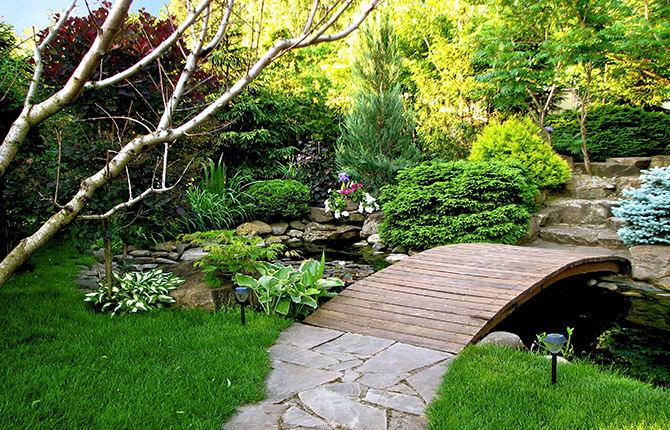
- The eco style is characterized by complete immersion in the natural environment while preserving the plants, stumps, boulders, streams, and hills present on the site.Simple, slightly curved wooden bridges across a stream without openwork railings and with simple cladding will fit organically into such an environment. They can serve as a continuation of the path paved with stone tiles.
Preparatory work
For installation on the bridge site, a place where a beautiful decorative appearance will be provided is suitable. Then they think over the shape, draw up a diagram, prepare the material and the necessary tools.
Which place to choose
For a bridge that serves a decorative and practical purpose, mark a place on the site where there are unevenness and changes in relief. Often they are specially equipped.
Several options for places where such an object will look harmonious:
- Organization of crossing a stream flowing on the site. Here such an object becomes a necessity.
- Creating a decorative composition in which the bridge becomes part of the path.
- Arrangement of walkways over a small depression resembling a ravine.
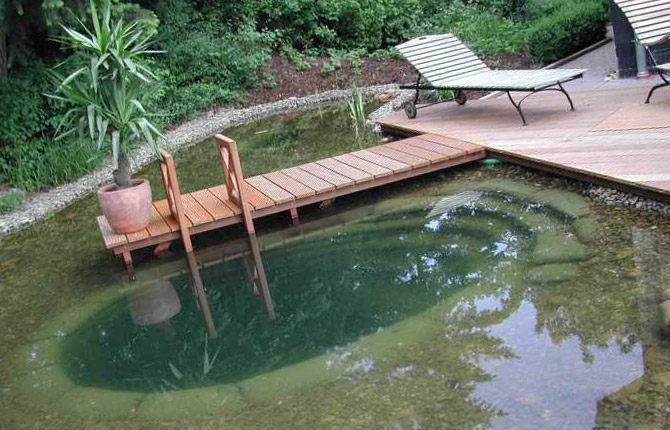
- Construction of bridges across a natural or self-created decorative pond.
- Installation next to flower beds, which will look like banks covered with flowering plants.
- Arrangement of a composition representing a dry rocky stream with a bridge thrown across it.
We prepare tools and materials
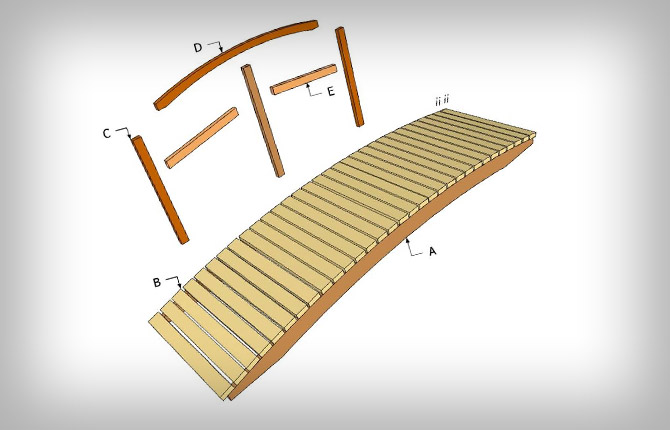
To make an unusual decorative bridge with your own hands, you need to think about its design. Then a drawing is drawn up, where the required dimensions of all components are indicated.
When evaluating the instructions and types of material, take into account that it is easier to make the next bridge from wood.
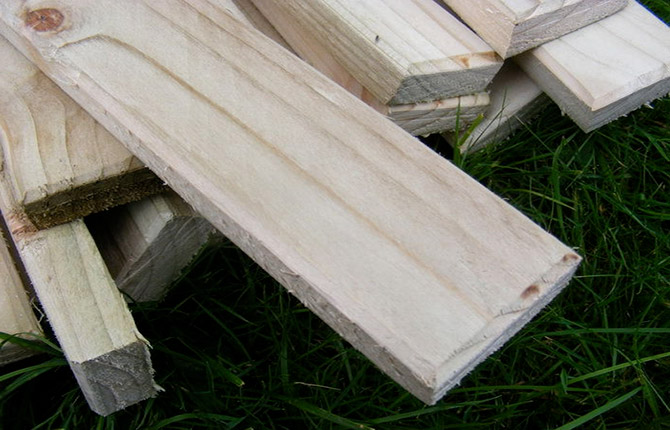
You need to prepare:
- Beams for the base (cross section 23 x 10 cm) - 4 pcs. The length depends on the area where the decorative transition is planned to be installed.
- Boards for crossbars. Their width is 15 cm, thickness - 2 cm, length - 100 cm.
- Planks - spacers (2 pcs.) 15 mm thick, 80 cm long
- Self-tapping screws (galvanized).
- Clamps.
- Carpenter's glue.
- Screwdriver.
- Saw (jigsaw).
- Metal crutches. Choose a length of at least 50 cm.
If you plan to create a small concrete bridge, then prepare:
- plastic boxes - 2 pcs.;
- steel rod Ø 6 mm - 2 pcs.;
- plastic clamps - 8–10 pcs.;
- flexible aluminum wire;
- cement M500;
- sifted sand;
- acrylic paint (brown and beige);
- ropes.
Step-by-step assembly instructions
To make a decorative bridge for the garden with your own hands, follow a gentle sequence of actions. Choose a simple type of design that does not require much time to construct.
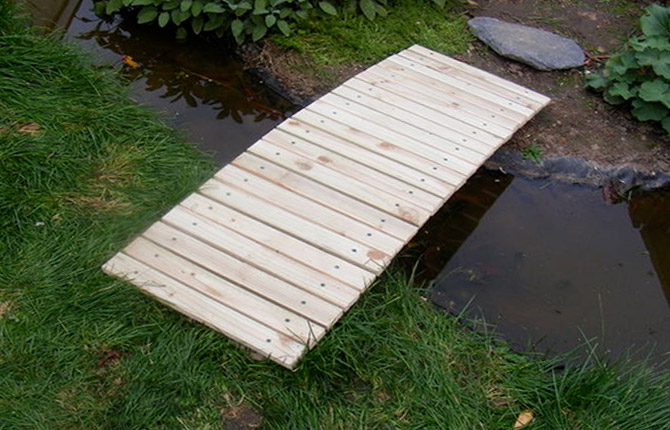
Wooden walkways
Given the easy processing of wood, such an object can be made within a few days.
Step-by-step instruction:
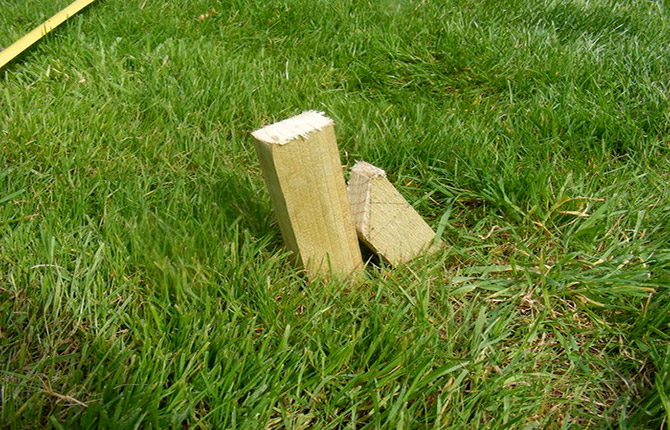
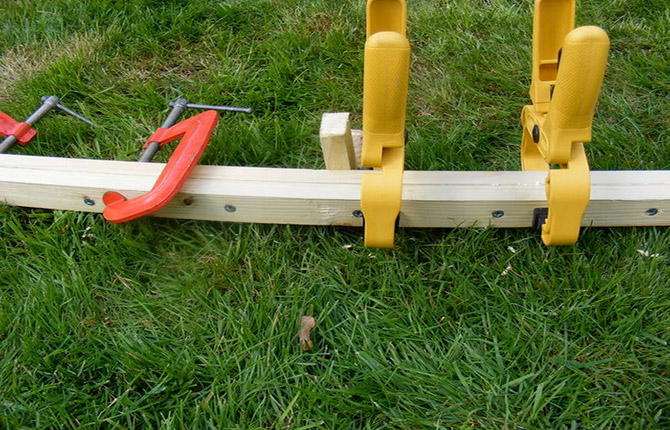
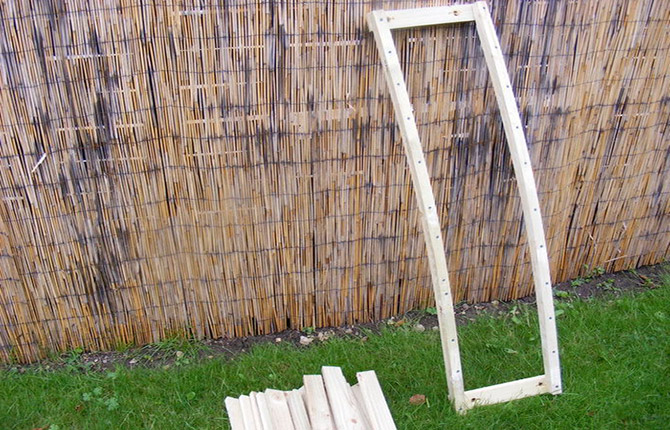
- To give the future base of the decorative bridge the desired curvature, stakes are driven into the ground, orienting them so that timber can be laid between them.
- To ensure flexibility, the bars are first soaked in water. Then they are inserted between the fixed stakes, connecting in pairs. Wood glue is used for fixation. They are clamped with clamps, and self-tapping screws are screwed in to ensure a stronger connection.
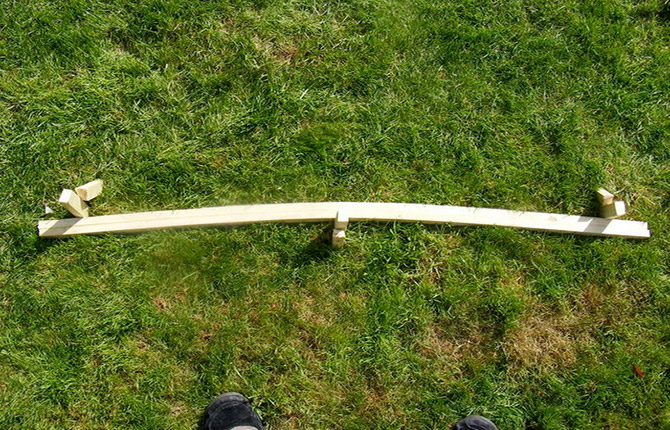
- Hold until the resulting bend takes on a static shape.
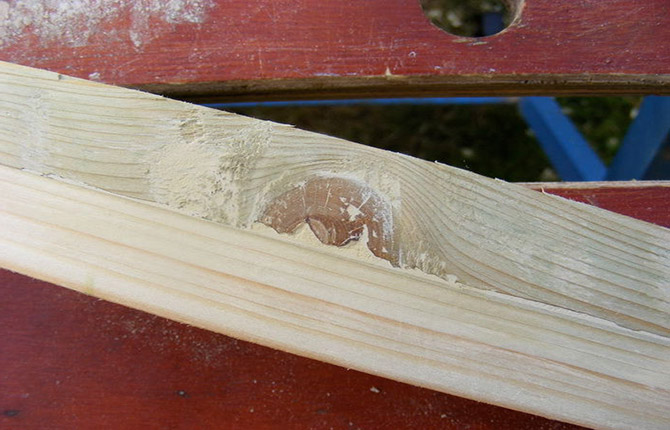
- After complete drying, inspect the prepared curved bases. Identified chips, potholes, cracks, as well as joints between beams need to be puttied.
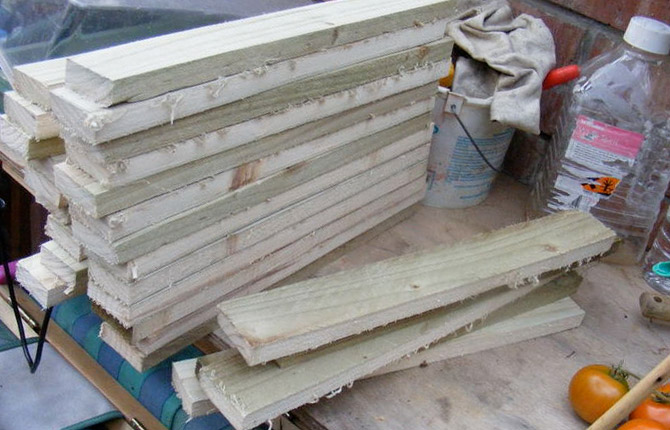
- Cut the crossbars to the required size. This bridge will require meter-long pieces of board.
- All edges (longitudinal and transverse) are processed using a 45° bevel.
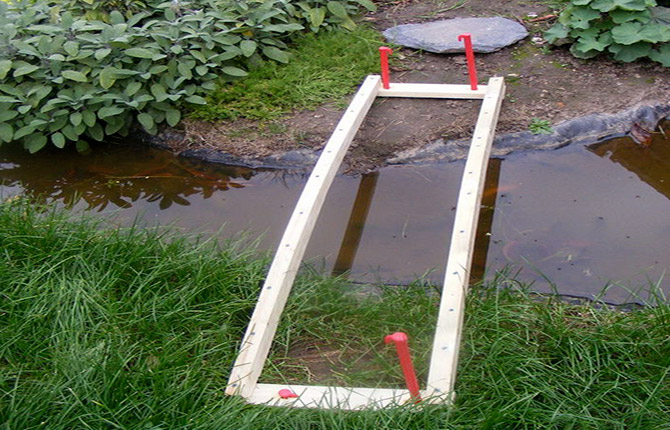
- For a decorative bridge 0.8 m wide, two strips are cut - spacers of the appropriate length. They are fixed with self-tapping screws along the edges of the beams, creating a frame. Drill two holes in the planks.
- Install the frame for the decorative bridge at the selected location. The soil is pre-leveled. For fixation, metal crutches are driven through prepared holes on the transverse strips.
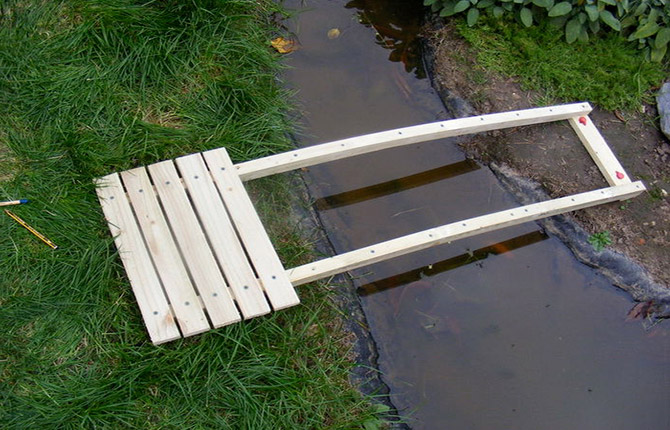
- A deck of transverse boards is attached to the frame, leaving a small gap between them. To avoid rust, galvanized screws are used.
- This continues along the entire length of the decorative bridge being manufactured.
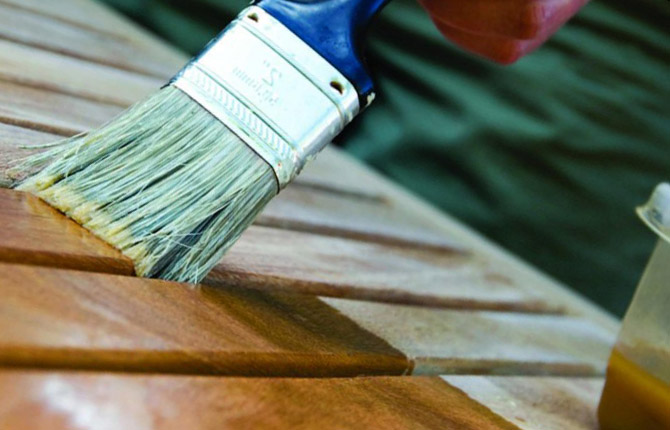
- To ensure the protection of wood from destruction and rotting, bridge structures are impregnated with special compounds. This can be varnish, drying oil, waterproof paint.
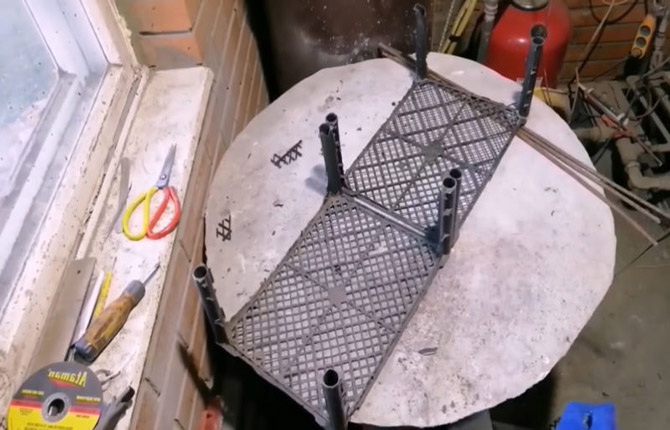
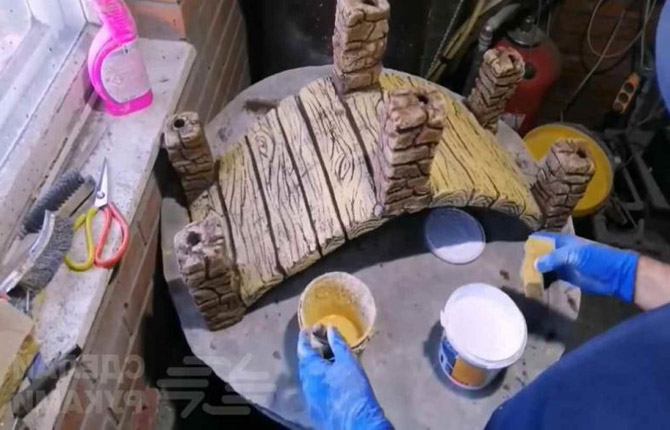
Simple miniature concrete bridge
Manufacturing such an object does not pose any problems.
Algorithm:
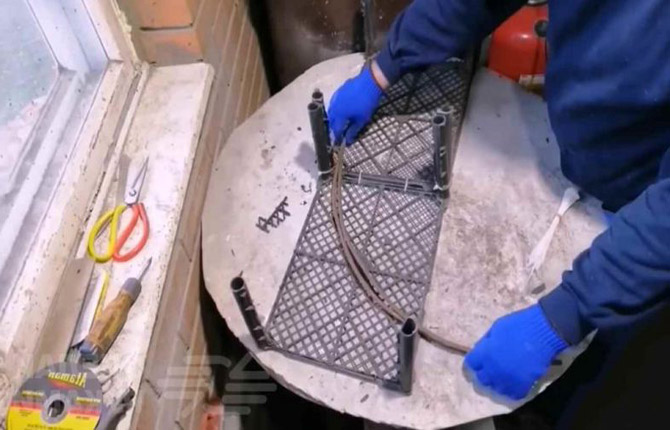
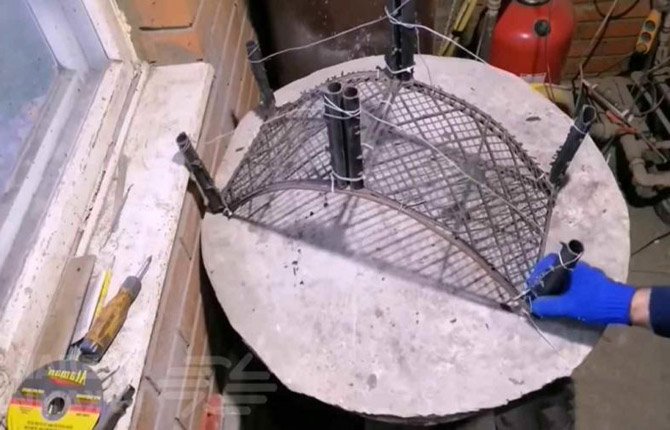
- They make the basis for a future crossing. To do this, the side walls of two plastic boxes are removed using scissors. What remains is the bottom and four corner posts. The workpieces are connected to each other with plastic clamps.
- Steel rods are bent to form arches of the desired shape.
- Screw the curved rods using flexible wire to the sides of the connected workpieces. To keep the posts level, string a wire between them.
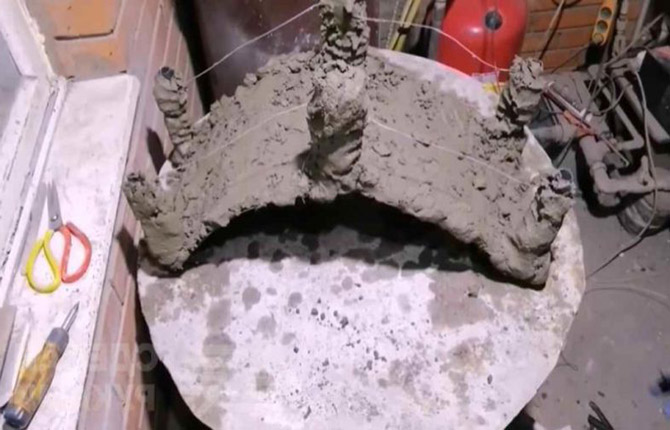
- Mix the concrete mass from M500 cement and sand in a ratio of 1:2. Add water gradually to obtain a uniform viscous consistency. Distribute concrete over the frame. After this operation, it is left for a day.
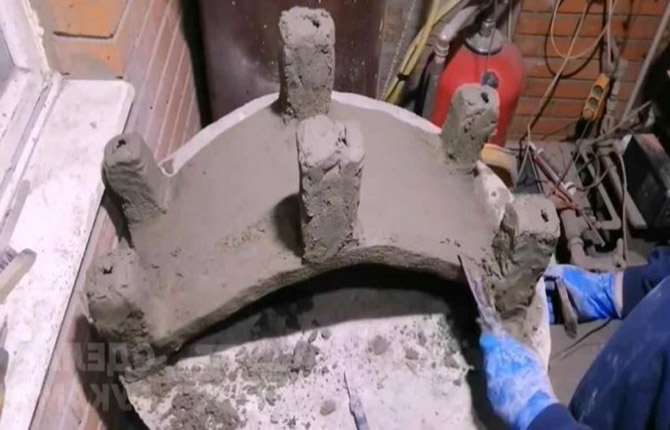
- After 24 hours, cement is applied from the inside out, and then the front surface is leveled.
- When the solution has set a little (after 2-3 hours), strokes are applied, creating a wood texture on the flooring. An imitation of masonry is made on the beams. Leave the workpiece to dry for 5-8 days.
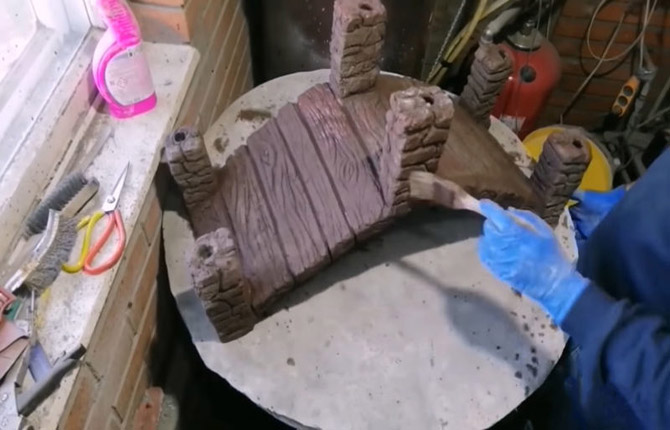
- Remove excess cement deposits with a stiff brush. Apply a layer of brown acrylic paint mixed with primer.
- Then a light paint oriented towards outdoor work is applied with a sponge.
- After the paint layer has dried, the rope handrails are tightened.

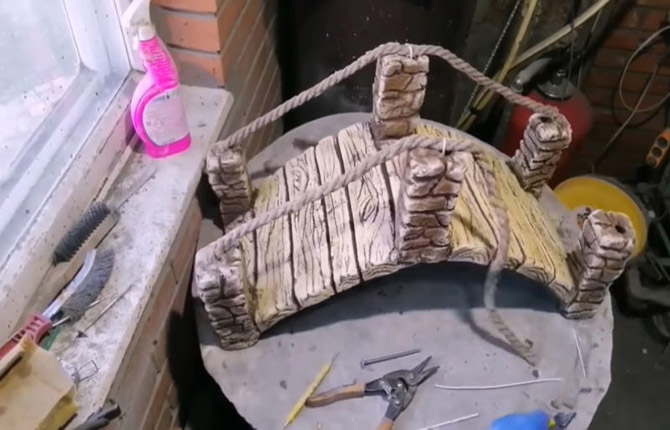
A miniature finished bridge is ready for installation on site.

Articles for you:
- How to make a pond with your own hands
- Cheap and beautiful fence for the home
- How to beautifully design garden paths from paving slabs “Krakow Clover”
- How to properly make a cellar at the dacha with your own hands in the ground and on the surface
There are many ideas to help you understand how to make a decorative bridge. They create such attractive objects that decorate the landscape from different materials. If you found the information in this article useful, please share it on social networks. If possible, tell us about your experience in making garden bridges in the comments.


I have a corner on my property where a large cesspool has formed, surrounded by berry bushes. I want to put a wooden deck across this ravine. How to prepare the soil so that the tree lasts longer?
After choosing the place where the wooden flooring will come into contact with the soil, first level the surface. Then add a layer of pebbles. You can use stones that go a little deeper. A small concrete platform protects wood well from rotting.
I have a flat dacha plot. I would like to install a beautiful wrought iron walkway. What to do so that it does not turn out to be a foreign object?
The best solution would be to lay a dry stream. First, its contours are marked on the surface. Then they dig a shallow trench, the bottom of which is covered with geotextile to keep weeds out. Lay stones and pebbles. Large cobblestones are oriented near the shores. You can place a flower garden next to the stream. All that remains is to install the bridge.