How to build a “Breadbox” greenhouse with your own hands: drawings, dimensions, instructions
For most summer residents, building a greenhouse "Bread bins" DIY - the best option for growing seedlings in small areas. The design gained fame and popularity thanks to the principle of the hinged top of the greenhouse. Of all the options, the bread box can be considered one of the most convenient solutions.
The content of the article:
Description of design
Greenhouse "Breadbox" made from a profile pipe is also found under the names “shell”, “clamshell”. This is all the same version of a greenhouse or greenhouse, its structure reminiscent of a home box for storing bread.
Structurally, the greenhouse consists of three elements:
- The base is a fixed rectangular box on a frame made of a profile pipe, covered with film or carbonate.
- The upper part of the arched type is based on a ¼ arc, installed on top of the base, covered with film or polycarbonate. In some models, greenhouses are made stationary, but more often they are movable on hinges.
- The inner part of the “Bread Box”, or flap, the size of a quarter of a circle, is mounted on hinges. The peculiarity of this design is that the sash can rotate around a horizontal axis by 1/2 sector.
When opening the greenhouse, any outer or inner door of the “Breadbox” greenhouse can be lifted by hand. That is, the lid can be opened from any side. This is convenient if you need to open the seedlings for ventilation and illumination, depending on the location of the star in the sky.
Construction process
The structure can be welded or assembled from a profile pipe with bolts and angles. The cladding of the “Breadbox” is made of polycarbonate. In the first case, the greenhouse-breadbox is of a stationary type, in the second the structure can be disassembled and stored in a shed at the dacha before the onset of the seedling growing season. It can be made from wood, but the quality is much lower.
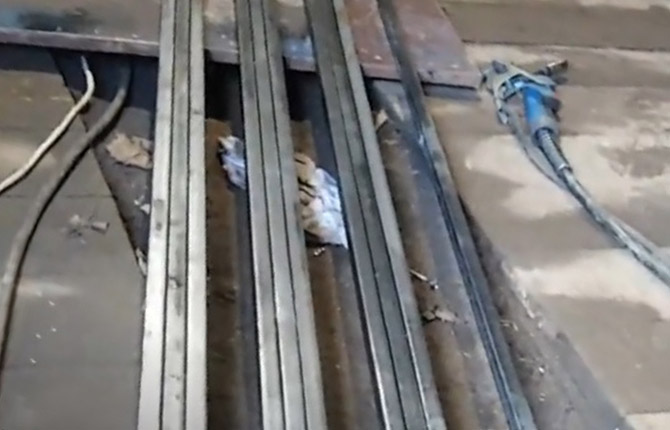
Preparation of tools and materials
The step-by-step process of building a greenhouse consists of the following stages:
- blanks from the profile pipe are cut, then the outer and inner doors are welded sequentially;
- the profile pipe is cut in the same way and the frame of the fixed base is welded;
- install hinges;
- The frames of all three parts are covered with cellular polycarbonate.
To make a “Breadbox” greenhouse, you will need to work with a profile pipe 20x20 mm, 20x40 mm in the amount of 20 m each. The frame is covered with cellular polycarbonate 6-8 mm thick. The dimensions of the greenhouse are chosen so that the carbonate can not be cut out in pieces, but sewn on with cut panels of 200 cm each.
You can cover the greenhouse with plastic film, but it is enough for a maximum of a season; besides, polycarbonate has a much better degree of transmission of infrared and ultraviolet waves, which are most useful for seedlings and greenhouse greens. Yes, and you will have to place it away from the trees.
Fastening polycarbonate to a frame made of corrugated pipe is a rather difficult task; you have to use special fasteners (screws) with compensating washers. The situation is worse if it is necessary to join two polycarbonate sheets. In this case, it is necessary to use special strips laid at the joint between the panels.Therefore, most often “Breadbox” greenhouses are built in small sizes, and in addition, the larger the frame, the more difficult it is to manage the doors.
Tools you will need:
- pipe bending machine;
- welding machine;
- Bulgarian;
- set of metalwork clamps;
- measuring tool;
- screwdriver with drill bits and hexagon socket.
In addition, before final assembly, weld the hinges and paint the metal with enamel paint.
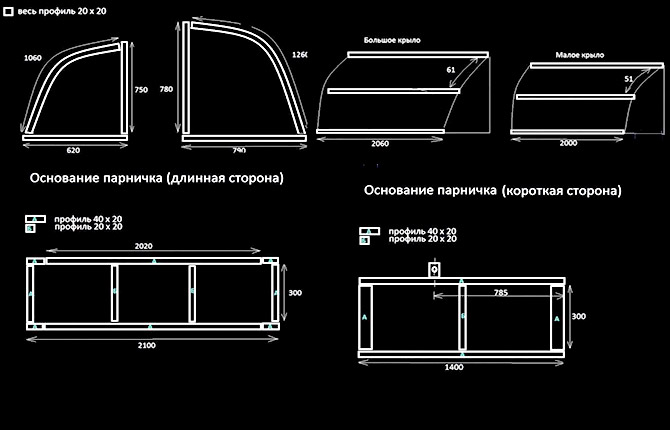
Calculation of dimensions and creation of a drawing
First of all, it is necessary to calculate the dimensions of the movable doors of the “Breadbox” greenhouse. Since the inner part goes completely under the top, they cannot be the same size.
All arcs used in the manufacture of sashes are cut from two identical blanks, bent in advance on a pipe bending machine. Therefore, their radius of curvature, regardless of size, is the same. Only the length of the sector around the circumference differs.
The inner arch length is 106 cm, the outer one is 126 cm, respectively, the side legs for the first are 75 cm and 62 cm, for the second - 78 cm and 79 cm.
Assembly is carried out by installing three horizontal crossbars. On the inner sash, profile sections of 15x15 mm are sewn in increments of 51 cm along an arc, on the outer sash - in increments of 61 cm.
The lower base of the “Breadbox” greenhouse for beds is made of corrugated pipe 40x20 mm and 20x20 mm in the form of a regular rectangular frame. Drawings, or rather sketches with dimensions, are given below.
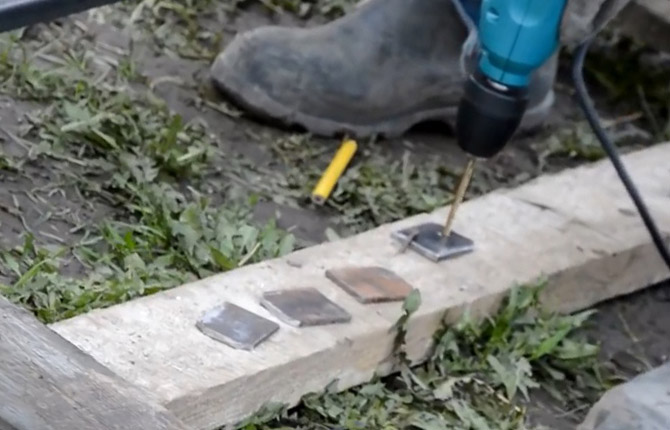
After assembly, you need to remember to weld a couple of plates under the hinge on the base of the “Breadbox” greenhouse. The plates are made from steel strip 5 mm thick.
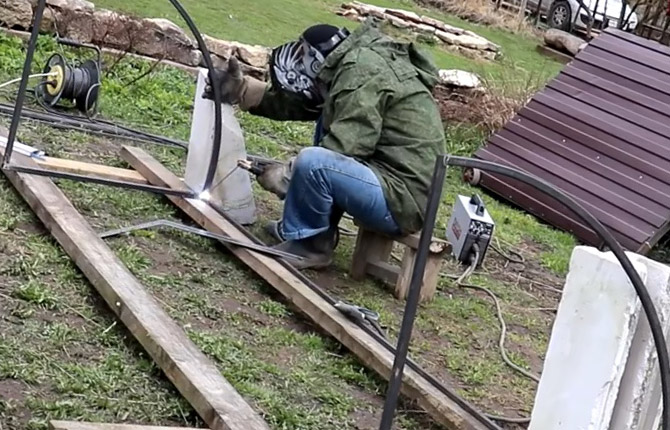
Assembling the sashes
The first step is to assemble the sides of the “Breadbox” greenhouse. To do this, a set of two legs and an arc is laid out on a sheet of fire-resistant material.Before welding the parts, you need to make sure that they are in the same horizontal plane, otherwise the sidewall after welding may turn out crooked.
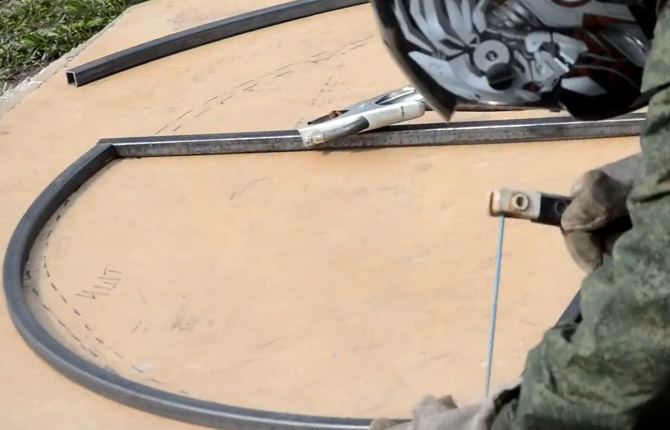
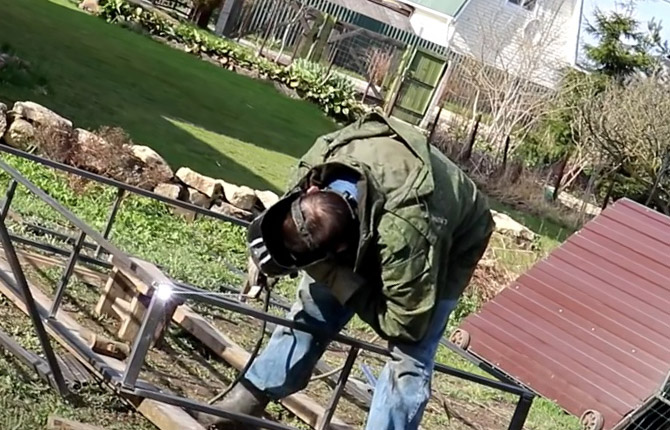
Next, you need to set the two sidewalls vertically, fix them at a distance equal to the crossbar and weld first the bottom, then the top. After adjusting the sash geometry, the middle horizontal cross member is additionally welded.
After welding, the frames of the two sashes are inserted into each other. Moreover, this must be done immediately, and not postponed until the final stage of assembling the “Breadbox” greenhouse. This marking will help clarify the gap between the corner parts. It should be within 10 mm.
If the distance is greater, then it is necessary to slightly bend the frame. In any case, both frames should not touch each other.
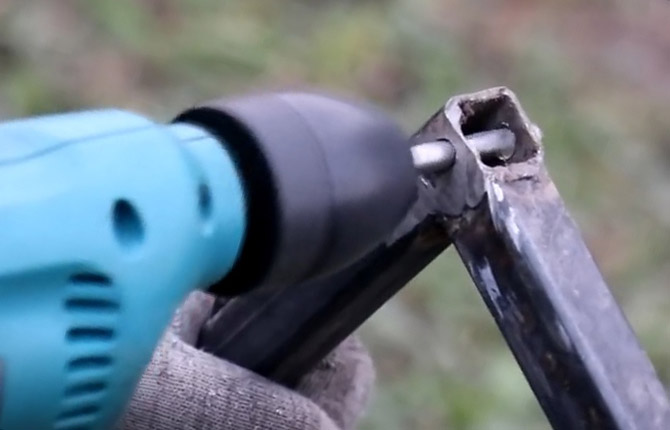
Another nuance - to make the upper part of the greenhouse, a profile pipe with a small cross-section and wall thickness is used. Therefore, you need to cook with an electrode in spots. Complete digestion of the seam line will need to be done after the final adjustment of the geometry of all parts of the greenhouse frame.
Advice! If possible, it is advisable to use a carbon dioxide semiautomatic machine for welding work.
Particular attention should be paid to welding the corner of two legs. In this place, it is advisable to weld an additional reinforcing gusset plate or install a 10-15 cm long insert-strut in each corner.
Making a greenhouse base
The lower part of the “Breadbox” greenhouse is a rectangular double frame 140x210 cm. The height of the vertical frame posts is 30 cm. To make the base of the “Breadbox” greenhouse, you will need to cut six blanks from a 20x20 mm profile, 300 mm long.Corner posts (4 pcs.) are cut 300 mm each from a 40x20 mm profile pipe.
The first step is to weld two frames measuring 140x210 mm from a 40x20 mm profile. The scheme is as follows: first, a pair of two sections of 140-210 cm are welded at a right angle. You need to cook on a flat base, strictly maintaining the angle.
Then two letters “G” are laid out on boards, secured with clamps and welded into a rectangular frame. Welding seams will need to be beaten with a hammer to remove slag, scale, and drops of metal. To make the base of the “Breadbox” greenhouse, two such frames will need to be made.
Next, we remove one of the frames, and vertically 30 cm sections are welded to the second according to the drawing. In the corners - from a 40x20 mm profile, so that the frame of the greenhouse is more or less stable. The remaining racks are made from a 20x20 mm or 15x15 mm profile. Strength and stability for a greenhouse - “Breadbox” is enough even with 10x15 mm.
Each part is first grabbed with one point, then aligned using a square in two perpendicular vertical planes. Only after this can a full seam be made.
Once all the vertical posts are welded, you can lay the second rectangular frame on top. It needs to be fixed with clamps in the corners on the racks, if necessary, bend them so that the dimensions completely match.
Important! The posts are welded between the top and bottom frames, not on top or from the inside.
Next, the parts of the “Breadbox” are welded, first at the corners, then the remaining racks are welded together.
Assembling the rotary unit and installing the sashes
Now you need to install the rotating “roof” of the greenhouse on its base. For the first time, the doors of the “Breadbox” are laid out on the base for fitting.You need to select the places where the hinge plates will be installed.
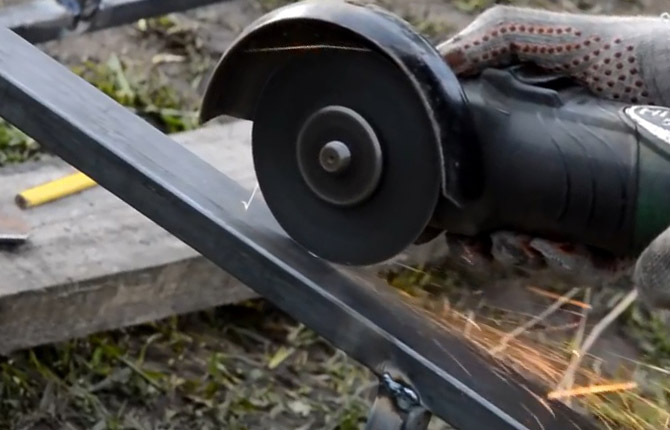
At the same time, you will need to mark the holes for the bolts and nuts. They will perform the functions of rotary axes. After marking, the location for installing the plates is determined. You need to cut along the line with a grinder.
Since the plate is quite thick, the cut must be made twice so that the hole width is at least 6 mm.
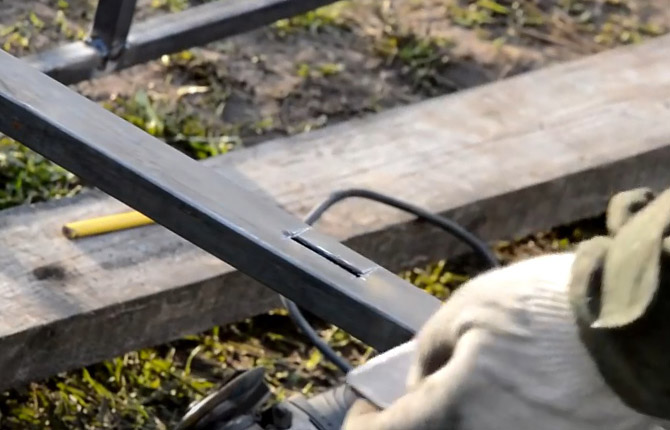
The same cut needs to be made on the back side of the profile. Next, you need to cut four 5x3 cm plates from steel 5-6 mm thick. In the upper part it is necessary to drill holes for the axles.
The same holes are drilled in the corners of the doors of the “Breadbox” greenhouse.
After drilling, all the plate parts and both doors are laid out on the base of the greenhouse, and a bolt is threaded through the holes. This must be done on both sides of the “Breadbox”. While the plates are not welded to the upper profile, you need to open and close the doors a couple of times to make sure that nothing interferes with the movement of the greenhouse halves.
If there are no problems with turning the wings, then the plates can be welded to the base of the “Breadbox”.
It is clear that after welding, the seam must be cleaned of scale and slag, and it must be opened with a primer with a rust converter. Of all the parts of the Khlebnitsa greenhouse frame, this unit breaks down most often.
If according to the greenhouse design it is planned to constantly open and close the doors of the “Breadbox”, then instead of a bolt with a nut, install a hardened steel axle with a diameter of 6 mm. The wear on the surface of a “raw”, soft bolt is an order of magnitude higher than on hardened steel.
Healthy: DIY greenhouse heating system
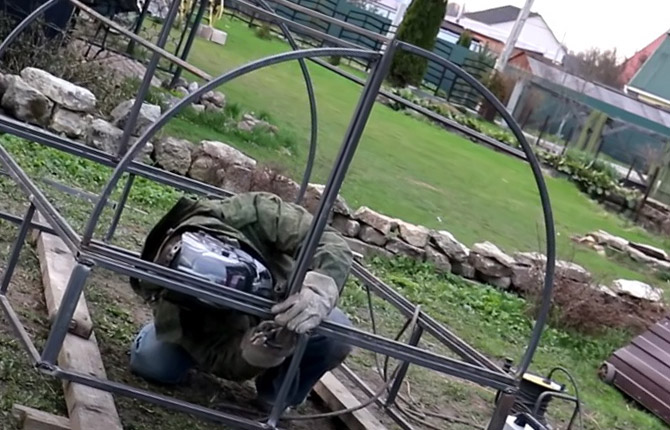
Installation of the “Breadbox” greenhouse frame
The greenhouse will be convenient to use if you install it not on the ground or pallet, but raise it higher.So that any person, without bending too much, could open and close the door of the “Breadbox”.
The easiest way is to place the frame of the greenhouse on its side and weld one reinforcing rod with a diameter of 10-12 mm to the corner vertical posts. When installed, the rods will penetrate deeply (10 cm) into the soft soil, thereby ensuring reliable fixation of the “Breadbox” greenhouse on the site.
After attaching the posts, the greenhouse will need to be disassembled. Sand all metal surfaces with sandpaper (to white metal), then wipe first with a dry cloth, then with a clean cloth soaked in a solvent, for example, P647.
Since it is planned to grow seedlings inside the “Breadbox,” heat and high air humidity will eventually lead to intense rusting of the metal. Therefore, it is advisable to pre-prime all metal parts of the greenhouse, dry them, and only then can they be painted in any color, not necessarily green.
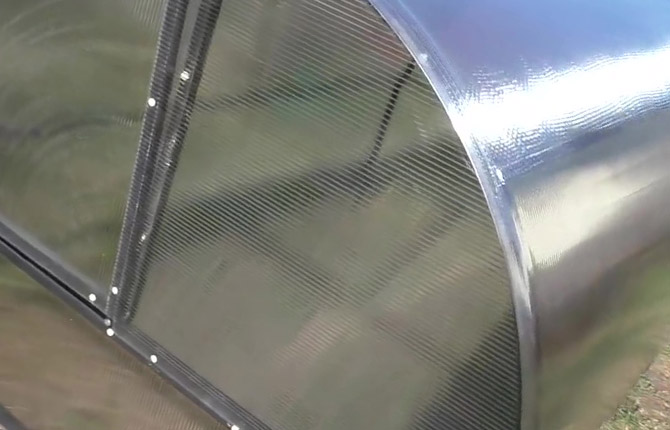
We cover the frame with polycarbonate
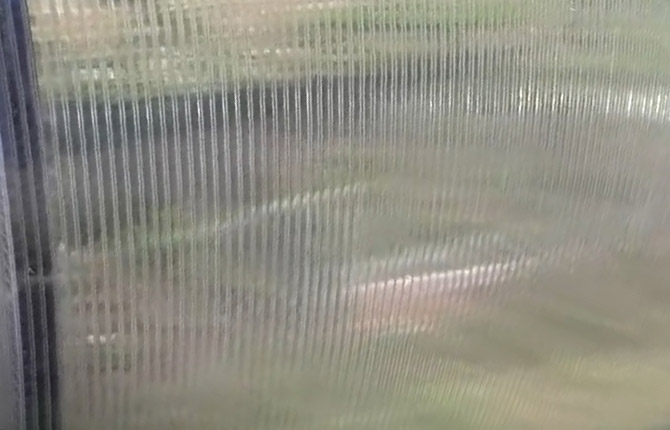
If you look closely at the structure of cellular polycarbonate, you can see that it consists of two layers separated by partitions. At the same time, the panel is quite soft, it can be bent in an arc. Moreover, according to the instructions, polycarbonate on rounded surfaces must be laid “edges” parallel to the arcs.
Otherwise, over time, the cladding will lose its original tension and sag like a bubble, like plastic film in the wind. More detailed recommendations should be looked at depending on the brand of material.
On all other surfaces of the “Breadbox” of the greenhouse, polycarbonate is mounted so that the ribs are positioned vertically.This is done intentionally in order to allow water condensation that falls inside the honeycombs to flow freely down the walls.
The top edge of the polycarbonate must be covered. For roofing coverings of roofs, awnings or canopies, special end strips are used. For a simple “Breadbox” greenhouse, it is enough to seal the top edge of the canvas with ordinary tape.
Since the frame of the greenhouse is assembled from a steel profile pipe, to fasten the cellular polycarbonate you need to use special self-tapping drills with a hexagonal head, a wide metal washer and a silicone gasket.
You cannot fasten polycarbonate with ordinary metal screws or bolts and nuts. Carbonate has a very high coefficient of thermal expansion. If the material heats up from the sun's rays, its length may increase by 2-3 mm. Accordingly, the lining on the “Khlebnitsa” greenhouse can inflate with bubbles in the heat, and in the cold of night it can become stretched, even to the point of damage and rupture of the canvas.
Therefore, you need to attach polycarbonate to the greenhouse frame in the following order:
- Pieces of the required size are cut out of a 6-meter canvas.
- Carbonate blanks are laid out on the frame and secured with tape. It is advisable to disassemble the bread box in advance, this makes it easier to work with self-tapping screws.
- Mark the points for screwing the fasteners into the metal profile.
- A hole with a diameter of 2.5 mm for self-tapping screws is drilled at the points, and at the same time a hole equal to the diameter of the fastener plus 1.1-1.5 mm is knocked out using a special die-cutting tool.
- The fastener is inserted into the prepared hole and screwed until the silicone washer comes into contact with the polycarbonate surface.
The carbonate should only be slightly pressed against the corrugated pipe; you can even check it with your hand, but most often visual inspection is sufficient. The silicone washer reliably protects the hole in the lining from water ingress, and the gap between the screw and the blade allows the latter to expand freely during heating or cooling.
Results
Building a “Breadbox” greenhouse with your own hands is no more difficult than a regular greenhouse or greenhouse on a wooden frame. All that is required is to accurately assemble the rotary assembly so that the edges of the doors do not catch when opening and closing. It is also necessary to correctly cut and secure the polycarbonate to the metal frame of the building.
Tell us about your experience building the “Breadbox” greenhouse. What problem areas do you think need to be addressed first? Also bookmark the article and share it on social networks.

The greenhouse is cool, but it turned out to be too heavy. It's easier to make it from an aluminum profile. From experience, I’ll say it’s twice as easy; I take it out of the barn myself in the spring, without even disassembling it. But you can’t leave it for the winter - the corrugated pipe rots, the quality of the metal is poor.
Have you tried it from a polypropylene pipe? The same can be done and it will turn out much warmer, maybe even cheaper from a profiled one.