How to make a drainage well with your own hands and connect pipes to it
Basements and ground floors of private houses located in areas with high groundwater levels are often subject to flooding, which can ultimately lead to the destruction of the foundation. A complete drainage system installed around the house will prevent this.
We will tell you how to arrange drainage and install a drainage well with your own hands. The article presented for consideration describes in detail the design of a system for collecting and draining groundwater to drain it from the foundation. Options for constructing wells are listed and installation methods are described.
For a visual understanding of complex information, it is accompanied by useful diagrams, collections of photos and video tutorials.
The content of the article:
Purpose and design of the drainage system
Drainage must be carried out if the house is located in a low-lying area, or the groundwater level is higher than the ground floor or basement of the building, and there is a risk of flooding. It is especially important to do site drainage, located on clay soils that are prone to heaving when the lower layers freeze during the cold period.
The drainage system simultaneously performs several important functions:
- reduces groundwater pressure on the walls and floor of the house;
- prevents flooding of basements;
- drains the area adjacent to the building.
It is advisable to carry out the arrangement of drainage at the stage of digging a foundation pit for the house, so as not to disturb the landscape of the site when outbuildings have already been erected and equipped on it.
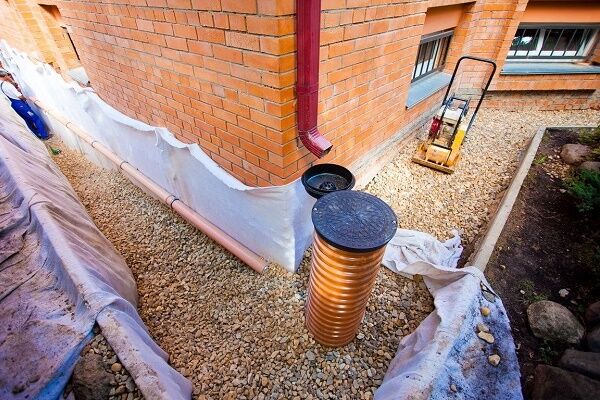
For arrangement drainage system around the perimeter of the house a trench is being developed. It should be located at a distance of one and a half to three meters from the foundation pit or building (if the house has already been built).
Then a closed pipeline is laid into it, and one or more drainage wells are installed in the necessary places. The number of wells and pipe channels depends on the area of the site, the depth of groundwater, and the type of soil.

Some people confuse the drainage system with the stormwater system, but the difference between them is quite significant. Storm drainage is designed to drain rainwater and, as a rule, is located on the surface. The depth of the drainage pipes should be below the base of the foundation.

You can read about how to develop a drainage system project for collecting and draining groundwater, draining and landscaping the site in another popular article our site.
Main types of drainage wells
There are several types of wells, which differ from each other in their purpose, material of manufacture and size. The design of drainage wells of different types is almost the same.
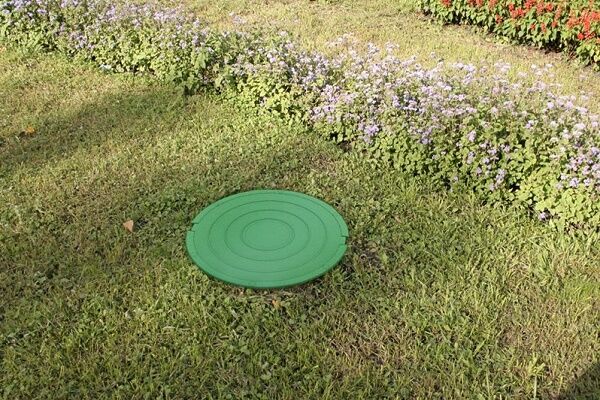
They are a container with a closed bottom, into the shaft of which pipes are supplied drainage sewer. The well is completely immersed in the ground, and its top is covered with a hatch.
The main difference between wells is their purpose. Each type is designed to perform a specific function and is located in a specific place in the drainage system.
Characteristics of manholes
Inspection or otherwise inspection drainage wells are intended for:
- conducting routine inspections of the sewer system;
- monitoring the performance of the pipeline;
- periodic cleaning of pipes and carrying out repair work.
Inspection wells are installed in places where there is the greatest likelihood of contamination or silting of pipes. Their sizes are selected taking into account the characteristics of the sewer system. In small pipelines, as a rule, they are installed inspection wells with a diameter from 340 to 460 mm.

Large drains are equipped with drainage structures with an internal diameter of up to one and a half meters. Some containers are equipped with steps for convenient descent. An adult can easily fit into such a well to carry out work on cleaning or repairing the pipeline. Cleaning the system is carried out by flushing the pipes with a jet of water under pressure.
A type of inspection wells are rotary structures, which are located at the corner joints of pipes. They do not have to be installed on every turn; they are usually installed across the corner.
When installing rotary wells, it is necessary to take into account the design drainage system and install them so that all corner and cross sections of the pipeline can be brought to them.

Purpose of storage structures
A collector or in other words a water intake well is used to collect and accumulate water and its subsequent pumping into a reservoir or drainage ditch. It is a large container with a diameter of up to one and a half meters, into which all the pipes of the drainage system are diverted.
It is installed in places where it is impossible to install a filter well or to divert water collected by the sewer into a drain. As a rule, they are taken outside the site.

The water intake tank is usually equipped with an electric pump, which pumps the accumulated liquid into a reservoir or for watering a garden. Typically, an automatic system is installed in storage tanks, which, when the tank is filled to a certain level, pumps out water automatically.
Features of absorption tanks
Filter wells are used in areas with slightly moist soil, located far from natural bodies of water and not equipped with drainage systems. In this case, the amount of water to be pumped should not exceed 1 cubic meter. m per day.
The shape of the well can be round with a diameter of up to one and a half meters, or rectangular or square with an area of no more than 6 m.Typically, concrete rings or plastic containers are used to make a well.

Device absorption well differs from other types of drainage containers in that it does not have a sealed bottom. Instead, a filter system is installed at the bottom of the well, which passes dirty water runoff through itself, cleans it of debris and discharges it into the deep layers of the soil.
Material for making drainage wells
Wells for arranging a drainage system can be made yourself from concrete rings, or you can buy ready-made plastic containers of the required size and install them on the site. It’s up to you to decide how to make a drainage well, but it’s worth considering that the first option is cheaper, but much more labor-intensive to manufacture, the second is simpler, but somewhat more expensive.
Making a well from concrete rings poses a number of problems. Due to the large weight of concrete structures, you may have to hire special equipment and invite assistants. They need to make holes for pipes, which is also quite difficult.
However, the complexity of installing a concrete well is justified by its great reliability, strength and durability. Concrete structures are practically invulnerable to any negative influences.
They can be installed in any place and even in areas standing on soils subject to hydrothermal movement and heaving during freezing, where plastic structures can be deformed.
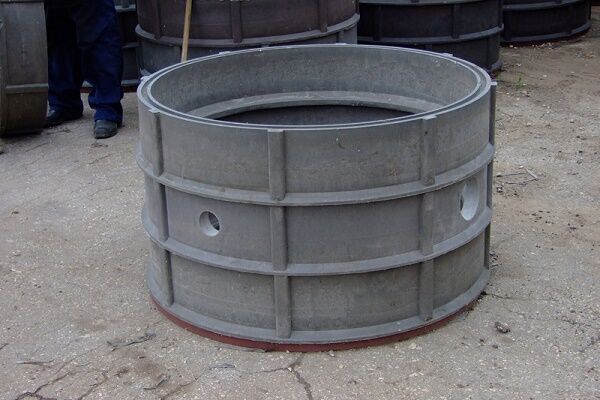
Modern plastic containers are also very reliable, and in addition, they are convenient and easy to install, weigh little and are easy to assemble. Their body already has holes of the required diameter for connecting pipes.
Many people resort to a combined installation option in order to save money. For inspection and rotary wells, plastic tanks are purchased, and the filter and storage tanks are made of concrete rings. There is another available option - to make a well yourself from plastic pipes; how to do this is described below.

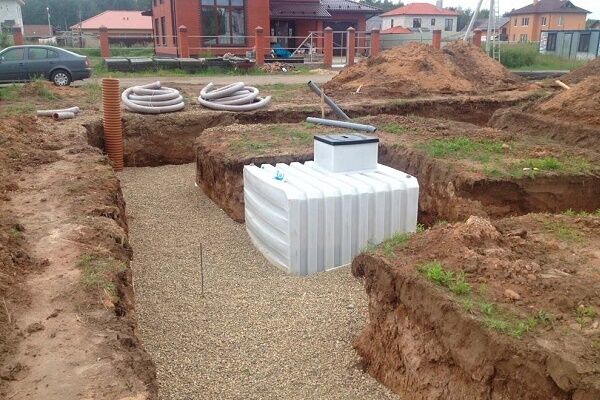
Basic principles of drainage arrangement on the site
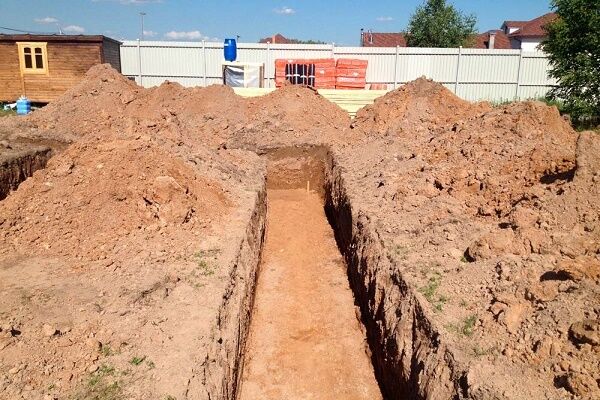
To install the drainage system, the highest point of the site is selected, and a trench is dug from it with a slope of 2 to 5 cm, two meters deep, where the pipes are laid. Rotary wells are installed in the corners, and inspection wells are installed in the places of nodal connections.

The end point of the sewer system, where everything leads pipes laid with a slope, is a filter or storage well from which forced or natural drainage of water is carried out.
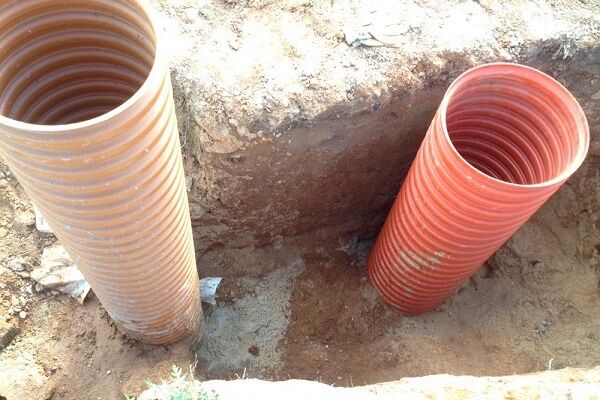
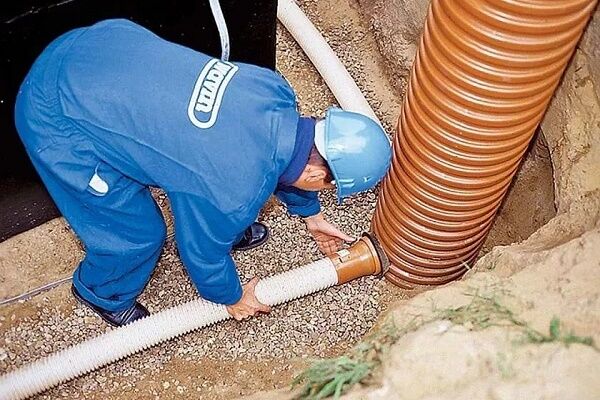
For the installation of drainage sewerage, it is recommended to use special corrugated pipes with perforation, made of PVC or polyethylene. They have no technical restrictions on installation and are very easy and simple to install. Depending on the size of the outlet holes in the drainage well, you can purchase pipes with a diameter of 50 to 200 mm.

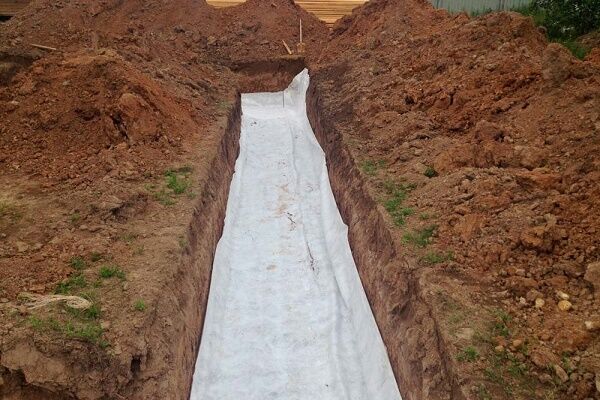
For the full operation of the entire sewer system, it is necessary to carry out a number of preparatory measures. Sand is poured into a 5 cm layer at the bottom of the trench and compacted thoroughly. Then the bottom and walls of the ditch are covered with geofabric, which will serve as a filter to prevent siltation of the system.
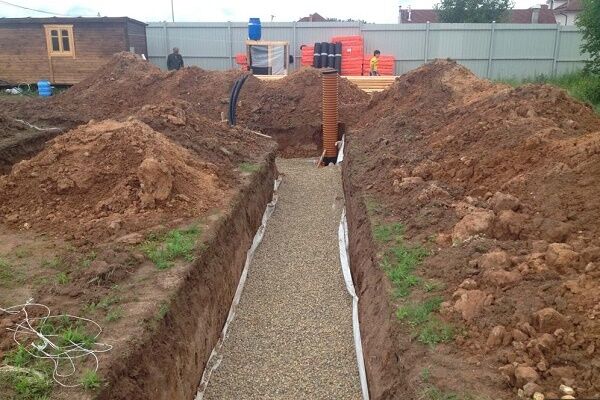
This is followed by a layer of crushed stone, approximately 10 cm on which is placed perforated pipe, is covered with another layer of crushed stone and wrapped in geofabric with an overlap. On top of this “pie” is poured a layer of earth, which was selected when digging the trench.

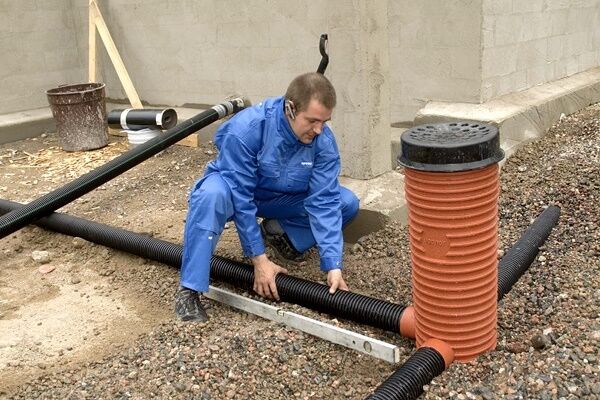
Production and installation of plastic wells
The installation process depends on the type of well. For viewing, rotary and storage structures it is necessary to make a concrete base.Absorption wells without a bottom require the installation of a filter system.
How to install an inspection and collector well
If you purchased a ready-made plastic container, then you only need to install it on a pre-prepared base. The installation of both types of wells is practically the same. The difference can only be in size, number of outlet pipes, as well as in horizontal or vertical arrangement.
Inspection rooms, as a rule, have a vertical design; storage rooms can be made horizontally or vertically. In addition, collector wells are usually equipped with a drainage pump and pipes are discharged into a drainage basin.

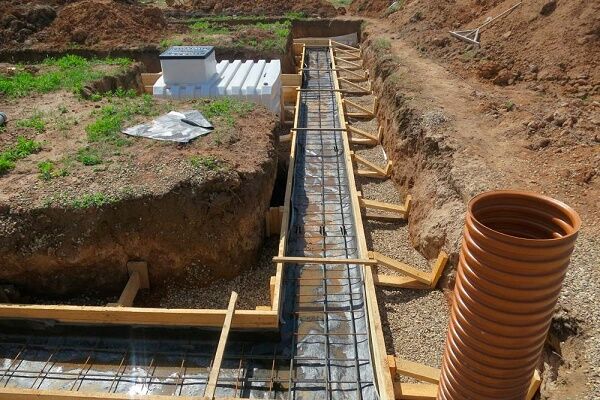
Before constructing a well for collecting and discharging drainage water, dig a ditch, carry out preparatory work as described above, and lay pipes, but do not fill it up yet.
Well installation consists of the following steps:
- deepen the area where you plan to install the well, it should be 40 cm deeper than the level of the pipes;
- pour and compact a layer of sand and crushed stone;
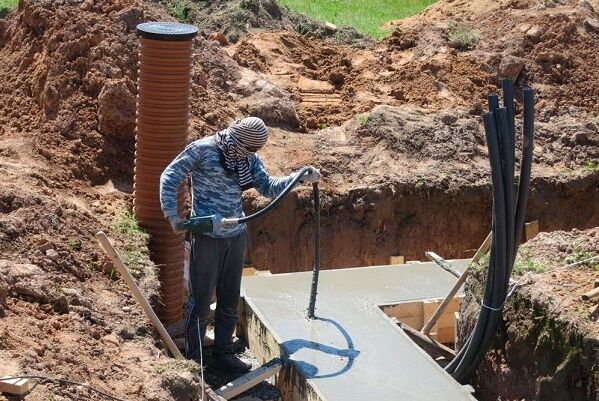
- prepare a concrete solution (3 parts sand and 1 part cement) and fill the bottom with it;
- after the base has hardened and is completely ready (this will take about 2 days), lay a layer of geotextile;
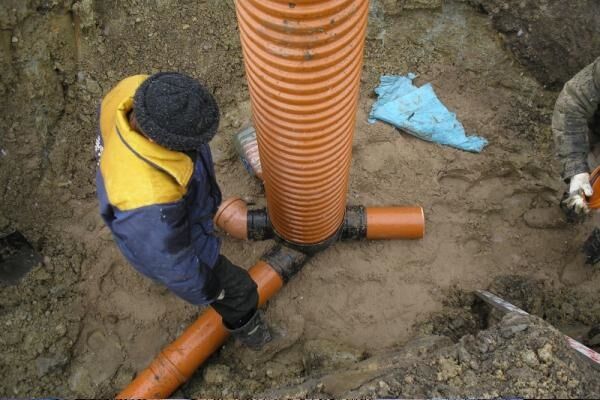
- Place the container on a concrete base and connect it to the pipe bends;
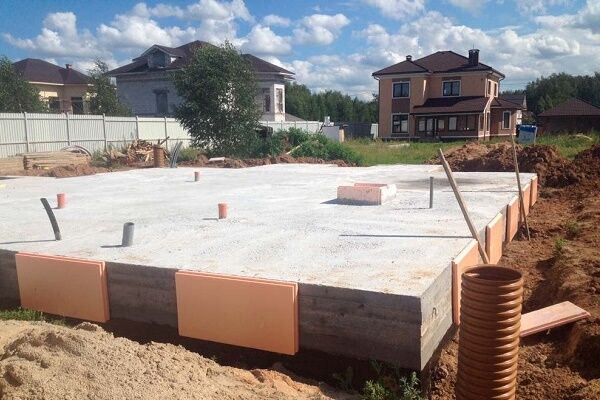
Finally, mount the hatch on top, fill the structure on all sides with crushed stone and soil.
Installation of a plastic absorption structure
To install a filter well, you will need plastic containers without a bottom. Their installation is carried out in the same way as described above, with the exception of pouring a concrete base. Instead, a filter system is made at the bottom of the well that purifies the incoming water naturally.

A layer of gravel, crushed stone or other similar material 20-30 cm thick is poured into the bottom. Pipes are brought into the upper part of the well, the structure is covered on all sides with crushed stone or gravel, the top is covered with geofabric and closed with a hatch.
Making containers from plastic pipes
If you don't have finished plastic container, you can make it yourself. To do this, you will need a plastic pipe of a certain diameter (35-45 cm for inspection and rotary structures and 63-95 cm for collector and absorption structures). In addition, it is necessary to purchase a round bottom and a plastic hatch in accordance with the size of the pipe and rubber gaskets.
Manufacturing algorithm:
- Cut the plastic pipe to the required size to match the depth of the well.
- Approximately at a distance of 40-50 cm from the bottom, make holes for the pipes and equip them with rubber gaskets.
- Attach the bottom to the container and seal all seams with bitumen mastic or other sealant.
Installation of a homemade drainage tank is carried out according to the above described scheme.
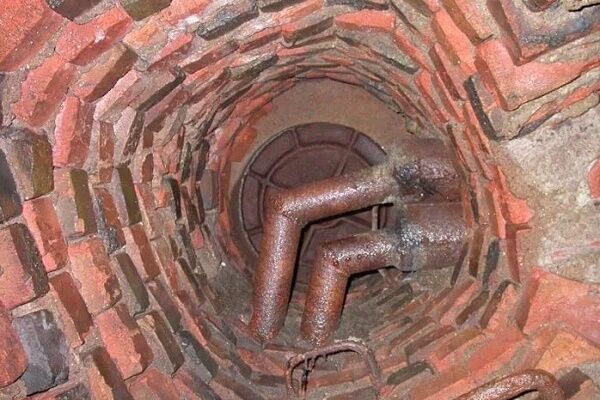
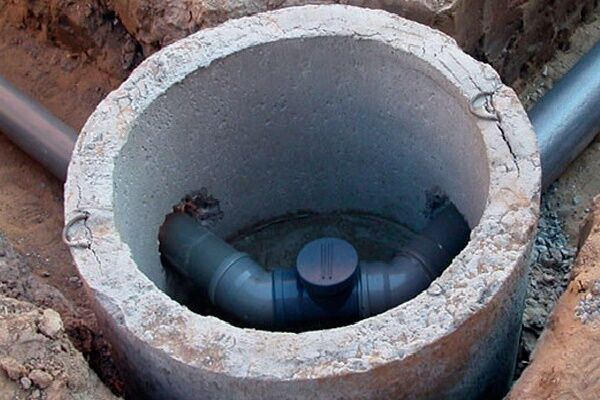
Construction of a well from concrete rings
For the well, it is necessary to purchase reinforced concrete rings, which are made from moisture-resistant concrete. The dimensions and diameter of the rings are selected based on the type and purpose of the well. But it must be taken into account that their depth must be at least two meters.
Concrete rings are available in various sizes (height from 10 cm to 1 m and diameter from 70 cm to 2 m), so choosing a product will not be difficult. For a well, rings with a height of 50-60 and a diameter of 70-150 cm are usually chosen. Their weight, depending on the size, ranges from 230-900 kg.

Of course, such a weight is not impossible to lift alone, so you will have to invite one or two assistants. The structure can be installed in two ways. If the diameter of the ring allows a person to fit inside, then you can simply place it on the ground, and then begin to excavate the soil from the inside.
The ring will press with its own weight on the ground and gradually sag as soil is dug out from under it. In this way, you can install all the rings, placing them on top of each other and fastening them together with metal brackets.
The second option is to first dig a pit, the width of which should be approximately 40 cm greater than the diameter of the rings.If the soil is soft, the bottom should be covered with a 15-20 cm layer of gravel, and then concrete rings should be lowered. With this method, if an inspection or storage well is being made, it is advisable to install a lower ring with a solid bottom.

If there is no bottom, then you will need to make it yourself. To do this, the lower part of the well is filled with concrete mortar with reinforcement. When installing an absorption structure, the bottom of the container is equipped with a filter system, as described above.
All joints between the rings are coated with a cement-sand mixture, and then, after drying, sealed with bitumen-polymer waterproofing.
Further from the well according to developed scheme a trench is being dug for drainage pipes, but do not rush to lay them, since you will first have to do another rather labor-intensive job - making holes in the concrete to connect the pipes. This can be done using a hammer drill and pobedit or diamond bits for concrete. They have different diameters, so choosing the right size is easy, but their cost is quite high.
If you don’t have a concrete crown on your farm, and you don’t want to spend money on buying one, you can resort to another cheaper method. In the place where you intend to make the branch, attach the pipe and draw a circle of the required diameter with a pencil. Drill through holes along the contour of the drawn line with a hammer drill.

Point the crowbar at the central hole and begin to break it slowly, as the hole widens, take a large hammer or sledgehammer and complete the process. Now you can bring the pipes and, putting protective rubber seals on them, insert them into the hole made. Also coat the insertion points with bitumen. Install the ceiling.
The concrete well is filled with crushed stone on all sides to a height of approximately 50 cm, and then clay is poured to the very top and compacted well. Such a clay cushion will prevent water seepage and extend the life of the well.
Conclusions and useful video on the topic
Detailed instructions for arranging a drainage system at home can be viewed in the following video:
The following video will tell you how to make a drainage well from concrete rings:
Installing drainage wells is a difficult process, but mandatory for areas with high groundwater levels. If the territory is not equipped with a full-fledged drainage system in a timely manner, then periodic flooding of the basement of the house will inevitably lead to the destruction of the foundation of the building.
We are waiting for your stories about how you built drainage on the site and installed drainage wells. You can write about your own experience, comment and discuss the article, and ask questions in the block below.


Still, I would give preference to concrete rings for making drainage wells. They themselves are heavy and much more reliable and durable than plastic ones. I have seen more than once how in the spring plastic containers dug into the ground “float”, be it septic tanks or wells.Of course, with concrete rings there is more fuss, but with proper and careful installation it will last for 100 years.