Drainage diagram around the house: nuances of designing drainage systems
Drainage of ground and storm water from the foundation will significantly increase the service life of both the permanent building and the country house.An easy-to-use drainage system will protect underground concrete structures from gradual erosion and basements from watering. But it is extremely important to prevent the destruction of the very foundation of the structure, right?
A well-designed drainage scheme around the house will help to build an efficient system for collecting and draining natural water. We invite you to familiarize yourself with carefully selected and verified information based on regulatory documents and real experience of builders of low-rise buildings.
We will tell you in detail about the types of drainage systems, the features of their design, and the specifics of operation. We will give reasons in favor of choosing a certain type of drainage. The useful information presented to your attention is supplemented with photos, diagrams and video instructions.
The content of the article:
Types of drainage structures for drying areas
When designing a drainage system, the goals that are planned to be achieved are first determined. They may consist of draining the entire area, protecting the foundation and basement of the house from excess moisture.
Of the existing drainage systems, two main types can be distinguished - open and deep (closed). The first can be used for agricultural needs, for drainage from cultivated areas. Closed drainage is used to drain water in dacha and cottage areas, to protect buildings from the negative effects of high groundwater levels.

Combined drainage systems are also used. They are often supplemented with storm sewer lines designed for recycling atmospheric water. Provided they are properly designed, they can significantly save on the construction of each system separately.
#1: Open drainage device
Open drainage is the simplest and most economical method of draining water, which can be used subject to the following conditions:
- the underlying soil layer is clayey, poorly permeable to water, which is why the fertile layer, located 20 - 30 cm from the surface of the earth, is waterlogged;
- the site is located in a lowland into which rainwater naturally flows during periods of heavy rainfall;
- there is no natural slope in the terrain of the site to ensure the movement of excess water towards the street.
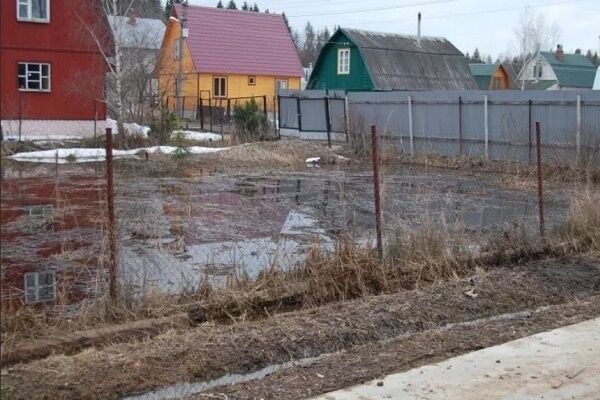
Open drainage is arranged in areas with high groundwater level, the elevation of which is most often determined by the location of the land plot in a lowland or the clayey composition of the soil, which does not allow or very weakly allows water to pass into the underlying layers.

Planning a drainage scheme is best done at the design stage of a house. This will allow you to link the work drainage system and place a rainwater inlet under the gutters up to the blind area.
Open drainage is considered the simplest and does not require drawing up a diagram. It consists of trenches 0.5 m wide and 0.6-0.7 m deep. The sides of the trench are positioned at an angle of 30°. They encircle the perimeter of the territory and direct wastewater into a ditch or pit, into a storm drain.
Areas sloping towards the street are easier to drain. To do this, a drainage ditch is dug in front of the house, across the slope, which will retain water from the garden. Then they dig a ditch, it will direct the wastewater towards the street, into the ditch.
If the site has a slope in the opposite direction from the road, then a transverse drainage ditch is dug in front of the fence facade and another longitudinal one is made to the end of the site.

The length of lines for water drainage, the number of wells and sand collectors depends on the area of the site, its topography, and the intensity of precipitation in a particular area.

If the site is considered more or less flat, and its level of swampiness is not too high, then you can get by with the installation of a simple drainage system.
Along the foundation of the fence, in the lowest place of the site, they dig a ditch 0.5 m wide, 2-3 m long and 1 m deep. Although such a drainage system will protect against high groundwater levels, it will also cope well with precipitation.

Over time, this simple drainage system may become ineffective due to gradual silting. To prevent this from happening, it can be protected with a geo-textile. It is laid on the ground, and after filling the ditch, the drainage layer is overlapped with it. From above, to hide the ditch, it is sprinkled with a layer of fertile soil.
#2: Construction of an effective storm drain
Storm drainage is necessary for the accumulation and removal from the site of water falling in the form of precipitation. It is equipped with point and linear drainage devices.
The first type of water collectors is installed under the risers of an organized drainage system. The second type of water collectors is located under the slopes of roofs with unorganized drainage.
Water entering the catch basin moves through an open or closed pipeline. It is diverted either to a common catchment well or to a collector well, from which it is transferred to a centralized sewer network or drainage ditch.

Elements of a storm system with point drainage basins also include drains, ladders, and dampers. Some manufacturers provide the possibility of connecting storm water inlets to roof gutters, as well as to underground drainage systems.
In addition, ready-made production models include sand traps and waste bins to simplify system maintenance.

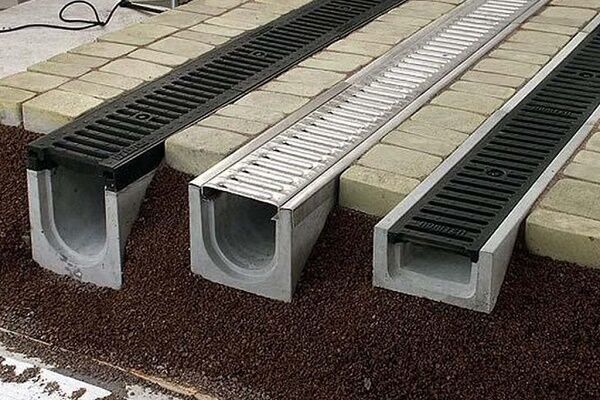
This is a system of drainage gutters made of plastic or concrete, which are installed on the site in those places where water accumulation is most likely, but extremely undesirable.

Designing storm drain scheme with linear water intakes, the first step is to plan the placement of a catchment or collector well. Next, determine the location of the rotary and inspection wells. Their placement will depend on the placement of stormwater inlets, gutters and closed sewer branches.
To prevent water from the street from entering the yard, gutters are installed along the line of gates leading into the yard, garage doors, and also in the area of the gate. When choosing system elements that will be installed on the roadway, the future load on them is taken into account.
To prevent moisture from getting inside the building, the slope of the coating in the garage is made towards the water intake grille.This way, when washing a car or thawing snow on a vehicle, water will flow into the gutter.

To give the storm drain a neat appearance, special trays made of polymer concrete and plastic are used, which are covered with metal or plastic gratings. When entering the house, use a special tray to clean shoes.
The grate for the gutter installed near the pool is chosen to be plastic, white, to avoid burns on a hot summer day.

Gutters and water intake points are connected to the drainage tank sewer pipes. Inspection wells are provided at the junctions of gutters and pipes. They are designed to facilitate access to the system and clean it from possible clogging.
Inspection wells are made mainly of plastic. In order to obtain the required depth, their design provides for the possibility of extension using special extension elements.

A wide range of system elements allows for the most rational design drainage diagram around the house, which will be optimal from a technical and financial point of view.

#3: Construction of closed drainage options
Underground, closed drainage is used if the installation of an open system will take up too much space on the land plot or it absolutely does not fit into the landscape picture of the area. The conditions for constructing a closed drainage system are similar to those for organizing a network of open drainage ditches and ditches.

It is imperative to organize underground drainage on the site if:
- it is located in a lowland, wetland area;
- there is a natural pond near the buildings;
Its device is recommended if the house has a usable basement (garage, basement, cellar).
Underground drainage can be divided into two types:
- wall drainage;
- trench (stratal) drainage.
Both types of underground drainage are carried out at the construction stage of the building. If it was decided to begin the problem of drainage after the construction of the house, then a trench ring system is used. There are also limitations to the use of trench drainage. It can be used if the house does not have a basement.
The point is that, after bookmark drains, backfilling the pit with sand or soil creates a looser environment between the bedrock and the foundation.As a result, high water penetrates into this environment and then even the presence of a clay castle does not protect the building from moisture.
Therefore, if the house has a basement floor, for effective drainage it is best to install wall drainage. It is used for drainage to drain groundwater directly from the foundation of a building, to protect basements, cellars, and ground floors from flooding.

Wall-mounted drainage system limits the rise in water level, preventing it from rising above the line of drainage pipes - drains. It is believed that a drainage pipe 1 m long can drain an area of about 10-20 m2.

The distance from the drainage pipe to the foundation depends on the placement features inspection wells. They are laid in each corner (or through one corner) of the building, as well as in places where pipes turn and connect.
Inspection wells are also located in places where there is a large difference in the level of the site and where the pipes are long - the distance between the wells should be no more than 40 meters.

The entire system closes to the last well.It should be located in the lowest place. The water then flows into a regular sewer or open reservoir. If it is not possible to drain water from the house by gravity, then pumping equipment is installed and it is forcibly pumped out.
To ensure gravity drainage of water, pipes are laid with a slight slope towards the collecting manifold. The slope should be two centimeters per meter of drainage pipeline. The depth of the pipe must be greater than the freezing depth of the soil.

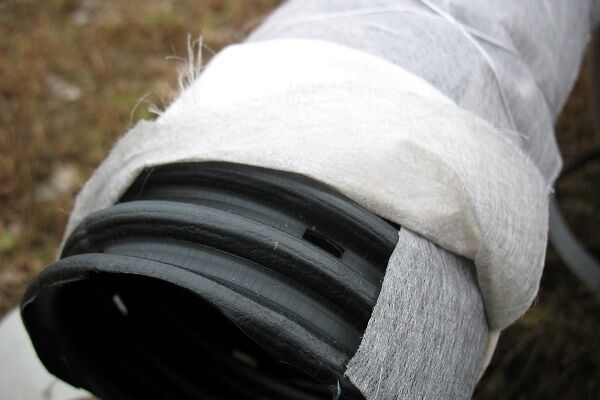
To save on geocomposite materials and prevent them from mixing with the soil, geotextiles are used. It freely passes water to the drains and at the same time retains particles that lead to siltation. The pipe itself must also be wrapped in protective material before backfilling. Some drain models are produced with ready-made geotextile filters.
You can increase the efficiency of wall drainage using a profiled polymer membrane, which can be two- or three-layer. One of its layers is a polyethylene film with formed protrusions, the second layer of the membrane is geotextile fabric.
The three-layer membrane is equipped with an additional layer of smooth polyethylene film. The membrane helps filter water from the soil while also serving as a waterproofing layer for the building's foundation.
Closed trench-type drainage protects the structure from flooding and moisture. It is a filter layer that is poured into a trench at a distance of 1.5-3 m from the wall of the house.
It is better that the depth of the drain be 0.5 m deeper than the base of the foundation - this way the water will not exert pressure on it from below. Between the trench with drainage and the foundation of the house there remains a layer of clay soil, which serves as a so-called clay castle.

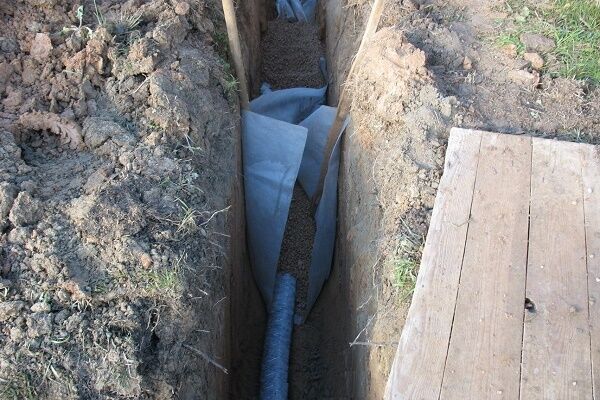
As with the installation of a wall drainage system, drains are laid on a layer of gravel or small crushed stone. Both the pipes and the gravel layer are protected from clogging by geotextiles.
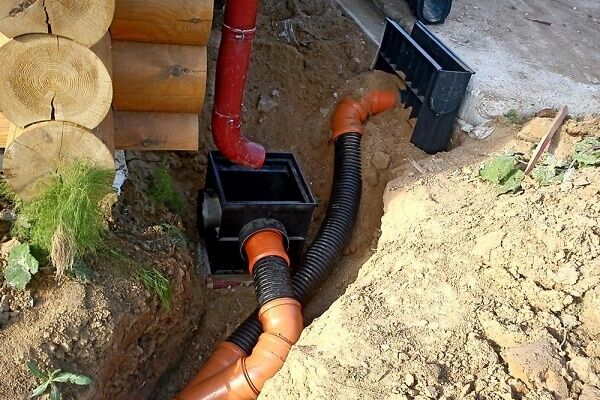
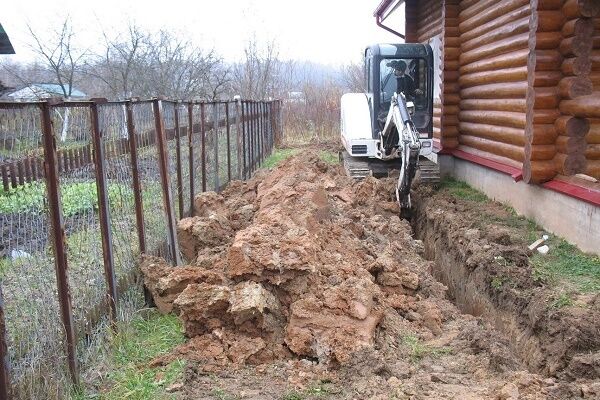
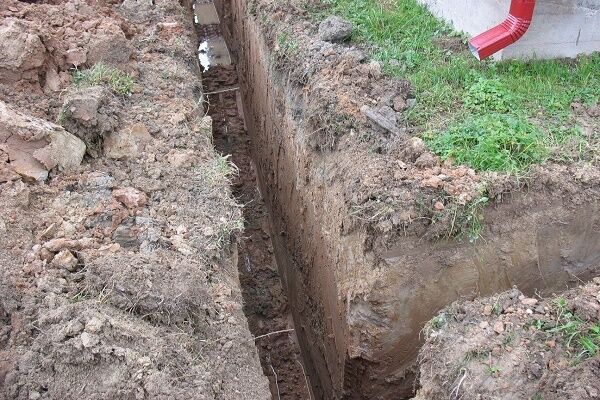
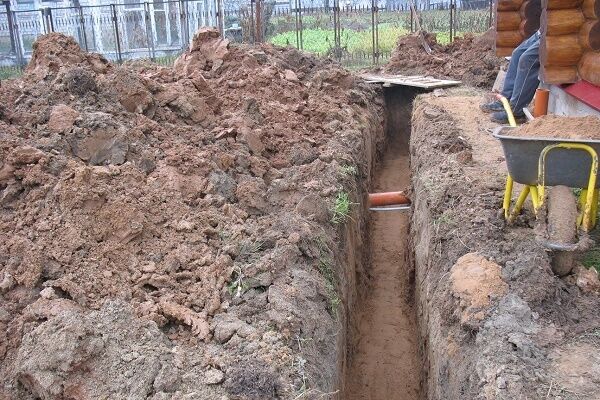
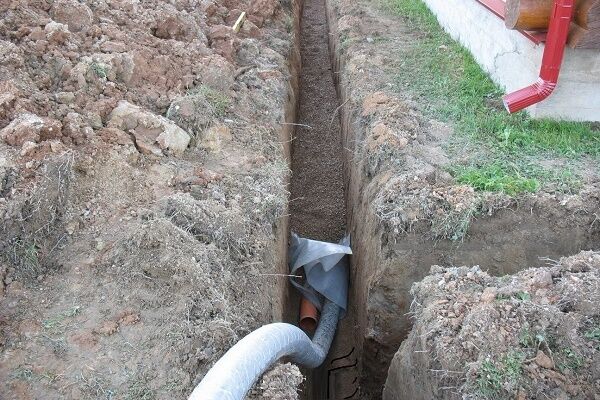
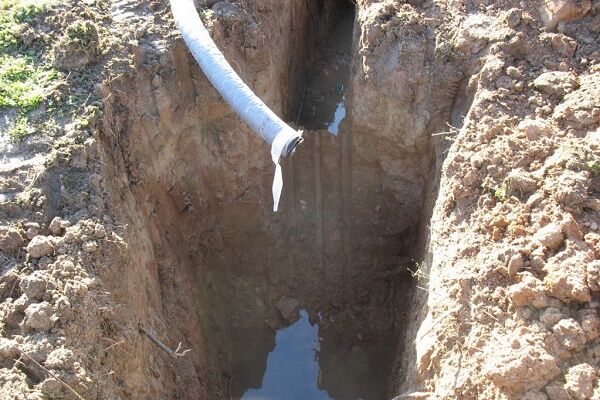
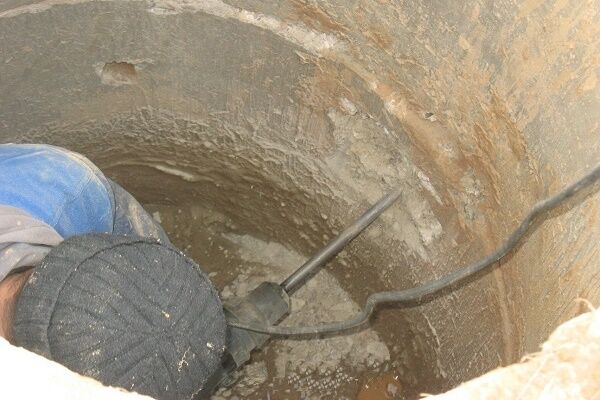
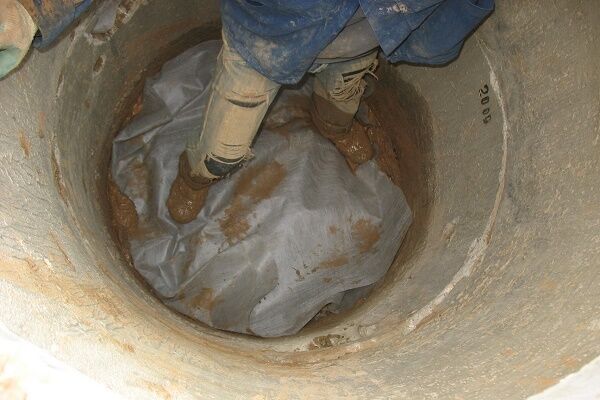
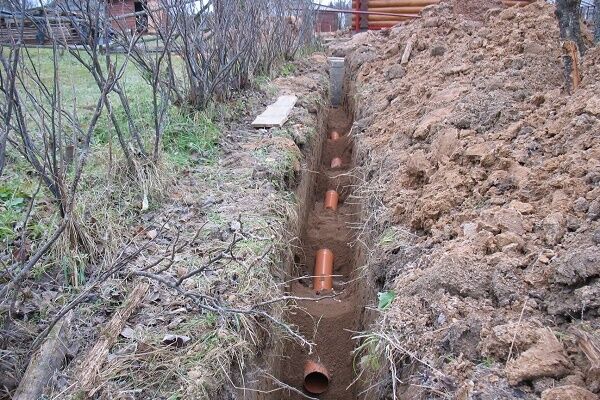
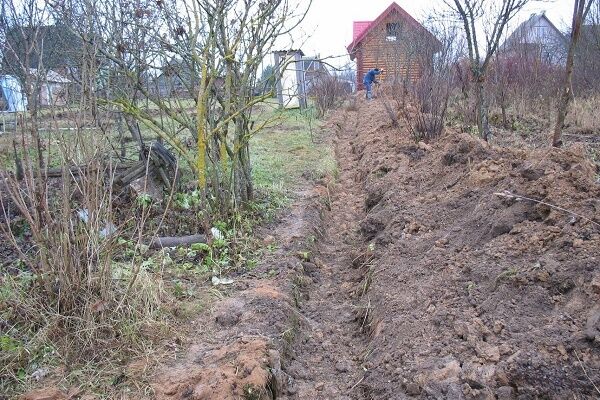
#4: Construction of wall drainage step by step
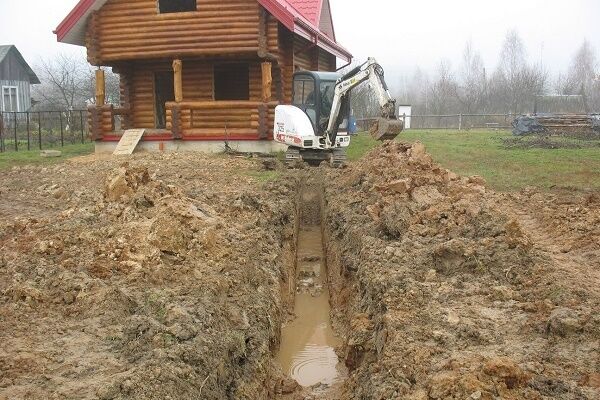
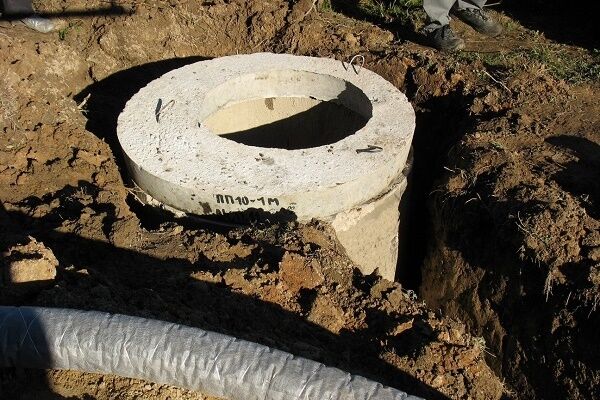
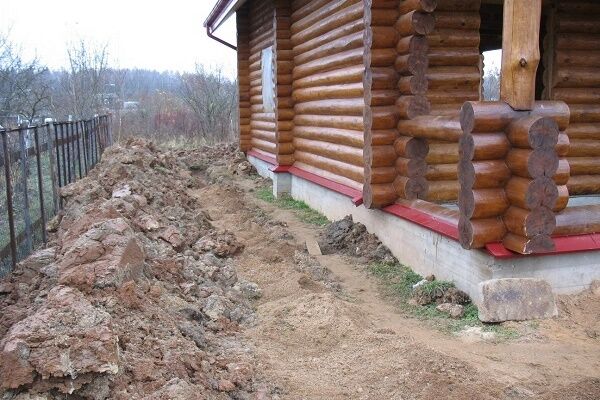
In order to get a clear idea of the process of installing drainage around a country house, let's look at an example. The area shown in it required the installation of a groundwater drainage system, because Under the soil-vegetative layer lie loams and sandy loams, which are extremely poorly permeable to water due to their low filtration capacity.
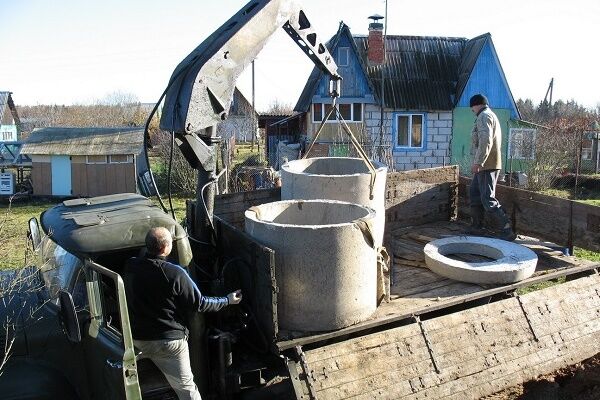
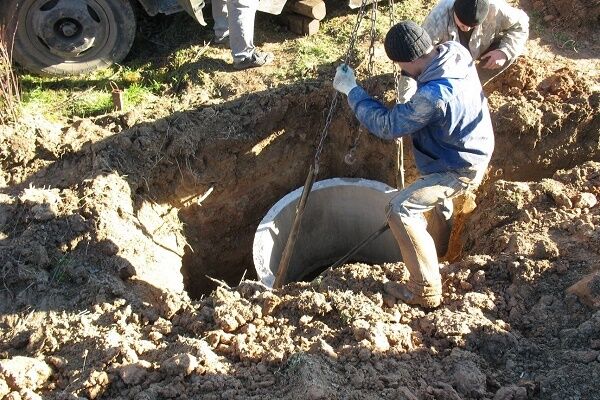
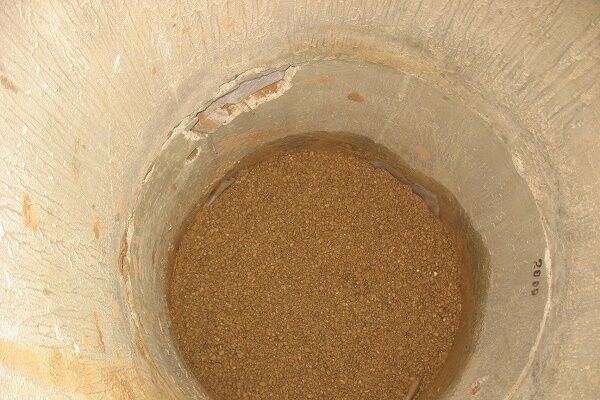
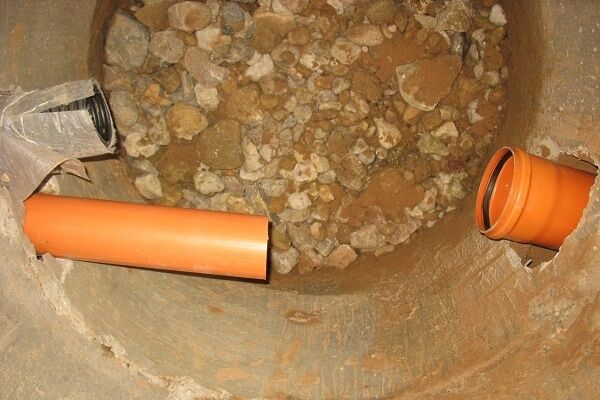
The collector well in the example is designed to partially discharge collected water into the underlying soil strata and to partially drain excess off-site into a public drain. Drains from the septic tank, storm drains and drainage will be connected to it. To drain excess water, a drain pipe located below all will be installed.
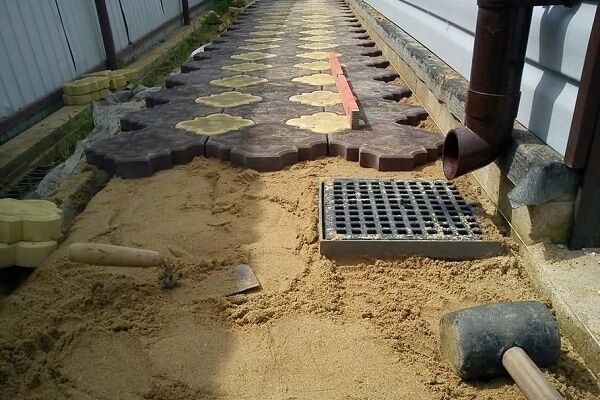
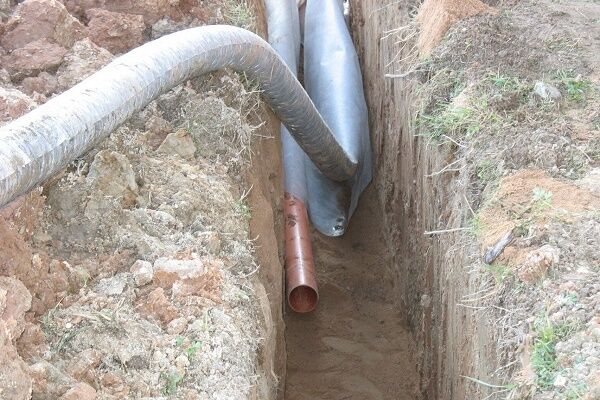
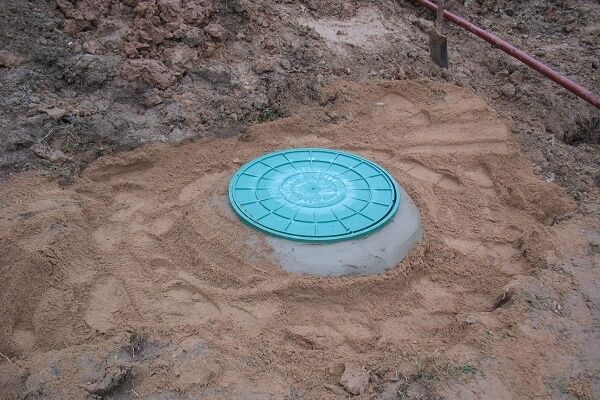
Having successfully completed the bulk of the work, we proceed to the final landscaping:
#5: Organization of combined systems
You can also organize a combined drainage system on the area near the house. For example, wastewater from drainage and stormwater can be accumulated in one collector well. In this case, the sewage collector must be constructed taking into account the load from both systems. In addition, storm drainage can include point and linear catch basins.

It must be remembered that mistakes made with a mixed type of drainage can even lead to a rise in water level, flooding of basements and cellars. The main drawback is the drainage of water from the drainage system into the underground drainage system.
When these two systems are combined, water from the roof enters the drains and seeps into the ground. This occurs especially actively during heavy and prolonged precipitation.As a result, water, instead of leaving the system, seeps into the soil and saturates it with moisture.
Conclusions and useful video on the topic
Video #1. Scheme of surface drainage and its installation:
Video #2. DIY trench drainage system around the house:
Video #3. Nuances of design and construction of a drainage system:
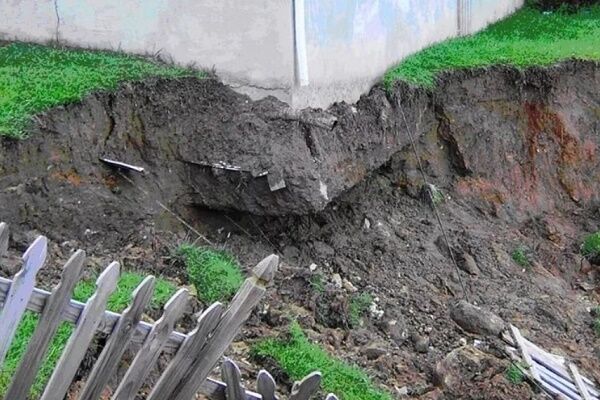
When designing a drainage system around a private building, it is very advisable to first obtain advice from a hydraulic engineer. Failure to comply with the rules and conditions of water reduction can lead to subsidence of the soil, house, and road.
This is especially important to consider when installing deep drainage. Therefore, it is better to draw up a drainage diagram around the house at the planning stage, then all the nuances of construction and drainage will be taken into account in one project.
Those wishing to talk about their own experience in drainage installation are invited to post comments. You can write them in the block below. Here you can ask questions and publish photos on the topic of the article.


Hello, I am very interested in the topic of the drainage system, because when arranging my own summer cottage I encountered the problem of choosing drainage. Due to the fact that the area is swampy, a simple ditch along the perimeter is not enough, apparently. So here is the problem in this case: you need to use underground drainage. Questions immediately arose: what type? What is more effective: trench or wall?
Good afternoon, Ivan. Need a wall one.
Wonderful article, cool photos, clear and accessible, thank you very much for the material☕
Hello.Please tell me which drainage is better to choose if the house is on a pile-screw foundation? The soil on the site is loam, the site was raised with “finishing soil” - this is 30-40 cm of imported soil (sand + clay).
Good afternoon, Yulia. Since the house is on stilts, the single most important drainage requirement is efficiency. There is no difference between trench or wall; it will not be possible to wash away the foundation. For calculations and design, I advise you to contact specialists, and I also recommend that you further familiarize yourself with article on our website about drainage design.
Honestly, I don't think the area was raised by clay, otherwise you've created a problem for yourself. Clay, as you know, is not particularly permeable to water. For leveling use: sand, fertile soil layer, chernozem, peat/sand mixtures.
Hello. Nikolay, you are not entirely right. The filling is created with materials that have density due to the binding components - sandy loam mixture (denser than pure sand, but still free-flowing, used for rough filling of roads, backfilling of pits), loam (mainly clay, used for landscaping), coarse soil (stone rocks from 2 mm, suitable as a material for road work, rough backfilling of areas).
Loam is the best option for creating compacted relief soil. It has fairly good throughput characteristics, which makes it possible not to create a swamp on the site and, at the same time, it retains a sufficient amount of moisture to ensure soil fertility and prevent it from drying out.
Good afternoon.Yulia, what kind of drainage did you end up doing around the house? (the house is also on a pile-screw foundation)
Hello! If you apply the recommendation and dig a ditch in front of the fence (in an area with a slope from the road), where do you think the accumulating groundwater should be directed?
Hello. Familiarize yourself with local and regional land use and development regulations. If you don’t have any in your region or don’t have a clause on the rules for groundwater disposal, use the nearest sewage system, drainage ditches, and so on.
Hello. We are faced with a terrible problem - dampness in the house. The walls were just plastered, wallpaper was pasted, and in the very first winter mold appeared underneath. They poured on the foundation and insulated it in the spring - it didn’t help. Same thing next winter.
They decided that due to the fact that the former owners raised the level of the slope too much and laid tiles, and now all the water goes under the house. We made a canopy, but again, alas, there was a damp smell and mold in the middle of the house. What should we do, please advise? I have small children, I am afraid for their health.
Hello, Ekaterina. Have you visually examined the fact of water flow under the house? Just mold in the house does not guarantee improper drainage; there are a million other possible reasons. What to do - redo everything again, dismantling the tiles, correct slope and everything like that. It’s simply impossible to say for sure without photos and additional information. BUT! I repeat, rule out all possible reasons other than this, the most real one.It’s just that if this is not the only problem, while you struggle with the slopes, the mold will grow and poison you even more.
Hello.
We bought a plot of land with a foundation, built a house, completed pre-finishing work on the ground floor, and then the water began to flow. The height of the basement floor is 2.5 - excluding the finished floor and ceiling. The basement floor is deepened by 1.5 m. I have a question about how to do the drainage. You write that if the house was built, it is a round-trip building, but if there is a basement floor, it is not suitable. Wall drainage is performed during the construction of the building. In the end, what should we do now?
Good afternoon. Tell me which drainage system is best to install. I bought a finished house with a monolith foundation 1m deep. Groundwater is very close, there are 2 rings of a septic tank and after pumping, after 2 weeks the rings are almost full again. At the same time, the soil is sandy, 15 cm of soil is then sand. There are no puddles after heavy rains. I want to divert groundwater from the foundation.