Installation of gutters: how to properly install a gutter and attach it to the roof
One of the key stages in arranging the roofing system of a house is drainage.Without its organization, it is impossible to protect the facade of the building from rain and water flows during the snow melting period.
How to install drains correctly and what to consider when installing a structure, we will look at this article.
The content of the article:
Key points when designing gutters
The question of how the drainage system will be arranged must be resolved at the design stage of the building.
When making calculations, you must be guided by the requirements of the current SNiPa 2.04.01-85. This approach will allow, taking into account all the nuances, to competently select the optimal design option.

Key points to follow when designing a drainage system:
- After making a copy of the roof drawing, draw a plan for the location of the drainage elements.
- Calculate the total area of the roof and all its slopes separately, taking into account the adjacent vertical walls.
- Taking as a basis the readings of rain intensity in a given area, determine the throughput of the system.
- In accordance with the obtained values, determine the diameter of the installed drainpipes, the number and cross-section of drain funnels, as well as the frequency of their placement along the wall of the building.
The result should be a system capable of collecting and discharging the maximum amount of liquid.
At the design stage, it is important to determine the location of the risers so that they do not disturb the exterior composition. Most often they are placed in the corners of the building, but the option of arrangement in a niche created by a bay window is quite acceptable.
If the pipe coming from the drains is discharged onto a blind area, it is better to remove the risers as far as possible from the entrances to the basements, basement ventilation vents and walkways near the house.
Components of a drainage system
The system includes two groups of parts - horizontal and vertical drainage parts. Together they number about a dozen types of structural elements, each of which performs its assigned task.

The structural elements of the drainage system are:
- drainpipes – key functional elements of the system designed to move masses of water from the roof;
- gutters – narrow channels for collecting and redirecting water;
- funnels – conical sockets in the upper part of the pipe are designed to collect, retain and drain water flowing down the gutters;
- knee – structures in the form of short curved sections of pipes are installed to change the direction of water flow;
- brackets – fasteners for fixing the gutter to the roof;
- seals – additional elements ensure fastening strength at joints;
- clamps – fasteners for fixing the structure to the facade of the building.
During construction drainage system On long-pitched roofs, guide gutters are additionally installed. Their main purpose is to reduce the speed of water flow along the roof surface.

The shape of gutters and brackets can be any. There are products with a round and semicircular cross-section, U-shaped and trapezoidal in shape.
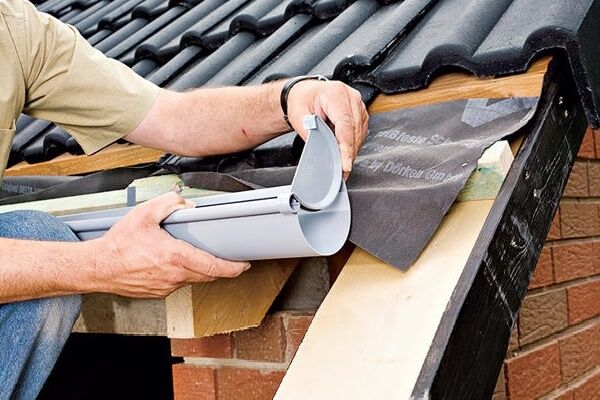
Gutters also differ in the way they are connected to the bracket. The easiest way to install systems is by simply snapping them into place. The included rotary latches make it possible to remove part of the gutter without much hassle if replacement or repair work is necessary.
Drainage funnels are universal; they can be installed anywhere in the drainage system. The plugs that cover the gutters come in two versions: left- and right-handed.
Connecting drainpipes and laying water outlets from the base of a building cannot be done without using elbows. Their number is determined on the basis that three elbows are required for each drainpipe: one at the bottom and two at the top.
To fix the drainage structure to the facade of the building, clamps are used. For metal water pipes, fasteners with screw-in elements and a long pin are chosen. For PVC structures - plastic clamps with two support points.
Material Type Options
The price of a drainage system depends on several factors, one of which is the material of manufacture. The modern market offers many options for materials that can be chosen when arranging a drainage system. The choice largely depends on the appearance of the building and the aesthetic ideas of its owner.

The most widely used products are those made of polymers and metal.
Each type has its own advantages and disadvantages:
- Plastic – light, durable and at the same time quite easy to process material. At a low price, it shows excellent performance parameters. Installation of PVC gutters is not particularly difficult.
- Cink Steel – a strong and more durable material than polymer. To give the product a more presentable appearance, manufacturers coat the steel with a polymer coating.
- Aluminum – a lightweight and easy-to-use material with a service life of over half a century.
- Copper - a beautiful, durable, but at the same time quite expensive metal. But it is vulnerable to the damaging effects of electrolytic vapors. To minimize risk, all elements of the system should be made of the same material.
Polyvinyl chloride, used for the production of components, is much lighter than metal. This makes it possible to install brackets with a smaller cross-section without losing the mechanical strength of the structure. But when installing PVC structures, linear variations in dimensions should also be taken into account.

Compensating couplings allow the main elements of the system to be shortened and lengthened without the risk of deformation. They are also used when installing metal gutters, despite the fact that they have much less thermal expansion.
The material for the manufacture of seals is EPDM rubber. It is a modern analogue of rubber.

To further protect the rubber and simplify the installation process, the seals are additionally treated with silicone grease.
Drainpipes are produced in sections from one to four meters. They come with rectangular and round cross-sections. This does not affect their performance in any way. The choice is limited only by the design solution of the drainage system and the design solution of the facade of the house.
When purchasing drainpipes made of polymer materials, keep in mind that they have the same diameter along their entire length. Therefore, to connect them to each other, you will need to use special couplings, which entails additional costs. We also suggest that you read the article in which we examined all the pros and cons plastic and metal gutters.
Calculation of the required number of elements
It is better to entrust this rather important undertaking to specialists who sell drainage systems, or to specialists from a company that provides roofing installation services. In the absence of such an opportunity, the calculation can be performed on your own.

Key points for proper calculation:
- Gutters. The total length of the channels must correspond to the length of all roof slopes used to collect water. They are connected using connectors.
- Water intake funnels. They are installed at the outer corners of the building and additionally placed every 8-12 meters so that the overall slope of the channels is not too large.
- Drainpipes. The number of products corresponds to the number of funnels, and the length corresponds to the distance from the roof to the ground surface.
- Brackets. The number of brackets is determined on the basis that one element is required for each meter of channel. Additional holders will be required for funnels in the center and walls and in the corner of the house.
The number of clamps directly depends on the height of the building.But in any case, each individual pipe section being installed is secured with at least one clamp. When installing a drainpipe in a one-story building, three fasteners located at the top, bottom and middle of the product are often sufficient.

When calculating, they take as a basis the condition that per 1 sq.m of roof in the horizontal projection there should be 1.5 sq.cm of cross-sectional area of the drain and funnel. For example: the cross-sectional area of a pipe D 100 mm is 78.5 sq. cm. This is the average value.
Depending on whether the system has to be installed in regions with high precipitation levels, or, conversely, in arid areas, adjustments are made to the calculations.
Methods for attaching brackets
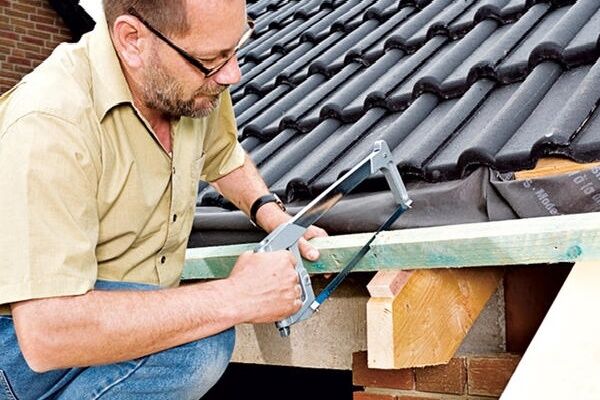
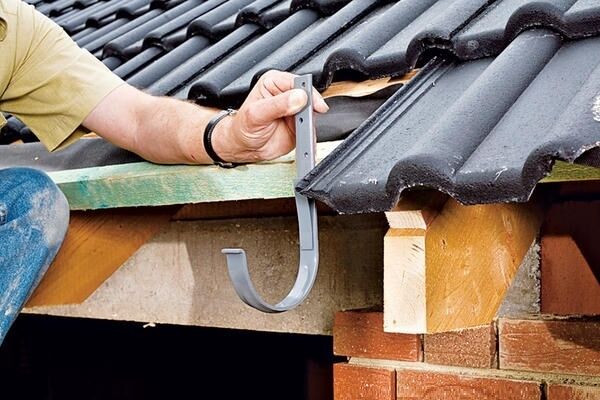
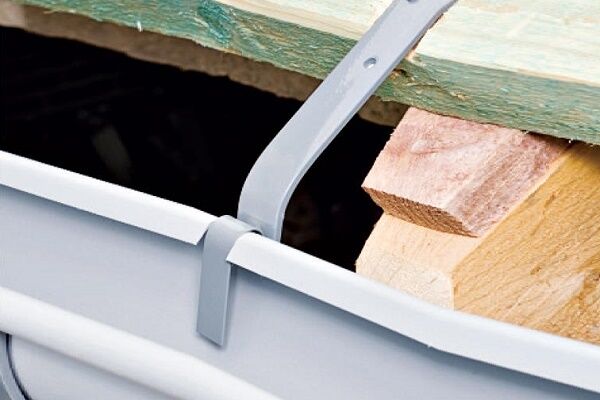
It is worth installing brackets according to the rules at the stage before laying the roof. If the fixation is carried out after the coating has been laid, then ordinary short hooks are used as fasteners.
Depending on the shape of the bracket, the elements can be attached in one of three ways:
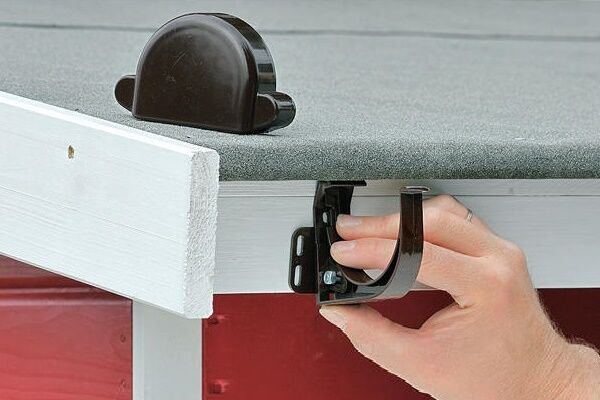
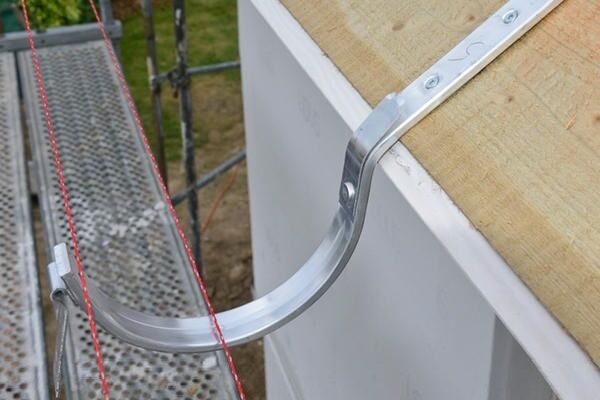
- Fixation to the roof front board – it is used when it is necessary to install the system on a finished roof.
- Rafter leg mount – used at the installation stage prior to laying the roofing material.
- Fixation at the bottom edge flooring or the first plank of the sheathing is used for roofing, the pitch between the rafters of which exceeds 600 mm.
Brackets designed for fixation to the front roofing board are most often included with systems made of polyvinyl chloride.

Metal brackets for fastening to the front roofing board are made shorter. If the roof structure does not provide a frontal board, combined brackets are used.
They are equipped with extensions made of steel. Due to this, it is convenient to attach them directly to the rafter leg.
If it is impossible to provide access to the rafters, metal crutches are attached to the wall.” They act as a support for further fastening of the metal gutter.
The fixation method, which involves fastening to a rafter leg, is effective when arranging the roofs of houses in regions with heavy rainfall. It is also used when it is necessary to drain water from roofs that have a large area, for covering which heavy coverings are used.

With this method, the hooks are inserted behind the base and installed at an equidistant distance in order to ensure the desired slope of the gutter.
The third method of fixation, which involves fastening to a sheathing, is most often used when arranging a roof covered with ondulin or metal tiles. It is chosen only if the recesses cannot reduce the load-bearing capacity of the sheathing in the eaves area.

When choosing the third method of fixation, it is important to remember that only strict adherence to installation rules and installation procedures can ensure the reliability and durability of the structure.
Gutter installation technology
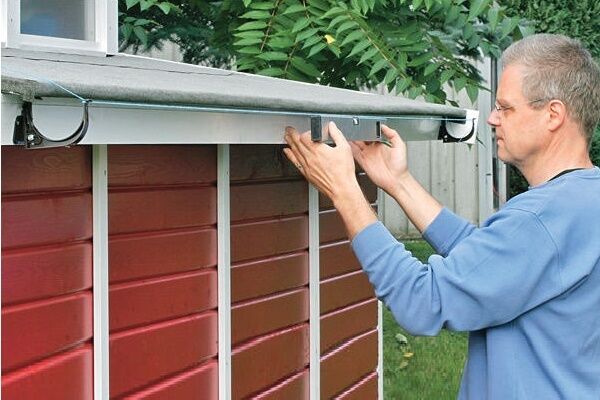
Installation of equipment for drains is carried out after completion of the facing work. There is nothing complicated about how to prepare and install a gutter. Even a novice master can install the PVC system.
Assembly and installation of a drainage system includes a number of standard steps:
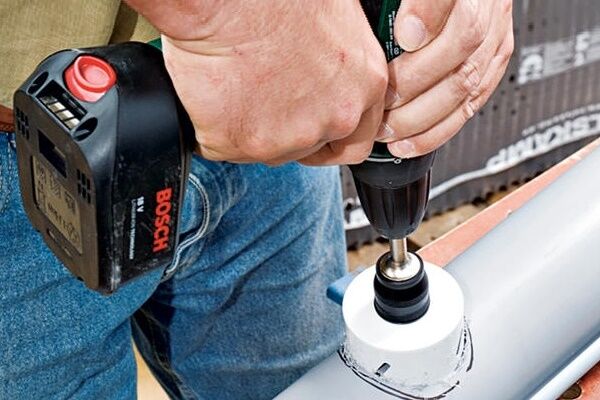
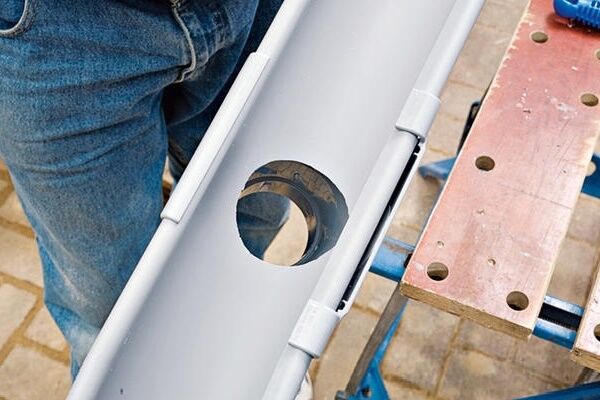
After installing and fixing the gutters, drainage funnels are installed at the lowest points of the drainage system, to which drainpipes are connected:
Installation of horizontal elements
A set of tools that will be needed during the work:
- marking cord;
- tape measure at least 3 meters long;
- hacksaw for metal;
- universal screwdriver;
- hammer;
- flat bender;
- pipe pliers.
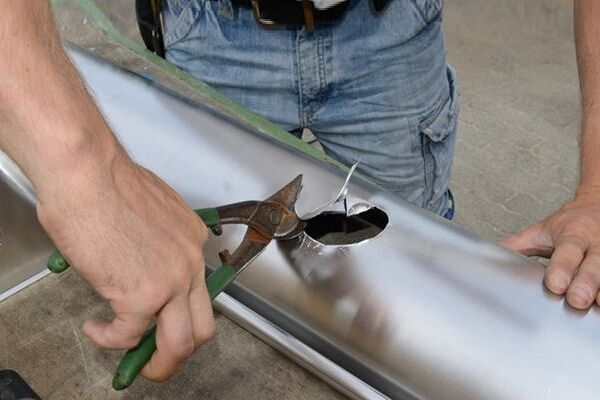
Some craftsmen cut metal gutters and pipes using a grinder. But this is far from the best solution, since the rotating disk heats up the polymer coating during operation. And this can cause damage to the drainage elements during operation.

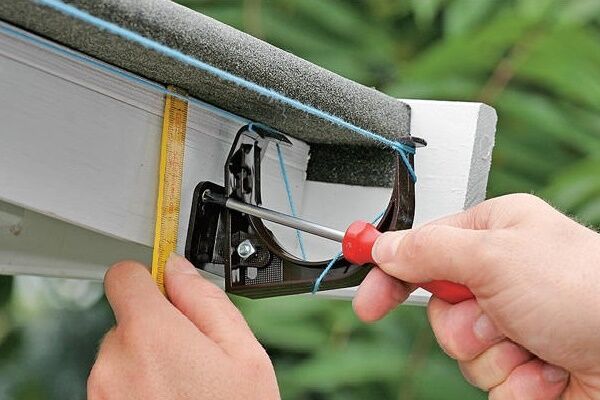
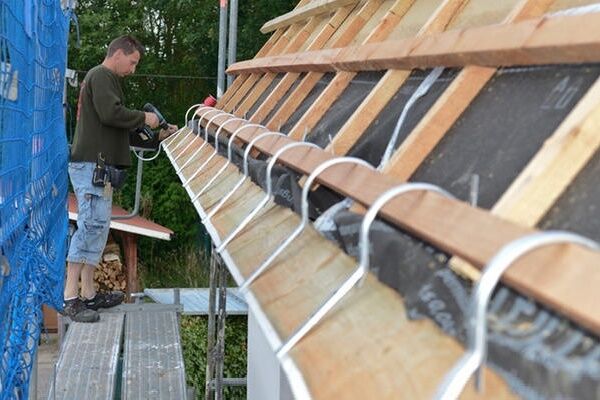
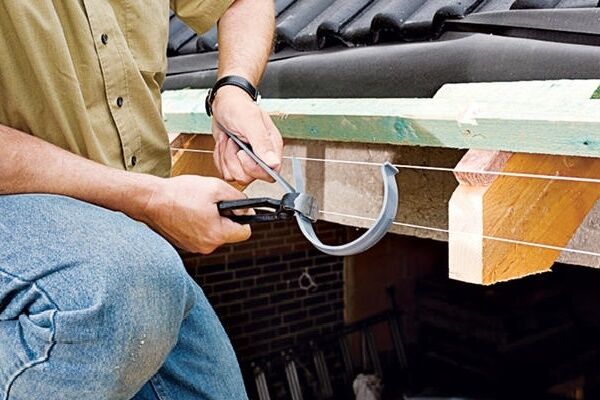
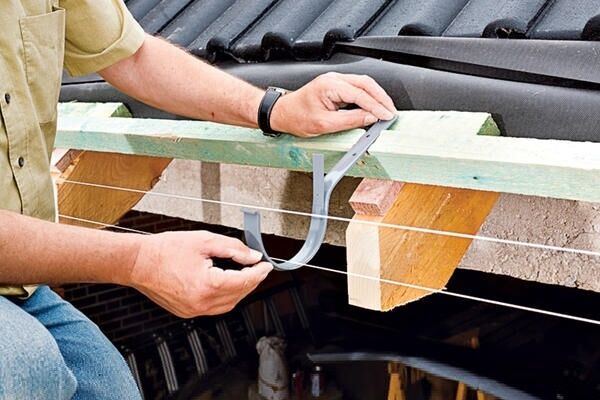
The installation of brackets begins with the installation of the outermost elements.Then the distance between the drainpipes is divided into equal intervals of 60-80 cm in length for installation of the remaining hooks.
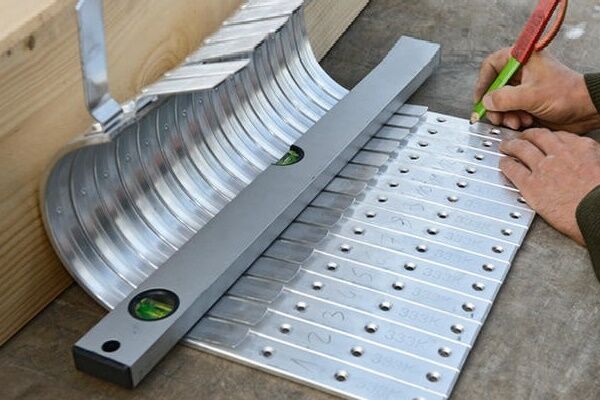
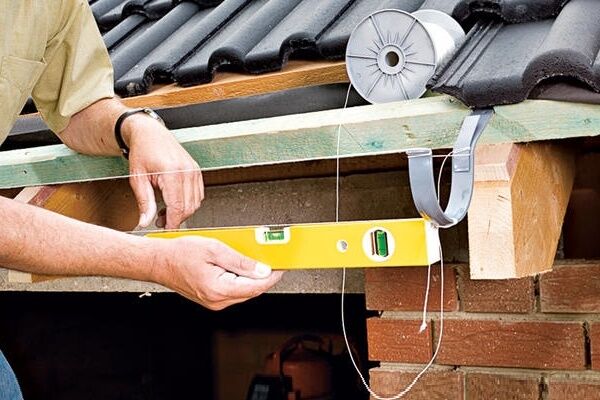
To simplify your task by ensuring a uniform slope of the gutters in the direction of the water intake funnels, it is better to pull the cord when marking. The boundary values of the slope are from 2 to 5 mm per linear meter. To increase the accuracy of installation, it is better to mark several key lines by pulling the string in two or three rows.

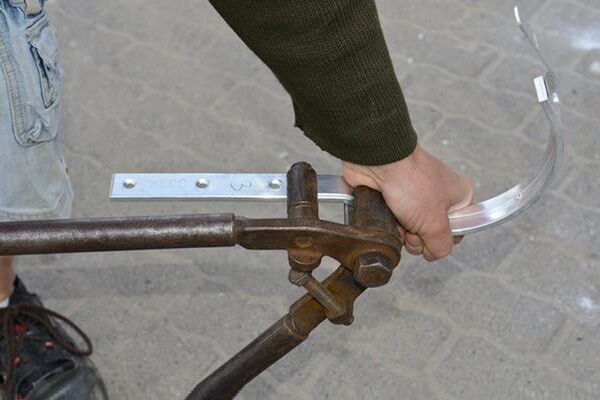
During the installation of brackets, the slope is achieved by moving short fasteners vertically or by bending metal holders at the calculated location.
In order not to disturb the galvanization and not damage the polymer coating, a special device is used to bend the fasteners - a flat bender.

Collection of the drainage system can be done in one of two ways:
- Lay out all the elements on the ground in a horizontal position, and then insert the assembled structure into the brackets fixed around the perimeter of the building. This method is applicable for small houses and small finishing areas.
- The traditional option involves the phased assembly of all system elements directly on the building.
Installation of the drainage system should be carried out in the order “from top to bottom”: first, water inlets are installed, then the drainage risers are connected.This is dictated by the technological features of the drainage system.

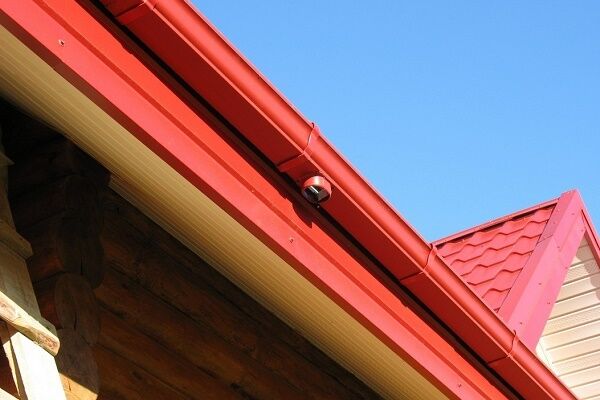
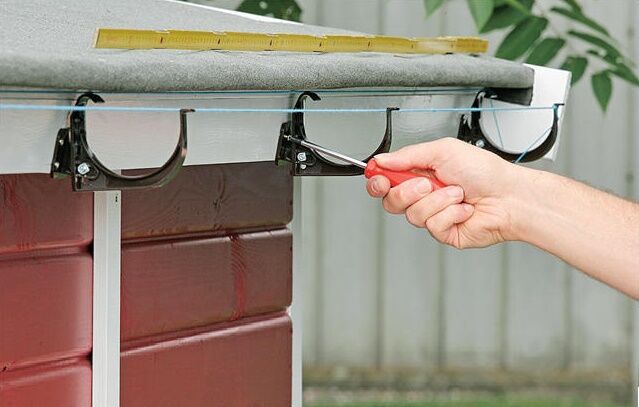
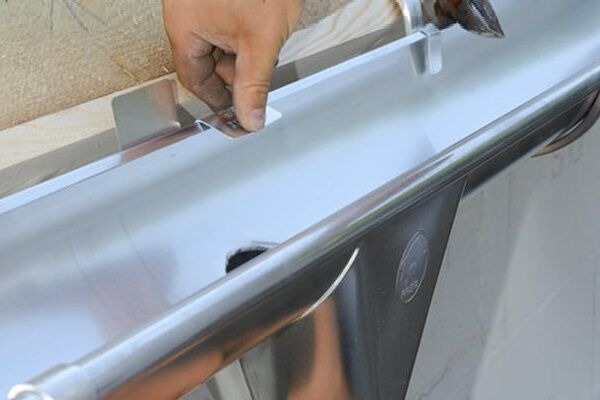
Before attaching gutters to parts of the roof, funnels are first installed, not forgetting to take into account possible temperature expansions. Then the gutters are installed, placing them 2 cm below the line, which conditionally acts as a continuation of the overhang. They are produced in lengths of 3-4 meters. Gutters that occupy extreme positions in the line will most likely have to be cut.
When installing gutters, it is worth remembering that they must be at least one-third covered by the overhang of the eaves. Ideally, the overlap should be half its own diameter.

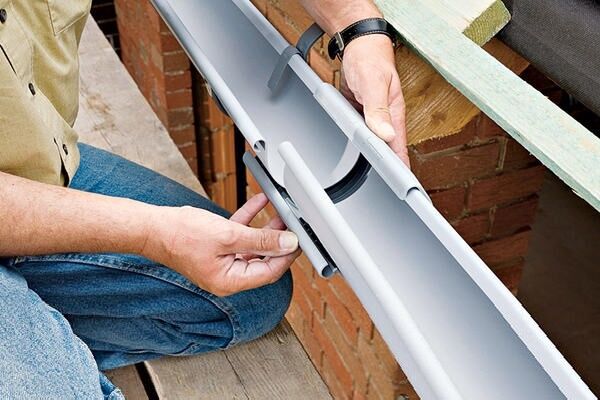
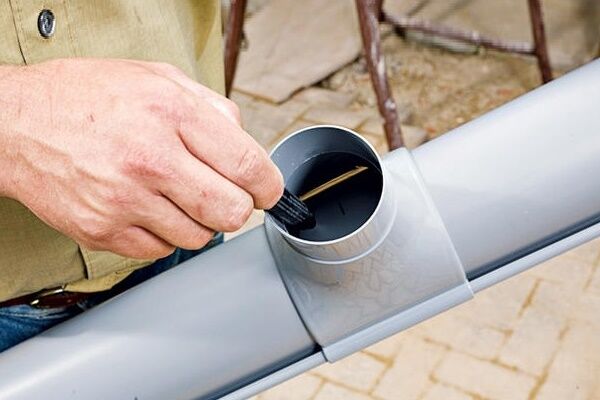
A rotating element, connector or plug completes the line of gutters. When joining the elements, a layer of glue 5 mm thick is applied to the inner surface.
An important point: gutters made of polyvinyl chloride cannot be connected end-to-end. This can cause cracks to form and lead to structural failure.
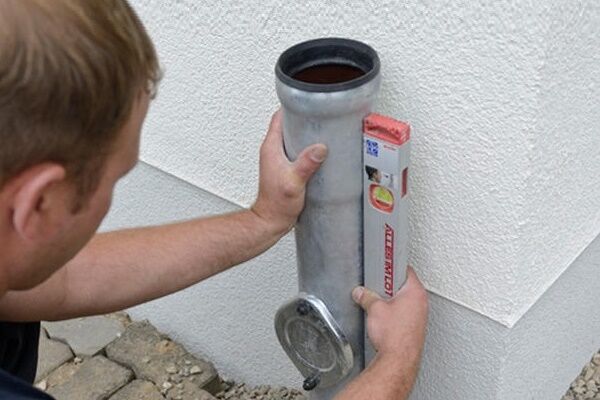
Installation of drains and drainpipes
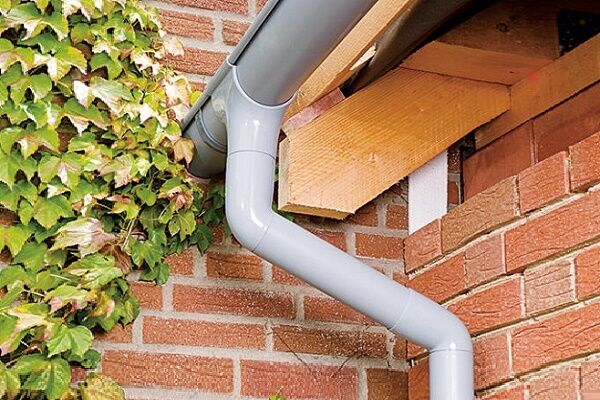
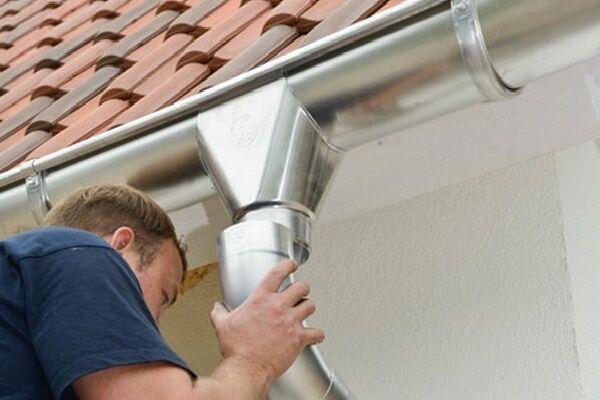
To move from the funnel to the drain, two elbows and one straight section are used. For roofs with narrow eaves, the transition is assembled by connecting only the upper and lower knees. The distance of the lower elbow to the building wall is usually determined by the manufacturer.
The assembly of the drainage riser begins with the installation of a funnel, towards which the slope of the gutters must be formed for spontaneous drainage of rainwater:
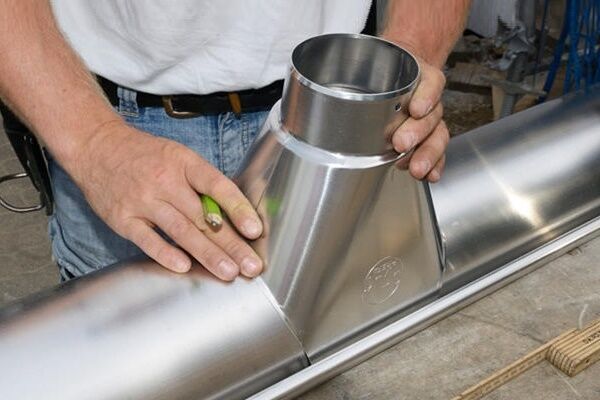
The funnel is the starting element of the drainage riser, to which it is connected. To connect at the top, use two corner elbows, which can be connected to each other if the roof has a narrow eaves, or connected using a piece of pipe if the eaves are wide. Further:
Installation of gutters should not cause any particular difficulties. Four-meter sections are easily joined together using couplings. Connect the parts, moving from top to bottom. A drain is attached to the bottom end of the pipe using glue.
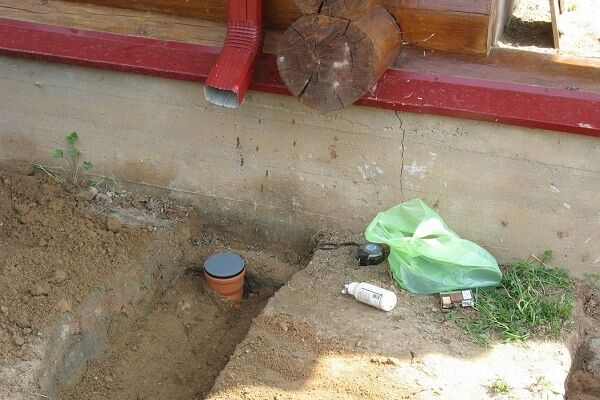
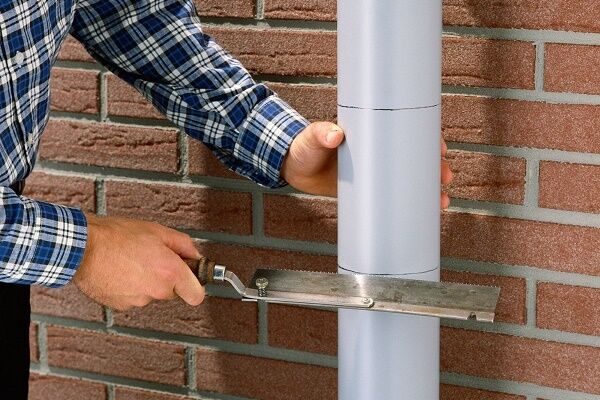
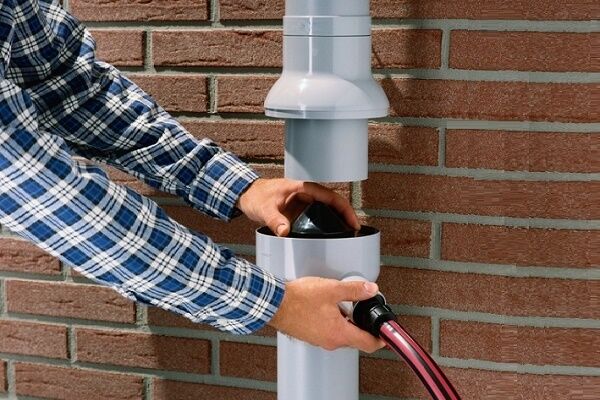
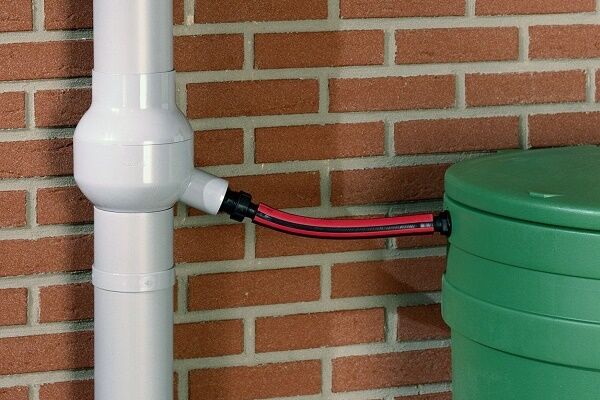
If you want to collect rainwater in a storage tank for use for household purposes, connect it to the drainpipe water collector:
If the site is equipped storm system, the task is simplified - the drainpipe is simply led into a collection well, or it is placed 5-10 cm from the surface of the tray.
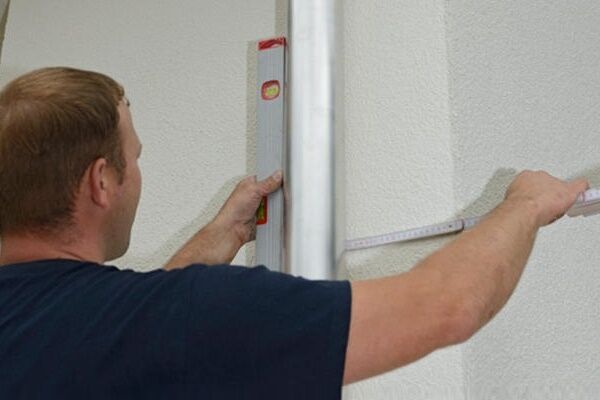
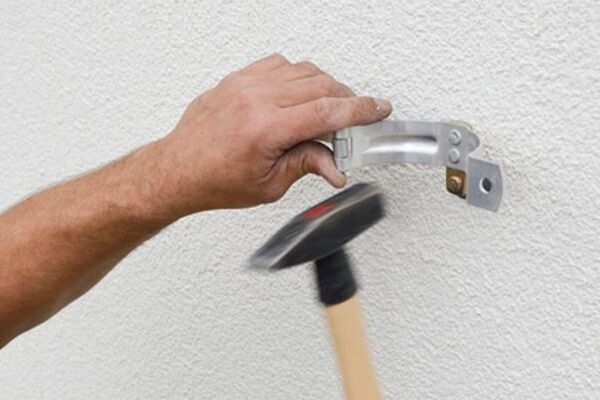
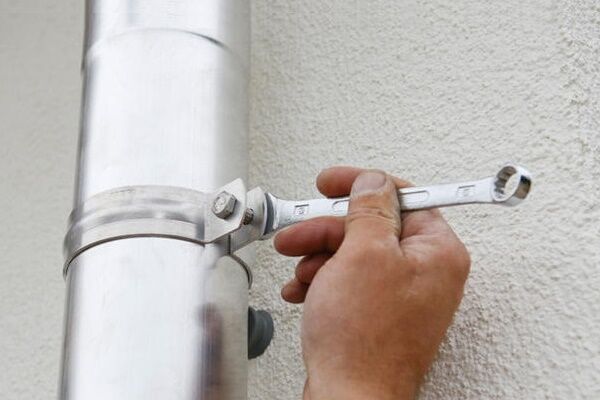
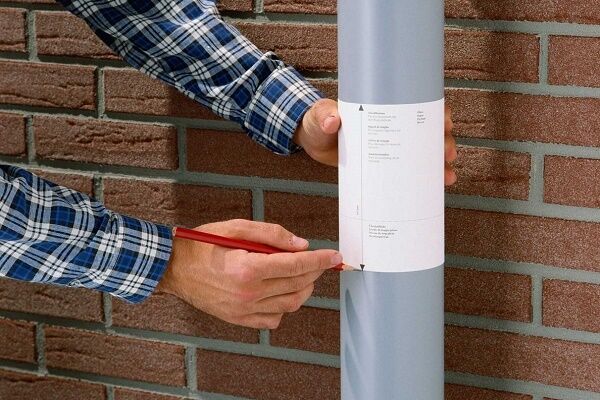
To make it possible to fix the drain riser, mark the placement points of the clamps. The lowest point should be located directly above the drain.The riser clamps are not tightened too tightly so that the pipe can move slightly up or down during linear expansion.
To ensure that water flows freely from the roof during the cold season, the gutters are equipped with a heating system. How to do this, read in this material.

Conclusions and useful video on the topic
Advice from professional installers will always come in handy if you want to do it yourself install a drainage system on the roof.
Tips for organizing drainage:
Example of assembly and fastening of elements:
Any owner can design and install a drain using a modern modular system. The main thing is to have minimal construction skills and not be afraid of heights.
Do you have any questions about the topic of this article? Have you found any bugs or have valuable information that you can share with our site visitors? Please leave comments in the block below.


Helpful information! I live in a house divided between two owners: that is, on one side is my family, and on the other side are the other owners. So the neighbor, a slippery fellow, installed the drainpipe incorrectly and everything is draining under my porch. And since it is wooden, something has already begun to rot there. I'll have to send him the link so he can have a look. But my craftsmen did everything, you can’t find fault there.
We are building our own house. They hired workers. The construction is almost finished, and then the husband decided to save money) He said that he would install the gutters and attach it to the roof himself.We have a two-tier sloping roof, so it became necessary to install gutters on the eaves of each pitched plane. Aluminum was chosen as the material. We thought it would be easy, but it turned out that it was better to entrust the construction to experienced roofers. After installing the gutter, my husband’s hands wet the façade of the house on one side, and rainwater poured from the drainpipe directly onto the foundation and porch. Remade. Now everything is great!