Sink built into the countertop: installation diagrams and analysis of installation features
A sink in a bathroom is an essential item.Not so long ago, there was simply no special choice when purchasing this plumbing fixture, whereas today there are many varieties of truly necessary equipment.
Particularly popular is the sink built into the countertop. This is explained by the fact that it is convenient, practical and at the same time has a very attractive appearance.
The content of the article:
Built-in sinks: what are they?
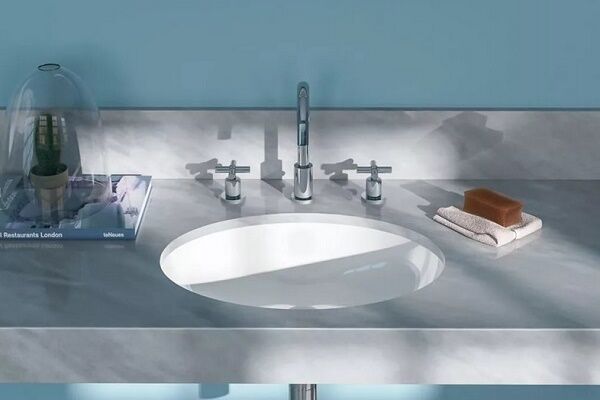
Built-in sinks are those that form a single whole with the countertop. Based on the type of installation, they can be divided into two groups. The first category includes the so-called overhead or top-mounted devices.

If installed incorrectly, moisture may enter the tabletop through this seam, which will lead to rapid destruction of the base. At the same time, overhead models are easy to install and relatively low cost.
The second group - integrated (or built-in from below) models - are inserted into the base and secured from the inside with special fasteners. They become a kind of continuation of the tabletop. This is a more aesthetic option, however, its installation is a little more complicated and the cost is higher.
When purchasing a sink that is mounted in the bathroom countertop, you must definitely pay attention to what material it is made of, since its performance characteristics and installation method will depend on this. Let's consider what material is used for the production of plumbing fixtures.
Ceramics
The material is baked clay. You need to know that, depending on the manufacturing method, a ceramic sink can be porcelain or earthenware. The first option is more fragile.
At the same time, it is distinguished by greater uniformity and density than earthenware. Porcelain is easy to clean, dirt does not stick to it and it is more beautiful. Its cost is slightly higher.

Budget sink models are made from faience. This is a relatively inexpensive material that is more durable than porcelain. The main disadvantage of earthenware is its high porosity. Pollution easily penetrates the pores and lingers in them, so it is quite difficult to care for the material.
In addition, over time, small cracks may appear on the earthenware, which gives it a vintage look, but affects its strength.
Metal
The traditional material for making sinks is stainless steel.However, such products are usually not chosen for the bathroom, unless they are selected to match the tray in the shower stall or bathtub.
Sinks made of non-ferrous metal, simulating copper or bronze, will be more appropriate in the bathroom. Such models will fit perfectly into a Mediterranean or rustic style.

Metal sinks have many advantages. They are strong and durable, quite resistant to various mechanical damage. Their weight is relatively light, so installation is not difficult. At the same time, the products have a very attractive appearance, especially antique-style models. Disadvantages include difficult care and high cost.
Natural and artificial stone
Natural materials most often used are marble, basalt, travertine, granite or onyx. All stone sinks very beautiful, durable and environmentally friendly. However, the cost of such products is high. This is due not only to the price of raw materials, but also to the complexity and labor-intensive process of processing natural stone.

Only special products can be used to care for products; acids and abrasives can damage them.
Artificial material has all the advantages of natural material and even surpasses it in strength. It consists of about 80% stone chips, which are bound by a special polymer.The result is very strong and durable products that are also easy to maintain. Their prices are more affordable.
Glass
The products are made from special tempered glass, the strength of which is sufficient for trouble-free use of such a sink. The glass surface of the equipment is resistant to mechanical damage and is almost impossible to scratch.
In addition, the high density of glass prevents dirt from being absorbed into the surface. The products are insensitive to temperature changes and aggressive chemicals.

Glass sinks are very attractive in appearance. They can be produced in a variety of colors, transparent or tinted. The shape of the product can also be any, even the most unexpected.
The owner can be inconvenienced by stains and water marks remaining on the glass, but the use of special cleaning products easily solves this problem. For transparent sinks, special chrome-plated components are used.
Why choose a countertop sink?
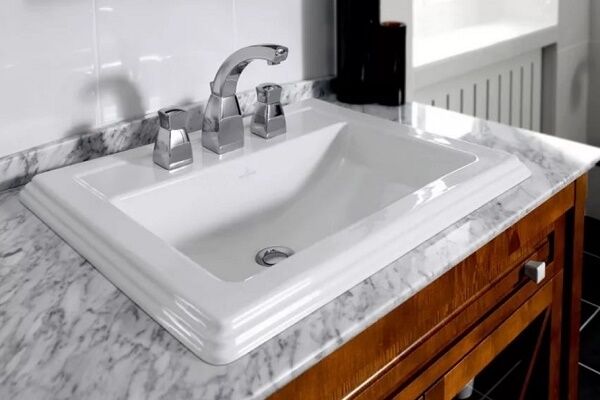
The sink built into the countertop is very practical. This option for arranging a plumbing fixture has many advantages. First of all, a furnished tabletop or cabinet with sink helps to properly organize the bathroom space.
The cabinet into which the sink is built can be either straight or angular. The latter option allows you to save as much free space as possible in the room.

The “working” area of the sink, thanks to the countertop, increases significantly, which allows you to store all hygiene items directly on it, without cluttering the wall with shelves.
Engineering communications are securely hidden inside the cabinet on which the tabletop rests. As a result, another storage space appears in which it is convenient to keep washing powders, stain removers and any other products.
A built-in sink is more durable than its wall-mounted counterparts. This is explained by the fact that the bowl rests on the walls of the base along its entire perimeter, so it can, if necessary, withstand heavy loads.

The installation method of such equipment requires greater tightness. If the device is installed correctly, water when washing does not get inside the base and cabinet, as well as onto the floor. The latter is ensured by the fairly wide edges of the tabletop.
Perhaps, externally, designs with a built-in sink may seem cumbersome. It all depends on the chosen model, area and style in which the bathroom is decorated. In any case, you should select the size and design of the sink and base, guided by the design of the room.
Features of installing a built-in sink
To understand how to install a sink in a countertop, you need to decide on the installation option.
There are several ways:
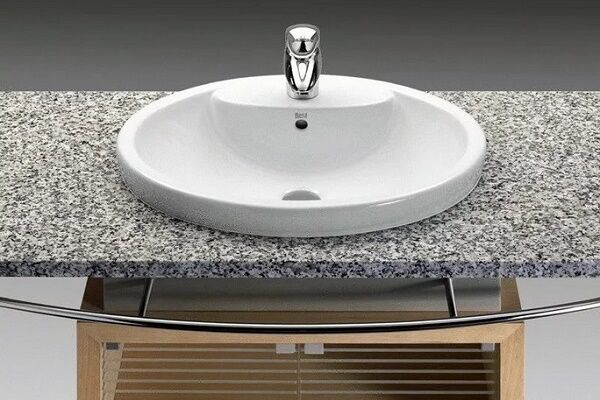
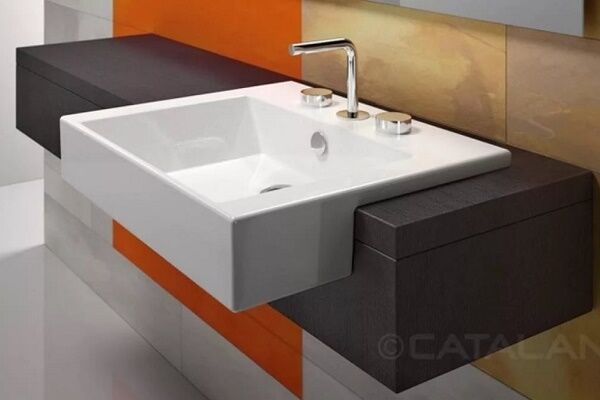
- Flush with the tabletop. A hole is made in the base, at the edges of which small recesses are made into which the sides of the sink are placed.
- A sink “recessed” into the base. It assumes that the top edge of the product will be slightly below the plane of the tabletop.
- Equipment raised above the base. In this case, the sides of the sink are placed on the edges of a hole cut in the countertop, which serves as a support for them.
- Partially built-in sink. The device is lowered into the hole in the base by a third, half, or some other way. The rest of the equipment rises above the countertop.
Depending on the chosen installation method, the installation procedure will vary, although in general everything goes about the same. Before work, the master needs to prepare tools and materials.
We will need Phillips and slotted screwdrivers, a building level, a marker or pencil, a tape measure, a drill or screwdriver, self-tapping screws, masking tape, silicone sealant and sandpaper. An electric jigsaw is usually used to make a hole in the countertop, but if it is made of artificial stone, then you will need a grinder.
Equipment installation instructions
Once the necessary tools and materials are prepared, you can begin to work. It is carried out in several stages.
Choosing a sink location
It is clear that the place where the sink will be located is predetermined. But now you need to accurately designate the device’s seat. It is important to take into account several key points.
The equipment can be installed almost anywhere on the countertop. It would be a mistake to assume that this can only be done exactly in the middle of the base.

When placing the sink close to the edge, you need to understand that the remaining section of the base must be wide enough so as not to lose strength and not break off during use. In addition, you need to make sure that utility lines can be easily connected to the sink and that nothing should interfere with them.
The internal load-bearing elements of the cabinet should not interfere with the connections. If this is not the case, the sink should be positioned differently, since damage to the supporting structure may result in the destruction of the cabinet.
Note that in addition to marking the location of the bowl, before starting work, you should also mark the attachment points of the tabletop on the wall, if it does not rest on the cabinet. In this case, it is marked according to the principle of determining sink installation height.
Preparing the main template
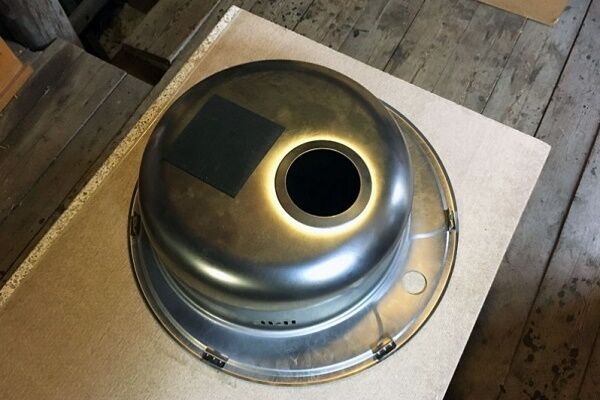
To properly embed the sink into the base, you will need a template. This is the name of the paper part that follows the contours of the sides of the product. Usually the template comes with the sink.

To do this you will need a sheet of cardboard of sufficient size. It is laid on a horizontal surface, after which the sink is placed on it bottom up. The device is pressed against the cardboard and carefully traced along the edge of the sides. The finished template is cut out with scissors and used for its intended purpose. Some people prefer not to bother with preparation and outline the sink directly on the countertop.
Marking the base for equipment
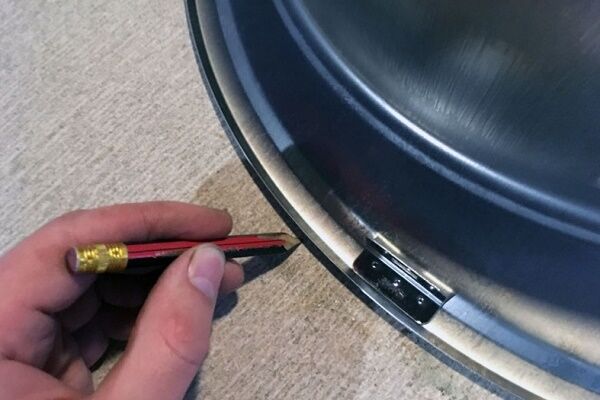
The marking procedure will vary somewhat depending on the method of securing the sink under the countertop. First, we take the template and place it in the place where the equipment will be located.
If it is assumed that the sink will rest with its sides on the edge of the hole, proceed as follows: carefully measure the size of the sides, then carefully trace the template.

If the sink must be recessed into the countertop, proceed differently. In this case, the mounting hole must match the size of the sink so that it can be lowered into the base.
To fix such a product in place, special fasteners are used.To mark the so-called semi-built-in sink, a template is used that follows the contours of the product at the built-in level. As in the case of a sink “recessed” into the base, it is traced exactly along the contour; no allowances need to be made.
If the countertop and plumbing fixture are fixed separately, then attaching a sink to the wall produced in the standard way described in the article we recommend.
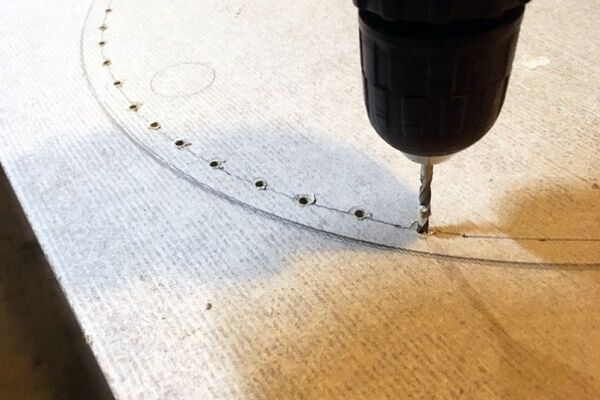
Making a hole for the device
For standard wood-based worktops in a variety of finishes, the easiest way to make a hole is with an electric jigsaw.

First you need to prepare a hole through which you can insert the jigsaw blade. To do this, take a drill and drill a hole in that part of the tabletop that will subsequently be removed. We insert the blade and start cutting.
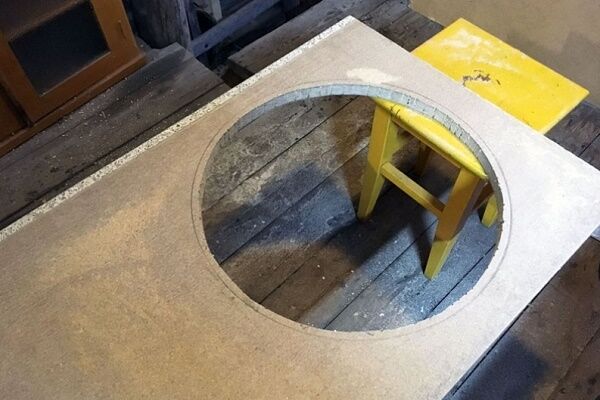
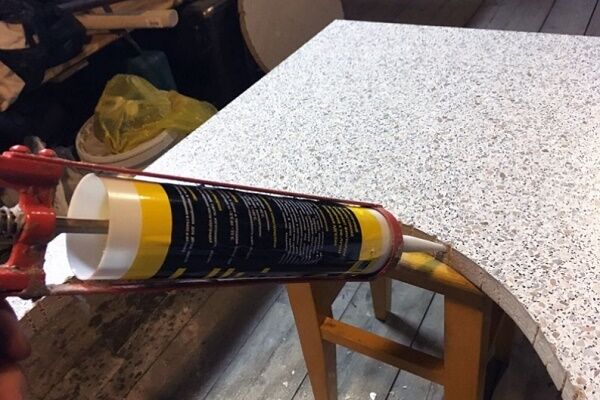
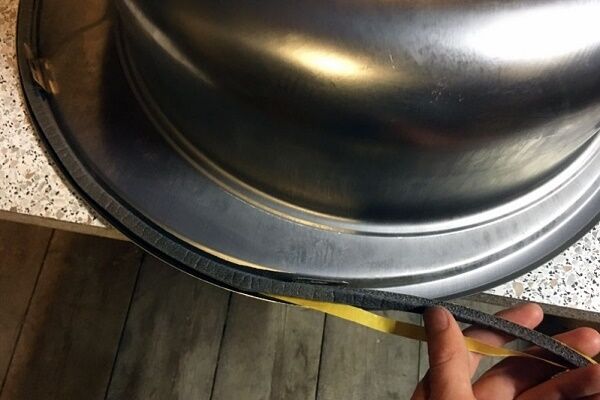
We carry out the work extremely carefully and accurately so that unwanted chips and cracks do not appear on the base. Carefully clean the walls of the finished hole with sandpaper. They must be smooth and even; chipping on them is unacceptable. Now you need to protect the cut of the base from moisture.

To make it more convenient to work, you can take a narrow spatula. We put sealing tape on the sealant. It can be made of thin rubber or polyethylene foam.
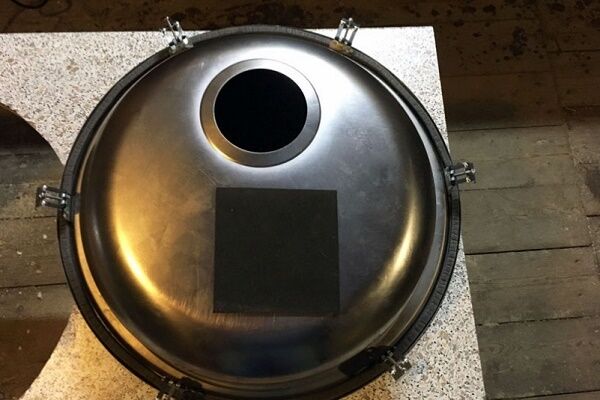
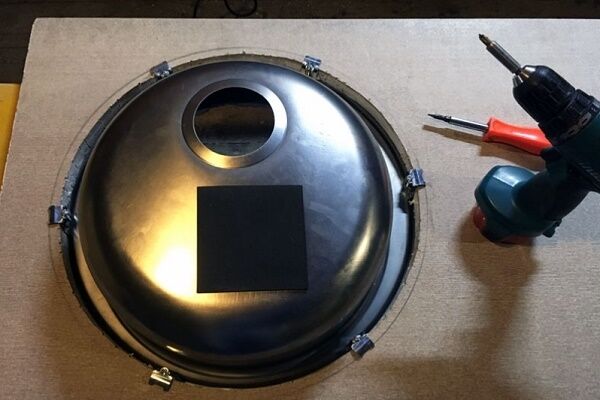
Brief step-by-step photo guide
To visualize the process of inserting a sink into a countertop, we suggest that you familiarize yourself with the photo instructions:
The next steps are to prepare the hole and the sink itself for installation. Let's get started:
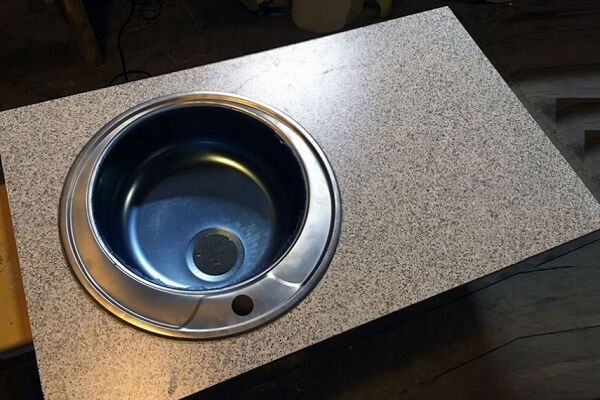
Now the countertop sink is completely ready to connect to the sewer outlet and install the faucet.
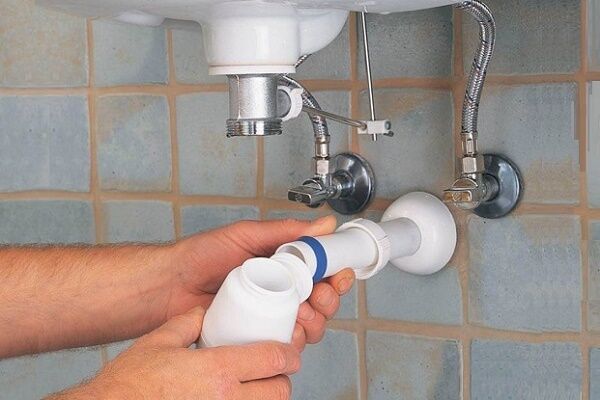
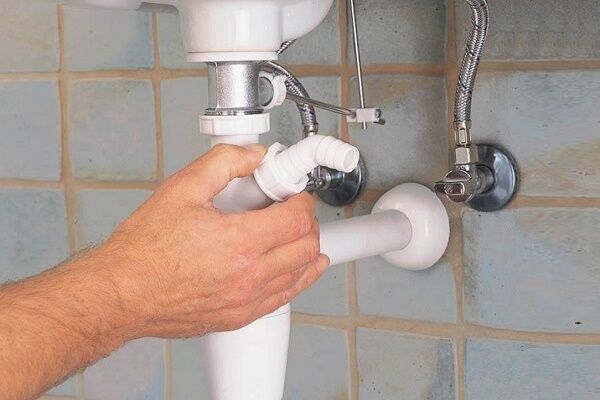
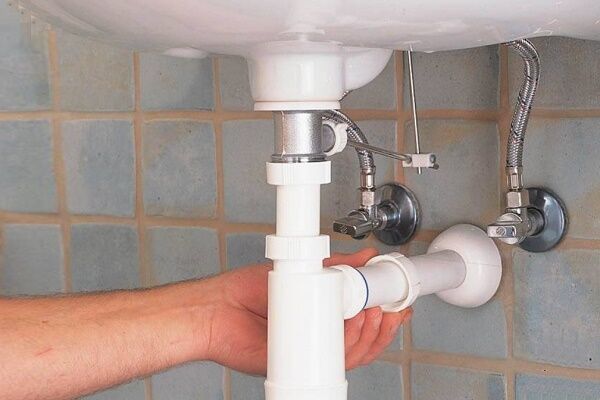
Connection of utilities
Now it will be convenient to connect utility lines to the sink installation site. Let's start with the sewer. If necessary, we make holes in the cabinet and insert the pipe into the structure. We arrange everything as conveniently as possible for the subsequent connection of the sink.
Next we work with the water supply. We put pipes inside for cold and hot water.The faucet is usually installed on the countertop, if so, it is better to install it at this stage. If produced installing a faucet on a sink, then it is fixed on the device before attaching it to the tabletop.

First, we assemble the mixer, following the assembly instructions, which a conscientious manufacturer must include in the packaging with the product. We fix the flexible eyeliner. There are rubber cuffs on its fittings.
Experienced plumbers advise moistening them with water before screwing them into place. After the mixer is ready for installation, we place a special o-ring on its lower part.
Now you can cut a hole in the countertop for the mixer, then insert the device into it, passing the liner into the hole. We place a pressure washer on the back side of the tabletop, having previously installed a special rubber gasket under it.
During operation, it will prevent possible leaks. Next, screw the nut onto the stud. We level the mixer as much as possible and tighten the fasteners.

After we have completely tightened the nuts, we check that the mixer is installed correctly and firmly. It should not rotate or move. The appliance must stand firmly in its intended place.
All that remains is to connect it to the water pipes. The nuts of the flexible line are screwed onto the corresponding parts.For better compaction, you can additionally use fum or flax tape.
Installing the sink into place
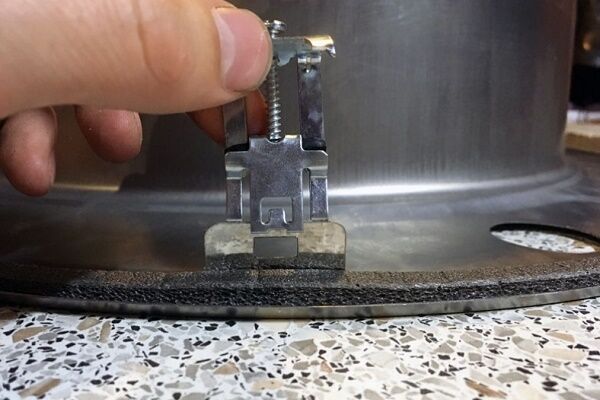
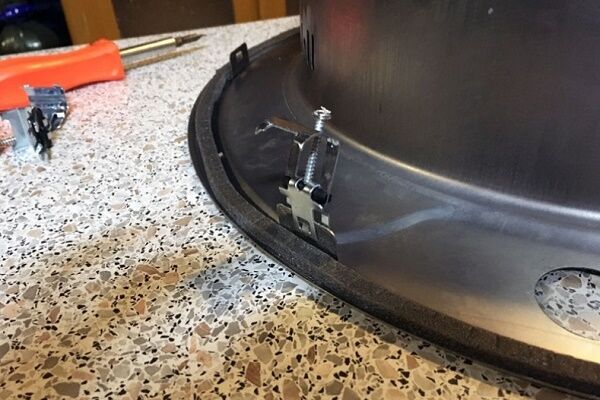
We apply sealant to the sealing tape pre-glued to the cut of the mounting hole, and place it on the mounting points for the sink, if any. We bend the fasteners slightly so that they do not interfere and insert the bowl into the hole.
Rock the product slightly to find the optimal position for it. After we find it, we tighten all the fasteners completely and carefully remove the excess sealant that has protruded around the bowl.

If the sink is a countertop sink with wide sides, be sure to coat it with silicone sealant underneath. This will protect the resulting seam from the damaging effects of moisture. We carefully examine the cabinet with the sink from the inside.
All gaps and seams are carefully treated again with silicone sealant. We do the same with the junction of the base and the mixer.
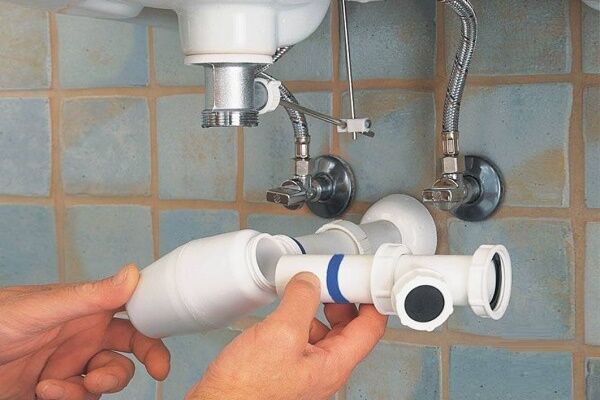
Siphon installation and connection
We start with assembling the product. As in the case of the mixer, we carry it out exactly according to the manufacturer’s instructions. The most important point when carrying out this procedure is maintaining the tightness of the connections.
We pay special attention to the bottom plug, since it bears the main pressure of the liquid. It is advisable to carefully inspect it before purchasing for the presence of burrs, chips and other defects. There should not be any, otherwise the integrity of the gasket will be compromised.
It happens that the manufacturer supplies siphons already assembled. In this case, you should not be lazy and disassemble the device.This way it will be possible to check the presence and integrity of the gaskets, as well as the fastening of all elements of the device. We assemble the siphon, controlling the clamping force so as not to accidentally damage the product.
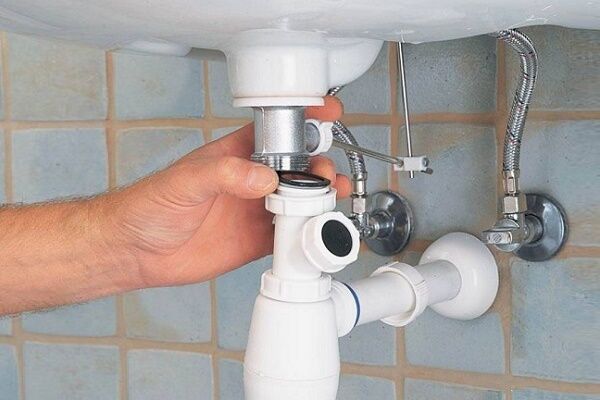
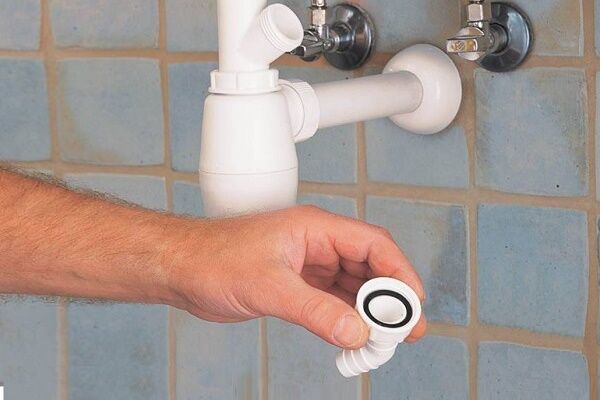
When installing the bottom plug and all equipment connections, it is advisable to secure the gaskets with sealant. We tighten the elements of the device without strong pressure, but until it stops. Having installed the outlet pipe in place, tighten the fastening screw, and then remove the excess sealant with a damp cloth.
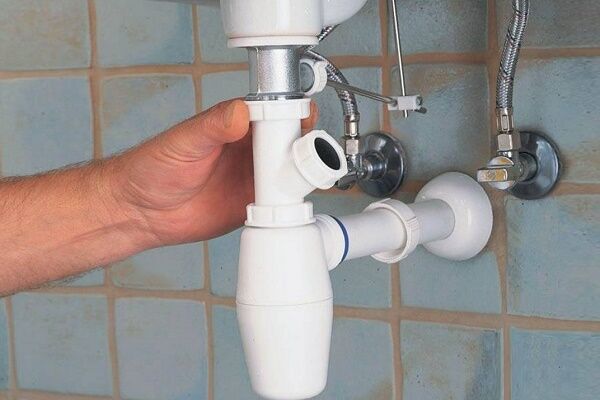
Experienced craftsmen remind you that the installation height of the siphon can be adjusted using the outlet pipe. We attach the siphon to the sink and secure the part with the trap with a screw. Then we connect the main part of the equipment to the sewer pipe.
If the sink design is designed for installation of drain with overflow, two pipes are connected to the bowl. We advise you to read the step-by-step guide outlined in our recommended article.
After this, it is advisable to conduct a test run, even if it is intended to connect additional equipment to the same pipe. For example, if you installed siphon for connecting washing machines to a sewer outlet common with the sink.
This will make it easier to deal with possible problems. At the time of the test run, we close the additional holes with special plugs. We open the water supply and check the functionality of the siphon. If everything is in order, turn off the water and, if necessary, connect additional equipment.
Plumbers recommend additionally securing the drain hose from the washing machine with a clamp to prevent it from being torn off by water. The hose extending from the siphon should not be stretched or twisted so that the outflow of liquid is not complicated in any way.
Recommendations from experienced plumbers
And in conclusion, a few recommendations from professionals on how to properly attach a sink to a countertop. The first concerns cutting out a hole in the base. At this stage, it is important not to damage the base and make the seat of the required size.

If there is no sealant, then you can use regular PVA glue to treat the cut of the base. It will give the same effect. You can cut out the required hole in an artificial stone countertop using a grinder with a diamond-coated disk installed in it.
After installing the equipment, it is worth checking the horizontal position using a building level. A mistake will lead to unpleasant consequences.
He will familiarize you with the rules and technology for installing an overhead sink on a countertop. next article, which provides selection guidelines and installation instructions.
Conclusions and useful video on the topic
Video #1. Subtleties of installing a built-in sink:
Video #2. A detailed story about installing a built-in sink:
Video #3. What type of sink is best to choose for installation paired with a countertop:
A countertop washbasin is a practical and beautiful solution for any bathroom. It will be appropriate in both spacious and small rooms.
In addition to its attractive appearance, such a sink is very easy to use, which is why it is in particular demand among designers, and its popularity continues to grow. Installation of built-in equipment is simple and accessible even to a novice master.
Tell us about how you assembled and connected the built-in plumbing with your own hands. It is possible that in your arsenal there will be technological subtleties that will be useful to site visitors. Please write comments, post photos related to the topic of the article, and ask questions in the block below.


Installing such a sink is no more difficult than a regular one. Connection to the siphon according to the standard scheme. But how I had to worry about adjusting it to the hole in the tabletop. It seemed like everything had been calculated, but water was still leaking. I redid it several times, to no avail. As a result, I simply sealed everything around the perimeter with polyurethane foam from below, under the countertop. Now it doesn't leak.