How to properly attach a sink to a wall: step-by-step instructions
A sink is a necessary element for any bathroom.You can find many different models on sale, differing in material of manufacture, shape and installation method.
Among the entire range, wall-mounted sinks are in good demand. Such plumbing comes in handy when there is limited space in a bathroom or bathroom, and its installation does not cause any particular difficulties. You can fix the sink to the wall yourself. Do you doubt your own abilities?
We will tell you how to choose the optimal model and dimensions of plumbing fixtures, what tools you will need during the work, and also provide installation instructions describing each technological stage.
The content of the article:
How to correctly determine the size of a sink?
All plumbing fixtures can be divided into several groups, differing in size:
- compact miniature sinks, designed specifically for small spaces;
- standard equipment — provided in the product lines of most manufacturers;
- combined instruments, combining two or more shells;
- non-standard equipment of various sizes and shapes - carried out according to individual projects.
When placing plumbing equipment in a room, its three main parameters must be taken into account: depth, width and height.This is the only way to choose the optimal size device for a specific room.
This is very important, because a sink that is too large will take up a lot of free space, and a small one will be inconvenient to use. Not only the width, but also the depth of the product is important.

To correctly select the width of the sink, you need to remember that the optimal option is 0.5-0.65 m. Such equipment fits well into a medium-sized room and does not “eat up” the free space in it. It is convenient for washing and allows you to avoid splashing water on the floor.
Such a sink would look good in a large room, but wider models that solve some special design problems are also appropriate here.
The minimum width of sinks sold in stores is only 0.3 m. They are certainly not convenient enough to use, but for small rooms there are no other options.
When choosing a plumbing fixture, you also need to evaluate the method of installing the mixer. Most often, it crashes into the middle of the so-called installation site, where a special hole is provided for this purpose. The dimensions of the installation site are also important.
If you intend to install a double sink, and this is very appropriate in large families, you need to choose models where the distance between the centers of the two devices exceeds 0.9 m. Otherwise, using such equipment will be very inconvenient.
The distance to the wall also matters. Practice shows that the optimal option is 0.48-0.6 m. In this case, you need to focus on the arm length of the person who will use the device.

It's easy to do. You need to stand near the sink and extend your hand, its opposite edge should be at your fingertips or in the middle of your palm. It will be convenient to use such equipment.
It is worth paying attention to the depth of the bowl. The larger it is, the less chance there is of splashing water falling into it. The best models in this regard are the “tulip” or “half-tulip” type. They are quite deep. The worst of all are the flat “water lilies” that are placed above washing machines and some overhead sinks.
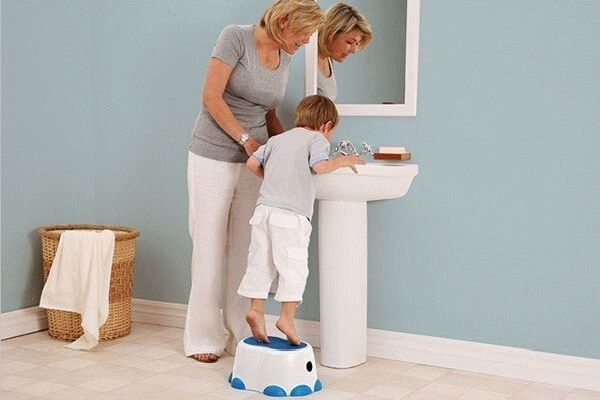
And the last important point: device installation height. It is selected based on the height of those living in the house. It is desirable that everyone is comfortable using the equipment. On average, the installation height is 0.8-0.85 m.
Cantilever models can be hung at the desired height, whereas devices with a pedestal are installed to the height specified by the manufacturer.
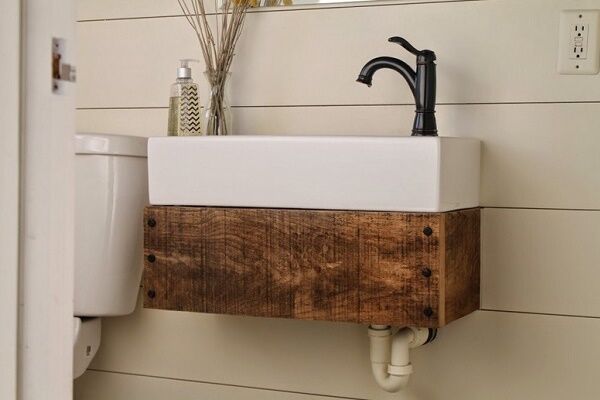
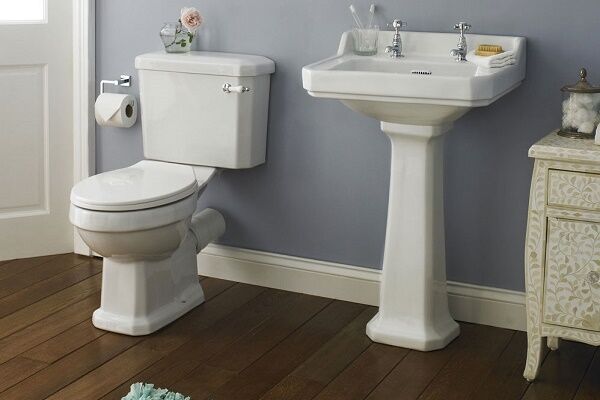
All sinks are divided into two large groups: wall-mounted or base-mounted. The second option involves the presence of a pedestal on which the bowl rests.
When attaching a sink to the wall, its entire weight falls on the fastenings or on a special frame. Therefore, they need to be secured especially carefully. It is highly undesirable to install such models on partitions. You should choose a strong load-bearing wall as the base. Otherwise, the structure may simply fall to the floor.
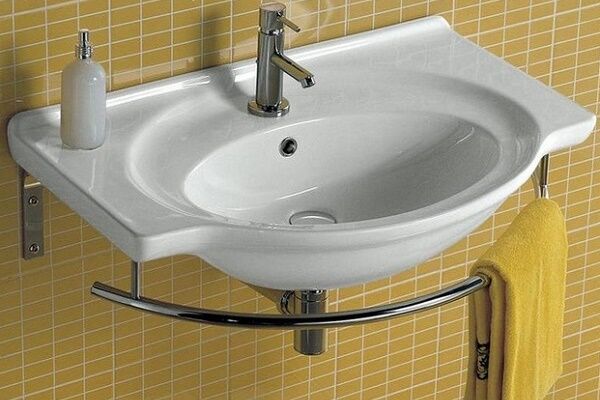
Console sinks are distinguished by the fact that the utilities connected to them remain visible. This is not aesthetically pleasing enough, so they try to hide them behind some decorative element.
Alternatively, you can install beautiful details, for example, chrome, which will decorate the interior of the room.

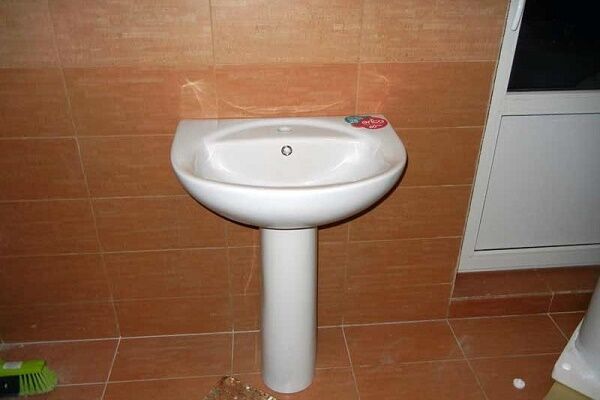
“Tulips” are considered a practical type of wall-mounted sink. Their bowl is fixed to the wall. However, part of the weight of the sink is taken by the base, which is also called the pedestal.
A big advantage of such equipment is the hidden supply of utilities. The pipes are laid inside the pedestal. The disadvantage of the design is the inability to adjust the height of the bowl.
For those for whom this is important, you can purchase the so-called “half-tulip”. This modification assumes that the pedestal does not rest on the floor. It, like the bowl, is attached to the wall. This base is shorter than the pedestal of a standard sink. But the supply pipes are still hidden inside the base.
We carry out preparatory work
Before installing the sink, it is necessary to determine exactly the location where it will be located and the procedure for connecting the equipment to utilities. Once again, carefully measure the height of the device and its width.
When choosing an installation location, be sure to take into account that the approach to the sink must be free. In addition, it should be convenient to use.
If a plumbing fixture is installed in place of a used device, the latter will need to be dismantled. This must be done very carefully and carefully so as not to damage the old sewer and water pipes.
After dismantling, we carefully clean the site of future installation and prepare areas for connecting utility lines. Experts recommend avoiding the use of all kinds of adapters if possible. They impair the sealing of connections and spoil the appearance of the structure.

In some cases it is impossible to do without adapters. For example, if you have to arrange a connection with very old pipes. Then it is advisable to purchase high-quality parts that best suit the pipeline.
One more thing. It is important to properly equip the sink if it is sold without a siphon and other elements. It should be understood that the siphon is not a universal element. Different siphons are designed for different equipment models. For example, the one that is suitable for a steel product is not suitable for sanitaryware.
Usually, a conscientious manufacturer supplies the sink with everything necessary.If so, you should make sure that all the parts are in place. It is advisable to immediately purchase and matching mixer.
Detailed installation instructions
We start with preparing the tools.
To work you will need:
- gas key;
- screwdriver;
- wrenches;
- drill with a drill equipped with a pobedit tip;
- hammer;
- construction level;
- marker or pencil.
In addition, you need to prepare plumbing sealant, sealant such as Fum tape and fasteners. On sale you can find special sets of fastenings for sinks. If you purchase such a kit from a trusted manufacturer, this will be the best option.

After the tools and materials are prepared, turn off the water, both hot and cold. You can start working.
Read the article: Rating of the best wrenches.
Marking the location for attaching the sink
Let's start with the markings. The first thing to mark on the wall is the central horizontal line. It will become the upper limit along which the edge of the plumbing equipment will be set. Using a level, check the horizontal position. Use short vertical lines to mark the width of the bowl.
Next, we measure the thickness of the side walls of the sink and set this value down from the central horizontal line.
We connect both marks with a line that will show the mounting height of the brackets. After that, take the shell and turn it over. Then we fix the brackets on the side walls. After this, we apply the bowl to the upper horizontal mark and press it against the wall.
At the same time, we make sure that all previously outlined lines coincide.Insert a marker into the hole and mark the places for installing fasteners.
Installing fastenings for brackets
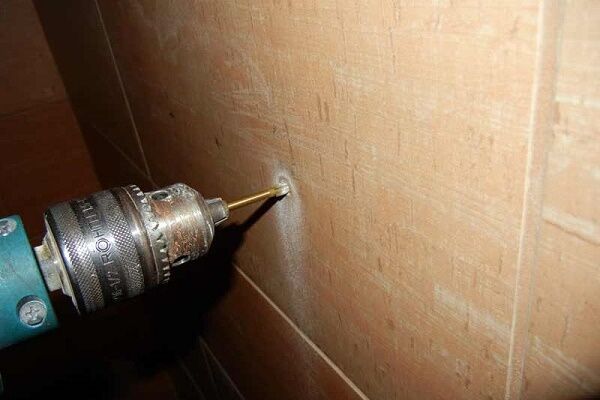
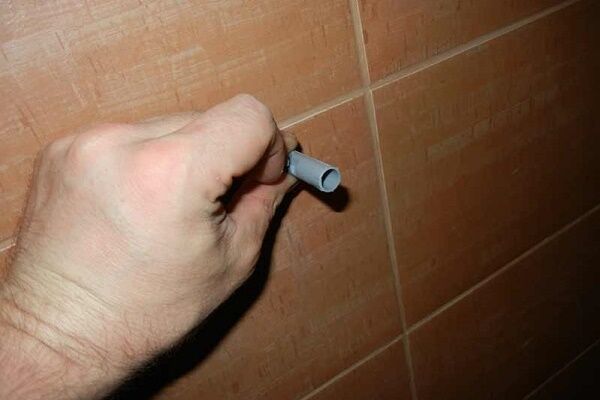
We take a drill with a Pobedit drill bit and prepare holes for fasteners in the designated places. Their depth should slightly exceed the length of the dowels, and their diameter should be slightly smaller than the cross-section of the bushings. You can put a little glue inside the holes to make the insert plugs stick better.
Using a hammer, hammer the dowels into the holes. Then we take the fasteners and screw them one by one into the plastic base.
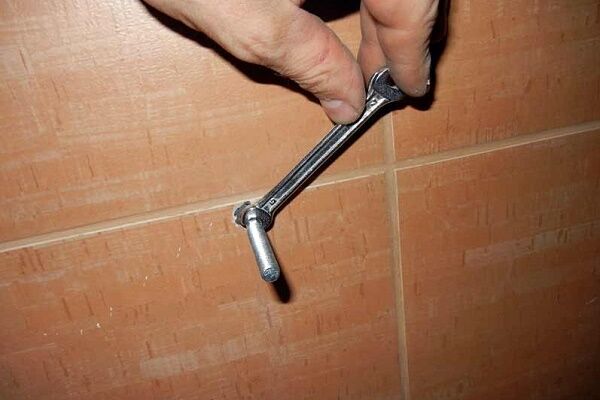
Installing brackets for the sink
We install brackets on the prepared fasteners, which are supports for the bowl. We place the sink on them and, holding it with our hand, mark with a marker the places where the fasteners will be installed to secure the device to the wall.
We remove the bowl and prepare holes for fastenings. We hammer the liners into them and screw in the fasteners.

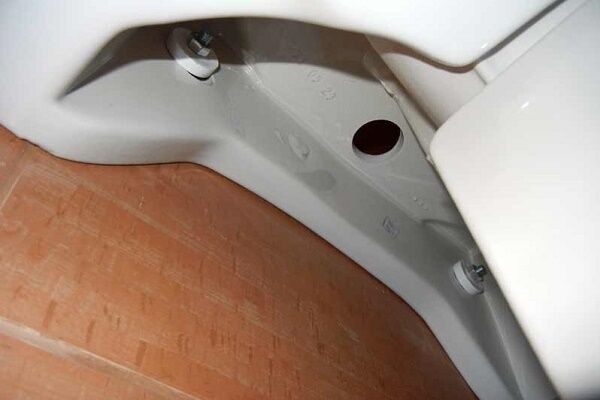
Before installation, apply sealant to the edge of the bowl to prevent water from leaking into the gap between the wall and the sink. As an option, you can use a special plastic strip, which will provide maximum protection from water. We glue it with silicone sealant. We put the sink in place, but do not fix it completely yet.
Install and connect the mixer
You need to know that the faucet can be mounted on the installation platform before the sink is put in place, or after that. Everyone does what is convenient for him. In any case, you need to remember that special materials will be needed to install the mixer.
Usually the manufacturer completes their products with them.If this is not the case, you will need to purchase additional studs, nuts, washers and gaskets.
Before installing the mixer, it is advisable to carefully read the manufacturer's instructions and strictly follow its recommendations. Typically, such instructions describe in detail the installation process, taking into account all the features of a particular model.
First, the mixer must be assembled into a single unit. In this case, tabs and seals must be used. Before assembly, an O-ring is usually placed on the spout.
The nuts must be removed from the studs, and then the mixer put back in place. First, a sealing ring is placed under the device and connecting hoses are pulled into the hole on the mounting plate.
The equipment is fixed to the sink using a clamping nut. This is done very carefully so as not to overtighten the nut, otherwise the shell may crack.

If the pipeline couplings and the mixer inlet axes do not fit together, the connection is made using special eccentric adapters. They have different thread diameters on opposite ends. The clamping nut is first tightened by hand, then with a wrench half a turn. Most often this is quite enough.
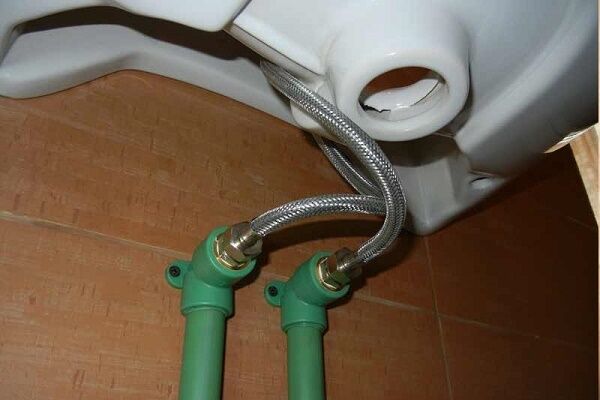
Once the faucet is secured in place, you can connect it to the water supply. Most often, flexible hoses are used for these purposes. We attach them to the pipes. We supply hot water to the left hose, cold water to the right.
We first tighten the nuts by hand, and then tighten them with an adjustable wrench. To seal the connection, be sure to use Fum tape or a similar material.Rewinding is performed along the thread.
An important nuance: the length of flexible hoses. It should not be too large, otherwise it will sag unsightly. Also, it cannot be too small, otherwise the hose will be stretched, which will cause its premature failure. In addition, the hoses must lie flat, without twists or kinks.

After completing the work, it is necessary to check the quality of the connections. This must be done after the siphon is connected, since you will have to supply water to the mixer.
During the inspection, the possible presence of water at the flexible connections and near the mixer is carefully monitored. If this is the case, then the nuts need to be slightly tightened with a wrench.
Detailed instructions for installing the mixer are described in this article.
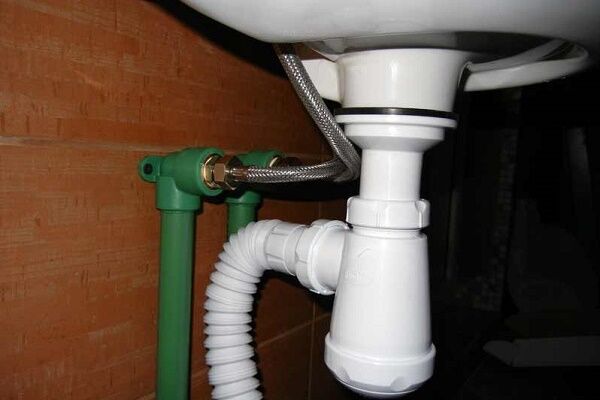
We connect the siphon to the sewer
You can find different ones on sale siphon models, when installing each of them, nuances are possible, so you should carefully study the installation instructions from the manufacturer. Let's consider the simplest option with a universal corrugated siphon.
First, we disassemble the siphon and check it for the presence of gaskets, the strength of the threads and the absence of debris inside the assembly. During the installation process, it is advisable to moderately lubricate the threads and gaskets with sealant, so the protection against leakage will be even more reliable.
We press the siphon with a special thick gasket against the drain with one hand. This must be done so that the gasket, without displacements or gaps, fits tightly to the drain along its entire perimeter. With your other hand, insert the mesh, screw and gasket into the drain hole.
Carefully tighten the screw, then tighten it. We fix the corrugation. To do this, insert it into the drain socket of the siphon and carefully tighten it with a wing nut.

We connect the siphon to the sewer pipeline. To do this, we insert a special rubber seal inside the pipe and install the corrugation bell into it. An important point: the corrugated pipe must lie flat, without kinks or twists. This completes the installation of the siphon.
You can conduct a test run of water and check for leaks. If liquid is leaking somewhere, the defect should be corrected immediately.
The sink is fixed in the same way without brackets. The installation process differs in that it is fixed directly to the wall, so during the marking process, the installation locations of the fasteners are marked, holes are drilled and dowels are driven in. Then the sink is applied to the wall and fixed in this place with special fasteners.
“Tulips” and “half-tulips” are fixed in the same way. Their distinctive feature is the presence of a pedestal on which the bowl is placed. It is important to correctly determine the installation height of such a sink, because it must exactly match the height of the pedestal.
After the bowl is installed on the sink mount, a pedestal base is installed under it.
Photo guide for installing a tulip sink
Despite the fact that the main load of the sink with a pedestal is distributed on the support leg, the bowl of the sanitary fixture is still attached to the wall:
Installation of a water lily sink
Flat “water lilies” are designed for installation above the washing machine. You need to understand that not every "washing machine" model Can be installed under the sink. Typically these are compact, low-rise devices.
Some companies specifically develop and produce them. It is optimal that the sink comes complete with such a device.In such a tandem, devices usually complement each other perfectly.

If that's not the case, choose a water lily shell very carefully. It should overlap the washing machine by at least 10 cm. This way the latter will be reliably protected from water splashes. Another important point is the presence of a special drain, which should be located as close as possible to the back or side wall of the device.
There are two types of this drain:
- Round. A flat-type siphon is placed directly under the drain hole. Water drains quickly, and this design rarely gets clogged. A significant disadvantage is that the siphon is installed above the washing machine, which is fraught with problems with wiring and short circuits in the event of an emergency.
- Slit-shaped. The siphon is attached to the washing machine in the back wall of the bowl, so if there is a leak, water will not get into the electrical appliance. However, the drain hole is very narrow and often clogs.
For safety reasons, you can look for a sink with an overflow, which will further protect your washing machine from water.

The installation process of the “water lily” is carried out as follows:
- Marking the wall. To do this, draw a horizontal line indicating the upper edge of the device. To ensure that the line is strictly horizontal, use a level. We try the bowl against the drawn line, making sure that there is a sufficient gap between the machine and the sink.If everything is in order, we mark the holes for the fastenings.
- We drill holes and install fasteners. In this case, we use dowel fastenings or anchor bolts.
- Putting the brackets in place. They are secured in place with bolts. Do not tighten them tightly at first, leaving gaps of about 0.5 cm.
- Treat with sealant the back of the sink to protect the joint between it and the wall from water. We also apply sealant to the parts of the bracket in contact with the surface of the bowl.
- Putting the sink in place. To do this, we put the eyes of the plumbing fixture on metal hooks, after which we fix the device in place using anchors or dowels.
- Checking the reliability of fastening sinks, after which we tighten the bolts that secure the brackets.
At the next stage, a siphon is connected to the sink. This must be done before the brackets are fully tightened.

There are several modifications of siphons for “water lilies”; the procedure for their installation may vary slightly.
In general terms, the work is performed in the following order:
- We find the assembly instructions and, in accordance with them, assemble the siphon. All threaded connections and sealing elements must be coated with silicone. Carefully tighten the threads so as not to break the plastic elements.
- We put the siphon pipe, intended for connection to the washing machine, onto the drain hose. To ensure a strong connection, tighten it with a screw clamp. We check its reliability. If it is insufficient, the pressure of the water drained from the machine may tear off the hose.
- We connect the siphon outlet to the sewer pipe. It is advisable to further bend the corrugated pipe and secure it in this position with soft wire or electrical tape. This will make it possible to eliminate the possibility of an unpleasant sewer odor, which often happens when installing “water lilies” equipped with a flat siphon.
The design features of the sink do not always allow the faucet to be mounted on a bowl. In this case, it is installed on the wall or on the side of the bathtub to be used alternately with one and another plumbing fixture.
It is important that the spout length of the device is sufficient for such manipulations. In rare cases, the sink is equipped with a hole for the faucet.

The faucet is installed in strict accordance with the manufacturer's instructions after installing the siphon and finally securing the sink to the brackets. During the installation process, we pay special attention to high-quality sealing.
All seals must be treated with sealant. Threaded connections are sealed with Fum tape or special plumbing tow and paste.
The nuts on the flexible line are made of zinc alloys and are quite fragile, so they must be tightened very carefully, otherwise they may break. Upon completion of installation work, we conduct a test run of water. We carefully inspect all connections, and if a leak is detected, we immediately correct all defects.
Conclusions and useful video on the topic
We invite you to watch useful videos on the topic of the article.
The nuances of proper sink installation:
The wizard's tips for connecting a siphon:
Installation and connection of the sink above the washing machine:
Installing a sink yourself is a fairly simple task. Even a novice plumber can handle it without outside help. It is important to do everything carefully and in strict accordance with the instructions, then the installed sink will serve for a long time without requiring additional maintenance.
Do you have personal experience attaching a sink to a wall? Do you want to share your accumulated knowledge or ask questions on the topic? Please leave comments and participate in discussions - the feedback form is located below.


I would never install a lily pad sink directly above a washing machine. When washing, the machine vibrates, sometimes even jumps from the imbalance of the laundry incorrectly loaded into it. And the shell will also shake all over and become loose over time. Why is this necessary? As for installing siphons, everything is written to the point. I would also advise housewives to place a special mesh on the sink, both in the bathroom and in the sink. Because women’s hair clogs the siphon quickly, and cleaning it is sometimes problematic (it’s inconvenient to get into it). And when installing, you need to look at the future so that there is room for ease of both replacement and cleaning.
I think it’s obvious that water lilies are placed not out of great desire, but for reasons of saving space in a tiny bathroom. As for the vibrations and bouncing of the washing machine, this should not happen with a normal level installation.
Once you have correctly calculated the locations for the screws and drilled holes for them, the rest of the work becomes a breeze.It is the screws that hold the sink, if they are securely fixed, then everything will be in order. The sealant is needed to prevent water from flowing down the wall. Well, the siphon is even more simple to connect, you just need to be careful and make sure that all the parts fit tightly.