How to install a faucet on a sink: a detailed analysis of installation technology
If you need to replace a faucet in the bathroom or kitchen, but have no experience in performing such work, do not despair.This does not mean at all that the task is impossible and you will have to call a plumber. It is enough to carefully study the manual and scrupulously follow all the instructions. Do you agree?
We will tell you in detail how to install a faucet on a sink. Here you will learn what technological features must be observed when installing the device, what types of sinks are installed on. The article also lists common mistakes that a home craftsman should not make.
The content of the article:
Installation of a mixer: analysis of technology
Almost every adult man is able to install a faucet at home. It’s just that you don’t always have similar experience behind you, and sometimes it’s awkward to ask more experienced colleagues.
A detailed installation process will come to the rescue, which will eliminate many questions and give you confidence in your own abilities - installing the mixer is quite easy to handle.
How to prepare for installation?
Before you begin the actual installation, you have to go through a preparatory stage. First you need to carefully inspect the sink if it is already installed in the bathroom. If it's a kitchen sink, you still have to study it. First of all, you are interested in the number of holes provided by the manufacturer for the future mixer.

Often the manufacturer completes the original sink bowls with a faucet with all the parts necessary for installation. But this is only possible in expensive models, where all the plumbing elements are designed in the same style.
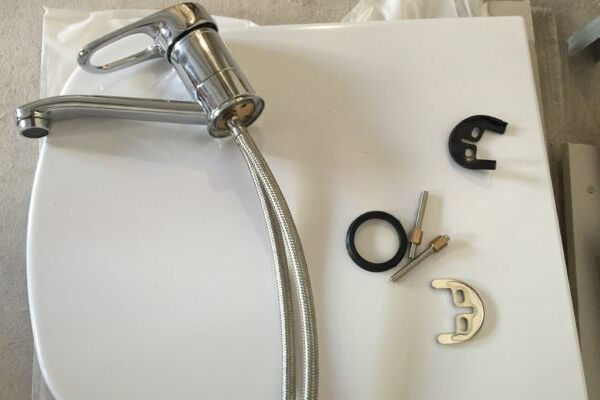
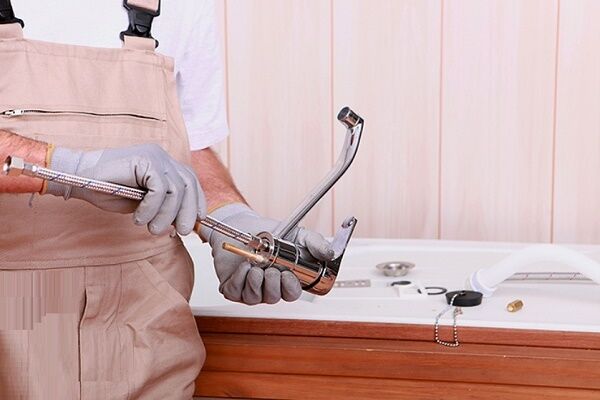
When purchasing a faucet, it is important to check that all parts are included. After all, installation will require nuts, sealing gaskets, flexible or rigid liners. The availability of all components should be paid attention to before purchasing the product.

When the mixer of the desired model and size has been purchased, the instructions have been studied, all that remains is to install it. To do this, you will need tools that it is advisable to prepare before starting work.
These are wrenches and adjustable wrenches, sealing tape, masking tape, a small wrench, a screwdriver, pliers, a flashlight, a plumbing faucet kit with all components, and a piece of soft cloth.
You may need to buy 2 additional hoses flexible liner, if the length of the tubes coming with the mixer is insufficient. You will also need a hacksaw for metal if you are going to install a model with bottom valve, having mechanical adjustment.

If the bathroom has already been in use, then most likely you will first have to remove the old faucet.It is important to do everything extremely carefully so as not to damage the sink if you do not plan to replace it. It is better to line the bottom of the container with a piece of soft cloth to avoid accidental chips and scratches.
Then you need to turn off the water supply taps to the mixer. If there are none, then you will have to turn off the water in the entire apartment/house. Then you need to check this by opening the mixer - if nothing drips, then you can proceed with dismantling.
If you plan to completely change a set of plumbing fixtures, then, naturally, first sink installation. Then you will need to turn off the water supply and lay a soft cloth over the front of the container to protect it from accidental damage.
Description of installation technology
If the preparatory work is carried out correctly, then installing the faucet on a ceramic sink will not take much time - on average it will take about 30 minutes. This is provided that the instructions included in the kit have been read and the mixer itself has been assembled.

The easiest way to install a faucet on a ceramic sink is if it is not yet secured to its place of work. When this is not possible, installation may be a little difficult and you will need a flashlight. In places that are difficult to reach, you will need to illuminate them with a flashlight - an assistant will be needed here.

In order to attach the faucet to the sink, you need:
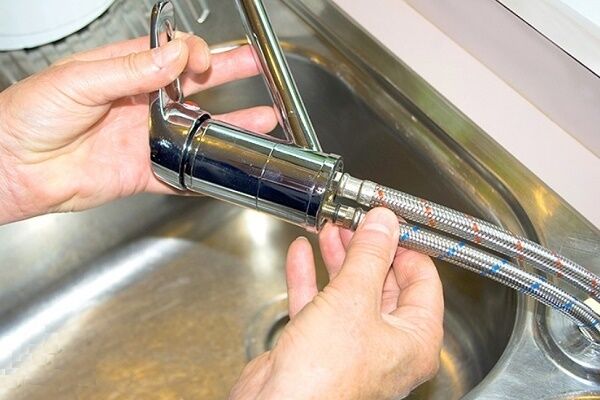
- Using a 10 or 11 wrench, screw the flexible hose to the mixer.You can use a flexible corrugated stainless steel tube.
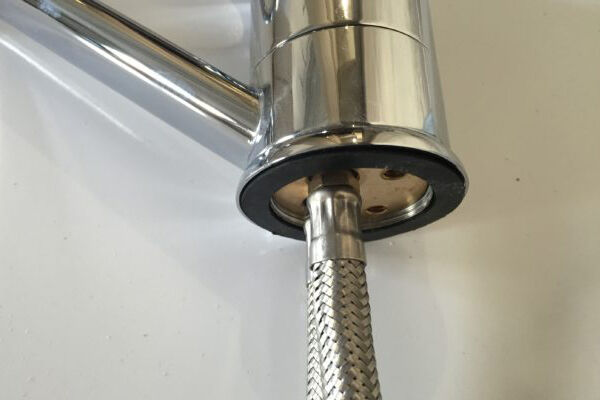
- Place a rubber or silicone gasket on the base of the faucet.
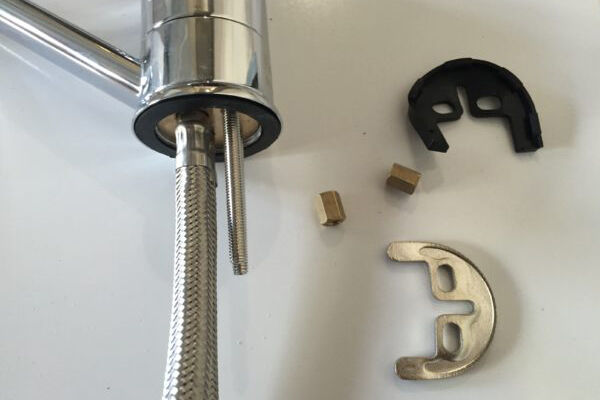
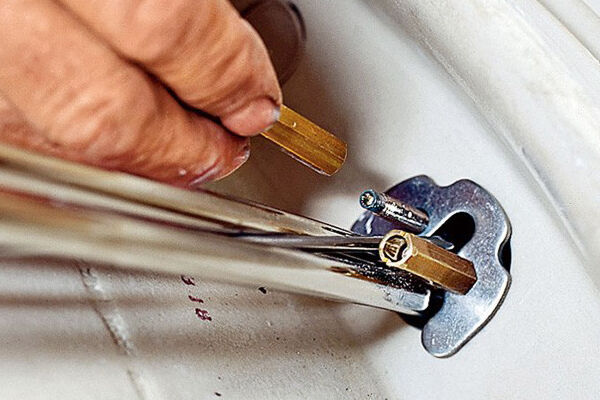
- Using a key or your hands, screw in 2 studs one at a time. If the model comes with a bushing, then you won’t have to install any studs.
- Insert flexible hoses into the hole in the sink.
- Place the horseshoe-shaped mounting piece on the bottom.
- Place a metal washer of the same shape on top of the gasket.
- Attach a union nut to each of the two studs, tightening with an adjustable wrench or wrench for security.
When tightening the nuts, it is important not to overdo it - the connection may burst and will leak water. If you tighten the nuts loosely, the fastening will dangle and the faucet on the sink will continue to dance from side to side.
When tightening the nuts, it is important to wrap the outer part of the faucet with masking tape so as not to scratch the decorative coating during work. You should also place a piece of soft cloth in the sink to avoid accidental damage to the surface.
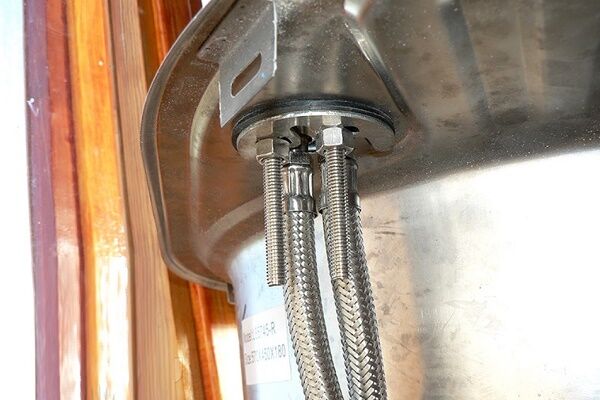
After securely fixing the mixer on the side, you need to connect it to the water supply network. To do this you need the free ends of a flexible or hard liner attach to the water pipes, securing everything with nuts.
Here you may need sealing tape to make the connection airtight. For a stronger connection, you can use an adjustable wrench.
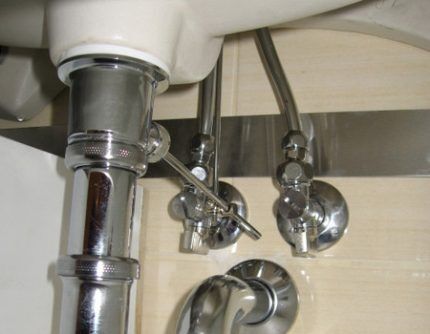
The length of the eyeliner is of great importance - it must be correct. A tube that is too long will get in the way and may get kinked several times, shortening its life. If it is a little short, then it is better to replace it immediately rather than build it up. You can use hard eyeliner, but this is more difficult, because precise dimensions are important here.

The final stage of installation
All that remains is to install the siphon on the sink, and if necessary, then the bottom valve - depending on which model is used. There are mixers that come with a mechanically adjustable bottom valve. Here, after specifying the required length, you will need to use a hacksaw to cut off the excess.
To put a siphon on the sink, you will need to assemble it following the instructions. Then put on the lower part, having previously installed the sealing gasket. You will need to install a gasket and a stainless steel outlet with a screw in the sink outlet. This screw needs to be tightened well with a screwdriver - it connects the siphon to the sink.

All that remains is to connect it to the sewer system. To do this, a corrugation is connected to the siphon, on the other end of which an adapter is put on, connecting the entire structure with the sewer pipe.
Now it's time to check the functionality of the system. To do this, you need to open the water supply to the apartment/house and open the tap. If water flows, then the tap is installed correctly. All that remains is to inspect all the connections so that nothing drips anywhere. If everything is in order, then the job was done “perfectly.”
The nuances of installing a mixer
Everything is clear when installing a faucet on ceramics, but questions may arise when the sink is made of a different material. There are small nuances, which we will now take a closer look at.
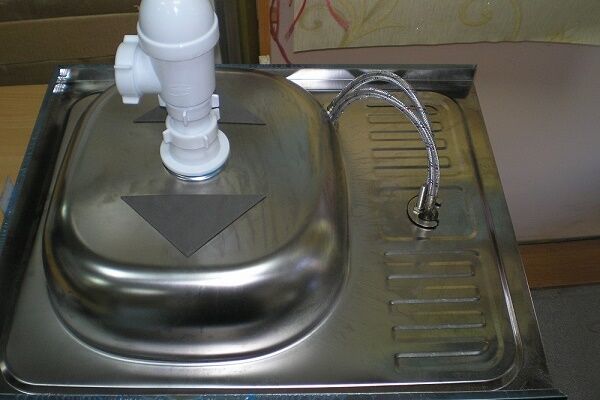
If the sink is stainless steel
The most important thing in installing a mixer is to choose the right model and perform each stage of the work correctly. It's not difficult, but it requires care and calm. If the sink is made of stainless steel, then you need to choose a faucet of a suitable design, size and shape.
Moreover, stainless steel is most often used to make kitchen sinks - it is a durable material. It is more convenient to install a mixer in stainless steel when it is not installed at the workplace.
If it is not possible to remove the sink, you will have to enlist the help of a friend, son, wife or other person. After all, the conditions in which a stainless steel sink is located are very cramped. Therefore, you can’t do without an assistant and a flashlight.
The process of installing a faucet on a stainless steel sink is similar to installing it on a ceramic sink. If there is no hole for the faucet, then it is easy to cut it with your own hands, processing the edges so that they become smooth.
If the mixer is placed on a wall-hung plumbing fixture, then first installing a bidet installation or for the sink. Then a bowl of plumbing equipment is hung on this support frame, after which the fittings intended to supply water to the consumer are directly connected.
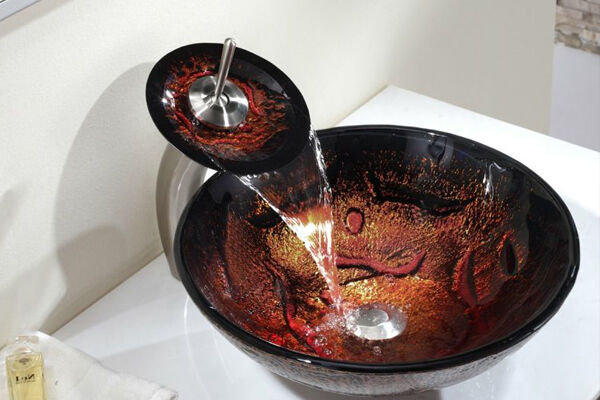
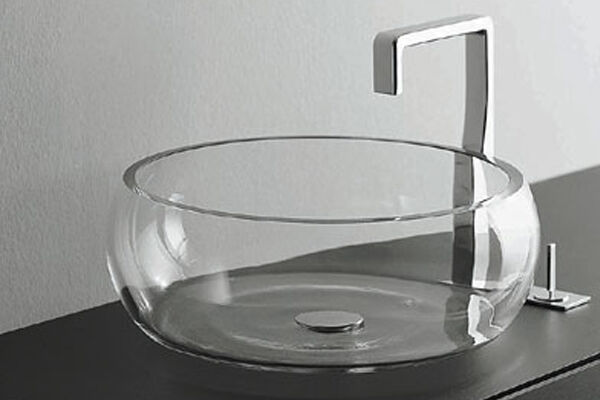
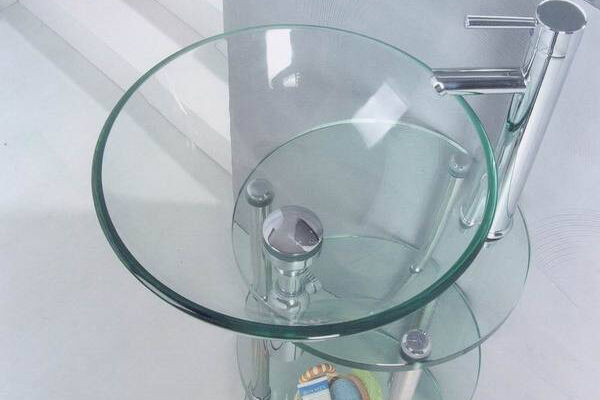
If the sink is made of glass
Glass products are often used in the interior. Look especially stylish countertop sinks from this material. Moreover, they can be of different shapes, colors and sizes - it all depends on the flight of the designer’s imagination.
There will also be no difficulties in installing a faucet on a glass sink. It is important to adhere to safety rules and choose the most suitable model.

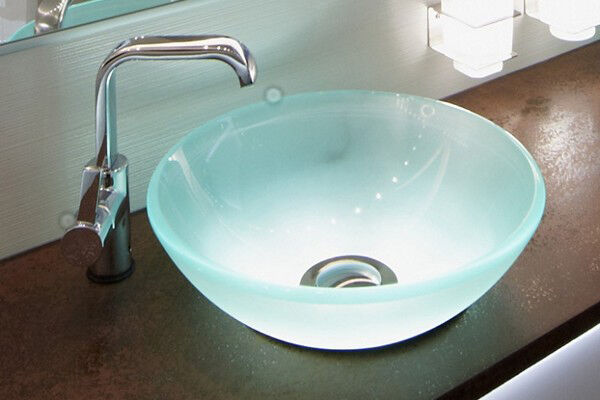
Installation is carried out on the surface in which the hole is provided. If it is a model mounted on a pedestal, the so-called tulip sink, then you have to work with this foundation.

When working with glass, you should not rush - although it is super strong, it can break if the hammer falls.
Other types of sink material
In addition to ceramics, glass and stainless steel, marble, porcelain, granite, plastic, acrylic and even wood are used to produce sinks. Porcelain containers are quite expensive.
As for installation, it is simple and depends on the type of mixer that is to be installed. The purchased model comes with instructions that detail how to install it correctly.

If the bathroom has a sink or a pedestal for a sink made of wood, then installing the mixer is not particularly difficult. The only thing is that this material is quite capricious and will simply not be able to last for a long time. Most likely the faucet will outlive the sink.

For marble, granite and acrylic, you will need to use a faucet installation technology similar to installing it on a ceramic sink. It is important to assemble the mixer correctly, and in the process of tightening the fasteners, do not overtighten anything and carefully carry out the connection and sealing units.

Mistakes made during installation
When the installation is carried out by an invited specialist who has considerable experience, the result of his work will be excellent - he knows exactly all the nuances. But self-installation does not exclude the possibility of various troubles. Especially if such work is carried out for the first time in life.
Firstly, after installation, you may find that the faucet is dancing from side to side or leaning to the side. This problem will not arise if you carefully fix the nut at the stage of connecting it to the sink. You also need to check that the placement is correct so that you don’t have to redo the work.

The second problem is that when hot water is turned on, cold water flows and vice versa. This is also an easily fixable problem.
There was simply some confusion with the pipes at the stage of connecting the tap to the water supply. It is necessary to turn off the supply of cold and hot water, disconnect the flexible connection and, having swapped the tubes, reconnect them.

As a result, a flexible line with a red tape should be connected to a pipe supplying hot water, and a tape with a blue braid should be connected to a cold water supply pipe.

Thirdly, leaks may appear at the joints. This is the result of the nut being loosely tightened. You should tighten it at the leak site and look again. If the leak does not stop, then the reason may be in the nut itself - perhaps it was overtightened and it burst. You'll have to use a spare one.

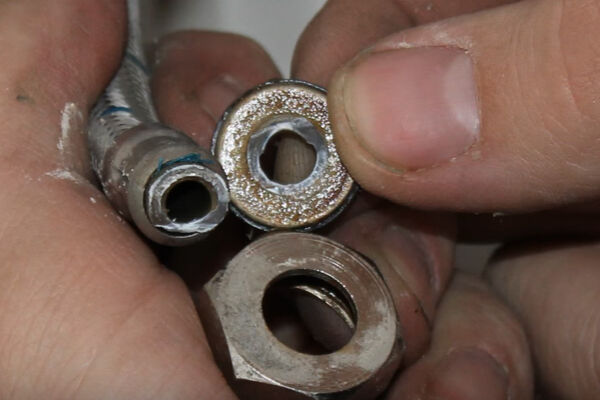
Fourthly, the flexible liner may burst.
This happens if one of the following situations occurs during installation:
- the flexible tube was short and had to be stretched a little;
- they attached an eyeliner that was too long, it twisted and bent several times;
- the liner is made of technical rubber with an aluminum frame, and the connection point is difficult to access. It was sharply bent and broke;
Whatever the reason, it must be eliminated. It’s bad when there’s not enough length, but no less bad when there’s too much length.
It is correct to choose the optimal liner, taking into account the material - it is desirable that the rubber tube is made of food-grade rubber, and the outer braid is made of stainless steel or galvanized.
He will familiarize you with the rules for installing a faucet on plumbing fixtures in a bathroom. next article, the contents of which we recommend that you familiarize yourself with.
Conclusions and useful video on the topic
Installing a mixer with a bottom valve has its own characteristics. How to do this correctly is described in the video:
If the length of the flexible hose included with the mixer is not enough, you should buy a longer one. The video tells in detail about the nuances of these hoses and the rules of selection:
It is convenient to install a faucet if the sink has not yet been installed. This gives full access when tightening various fasteners:
Even an original frap faucet must be carefully inspected and assembled before installation. And after completing the installation work, you should check its functionality:
If everything is done correctly and slowly, then installing the mixer will be an interesting pastime. The work done independently will delight you with an excellent result, which is in no way inferior to professional installation performed by an experienced plumber.
It is important that everything is securely fastened, but without fanaticism - fastenings do not like being pulled over.
Please write comments in the block below. Ask questions on controversial issues, share useful information on choosing and installing a kitchen faucet. Perhaps you would like to tell us how you installed it yourself?


Once upon a time, I mixed up the hot and cold water hoses, then I wondered why hot water flowed out of the tap with cold water for no apparent reason. Then I just realized it and had to rearrange it. Now I'm more attentive to this. As for faucets, there are so many now, but the quality leaves much to be desired. Previously I knew that the more expensive you buy, the longer it will last, but now the price is not at all an indicator of quality. Which is very disappointing. This is my second mixer in six months.
Hello. Lately we have noticed such confusion in many homes. It’s strange, but even experienced masters often get confused.
If ease of use allows, it is enough to simply change the icons on 2 “lambs”, rather than changing the entire supply. True, this is not permissible in all models of thermal mixers, but in ordinary ones it is quite possible.I suspect that the reason for the confusion sometimes arises from Soviet standards for connecting hot water to the right.
The process of installing the mixer is so simple that anyone can handle it by watching a master class on YouTube. If it is placed in a hole on the sink, then this is quite elementary, but if the pipe outlet is made on the side so that you can turn the faucet onto the bathtub, then the technology is a little different, but also simple. All you need is tools, a little physical strength and accuracy.
Everything is fine and clear when the situation is standard, but what to do if you need to install a single mixer or, simply, a cold water tap on a ceramic washbasin. The diameter of the supporting surface exactly corresponds to the diameter of the hole for the faucet on the washbasin. Are there any spacers for civilized installation or collective farming?