How to repair a faucet in a bathroom with a shower: causes and solutions for breakdowns
It is hardly possible to find a bathroom where a faucet with a shower hose would not be installed, allowing you to conveniently take hygiene procedures. But, unfortunately, like all plumbing devices, it often fails. Do you want to fix it yourself?
We will tell you how to repair a faucet in a bathroom with a shower with your own hands. The article we have presented describes in detail the common causes of operational disruptions and ways to eliminate their consequences. Taking into account our recommendations, you can restore your device without any problems.
The content of the article:
- Types of bathroom faucets
- Typical causes of malfunctions
- Types of breakdowns and methods for fixing them
- Failure No. 1 - low water pressure
- Failure No. 2 - valve leakage
- Failure No. 3 - the locking mechanism is faulty
- Failure No. 4 - problem with the ball mixer
- Failure No. 5 - the housing gasket is worn out
- Breakdown No. 6 - repair of the faucet-shower switch
- Failure No. 7 - leaking shower hose
- Failure No. 8 - other faults
- Conclusions and useful video on the topic
Types of bathroom faucets
As a rule, models of three categories are used in bathrooms:
- traditional two-valve taps;
- common single-lever devices;
- innovative sensor faucets.
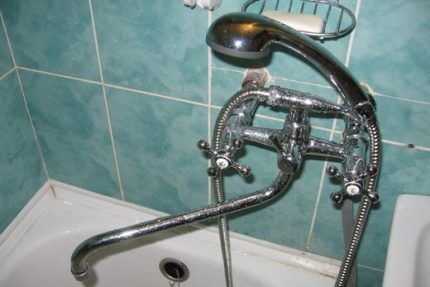
For many decades, houses have been equipped two-valve mixers. Such devices are equipped with two handwheel handles, one of which is intended for hot water, and the second for cold water.
The locking mechanism in older models was a system of a seat and a valve on a stem equipped with a rubber gasket. When the valve was tightened, the valve closed off the seat, which provided a path for the water to flow.
The stem with the valve had to be screwed in, then unscrewed - this was time-consuming and inconvenient. Instead, they now use a metal valve axle box or a device made of a pair of ceramic disks.
Single lever options have now gained great popularity. Lever or joystick mixers They have one shut-off and control mechanism that controls mixing, supply, and pressure of hot/cold water.
Based on the locking unit, the range of such mixers can be divided into two categories:
- with ball block;
- with disk cartridge.
The second option looks preferable due to its lower cost and maintainability. Its locking mechanism, similar to valve devices, includes two ceramic discs with holes for mixing and shutting off water flows. If it fails, replacing the cartridge is quite simple.
Single-lever ball faucets are more expensive, and they cannot be repaired due to the difficulty of finding the locking mechanism. Plumbing stores rarely offer it.
If the mixing ball fails, you will most likely have to throw it away and replace it with buy a new device. Our recommended article will introduce you to the selection criteria.
But Ball Valvesinstalled on hot water and hot water pipes in front of plumbing to shut off the flow in case of repairs, have almost completely replaced obsolete valves.
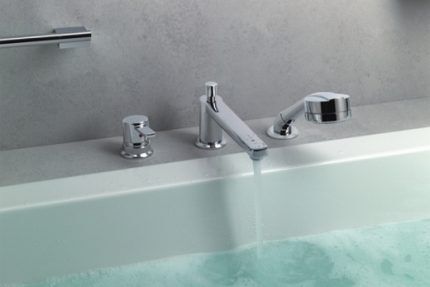
Device control element sensor faucet for a kitchen or bath with a shower, a photocell is used that turns on the stream of water when you bring your hands to the faucet and turns it off when you remove them. Repairing such plumbing requires experience and knowledge not only in the field of plumbing.
An exception to the rule is a clogged aerator, which manifests itself in a weakening of water flow. This problem, which we will discuss in detail below, can be easily fixed by yourself.
Typical causes of malfunctions
Failures of plumbing fixtures are largely associated with low quality products. You should not save money when purchasing by purchasing cheap faucets from little-known manufacturers. As a rule, when assembling them, low-quality components and consumables are used, which quickly fail.
It may be advisable to abandon the usual sealing options in favor of new analogues: instead of rubber gaskets, it is better to use modern analogues made of paronite or silicone. Their service life is much longer, and they are less deformed over time.
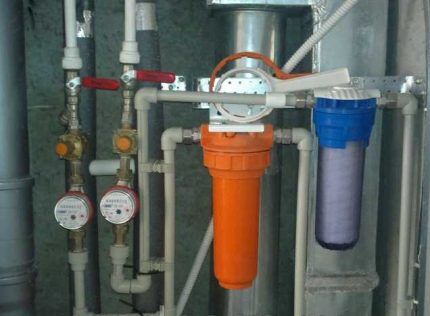
A common cause of malfunctions of mixing devices is also water flowing in pipes. Foreign inclusions and a high content of mineral particles lead to the formation of deposits, clogged filters, and cracking of seals.
Types of breakdowns and methods for fixing them
We list the most common problems with sanitary water faucets with detailed instructions on how to fix the problem.
Failure No. 1 - low water pressure
Using water that comes out of a tap in a thin stream instead of a rapid stream is inconvenient and not very pleasant. If the neighbors on the landing have the same pressure, the reason is most likely that the aerator is clogged.
This element is often included in the design of modern faucets. Faucet aerator saturates the water with air bubbles, reducing its consumption and reducing splashing. Fixing a clogged aerator will not take much time or effort.
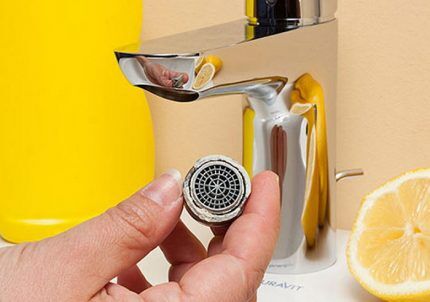
To do this, you will need to grab the aerator with pliers and unscrew it. Remove the mesh filter from the device, then rinse the parts thoroughly, clearing them of small debris and deposits. After cleaning, the device is assembled and inserted back into the tap.
Failure No. 2 - valve leakage
A common cause of water constantly dripping from a faucet is a worn gasket. This minor part plays a dominant role in old-style valve mixers, where it ensures the tight fit of the shut-off valve to the seat - the hole intended for water flow.
This type of problem can be easily corrected. You just need to stock up on a new high-quality gasket, as well as wrenches and lever wrenches.
You need to proceed according to the following instructions:
- Securely shut off the water supply system.
- Using a wrench, carefully release the bolt securing the wing.
- Move the adjustable wrench counterclockwise to unscrew the leaking housing.
- Remove the worn gasket and insert a new one in its place.
- Take the sealant - FUM tape, and wind it clockwise under the stop edge.
- Reinstall the housing and tighten the bolt, after which you can turn on the water.
If, even after replacing the gasket, the faucet continues to flow, you need to pay attention to the “saddle”. With long-term and frequent use of the mixer, this part begins to deform, become covered with scratches, cracks, which can lead to leakage.
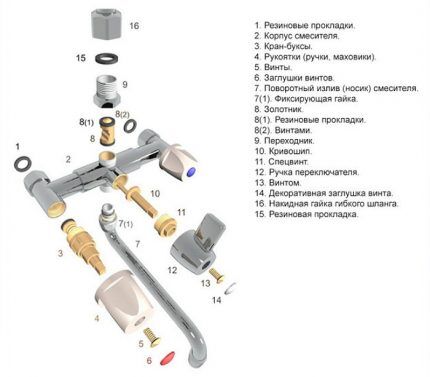
To solve the problem, you need to identify the damaged area, and then use a cutter to turn the found area with a little effort. This way you can level the plane of the “saddle”, thanks to which the mixer will easily fall into place and the leak will stop.
Failure No. 3 - the locking mechanism is faulty
A leak from under the lever is usually associated with a breakdown of the locking mechanism, which must be replaced with a similar element.
The following signs will help you verify this:
- it is difficult to operate the lever due to unexpected resistance;
- the supply of cold/hot water stops;
- the flowing stream spontaneously changes temperature;
- it is impossible to close or open the valve all the way.
For replacing the cartridge you need to use the following instructions:
- Remove the plug from the housing.
- Use a Phillips screwdriver to loosen the mounting screw.
- Remove the lever, and then remove the decorative nozzle.
- Using an adjustable wrench, unscrew the nut that secures the position of the cartridge in the housing.
- Remove the faulty unit.
- Place a new element in its place.
The final step is to reassemble the device in reverse order and installation in a regular place. Then the mixing fittings are reconnected to the water supply lines, after which the water is turned on and the work done is checked.
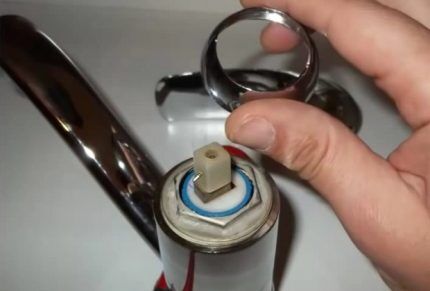
Please note that cartridges vary significantly in size and configuration. In order not to make a mistake when buying a new part, it is better to come to the store taking the old unit.
Failure No. 4 - problem with the ball mixer
If the ball joint is leaking, which may be caused by a worn gasket, you can try to repair it. For ball mixer repair First of all, you need to turn off the valves on the water supply system. After this, you need to unscrew the bolt on which the mixer is mounted and remove the device lever.
Next, you will need to unscrew the threaded connection and dismantle the faucet dome. After this, you need to find the sealing gasket and clean it of dirt. If there are any defects on it, this part must be replaced. It is also better to inspect the ball for damage. If they are found, you will have to change the tap.
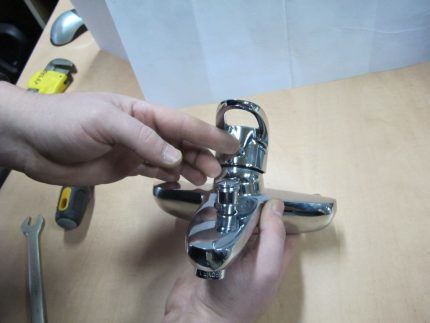
You should also consider the sleeve in which the ball is installed. If necessary, worn out seals around the moving parts of the device should be replaced.After this, you can assemble the reinforcement by performing the operations described above in reverse order, and the parts should be sealed with a special compound or FUM tape.
Failure No. 5 - the housing gasket is worn out
One of the most common failures in lever bathroom faucets caused by the fact that the spout is constantly in motion. Because of this, the rubber gasket located in the groove quickly wears out. To change it, you need to separate the gander from the body by unscrewing the fixing nut.
The damaged gasket is removed from the spout groove, after which a new part is installed there, and the gib is mounted in the body. The thread of the fastening nut is wrapped in 2-3 layers of FUM tape, after which the part that secures the spout is screwed in.
Breakdown No. 6 - repair of the faucet-shower switch
Problems with the shower switch are also common sources of leaks. This is mainly caused by a damaged gasket that is placed between the housing and the switch.
For repairs, you will need to disassemble the mixer, which is done as follows:
- the switch button is removed from the rod, which is held in a stationary position;
- you get the valve and stem;
- the oil seal is removed from the housing;
- a similar new part is installed in the intended place;
Next, you need to perform the manipulations in reverse order so that the shower switch is completely assembled. After this, you can turn on the water and check the quality of work.
The cause of malfunctions of spool switches is often a broken nut that holds this part. To cope with the situation, you should dismantle the tap, remembering to turn off the water. Remove the shower hose and switch handle.
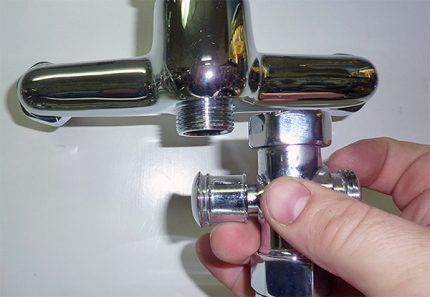
Unscrew the nuts that secure the spool and switch. Replace the broken part with a new one. Clean the threads, as well as the internal cavity of the nut, with sandpaper. After lubricating all parts with grease or a similar compound, install the mixer in its original place, and then turn on the water.
If the button that turns off the shower does not return to its place, then the spring has failed. To correct the situation, you need to disassemble the switch, as described above, and replace the broken element.
When water flows simultaneously from the shower and from the tap, without the ability to switch, the reason is a faulty oil seal, which is located on the switch rod.
In this case, the following operations are required:
- purchase a new oil seal, turn off the water;
- remove the button and remove the rod;
- remove the old one and insert a new oil seal;
- assemble the switch.
After execution faucet repair You can turn on the water to check the correctness of the work done.
Failure No. 7 - leaking shower hose
Sometimes water leaks at the junction of the faucet/hose or hose/shower head. In such a situation, the gaskets will need to be replaced. After turning off the water, the hose clamping nut is unscrewed with pliers, and then the old gasket is removed.
Instead, a new part is inserted, and it is better to give preference to a more reliable paronite or silicone product.
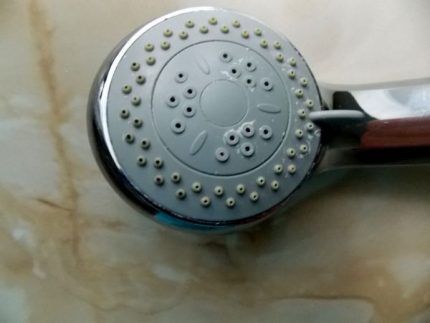
To seal, 2-3 layers of FUM tape are wound onto the thread, after which the clamping nut is tightened. Finally, the water is turned on and the operation is checked.
Failure No. 8 - other faults
We list a number of other faucet breakdowns that users may encounter:
- Continuous stream of water may be caused cartridge failure or a blockage that has formed between it and the gasket. In this case, you need to disassemble the tap, clean all the parts, and if necessary, change the valve.
- Dry rubber gasket may cause water to refuse to flow when the valve is open. To verify this, just tap the open device with some hard object.
- When the rod thread is broken the valve begins to rotate. To solve this problem, you can try wrapping the thread with thread, but only replacing the part will provide significant help.
- Damaged rubber gasket may cause constant noise in the tap. To fix the problem, it is recommended to change the gasket or cut off the worn edge.
As we can see, many mixer malfunctions can be easily corrected with your own hands using the simplest tools.
Before starting all work, it is important to carefully read and, if possible, watch the instructions, and perform all actions clearly and carefully.
Conclusions and useful video on the topic
The presented video describes how to repair the most common failures of a shower mixer:
The reasons for failure of shower faucets can be very diverse. In some cases, they are easy to fix yourself using common tools. In other situations, you have to resort to the help of plumbers.
Unfortunately, sometimes the faucet cannot be repaired and has to be replaced. To prevent this from happening, it is important to take preventive measures, and when purchasing plumbing fixtures, choose modern models from well-known companies.
Tell us about how you repaired a faucet with a shower hose with your own hands. Share technological nuances you know that will be useful to site visitors. Please leave comments in the block below, post photos and ask questions about the topic of the article.


