Replacing a cartridge in a mixer: instructions on replacing an old part with a new one
When equipping kitchen sinks and showers, single-lever faucets are most common.They are easy to install and convenient to use. The main functional mechanism of such models is the cartridge, the resource of which is limited.
You can install a new cartridge instead of a worn one yourself. We will tell you what steps are involved in replacing a cartridge in a faucet, and what nuances should be taken into account when repairing crane equipment. Our recommendations and step-by-step instructions will help you repair the device perfectly.
The content of the article:
Types of cartridges for faucets
The main purpose of the cartridge is to mix hot and cold water flows, as well as regulate the intensity of their supply, ensuring the uninterrupted operation of plumbing equipment.
When equipping single-lever mixers, two types of devices are used: ball and disk. In terms of service life, they are approximately equal. But still, the bulk of faucets for domestic use are equipped with disk-type mechanisms.

This is due to the fact that the legal situation with the production of ceramic disk mechanisms is much simpler. Not all manufacturers have a license to manufacture ball-type devices.In order not to pay for the right to issue, it is easier for companies to produce disk devices that are in demand on the market.
Steel ball devices
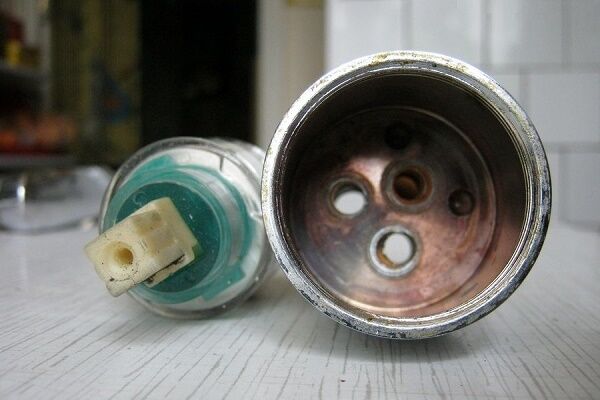
The design of the ball joystick is a locking element in the form of a hollow steel ball, equipped with three interconnected holes: two inlet and one outlet.

The temperature and flow pressure are set depending on the position of the holes in the inlet pipes and the cavities of the ball. The larger the overlap area, the stronger the flow.
When the lever is turned or tilted, the walls of the ball block one or both holes, allowing flows from the nozzles with hot or cold water to enter and mix inside the cavities of the shut-off element.
Main disadvantage ball devices – vulnerability to deposits that form and accumulate inside them during operation. They impair the smoothness of pressing the mechanism, causing the joystick to malfunction.

Based on the diameter, height and mounting part, these types of devices are presented in a wide range on the market. Therefore, when changing the cartridge on a mixer, it is important to select and install a completely identical spare part.
To protect yourself from mistakes when choosing, leading to unplanned waste, when buying a new “core”, it is advisable to take a used old one with you as a sample.
Disc “cores” made of ceramic plates
Disk cartridges are equipped with two smooth and tightly adjacent plates made of metal ceramics. The lower plate is securely fixed in the “core”, and the movable upper plate is connected to the control rod, due to which it rotates freely around its axis.

The mixing cavity contains a metal mesh, the main purpose of which is to suppress noise. In some models, the role of a noise absorber is performed by shaped protrusions.
The basis for fixing the handle of the single-lever device is the rod. It is attached to the upper ceramic disc and can be removed if necessary.
The water pressure in the cylindrical “cores” is adjusted by moving the top plate. It is equipped with projections and depressions that cover the holes of the lower disk. The more the holes are closed, the weaker the pressure.

To increase the tightness of the structure, most models have rubber gaskets installed at the bottom of the mechanism. To extend the “life” of ceramic elements, a metal mesh is provided. It acts as a coarse filter.
A similar device cartridges for shower cabins. We recommend that you familiarize yourself with the design and features of their repair.
Popular cartridge sizes
When purchasing a replacement element, it is important to pay attention not only to its shape, but also to the location of the holes for the rod. The sizes of replacement cartridges are standardized for each faucet model.

Most manufacturers single lever mixers cartridges of sizes 28 mm, 32 mm and 35 mm are used in the assembly. In products of the Kaiser and Grohe brands you can often find functional mechanisms in sizes 40 mm and 46 mm.
The most frequently purchased products include products with a diameter of 40 mm. They are marked d40. In addition to standard sizes, many original models often have components in sizes 18 mm, 20 mm and 22 mm.

When purchasing a cartridge, check whether the product can be returned and whether there is a warranty for it. Please note that if the device is not suitable, it can be returned or replaced in the store no later than two weeks from the date of purchase.
Common causes of breakdowns
Problems that arise during the operation of both types of devices are usually associated with wear and tear of moving elements. The reasons for this may be poor quality materials used in manufacturing, mechanical damage to equipment and impact of water hammer, creating excessive loads on the “core” elements.

In conditions of worn out and outdated plumbing systems, the average cartridge can last no more than 4-6 years.
The following signs will indicate that it needs to be replaced:
- the lever movement has become less smooth (with jamming or jerking);
- it is difficult to regulate the pressure of the water flow;
- water flows are not mixed, regardless of the position of the faucet handle;
- Even when the tap is closed, water continues to trickle out.
The failure of the mechanism can also be indicated by the opposite situation, when, with the lever in a static position, the water flows spontaneously change the temperature.

The cost of a faucet cartridge is insignificant compared to the price of the plumbing equipment itself. Periodic replacement of this element is a cost-effective measure that can be implemented on your own, without the involvement of plumbing workers.
Disc cartridge replacement technology
Almost all cartridge-type single-lever faucets are similar in structure. As a rule, they are a single structure placed in a metal or plastic case. The device replacement technology described below is suitable for each of them.
At repair of cartridge faucets It is better to replace the “core” entirely, rather than disassemble it into its component parts, since individual elements for practically disposable devices are quite problematic to find on sale.
The following photo gallery will briefly introduce the replacement procedure:
Let's look at how to change the cartridge in a kitchen faucet or shower faucet yourself, step by step. The whole process, even for a beginner, takes about 30 minutes.
Selecting the necessary tools
In addition to purchasing a new cartridge, you should prepare your tools in advance so as not to be distracted by searching for them while working.
To carry out repair work you will need:
- gas and adjustable wrench;
- slotted screwdriver;
- pliers;
- pliers with a narrow working part.
When disassembling some types of faucets, a hex wrench may be required. To remove old lime deposits, a special cleaning liquid such as WD-40 is useful.

To remove dirt from the mixer seat, prepare a clean rag or piece of cotton fabric in advance.
Device disassembly sequence
Before replacing the disc cartridge in the mixer, to prevent flooding, close the hot and cold water inlet valves. To make sure there is no water in the system, turn the mixer lever.
Disassembly of the device is performed in the following sequence:
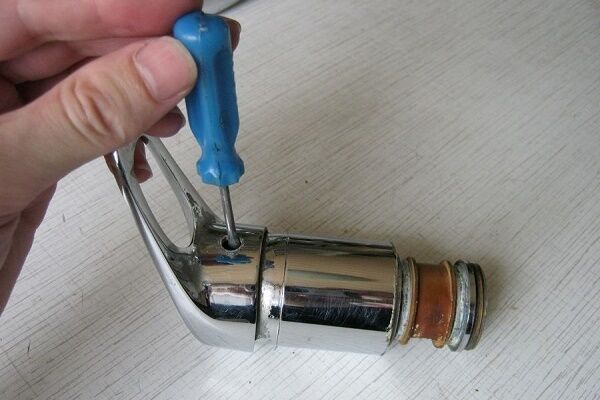
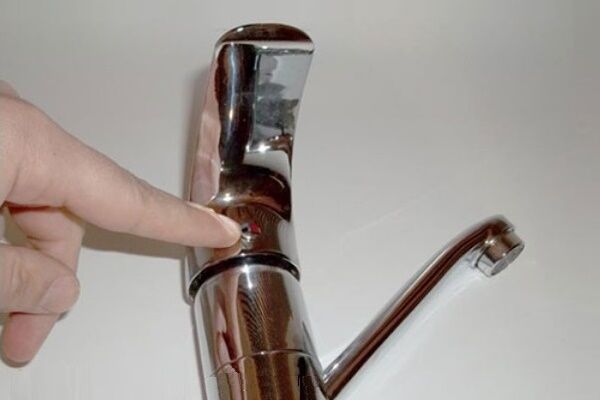
- Using a slotted screwdriver, remove the plug on the front of the faucet on which the hot and cold water marker is located.
- Using a hexagon or a thin screwdriver, unscrew the locking screw located under the plug. It connects the handle to the control rod.
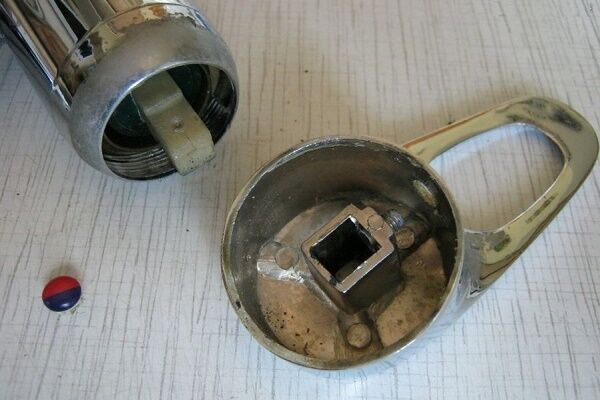
- Remove the rotary lever from the rod. Usually this stage does not cause difficulties, but sometimes you have to make a little effort.
- Remove the chrome decorative ring, which acts as a protective cover.
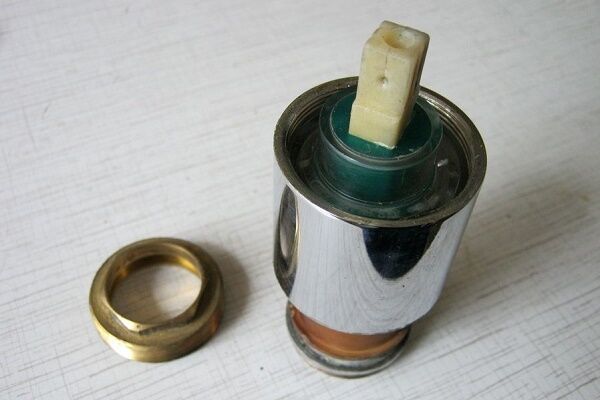
- Using a wrench or narrow-nose pliers, unscrew the brass clamping nut holding the ceramic cartridge.
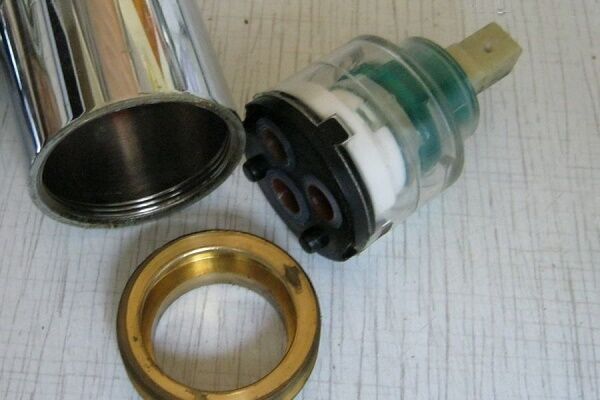
- Remove the faulty cartridge by slightly pulling it towards you, or gently rocking it from side to side.
If the nut holding the ceramic cartridge has become fused with the device, treat it with WD-40. By moistening the rusty nut with a wedge, in just a few minutes you can easily unscrew it and remove it from its socket.

Some experts recommend using the method of heating the device when disassembling a “boiled” mixer. To do this, the thread is heated with a canister that provides an open source of fire, or with a gas burner.
But it is worth considering that this method can damage the eccentric, and therefore poses a danger to the equipment.
Subtleties of cartridge installation
The removed cartridge is carefully inspected for cracks and other defects. If any are found, they go to the store, not forgetting to take the failed element with them.
Having purchased a new cartridge to replace the removed defective part, they begin to install it. Before installing a new unit, it is necessary to thoroughly clean the seat from any rust and dirt accumulated in it using previously prepared pieces of fabric. If you neglect this stage, the deposits accumulated at the bottom will not allow the new device to be installed hermetically.
When installing the cartridge onto the seat, it is important to ensure that the protrusions of the device and the recesses in the mixer body completely coincide. If this condition is not met, there is a high probability that the equipment will begin to leak when the mixer is turned on.

After the faulty element is replaced with a new one, the structure is assembled in the reverse order:
- First, bait and then tighten the fastening nut with pliers.
- Mount the protective cover in its original place.
- Install the handle and screw it on.
- Tighten the locking screw.
- Place the decorative plug in its original place.
After completing the assembly, all that remains is to check the functionality of the mixer. To do this, you need to resume the water supply and turn on the faucet, gradually removing the handle and observing whether a leak occurs. If one is found, you will have to turn off the water again and correct all the defects.
There are situations when replacing the “core” does not give the desired result. The tap continues to dribble. In this case, the reason may be hidden in the sealing gasket. Its main purpose is to seal the joint between the mechanism and the bottom of the mixer.

The only way out of this situation is to disassemble the device and replace the gasket.
How to replace the ball mechanism?
Most of the steps for changing the ball cartridge in a mixer are similar to those described when repairing disk devices.
The main stages of replacing the ball mechanism:
- Remove the decorative plastic cover on the faucet lever using a screwdriver.
- The locking screw located under the lining, depending on the head configuration, is unscrewed with a hexagon or Phillips screwdriver.
- Remove the mixer lever.
- The cover plate located under the lever, fixed to the valve body by means of a threaded connection, is unscrewed with an adjustable wrench.
- Using pliers with a narrow working part, remove the ball valve by the stem.
- Inspect the rubber seat of the cartridge and, if defects are found, replace it with a new one.
- Remove the ball and inspect for surface defects. There should be no influxes. The cavities in the ball are cleaned with a rag to remove accumulated debris.
- Replace the rubber gaskets and reassemble the structure in the reverse order.
In the future, in order to protect plumbing equipment from premature failure, it is worth installing at the cold and hot water inlet coarse filters.
Although many modern faucets often already have a built-in filtration system, installing an additional barrier for large elements present in the water never hurts.
If performing simple repair operations does not lead to the desired results, you will have to go to the store for a new device. With steps installing a new mixer The article we presented will introduce you.
Conclusions and useful video on the topic
Some useful tips for repairing faucets with your own hands.
Video #1. How to properly disassemble the mixer and eliminate the leak:
Video #2. An example of replacing a cartridge on a Chinese faucet and an introduction to common breakdowns:
Changing cartridges in faucets installed in kitchen sinks and showers is practically no different. But if your faucet has a more complex design and is equipped with sensors and thermostats, you should entrust the work of replacing functional elements to professionals.
Would you like to share the nuances of replacing a cartridge known only to you, or talk about repairing a single-lever faucet that you did yourself? Please write in the block below. Here you can ask questions and post photos on the topic of the article.


I changed the cartridge in the kitchen faucets myself, no problems arose. But in the bathroom I have a touchscreen device, and a problem has already arisen. I realized that I couldn’t handle it myself, so I invited a specialist. I watched the replacement, I think if the need for repairs arises again, I can handle it myself. The technician advised installing coarse filters to reduce the likelihood of breakdowns.
In a city apartment, a coarse filter is needed only if the water is very bad.Before being supplied to city networks, it is already filtered at the water utility.
Filters are in the bathroom and kitchen. The replacement did not cause any difficulties. I changed the filter in the bathroom myself, considering that I have no experience in this work. The instructions were very useful for people like me. The entire faucet in the kitchen had to be replaced. If you had the tools, replacing the mixer took literally ten minutes. I think the plumbers will handle it faster.
How to replace the cartridge in a two-tap mixer from Kludi?