How to make roof drains: general recommendations for arranging a drainage system with your own hands
Until the roof drains are installed, the construction of the house cannot be considered complete.They protect the facade, foundation and blind area from the destructive effects of moisture. To create such a system, you can purchase ready-made modules, order assembly, or build it yourself. In any case, knowledge of the general rules will be useful.
You will learn everything about the specifics of the drainage system from our article. We will talk about how to design and calculate a drainage circuit. We will show you how to choose the material for assembly and install a structure for draining atmospheric water.
The content of the article:
Features of organizing roof drainage
Installing a roof drain is not that difficult. Most manufacturers offer ready-made circuits with detailed installation instructions.
The main task is to first think through where the water will drain from and where, make the wiring correctly and take measurements. When drawing up a drawing, you need to take into account construction standards and recommendations that have already been tested in practice.
Types of drain structures
First you need to choose the type of system - indoor or outdoor, organized or unorganized. The type of drainage depends on the number of storeys of the building and roofing material.
It is advisable to equip houses with an internal spillway over 6 levels. These are heated buildings with roll or mastic roofing. Internal drainage is also suitable for flat roofs.

If there are up to 2 levels, you can get by with an unorganized system. The most acceptable and recommended option according to SNiP for buildings up to 5 levels is an external organized drainage system. It is easier to install than others and is not difficult to maintain.
Key design considerations
Before purchasing drainage elements, a drawing of the roof perimeter is drawn up with all protrusions, turns, and angles are measured. This helps to determine the system parameters and make calculations. But the drainage design must be based on justification.
There are 3 factors that are taken into account in the calculations:
- Area and design features of the roof.
- Amount of precipitation.
- Minimum possible temperature.
The diameter and footage of pipes, the number of funnels and brackets - all this depends on the roof area. If it does not exceed 100 m2, gutters with a diameter of 7-11.5 cm are suitable, the diameter of drainpipes is 7.5-13 cm. If the roof area is more than 100 m2, you need gutters with a cross-section of up to 20 cm and gutters up to 16 cm.
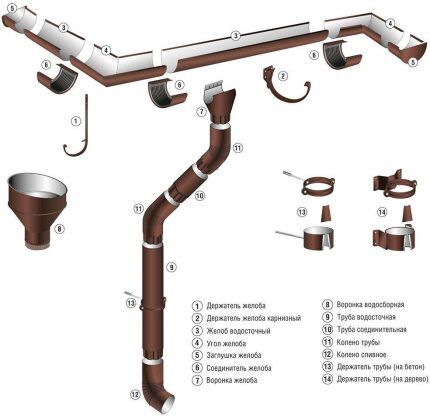
Usually design and choosing the type of drain does not cause any difficulties. The simplest systems are created for single-pitched and gable roofs. Traditionally, two separate gutters are equipped for gable roofs, and a continuous contour for hip roofs. In frame buildings, vertical pipes are placed along load-bearing posts.
Requirements for a drainage project:
- the slope angle for installing hanging gutters must be more than 15 degrees;
- gutters are selected with a side height of 12 cm;
- structural elements are checked for compliance with GOST 7623-75, where their technical parameters and marking features are indicated;
- drain points are installed at a distance of up to 24 m;
- The diameter of the pipes is calculated using the formula - 1.5 cm per 1 m3;
- The slope angle of the gutters is 0.2-0.3 degrees or from 2 to 5 mm per linear meter.
These parameters may vary depending on climatic conditions. The standards provide parameters for the eastern system, installed in regions with average temperatures (minimal risks of freezing) and precipitation (75 mm/h).
At the design stage, it is necessary to consider a system option for collecting and draining rainwater transported through the drainage system. Ideally, it is better to dispose of it in storm sewer, but there may be other options: discharge into a collector with subsequent release into a drainage ditch, filter well, filter field, rainwater collection container etc.
Principle of calculation of parts
The number of gutters is calculated based on the perimeter of the roof and the length of one slope. Next, the number of joints of the parts is determined and it is found out how many connecting elements are needed.
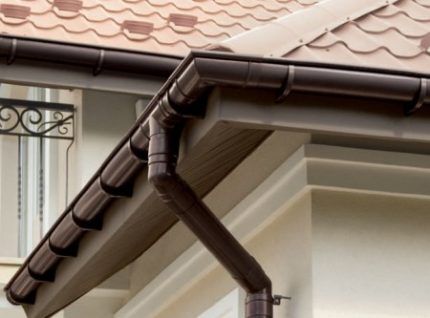
The number of fasteners depends on the selected material for drainage devices: for metal, the distance between fasteners is 40 cm, for plastic - 70 cm. Plugs are placed on each pipe break, funnels - on each drain.
It is impossible to calculate the exact amount of materials based only on the roof area.Two roofs that are identical around the perimeter may have different gutter parameters and costs.
The nuances of arranging a roof of complex shape
Here you need to collect water from each slope, bay window, and it is advisable to install several drains. If you arrange the system according to the principle of the minimum, a strong flow will enter the pipes, which will slow down as it passes through the gutters. This will create a load on the entire structure.
Sometimes additional channels for collecting water are needed above balconies, along the perimeter of towers, and in architectural superstructures. It is difficult to prevent such places from freezing and moisture penetration.
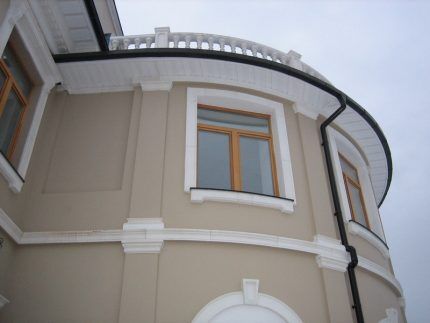
For lucarnes and roof windows, drains are not required. They are done only if the slopes are large and multi-directional.
Another possible problem when designing drainage for a complex roof is a large number of elements. Color helps: details are selected to match the roof or contrast with it. The design also uses the shape of the profile when it is installed as an architectural element.
Selection of materials for the drainage system
Quality, appearance, price - three parameters that guide the selection of materials for drainage. Climatic conditions are also important: in regions with sunny, hot summers, metal is preferable; for areas with high humidity levels, plastic is better.
Compare plastic and metal products To organize a drain, an article dedicated to the analysis and evaluation of both varieties will help.
There are several options on the market:
- Cink Steel. Inexpensive and easy to install solution.But steel is susceptible to corrosion, so the durability of the structure is questionable.
- Polymers. They look attractive, you can choose a color to match the roof, and they last a long time. But they are moderately fragile and require careful installation.
- Copper and aluminum. These materials look solid and emphasize the material capabilities of the owner. Their service life is unlimited. The only thing that stops you from buying copper or aluminum parts is the high cost.
Regardless of the material, each system consists of pipes, prefabricated funnels, corners and gutters. Drainage system design consists in assembling them according to a pre-made diagram and fastening. The parts are connected using adapters with sealing gaskets.
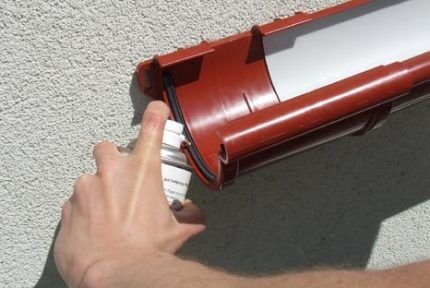
It is important that all the necessary components of the spillway are found in one retail outlet and from one manufacturer. Missing something can slow down the installation process.
When selecting drainage parts, do not experiment with attempts to adapt handicraft elements to existing circumstances. It is better to immediately focus on products from trusted manufacturers.
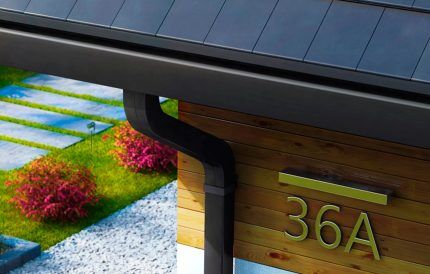
When choosing a material, the reliability of the rafter system is also important; it must withstand the weight of the spillway. When in doubt, stick to lightweight polymer construction.
Features of installation of elements
Time installation of a drainage system depends on the stage of construction/installation work. During the construction of the building, it is installed before the covering is laid. During the period of repair, if it was not planned to change the roof, installation is carried out at any time, but the gutter brackets in this case are attached to the front board, and not to the rafters.
Until recently, only under-roof fasteners existed. Today you can find different types of hooks and brackets that allow you to collect drainage before and after installing the roof.
The general installation algorithm looks like this:
- The location of vertical pipes is determined taking into account the placement of doors and windows. Usually these are the corners of the building or the center of the facade (if the length of one wall is more than 18-20 m).
- Funnels are installed at the lowest point of the gutter.
- Brackets are installed. The main holders are placed 10-15 cm from the funnels, the rest - at the same distance of 40-60 cm from each other.
- The gutter is placed in the brackets taking into account the expansion of the selected material.
- The gutter connectors are mounted between the brackets maintaining a distance of 10-15 cm.
- The gutter is connected to the funnels. If the gutter consists of several parts, it is more convenient to first assemble them and then fasten them along a conventional line that continues the roof. The distance is about 1 cm from the edge of the roof.
- Corners and caps are installed. If the angle of the roof is not straight, adjustable parts are selected and cut along the turning lines. This is how bay windows are treated.
- Pipes are installed 3-8 cm from the wall of the building. Plastic or metal clamps are attached to secure the drain to the facade.
Distance from final outlet to blind area - from 15 cm, to the ground - from 25 cm.If installed lower, there is a risk of ice forming inside the pipes, which can lead to rupture.
There must be a distance of at least 3 cm from the wall to the pipes so that the surface does not become damp. To bypass architectural elements or change the direction of drainage, a 135-degree elbow is acceptable.
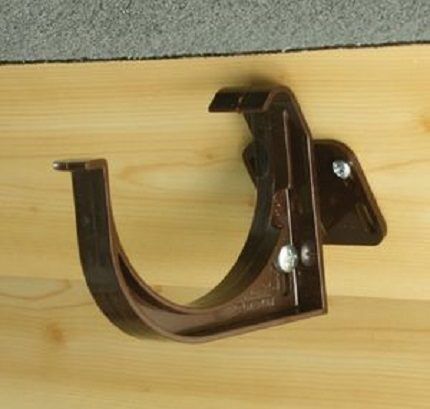
Installation of plastic drainage is carried out at temperatures from +5 degrees and above. Construction of a metal system can be carried out at any time that is safe for roofers, regardless of temperature indicators. Once installation is complete, the system is ready for use.
Maintenance of finished structures
Modern materials do not require regular painting or treatment with special compounds. In order for the drainage system to perform its functions well, it must be regularly cleaned of dirt and debris. This is usually done once a year in the fall.
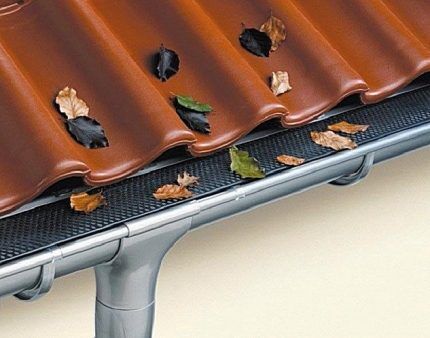
A common cleaning method is using a hose, when all dirt is simply washed away with water pressure. There are also robotic devices for plum care on sale. They are equipped with an intelligent system that independently calculates when and how many times it is necessary to “drive” along the gutters to remove all the debris.
If you do not monitor the condition of the drain, debris can block the flow, liquid will begin to accumulate in problem areas and flow out over the edges of the gutters.Additional load on the pipes will lead to breakage of elements and collapse of the structure.
In order to prevent the formation of ice jams in gutters and vertical pipes, it is recommended to install heating of gutters. Our recommended article will introduce you to the nuances of its selection and installation rules.
Conclusions and useful video on the topic
Components and features of installation of plastic drainage.
What happens to the drain if it is not cleared of dirt in time.
To reliably protect a house from moisture, a drain alone is not enough. You need to take care of the drainage system, which includes storm gutters, grates on them, sand traps, and liquid collection tanks.
Would you like to talk about how you built a drainage system with your own hands? Do you have interesting information on the topic of the article that is worth sharing with site visitors? Please write comments in the block below, post photos, ask questions about controversial or unclear points.


A very important point has not been mentioned. The drainage system must be supplemented by a storm sewer. Water from the roof must be completely collected by storm water inlets and drained away by stormwater drainage channels. Otherwise, ice will form in winter, and the tiles (or any other coating) will collapse much faster from constant contact with water. For example, look at how drainage systems are made in Scandinavian countries: their drainage elbow is usually straight in shape.
I would also add a taboo on using used parts, even if they look good.I saw a couple of times how money-hungry homeowners adjusted someone else’s drain to fit their walls. I didn't even know about this phenomenon until I saw it myself. Such a drain will leak in a hard-to-reach place, and you will discover this only when the walls and foundation begin to rot.