Heating of gutters: installation of a heating system for the roof and gutters with your own hands
In early spring and late autumn, all homeowners are faced with the problem of freezing roof slopes and freezing melt water inside gutters.If it is not resolved in a timely manner, the safety of people, as well as the safety of their property, will be threatened by large icicles and frozen lumps of snow falling from the roof.
A good solution is to heat the gutters, which will prevent the formation of ice. In this material we will talk about why you need to equip your drainage system with heating. We will also talk about what materials are required for this and describe in detail the essence of the process.
The content of the article:
- Is it worth heating the gutter?
- Features of the heating system arrangement
- Design of a drain heating system
- How to choose a heating cable?
- Heating system calculation
- Choosing a place to lay the cable
- Heating system technology
- Typical mistakes when installing a system
- Conclusions and useful video on the topic
Is it worth heating the gutter?
During the winter months, frost and heavy rainfall prevail in most regions of our country. As a result, large amounts of snow accumulate on the roof. An increase in temperature provokes first their thawing, and later active thawing.
During the day, melted water runs down the edges of the roof and into the gutters. At night it freezes, which leads to the gradual destruction of roofing elements and gutters.

Icicles and a conglomerate of frozen snow and ice accumulate at the edges of the roof.From time to time they fall down, threatening the safety of people below and their property, the integrity of the drainage system and the decorative elements of the facade.
All these troubles can be prevented only by ensuring the unhindered drainage of melted water. This is only possible if the edges of the roof are heated and drainage system.
It happens that in order to reduce the cost of a heating system, it is laid only on the roof surface. The owner is fully confident that this will be quite enough.
However, it is not. The water will flow into gutters and pipes where it will freeze at the end of the day because there is no heating. The gutters will be clogged with ice, so they will not be able to receive melt water. In addition, there is a danger of mechanical damage.
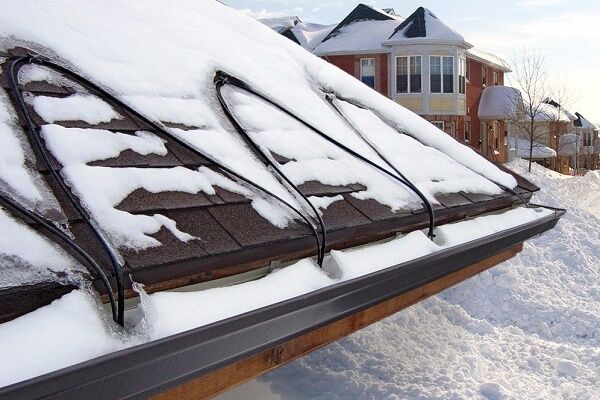
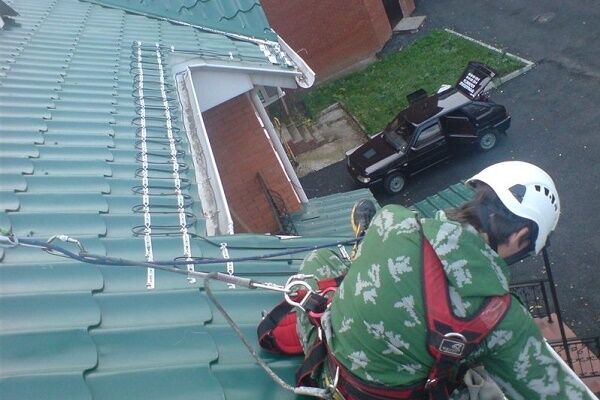
Thus, in order to get a good result, you should arrange heating for the roof and the surrounding gutters. In most cases, the heating cable is mounted on roof eaves, inside gutters and funnels, at the joints of roof fragments, along valley lines.
In addition, heating must be present along the entire length of drainpipes, in catch basins and drainage trays.
Features of the heating system arrangement
Methods for heating different types of roofs may vary. We are talking about the so-called “cold” and “warm” roofs. Let's look at the features of each option.
Heating a cold roof
This is the name given to a roof without thermal insulation along slopes with good ventilation. Most often, such roofs are located above non-residential attic spaces.They do not allow heat to pass out, so the snow cover on them does not melt throughout the winter.
For such structures, installing heated gutters will be sufficient. The linear power of the laid cable should gradually increase. They start with 20-30 W per p/m and end with 60-70 W per meter of drainage.
How to heat a warm roof?
A roof with thermal insulation is considered warm. They allow heat to pass out, so that even at sub-zero temperatures the snow cover on the surface of a warm roof can melt. The resulting water flows onto cold parts of the roof and freezes, forming ice dams. For this reason, it is necessary to arrange heating for the edge of the roof.

It is implemented in the form of heating sections laid along the edge of the roof. They are laid in the form of loops 0.3-0.5 m wide. In this case, the specific power of the resulting heating system should be from 200 to 250 W per square meter. The arrangement of heating gutters is implemented in a similar way to that used for cold roofing.
Design of a drain heating system
To heat the roof and gutters, a system with a heating cable is most often used. Let's consider its main elements.
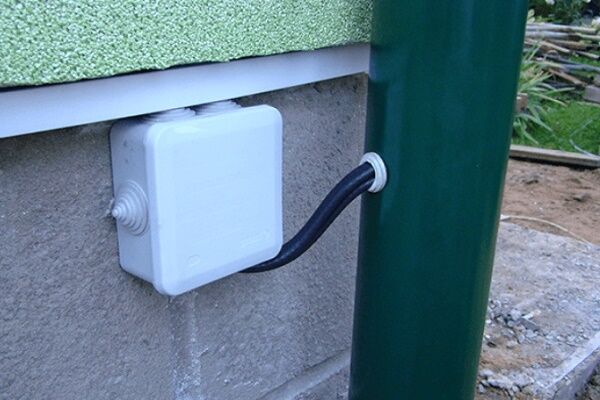
Distribution block and sensors
The distribution block is designed for switching power (cold) and heating cables.
The node includes the following elements:
- signal cable that connects the sensors to the control unit;
- power cable;
- special couplings used to ensure the tightness of the system;
- installation box.
The unit can be installed directly on the roof, so it must be well protected from moisture.
The system can use three types of detectors: water, precipitation and temperature. They are located on the roof, in gutters and drains. Their main task is to collect information for automatic heating control.
The collected data enters the controller, which analyzes it, makes a decision to turn off/on the equipment and selects the optimal operating mode.
Controller and control panel
The controller is the brain of the entire system, responsible for its operation. In the most simplified version, this could be some kind of thermoregulatory device. In this case, the minimum operating range of the device must be in the range from +3 to -8 degrees C. In this case, control and switching of the system cannot be fully automated; human intervention will be required.

A more convenient option for operation is to use a complex electronic control device with programming capabilities. Such equipment is capable of independently controlling the process of melting precipitation, its quantity, and monitoring the temperature.
The controller quickly responds to changes and makes optimal decisions, choosing the best mode of operation of heating equipment under existing conditions.
The control panel is designed to control the entire system and ensure safety during its operation.
The following elements are usually used to arrange a node:
- three-phase input circuit breaker;
- RCD (also known as residual current device);
- four-pole contactor;
- signal lamp.
In addition, it will be necessary to install single-pole circuit breakers for each phase, as well as protection for the thermostat circuit.
In addition, during the installation process you will need parts for fastening: roofing nails, screws, rivets. You will need heat shrink tubing and special mounting tape.
How to choose a heating cable?
Perhaps the most important element of the system is the heating cable. In practice, one chooses between two types of devices: self-regulating and resistive cable. Let's consider all the pros and cons of using both options.
Features of resistive type cable
It is distinguished by the simplicity of its operating principle. Inside such a cable there is a metal conductor with high resistance. When electricity is supplied, it begins to quickly heat up and gives off heat to the heated object. The resistive cable system is very easy to operate and does not require large expenditures.

The main advantages of using a cable of this type are the absence of starting currents during startup, the low cost of a resistive wire and the presence of constant power.
The last statement can be considered controversial. Because in some cases, constant power will rather be a disadvantage. This will happen if parts of the system need different amounts of heat. Some of them may overheat, while the rest, on the contrary, will not receive enough heat.
To regulate the degree of heating of a system with a resistive cable, thermostats or other devices are necessarily used.
The efficiency and cost-effectiveness of such a system depends on the correctness of their settings, so reality is often far from what is desired. In this respect, a resistive cable is significantly inferior to a self-regulating cable.
Experts recommend laying zonal resistive cable whenever possible. This variety is distinguished by the presence of a nichrome heating filament. Its linear power does not depend on size; if necessary, the cable can be cut.
Also, the advantages of the heating cable include ease of installation and long-term operation.
Self-regulating cable and the nuances of its operation
It has a more complex device. Inside such a cable there are two heating cores, around which there is a special matrix. It “adjusts” the cable resistance depending on the ambient temperature. The higher it is, the less the cable heats up, and vice versa, the colder it is around, the better it heats up.

A self-regulating cable has many advantages. First of all, for its normal operation it does not require the installation of a set of control devices: detectors and thermostats. The system will adjust itself, and overheating or insufficient heating, as can happen with a resistive cable, will not occur.
The self-regulating wire can be cut. The minimum length of the segment is 20 cm, its performance characteristics will not change depending on the length.During the installation process, if necessary, the cables can be crossed and even twisted, they will work as usual. Installation and operation of the self-regulating cable is very simple. It can be mounted outside or inside the heated object.
The system also has disadvantages. First of all, it's cost. A self-regulating cable costs about 2-3 times more than a resistive cable. It should be taken into account that it will cost less to operate. Another disadvantage is the gradual aging of the self-regulating matrix, as a result of which the self-regulating cable fails over time.
Read more about the features of choosing a self-regulating cable Further.
Heating system calculation
Experts advise choosing cables with a power of at least 25-30 W per meter for heating the roof and gutters. You need to know that both types of heating cables are used for other purposes. For arranging heated floors, for example, but their power is much lower.

Power consumption is estimated in active mode. This is the period when the system operates at maximum load. It lasts in total from 11 to 33% of the entire cold period, which conventionally lasts from mid-November to mid-March. These are average values, they are different for each area. The power of the system needs to be calculated.
To determine it, you need to know the parameters of the drainage system.
Let us give an example of calculations for a standard design with a cross-section of a vertical drain of 80-100 mm, a gutter pipe diameter of 120-150 mm.
- It is necessary to accurately measure the lengths of all gutters for water drainage and add up the resulting values.
- The result must be multiplied by two. This is the length of the cable that will be laid along the horizontal section of the heating system.
- The length of all vertical drains is measured. The resulting values are added together.
- The length of the vertical section of the system is equal to the total length of the gutters, since in this case one cable line will be sufficient.
- The calculated lengths of both sections of the heating system are added up.
- The result obtained is multiplied by 25. The result is the electric heating power in active mode.
Such calculations are considered approximate. Everything can be calculated more accurately if you use a special calculator on one of the Internet sites. If independent calculations are difficult, it is worth inviting a specialist.
Choosing a place to lay the cable
Actually, the heating system for gutters is not that complicated, but in order for it to work as efficiently as possible, the cable should be laid in all areas where ice forms and in places where melted snow melts.
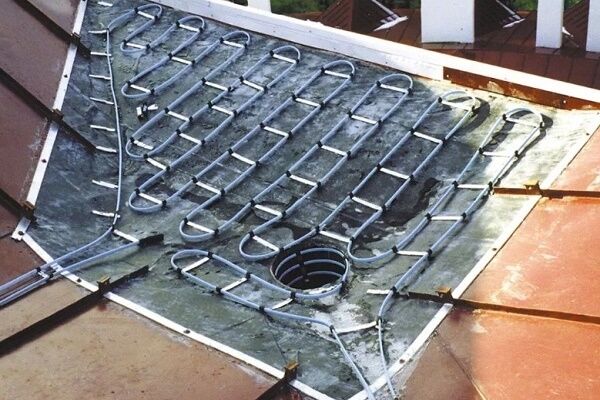
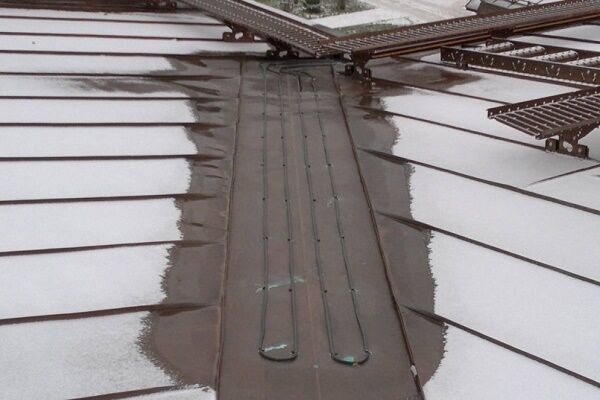
In roof valleys, the cable is installed down and up, extending over two-thirds of the valley. Minimum - 1 m from the beginning of the overhang. For every square meter of valley there should be 250-300 W of power.

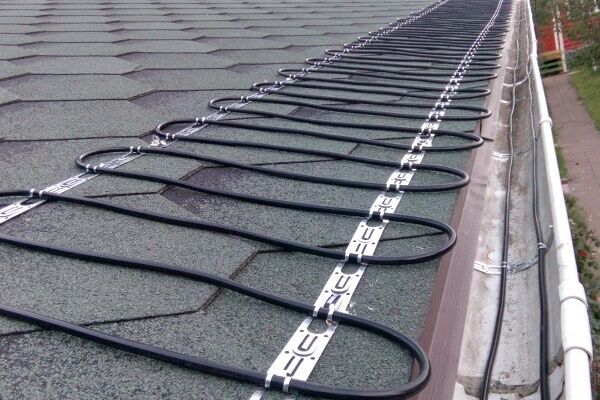
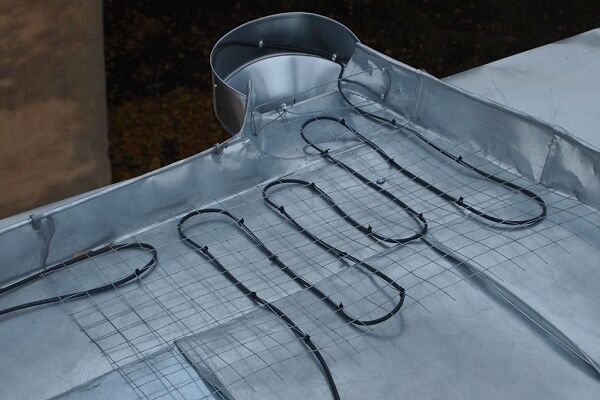
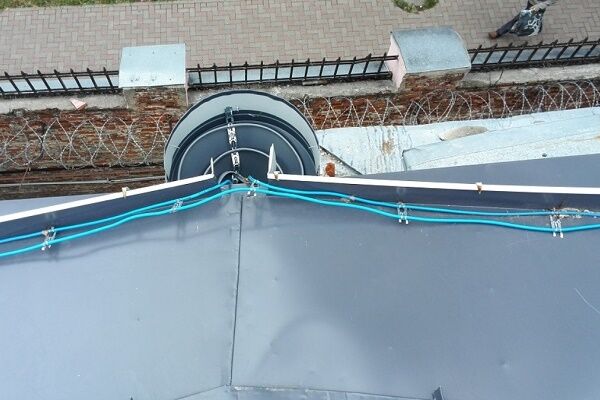
Along the edge of the cornice, the wire is laid in the form of a snake. The snake pitch for soft roofs is 35-40 cm; on hard roofs it is made a multiple of the pattern.The length of the loops is chosen in such a way that there are no cold zones on the heated surface, otherwise ice will form here. The cable is laid on the water separation line along the drip line. This can be 1-3 threads, the choice is made based on the design of the system.
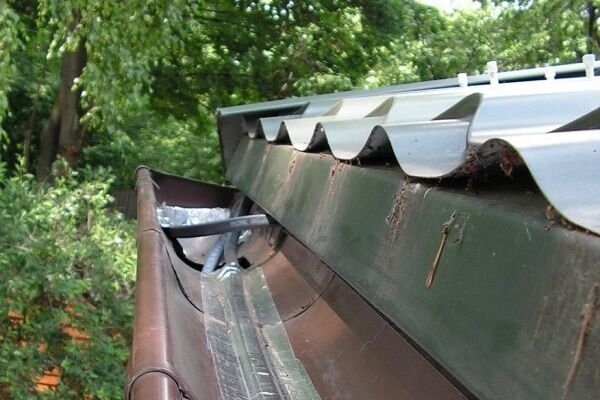
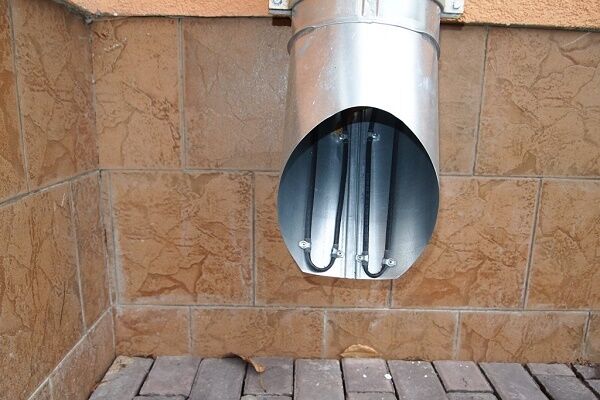
The heating cable is installed inside the gutters. Usually two threads are laid here, the power is selected depending on the diameter of the gutter. One heating core is laid inside the gutters. Particular attention should be paid to pipe outlets and funnels. This usually requires additional heating.
Heating system technology
We suggest you study the detailed instructions for installing a heating system for the roof and gutters with your own hands. The process of installing a heating system for gutters includes a number of standard steps:
First, we outline the places where the cable will be laid. It is important to take into account all the turns and their complexity. If the angle of rotation is too steep, it is recommended to cut the cable into pieces of the required length and then connect them using couplings.
When marking, carefully inspect the base. There should be no sharp protrusions or corners, otherwise the integrity of the cable will be at risk.
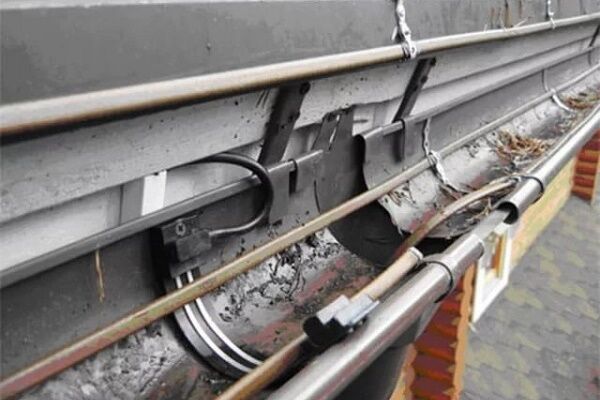
Inside the gutters, the cable is fixed with a special mounting tape. It is fixed across the wire. It is advisable to choose a tape that is as strong as possible.
The resistive cable is secured with tape every 0.25 m, the self-regulating cable - every 0.5 m. Each strip of tape is additionally secured with rivets. Their installation sites are treated with sealant.

Inside the gutters, the same installation tape or heat shrink tubing is used to secure the cable. For parts whose length exceeds 6 m, a metal cable is additionally used. A cable is attached to it to remove the load-bearing load from the latter.
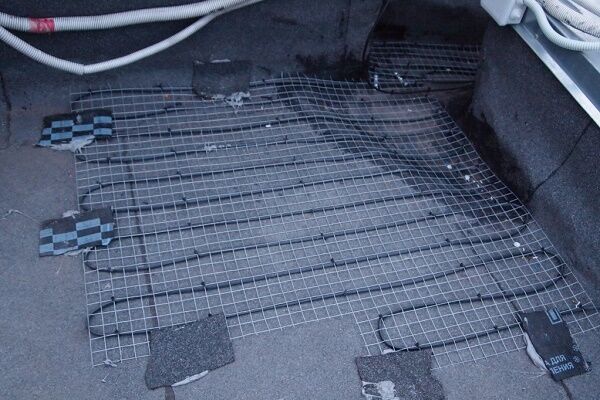
Inside the funnels, the heating cable is attached to tape and rivets. On the roof - on mounting tape glued to sealant, or on mounting foam.
Important note from experts. It may seem that the roofing material's adhesion to the sealant or foam is not sufficient to make a reliable connection.However, it is strictly forbidden to make holes for rivets on the roofing material. Over time, this will inevitably lead to leaks and the roof will become unusable.
We choose a place for distribution boxes and install them. Then we call and accurately measure the insulation resistance of all the resulting sections. We put the thermostat sensors in place, put the power and signal wires. Each sensor is a small device with a wire, the length of the latter can be adjusted. Detectors are placed in strictly defined places.

For example, a place is selected for a snow sensor on the roof of a house, a water detector is selected at the lowest point of the gutter. We carry out all work according to the manufacturer's instructions. We connect the detectors to the controller. If the building is large, the sensors can be combined into groups, which are subsequently connected one by one to a common controller.
Next, we prepare the place where the automatic control system will be installed. Most often this is a distribution panel located inside the building. The controller and protective group are installed here.
Depending on the type of controller, the nuances of its installation may vary slightly. However, in any case, it will have terminals for connecting detectors, heating cables and for power supply.

We install the protective group, and then measure the resistance of the previously installed cables.Now you need to test the automatic safety shutdown to find out how well it copes with its functions.
If everything is in order, we program the thermostat and put the system into operation.
Typical mistakes when installing a system
Experienced installers identify typical mistakes that are often made by those who install heating of gutters on their own for the first time:
- Design errors. The most common is ignoring the features of a particular roof. When designing, no attention is paid to cold edges, warm areas, spillway areas, etc. As a result, ice continues to form on some areas of the roof.
- Errors in fastening the heating cable: a moving wire “hanging” on a mounting tape, holes in the roof for fasteners, the use of a tape that is intended for installing a heated floor on the roof.
- Installation of plastic clamps intended for interior use as fasteners. When exposed to ultraviolet radiation, they will become brittle and collapse in less than a year.
- Hanging a heating cable into a drain without additional fastening to a cable. Leads to wire breakage due to thermal expansion and the severity of ice.
- Installation of power cables that are not intended for installation on the roof. As a result, an insulation breakdown occurs, which threatens electric shock.
Errors include connection heating cable in areas where its use is not required. His work will be useless, and the owner will have to pay for it.
Conclusions and useful video on the topic
Interesting information about heating cables and useful tips for installing them are presented in the following videos.
Features of the self-regulating heating cable:
How to assemble a gutter heating system yourself:
Installation of an industrial assembly heating system:
Practice shows that in cold weather it is necessary to heat the gutters. This makes it possible to get rid of ice and guarantees protection against sudden snow melting. You can set up such a system yourself.
The most difficult thing will be to calculate it and select the areas where you need to lay the heating cable. This part of the work can be entrusted to professionals. Having received the calculations and design, subsequent installation is easy to implement independently.
Do you want to ask a question about installing gutter heating? Please write it in the block below. Here you have the opportunity to report interesting facts on the topic of the article or share your own experience in arranging drainage heating yourself.


At one time this topic was interesting. Even at some point I started doing it, but problems arose. The living creatures bit the wires, and immediately the desire disappeared. Still, the thing is not so relevant for your own home. In all the winters I haven't had much ice on my gutters, mostly when spring comes. Wait a month and everything will be fine. It seems to me that it is better to do it for large buildings, it is just suitable for them.
When constructing a new roof, I provided for heating the roof surface to avoid the appearance of icicles and damage to property. But, as it turned out, I didn’t think through the system completely and didn’t install heating into the gutters. As a result, the melted water flowed into the gutters and froze there. Last summer I corrected the situation, this year I hope for a different result. For heating I used a resistive cable.