Connecting a light switch with two keys: installation details
Two-key switches are used when it is necessary to control two electric lighting devices simultaneously from one point. They also help you adjust the brightness of the lights in the simplest way. Agree, connecting a light switch with two buttons creates additional convenience.
We suggest that you familiarize yourself with the detailed process of installing and connecting a double switch. Here you will find interesting information about the design and design features of the light control device. With our help, you can easily carry out the installation.
We supplemented the thoroughly described instructions with visual illustrations, photo selections, installation diagrams and video instructions.
The content of the article:
- Internal structure of the switch
- Step-by-step description of the work process
- #1: Features of choosing a location for installation
- #2: Preparing for installation
- #3: Identifying Electrical Wires by Color Marking
- #4: Identifying conductors with a multimeter
- #5: Removing the Old Electrical Switch
- #6: Installation of elements with closed and open wiring
- #7: Options for connecting electrical wires
- #8: Connection diagram and step-by-step actions
- Example of connection from a nearby outlet
- Installation of a pass-through two-phase switch
- Connection to the power supply system
- Conclusions and useful video on the topic
Internal structure of the switch
The internal structure of a two-phase switch differs from a single-phase one by the presence of two output terminals instead of one.
More specifically, it consists of the following elements:
- mechanism and decorative panel;
- one input terminal;
- two output terminals;
- two keys.
Terminals are special clamping mechanisms.To connect a wire, you just need to strip it, insert it into the terminal block and tighten it with a screw. The input or common terminal is preferably located separately and is marked as L.
On the opposite side there are two output terminals. They can be designated as L1, L2 or 1,2. Some models may have screw terminals instead of a terminal block. It is not advisable to use them, since the fastening may gradually weaken and will have to be tightened.

You need to install the device so that when you turn it on, you press the upper half of the key. You can determine the top and bottom of an element using an indicator - a special screwdriver that works to make a short circuit.
To do this, take a nail or a piece of wire and touch it to one contact, apply an indicator to the other, holding your thumb on top.

If the light inside does not light, it means that the switch contacts are open. When the keys are in the on position, it should light up. It remains to mark the top part of the element.
Step-by-step description of the work process
In addition to standard models, a two-key switch can be additionally equipped with a backlight and indicator. The backlight helps to identify it in the dark, and the glowing indicator will make it clear that the electrical network is working and is closed. They also produce models with shock-resistant and waterproof cases.They can be installed in a bathhouse, bathroom or outdoors.
There are also pass-through switches. They have almost the same design, with the exception of an additional terminal. Such devices are connected to one or a group of lamps and allow you to control lighting from opposite ends of the room. For example, when entering the bedroom, you can turn on the light, and when going to bed, turn it off near the bed.
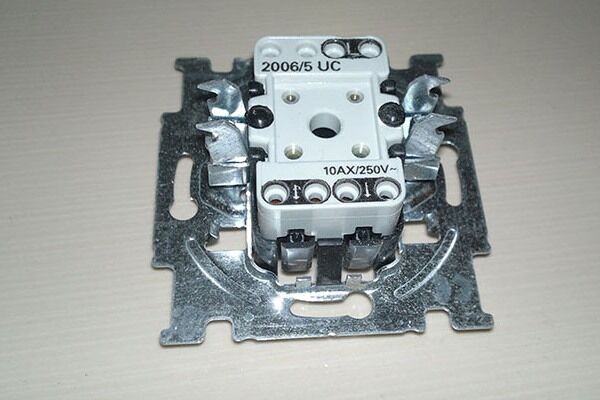
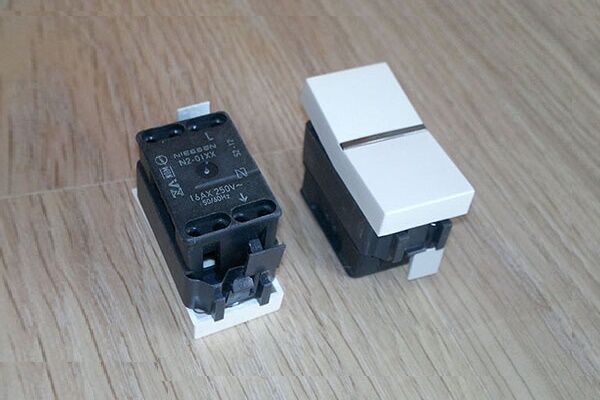
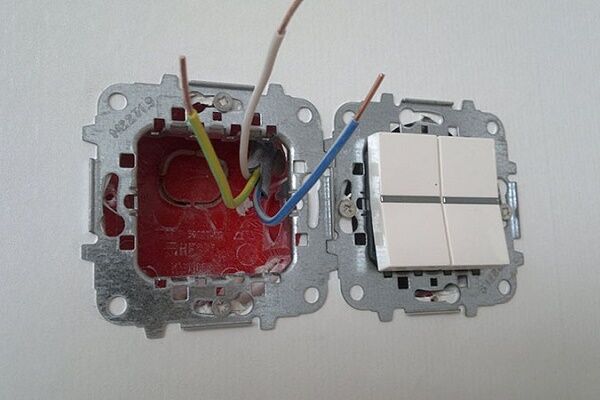
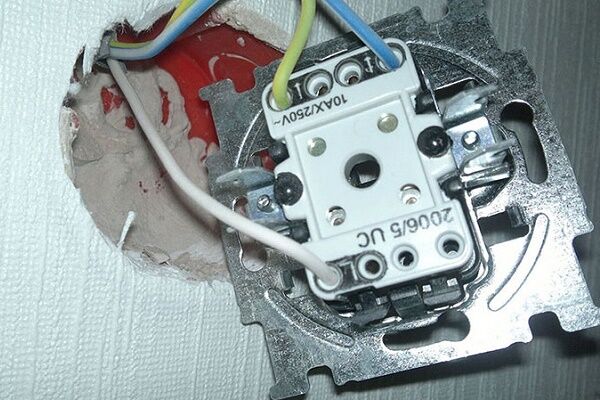
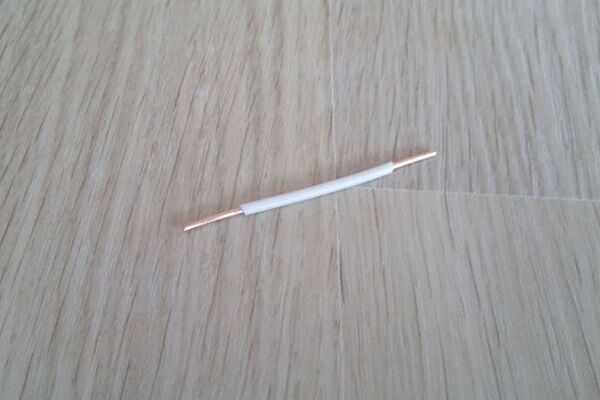
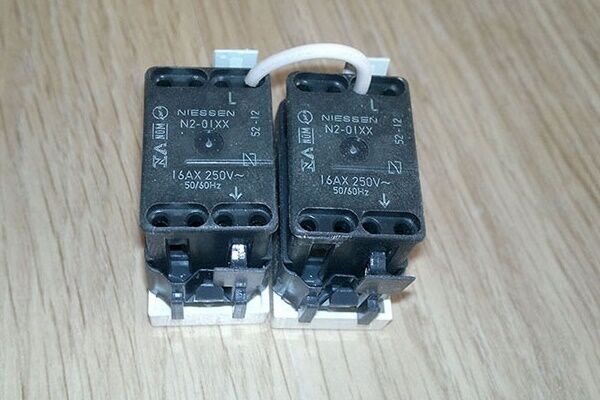
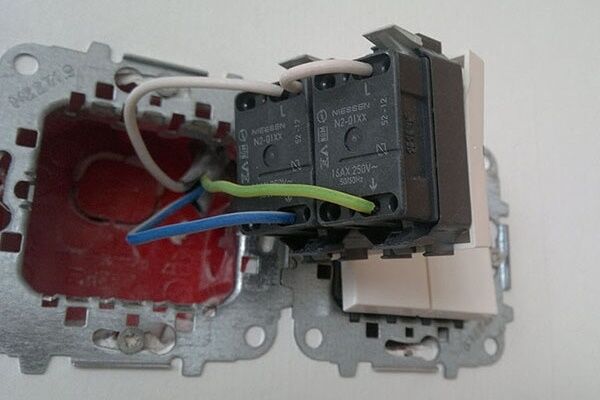
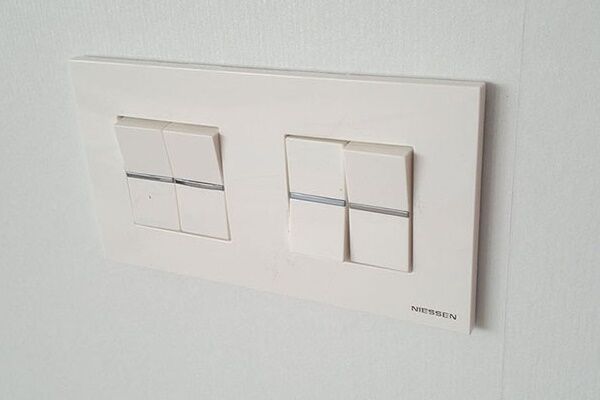
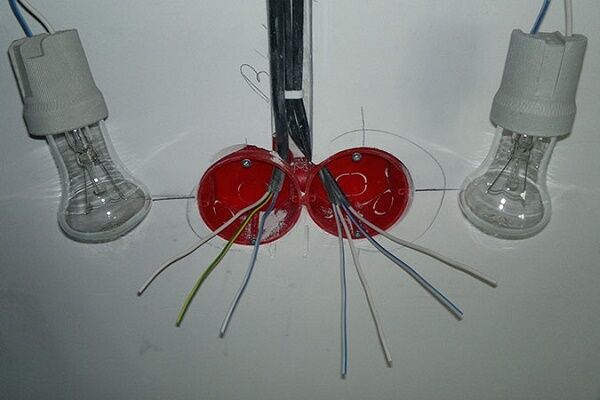
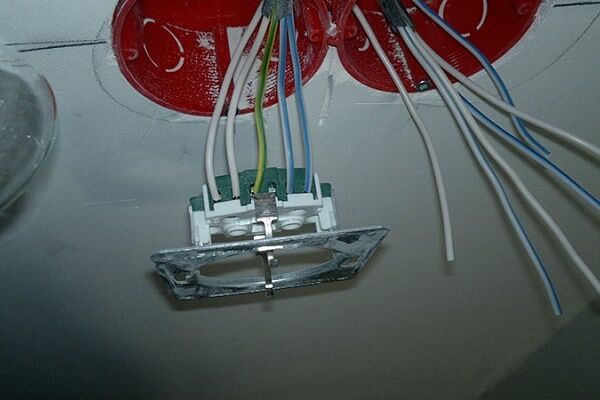
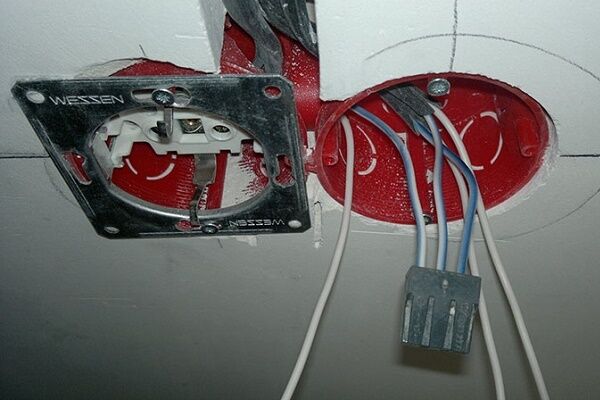
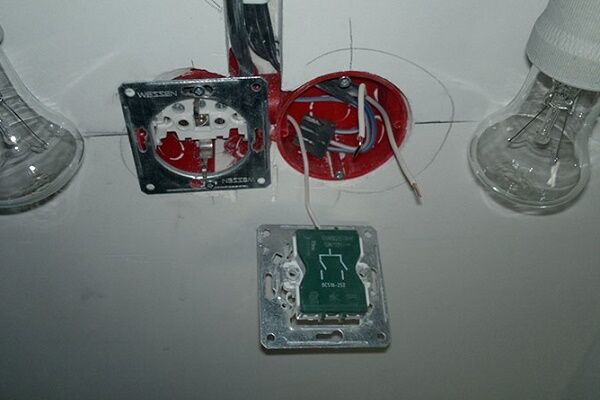
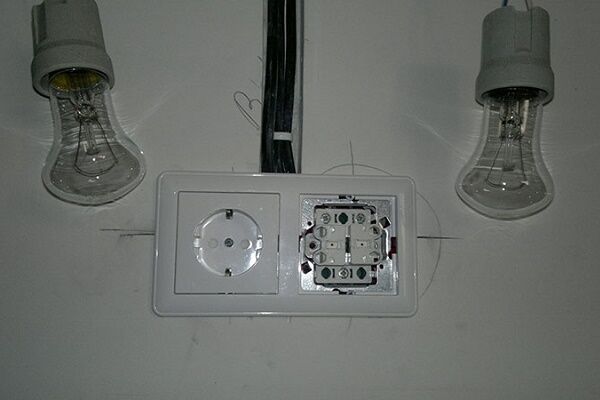
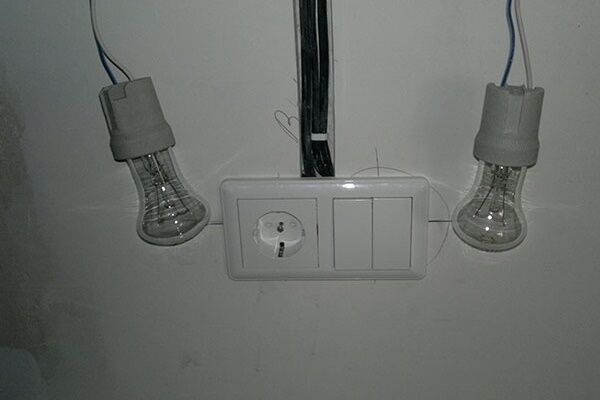
In practice, electrical installation products with one support and two keys or two single-key modules connected by a jumper can be used as a two-key device for controlling a lighting device. The difference in their installation is represented by the following photo selection:
#1: Features of choosing a location for installation
The legislation does not provide any standards for the placement of the device. Their installation means convenient use for adults and children.
And if previously the usual practice was to place the device at a height of about 2 m, now the switch is often located at the level of the lowered hand of an adult. Thus, the element becomes available to almost all residents of the house.

The only place where the placement of the switch may have any restrictions is in the bathroom or bathhouse. Here you need to consider the placement of the washbasin and open shower. When operating the device, it should not be exposed to drops of water.
#2: Preparing for installation
Whatever electrical installation work you have to do, the first thing that is important to do is turn off the power to the network. We must not forget for a second that electricity is dangerous. In addition to exposure to current, improperly laid electrical wiring can cause damage to electrical appliances or a fire in the house.
Rules of conduct when working with electrical networks:
- be sure to de-energize the network;
- do not touch connected devices with wet hands;
- do not use metal staples to secure wiring;
- do not overload the electrical network;
- It is better to replace a damaged wire with a new one rather than repair it;
- work can only be done with tools with insulated handles;
When working with electricity, do not touch water or gas metal pipes.
When starting to connect yourself, you must:
- take steps to comply with safety regulations;
- become familiar with the rules of wire marking;
- check the network for compliance with the markings.
Any home owner for replacement and switch connections You probably won’t want to invite an electrician. In addition, to perform this task, there is no need for complex devices and tools.
For installation you will need:
- mounting knife;
- insulating tape;
- hammer and chisel;
- pliers;
- indicator screwdriver, as well as curved and straight.
If the installation has to be carried out in a new location, and hidden wiring is laid in the house, a drill with a crown attachment or a hammer drill may be useful.

#3: Identifying Electrical Wires by Color Marking
It is strictly forbidden to proceed with installation without knowing and observing the markings. It is used to create safe conditions and reduce time spent during work.

To form the correct connections, use the following notation:
- zero - always and without exception blue;
- protection is also strictly one color - yellow-green;
- phase - has a predominantly brown or red color.
These are just the basic combinations. In addition, to eliminate confusion during identification, alphanumeric markings are used.
If during the work it turns out that there are no visual markings, then you need to mark the wiring yourself using multi-colored heat-shrink tubing or colored insulation.
#4: Identifying conductors with a multimeter
You should not blindly trust the labeling. These designations have changed their standards more than once. Therefore, when getting down to business, it is necessary to additionally check the character of the conductors. To do this, use an indicator screwdriver and a multimeter.
If the building has a single-phase electrical network without a grounding system, then an indicator will help determine the phase or zero. After turning off the power, strip the conductors and remove them so that they do not touch each other.
After turning on the power supply, bring a screwdriver to the wires. The light in the indicator will flash when you touch the phase conductor, but will not light up when you touch zero.

To analyze a network in which there is a third, protective conductor, use a multimeter. Having set the range for alternating current to a value above 220 volts, bring one tentacle to the phase, and fix the other on any of the conductors. When in contact with a neutral wire, the device will detect a voltage within 220 volts, with a protective wire - slightly lower.
#5: Removing the Old Electrical Switch
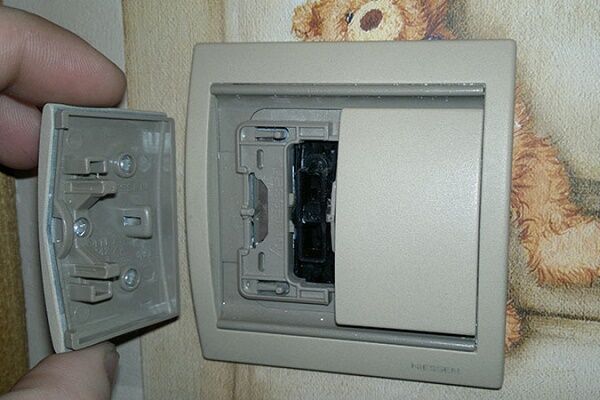
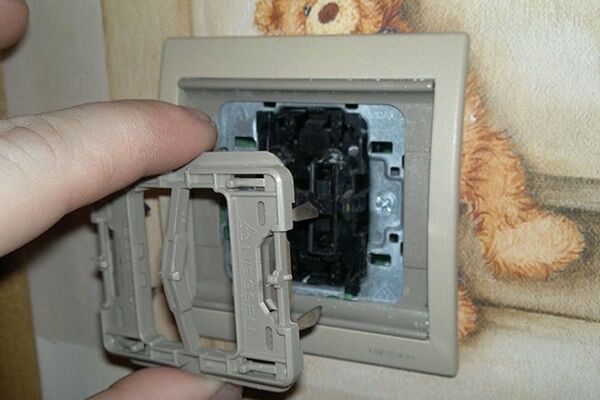
To have access to the fasteners, you need to remove the keys and decorative panel.To do this, use a screwdriver or a thin knife to pry up the first key and carefully remove it. They do the same with the second one. Next, remove the decorative cover. In some models they are unscrewed.

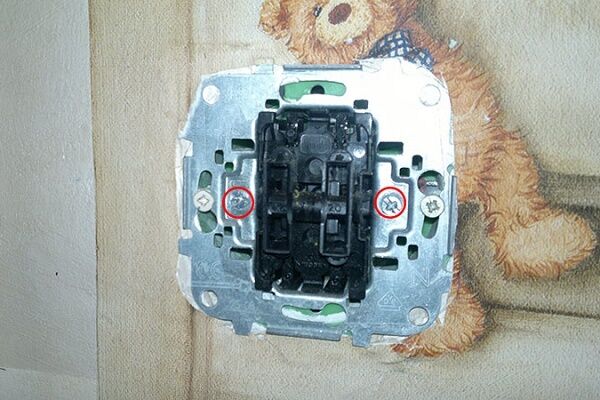
Then the mechanism itself is removed - it can be secured using clamping tabs or screws. Disconnect the conductors and, if necessary, dismantle the old socket box.
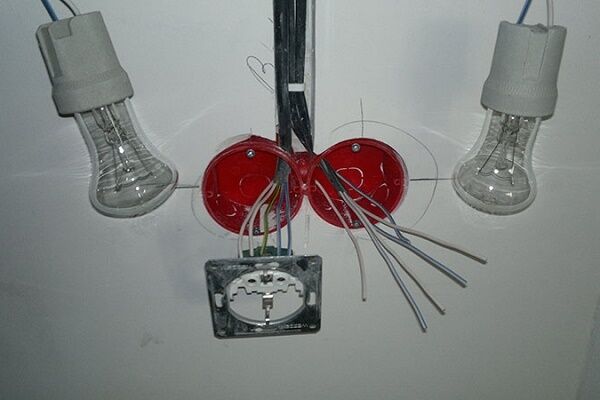
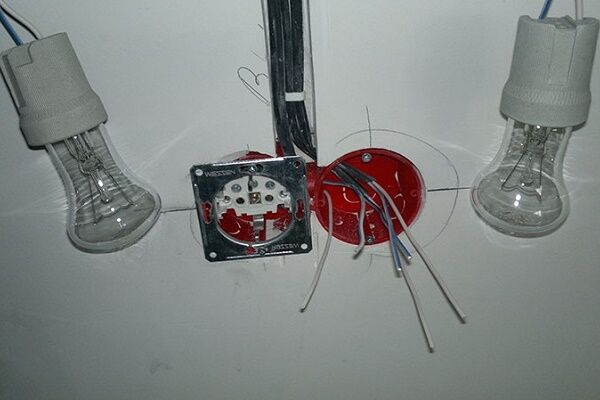
The dismantling process is clearly demonstrated in the photo gallery:
#6: Installation of elements with closed and open wiring
Installation of switches in newly built homes comes down to connecting the element to the previously installed electrical network. In an old house, in which the old wiring already requires replacement, you have to make new pipes and lay the cable.
And when the electrical wiring is placed openly, each cable is brought to the switch in insulating corrugated pipes and cable channels.
The subsequent choice of the switch model and the method of its installation depend on the way the wires are laid in the house. The device, which is suitable for open wiring, consists of a flat socket box, an internal mechanism, and an insulating decorative cover. The structure does not hide in a recess in the wall, but protrudes completely above the surface.

Installation starts with installation of a socket box - flat bottom. This is carried out using suitable fasteners. For different wall surfaces, screws or dowels, screws, and self-tapping screws can be used.
Next, after connecting the wires, fix the switch mechanism and put on a decorative insulating cover. The manufacturer has already thought out a hole for connecting the conductor. The cover itself is put on, hiding the mechanism, and secured with latches.
For installation of double switch in rooms with hidden wiring, socket boxes (wiring boxes) in the shape of a small bowl are used. A hole is cut in the wall or a small recess of the appropriate size is made.

During installation, make sure that the device is fixed evenly, without distortions. The socket boxes can be installed side by side - any required number - and fixed using gypsum mixtures.Then, towards the socket box, grooves are hollowed out with a depth sufficient to lay the wire.

#7: Options for connecting electrical wires
The weakest links in an electrical circuit are places wire connections. Not surprisingly, most problems occur there.

When connecting a switch, there is no need to consider all connection methods; here are the most basic ones:
- Hand twisting - a very common method that requires subsequent isolation.
- Terminal block - Widely used as a connecting link. It consists of copper clamps encased in a plastic housing.
- Soldering - although it helps to create high-quality grip, the laboriousness of the process does not contribute to its popularity.
It should also be said about the heat-shrink tube, which perfectly helps to insulate the joints and even strengthens them a little.

#8: Connection diagram and step-by-step actions
With the old electrical wiring system, power enters the house from the electrical panel via a two-wire cable. The grounding loop is placed on the transformer, to which the neutral conductor is connected.
Despite its simplicity, this method has a significant drawback - a low level of security.

In the working body of the switch, one of the phase wires of the three-core cable is connected to the common terminal block (L). To do this, insert the wire into the terminal hole and tighten the screw. The other two phase electrical wires are connected to separate contacts, and then lead to the installation box and connected to the phases of the lamps.

The wiring connection must be made in the junction box. It hides sloppy weaves from view and serves as an insulator.
To correctly connect the electrical wires, you must do the following:
- The conductors coming from the lamps and the two-phase switch, as well as the power supply wire, are inserted into the box, and the insulating coating is removed from an area of 2-3 cm.
- The phases of the main power cable and the switch are connected.
- The incoming neutral wire is connected to the neutral wires of the lamps.
- The phases coming from the switch are alternately connected to the conductors of the phases coming from the lighting fixtures.
Only the phase wire is connected to the switch. It is strictly forbidden to connect it to a neutral wire. Otherwise, simply replacing a light bulb can become a dangerous procedure.
It is better to supply any wire with a reserve, laying the excess behind the structure. It is not permissible to leave exposed wires, even inside elements. All exposed areas must be carefully insulated. It is better to do this with textile electrical tape.
You can find common double switch connection diagrams in popular article our site.
Example of connection from a nearby outlet
Let's consider the option of connecting a control device for two lamps according to the diagram below:
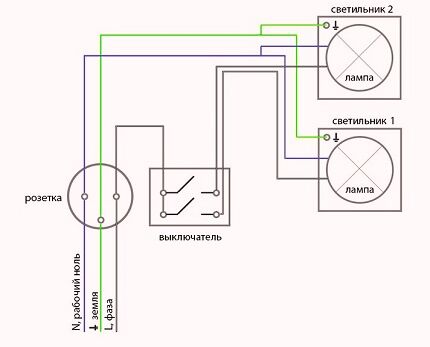
The location of an outlet and a switch nearby is a common situation for small domestic apartments. Let's figure out how to connect a double switch in this case:
Installation of a pass-through two-phase switch
To control several lighting fixtures from different parts of the room, use pass-through switch with two keys. Its internal structure is similar to two single-key pass-throughs, united in a common decorative case. It contains two groups of terminals that disconnect the current supply from one pair of electrical wires to the other.

How to install:
- The phase conductor from the installation box is laid to terminals 1 and 2 (on the right), which are connected to each other according to the diagram.
- There are already four phases coming out of the switch, which lead to the box, and then to the second switch.
- Two phases depart from switch No. 2 (without intersecting). They are led to a box where they are connected to two independent conductors leading to the lamps.
When carrying out installation, you can run one pair of wires first, and then the second, so as not to confuse them, otherwise the circuit will not work.
Connection to the power supply system
You can determine that the electrical wiring was carried out according to the new system by looking at the laid cable. It will be three-wire for single-phase power supply or five-wire for three-phase power supply. One of the single-phase power wires will be the phase marked in brown or red, the other will be the neutral (zero) marked in blue, and the third will be the protective wire marked in yellow-green.
To facilitate identification, alphabetic and color designations are used:
- A, B, C - phase;
- N - neutral or zero;
- PE - protective.
The difference between this connection diagrams consists of an additional protective PE conductor, which is led directly to the lamps.

After connecting the wires to the working mechanism, they are pressed closer to the body and then installed in the socket box. Secure in mounting box using clamping tabs or bolts. Put on the decorative case and keys.

Conclusions and useful video on the topic
You can view an accessible video on installing a simple electrical circuit here:
When installing the electrical network or its elements, it is necessary to correctly follow the above instructions. If there are any doubts about how to properly connect a light switch with two keys to the network, it is better to contact a professional.
If you have interesting information about installing a double switch or found controversial points in the article, please write comments. There is a block form for commenting below.


I'm not much of an electrician. I once tried to install the switch myself for a new chandelier. According to my idea, when one key was turned on, one light should be on, and when the second one was turned on, all the others should be on. But no matter how I tried, either nothing was burning at all, or everything was burning at once and with any key turned on. I decided not to get involved with this anymore; after all, electricians are a dangerous business.
Good afternoon, Ivan. I recommend drawing a diagram before starting installation work. The logic of its operation in relation to your chandelier comes down to splitting the phase in the switch into two lines - one goes to the first group of light bulbs, the second to the remaining one. The neutral wire that comes from the junction box must be divided into groups within the chandelier itself. I have attached a diagram to make it clearer.
I installed and connected the light switch with two keys myself. From my own experience, I can say with confidence that if you don’t understand electrical installation at all, then it’s better not to be amateur. At first glance, the connection diagram is very simple, but in fact there are a lot of nuances, and in order not to make things worse, it is better not to save money and call an electrician.
Generally speaking, installing a switch is not something that supernatural. However, I once had a case when during installation it accidentally happened that the exposed wire touched the skeleton of the switch. Because of this, electricity passed through it freely (I decided to check the functionality before installing the plastic case). If it weren't for the indicator screwdriver, I would have been seriously electrocuted. And all because I just gave a little extra when stripping the wires. So be careful when installing even such a simple thing.
How tired of these monotonous articles with stolen content from other sites - finally write original material... stop stealing information from other sites and broadcasting on different sites.
I've been looking for something useful about switches for an hour now, and after the first search positions - everything is the same thing that they have stolen... SHAME!
Hello. Articles on the site undergo strict uniqueness control and are written by professionals in various fields. Unfortunately, content and even forum questions are constantly being stolen from our site. Write what exactly you are interested in about switches and we will give you a clear answer from a full-time electrician.