Bottom valve: purpose, device + instructions for replacement
Europeans are amazingly creative when it comes to saving money.One of these devices is a bottom valve, which allows you to use much less water and not overpay your utility providers. The product has an ingeniously simple design, and at the same time it is very practical and easy to use.
Although the device first appeared in England, our compatriots also highly appreciated it and are using it more and more often.
We suggest you understand the design and operating principle of plugs, their advantages and disadvantages. The answers to the above questions are described in detail in the article. In addition, we have provided tips on choosing a foot valve and prepared step-by-step instructions for installing it.
The content of the article:
Convenient savings with bottom valve
These are small shut-off devices that are installed in sink drains to retain water. They were originally intended for water supply systems in which hot and cold water are drawn from different taps. This is how bathrooms are equipped in some European countries.
We perform this function different types of mixers, so sink shut-off valves have found other uses. They are used if you need to wash, shave, or manually wash children's clothes or underwear.
The devices eliminate the need to pour running water or collect it in a basin. Simply lower the valve and the sink will be filled in literally a minute.
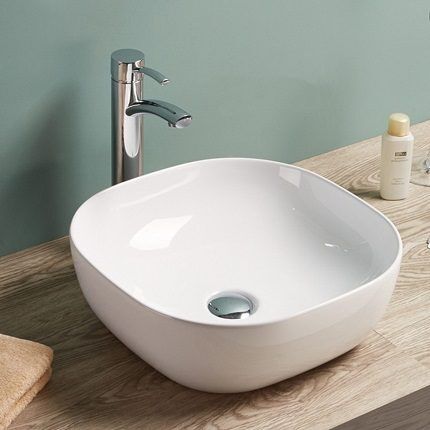
There are two main types of valves:
- With mixer. Devices included. Their installation is provided for by the model of the plumbing fixture. To control the operation of such a bottom valve, a small lever is used, which is located behind the tap or on the side of it.
- Push Open. These models are sold separately from the faucets. They are less popular than devices of the first type. They are often bought by people who are already accustomed to using a locking product, but the old one has worn out and needs to be replaced.
The devices would hardly have found widespread use in the post-Soviet space if they had not been included in some faucet models. Quite quickly, the benefits of their use became obvious, and now shut-off valves for sinks are in demand among buyers.
Another plus: installation does not require any fundamental changes to the water supply or sewerage systems.
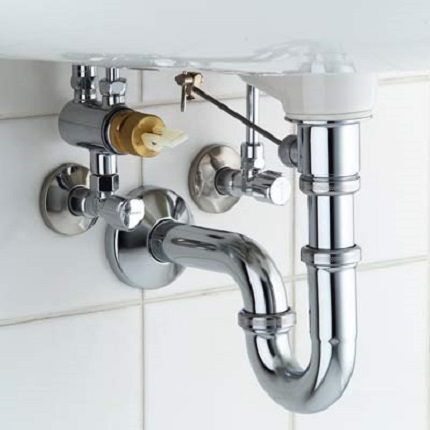
Designs can be with or without overflow. Externally they differ little, but the difference in functions is noticeable.
Valves of the first type are safe: if the water pressure suddenly increases or the owner moves away for a minute, the excess liquid will drain into the drain and not onto the floor.
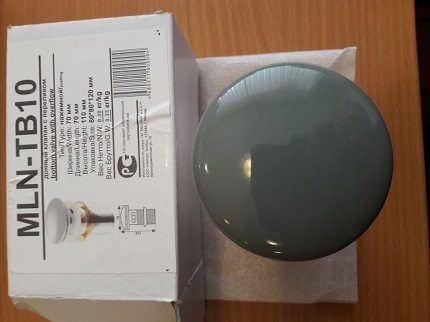
If the device does not have an overflow, the slightest carelessness can result in trouble.
Design and principle of operation
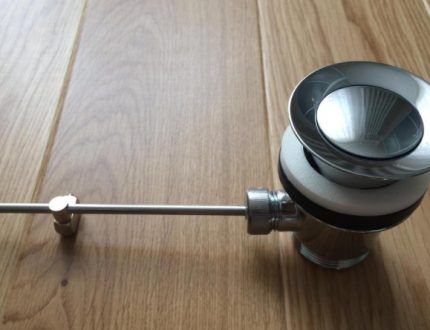
Lever (automatic) models consist of several functional elements:
- Cork. This is the valve that closes the drain hole in the sink.
- Lever arm controls (spoke). It is used to raise and lower the cork. This is convenient - you don’t have to put your hand in a sink filled with water.
- Kernel. It connects the control lever and the plug.
- Thread. The device is screwed to the siphon using a threaded connection.
- Siphon. The entire assembly is an integral structure for controlling water drainage.
Push Open valves are push-type mechanisms in which the plug is controlled by a spring.
The design is simpler than a lever one, but less convenient to use. To press the plug, you have to put your hand in the water. Many people find this unpleasant, especially if they washed or washed dirty clothes in the sink.
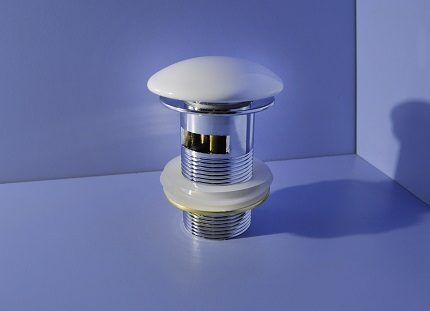
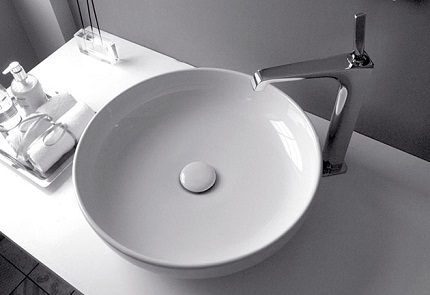
A significant advantage of Push Open models is their aesthetic appearance. A compact stopper at the bottom of the sink looks much more attractive than a complex design with a lever. From the outside, only a round lid is visible, the color of brass, bronze or chrome.
Pros and cons of using a valve
The use of new hydraulic locking devices has several advantages.
- Economic benefit. Due to rising utility tariffs, many had to think about cutting costs. The cost of devices ranges from 500-2000 rubles, depending on the model and manufacturer. It's a small price to pay to reduce bill amounts.
- Easy to use. The valve is operated with one finger. No effort is required to lower or raise it.This is accessible even to children.
- Ergonomic shape. The device is convenient and easy to clean.
- Beautiful design. A neat metal or ceramic lid looks much nicer than a hole in the sink. It also wins in comparison with the usual plastic stopper.
- Secure fastening. Traditional bathtub and sink plugs are tied to plumbing fixtures using fishing line, which can break at any time. Metal chains improve the situation somewhat, but they are also not entirely reliable, and they also make noise when used.
- Odor protection. Unpleasant odors in the bathroom are not always the fault of the users, and cleaning does not eliminate them.
It can be difficult to deal with the stench, but it is necessary, because sewer gases contain substances hazardous to health - hydrogen sulfide, ammonia. By plugging the drain, you can simply get rid of the problem.
Bottom plugs have no serious disadvantages, but a couple of nuances are worth considering. It will take time to get used to the peculiarities of using the mechanism: you need to monitor the water level when filling the sink.
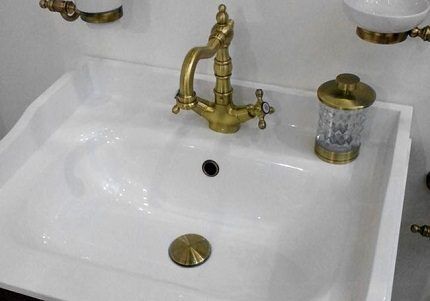
There are also irritating moments in the use of spring mechanisms - putting your hand in dirty, too hot or cold water. And with lever ones, it’s inconvenient to clean the parts located under the sink and behind the mixer.
By what criteria are plugs selected?
First of all, you should decide on the price. You need to understand well what the buyer gets for his money - quality of materials and workmanship, design or additional convenience.
Let's consider several design features on which the price depends:
- presence of overflow;
- type of control;
- design;
- brand.
The model should be selected based on sink type. If it does not provide for the possibility of removing excess water, install a bottom valve without overflow. An option is to replace the siphon with a more practical one.
As for the management mechanism, you need to clearly define your goals. If the sink holds water for hand washing, it is unlikely to be too dirty after use. There will be no problems with lowering your hand to the spring valve.
But if you plan to wash dirty shoes or greasy objects, it is better to give in to natural disgust and buy a lever device.
The role of the brand is difficult to overestimate when choosing fittings. Brand reputation is not only advertising, but also an indicator of the real quality of goods. Before purchasing, it is advisable to read user reviews and take into account their complaints about different manufacturers.
The bottom shut-off valve is a small part, but it can cause unpleasant moments if it quickly fails. It’s better to pay a couple of hundred rubles more and buy a reliable, beautiful plug that will last for several years without breaking.
Detailed installation instructions
The bottom valve, which is included with the mixer, is installed in stages.To install it, you will need simple tools and plumbing sealant, which is used for sealing seams when installing plumbing fixtures. All work can be done independently.
The only caveat: the standard set contains all the tools with sharp edges that can damage the sink coating. It is advisable to prepare gaskets in advance and press metal elements through them to protect the plumbing.
Stage 1 – preparatory work
The lever and hoses lead down through the hole, under the sink. Typically, mixers are equipped with flexible tubes. If the model comes with rigid hoses, you will have to bend them yourself.
It is important to do the work very carefully so as not to damage the walls of the pipes, otherwise they will quickly rot and leak.
It is highly undesirable to file the products, because... chips can easily get into the faucet mechanism. During operation, problems will arise that will lead to premature abrasion and wear of parts.
If it is impossible to do without cutting the hard pipes, after finishing the work you need to thoroughly rinse all structural elements with a powerful stream of running water.
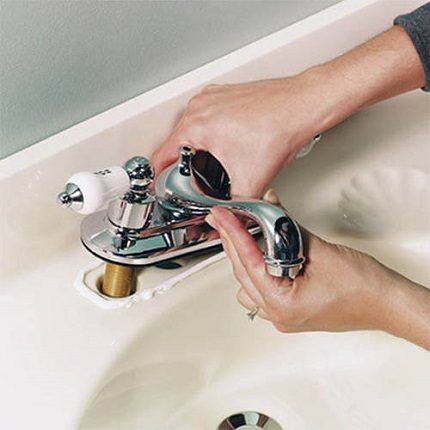
The tap is secured with a clamping nut. If there are doubts about the reliability of the installation, you can use sealant as an additional method of fixation.
Stage 2 - assembly and connection of parts
Using nuts with rubber gaskets, the hoses are connected to the supply pipes. You need to follow the shape of the bend. If it turns out to be in the shape of the letter U, everything is fine: water will flow freely.
But an S-shaped bend is undesirable. Unnecessary obstacles will create conditions for an uneven increase in pressure in the system, which within a year or two will lead to leaks at the joints.
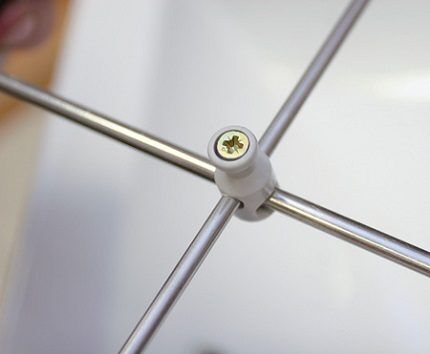
The shut-off valve is placed in the sink drain hole and the spokes are assembled. They are laid crosswise using a special plastic connector.
The clamp itself is twisted with a screwdriver. The result is a simple but reliable cross-shaped design.
Stage 3 - installation of the lever and siphon
The spoke must be connected to the lever and attached to the eye of the device, as shown in the diagram below.
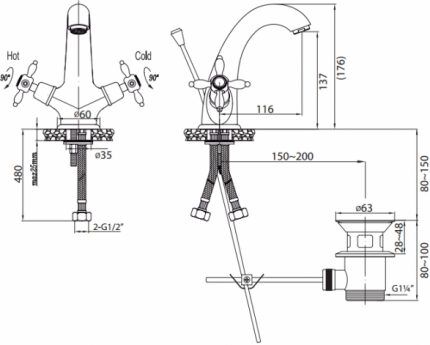
All that remains is to bring the corrugation from below and secure the siphon. It is important that the plug tightly closes the drain hole, so immediately check the quality of the system’s assembly.
It is necessary to open the tap and observe how the plumbing works for 3-5 minutes.
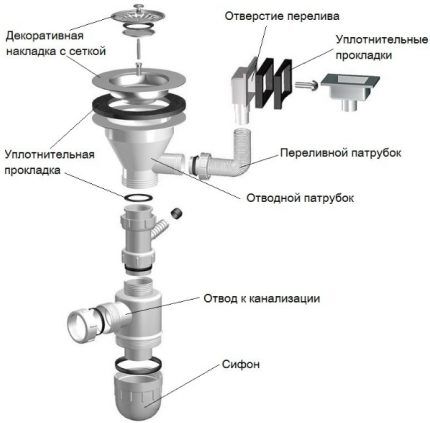
If the water flows well into the drain and the joints remain dry, everything is in order. If signs of leakage appear, the nuts should be tightened.
If even after this the joints are wet, you will have to completely disassemble the system and redo the work, since the installation was clearly done incorrectly. Sealing tape can correct the situation, but it is unlikely to last long.
Stage 4 - checking the tightness of the plug
The work can be considered complete if the siphon does not leak and the shut-off valve tightly closes the drain hole. They check it like this: lower the plug, draw the maximum amount of water into the sink and leave it for half an hour to an hour.
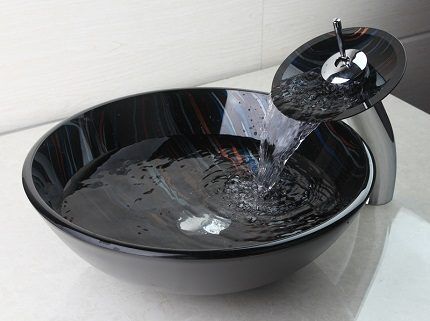
The indicator of correct operation of the device is a constant level. It’s better not to rely on your own eye and make a mark on the sink with a marker.
If after an hour the water remains at the same level, the shut-off valve is installed perfectly. Minor changes are a reason to check the tightness of the lid to the bottom of the sink.
Conclusions and useful video on the topic
Bottom plugs are still infrequently used, so their selection, installation and replacement may be difficult. We offer videos that will help prevent problems.
Detailed video tutorial on installing a foot valve:
AlcaPlast click-clack system devices:
Video review of the Nicoll SAS L2264 model:
Review of the Italian brand Webert valve:
Each foot valve buyer has their own goals. Some people find it convenient to wash their face in a sink filled with warm water, while others prefer to wash or wash small items. Ideas about convenience also vary significantly.
To eliminate mistakes, before purchasing you need to clearly understand how the device will be used. If you need to install a new plug instead of a worn one, you should choose the same model.
Do you have anything to add or have questions about choosing a bottom valve for a washbasin or sink? You can leave comments on the publication, participate in discussions and share your own experience of using such devices. The contact form is located in the lower block.


A good thing is this bottom valve. After the renovation, when all the new plumbing equipment was installed, I decided that such valves were necessary. It helps in many ways and also looks good. Not just a drain hole, but a neat hole with a valve. They are inexpensive, these valves. But the thing is irreplaceable. There is less risk of pipe clogging and debris getting in. And it’s great for simply filling a bathtub with water.
Are you so tender that you are sick of having to stick your hand into dirty water to open the bottom valve? Use a piece of pipe, a 10x10mm block, or just a tree knot picked up on the street. Just press them in the center of the valve and it will open; adjust the height of the device to suit your sink. The best solution is a piece of plastic pipe with a diameter of 1/2, 3/4 inches.
Tell me how to remove the drain from an old sink if it’s stuck, is there any remedy?