How to drill a well with your own hands: ways to do it yourself on a budget
Have you decided to build a well on your own property to provide your home and family with enough clean water? However, were you shocked by the amount it would cost to drill it? Agree that this event, although quite expensive, is extremely necessary.
The high cost naturally forces one to look for an alternative to the services of drillers. We will tell you how to drill a well with your own hands. We will help you understand the peculiarities of excavation and arrangement of a water source - this is a completely feasible task for those who are not afraid of hard work.
The article discusses different methods of constructing a well. After reading them, you will understand whether you can perform all the necessary operations. To better assimilate the information provided, the article is supplied with step-by-step photos and videos that document the process of drilling and making drilling tools at home.
The content of the article:
Types of water intake workings and soils
Before starting drilling work, you should study the composition of the soil on the site in order to at least roughly imagine your future well.
Depending on the characteristics of the aquifer, three types of wells are distinguished:
- Abyssinian well;
- filter well;
- artesian well.
The Abyssinian well (or needle well) can be installed almost everywhere.They break it where the aquifer lies relatively close to the surface and is confined to sand.
To drill it, they use driving technology, which is not suitable for constructing other types of wells. All work can usually be completed within one business day.

But the flow rate of such wells is small. To provide the house and site with enough water, sometimes it makes sense to make two such wells on the site. The compact dimensions of the equipment make it possible to install such a well directly in the basement without any problems.
Filter wells, which are also called “sand” wells, are created on soils where the aquifer lies relatively shallow - up to 35 meters.
These are usually sandy soils that lend themselves well to drilling. The depth of the filter well usually varies between 20-30 meters.

In a good situation, the work will take two to three days. Filter well needs good maintenance, since the constant presence of sand and silt particles in the water can cause siltation or sandiness.
The typical lifespan of such a well can be 10-20 years. The period may be longer or shorter depending on the quality of well drilling and its further maintenance.
Artesian wells, also known as limestone wells, are the most reliable, since the aquifer is confined to bedrock deposits.Numerous cracks in the rock contain water.
Such a well is usually not at risk of silting, and the flow rate can reach approximately 100 cubic meters per hour. But the depth to which drilling is to be carried out usually turns out to be more than respectable - from 20 to 120 meters.
Of course, drilling such wells is more difficult, and the work will take much more time and materials. A professional team can complete the work in 5-10 days. But if we drill do-it-yourself well on the site, it may take several weeks, or even a month or two.
But the effort is worth it, because artesian wells can last for half a century, or even more, without problems. And the flow rate of such a well makes it possible to supply water not only to one house, but also to a small village. Only manual drilling methods are not suitable for constructing such a mine.
The physical and mechanical properties of soils are also of great importance when choosing a drilling method.
During the work, you may need to go through a variety of layers, for example:
- wet sand, which can be drilled in almost any way relatively easily;
- water-saturated sand, which can only be removed from the barrel using a bailer;
- coarse rocks (gravel and pebble deposits with sand and clay aggregates), which are drilled with a bailer or a glass, depending on the aggregate;
- quicksand, which is fine sand, supersaturated with water, it can only be scooped out with a bailer;
- loam, i.e. sand with abundant inclusions of clay, plastic soil that can be easily drilled with an auger or core glass;
- clay, plastic rock, which can be drilled with an auger or glass.
How do you find out what soils lie beneath the surface and at what depth is the aquifer? Of course, you can order geological studies of the soil, but this procedure is not free of charge.
Almost everyone chooses a simpler and cheaper option - asking neighbors who have already drilled a well or built a well. The water level in your future water source will be approximately the same depth.
Drilling a new well a short distance from an existing structure may not follow exactly the same scenario, but it will most likely be very similar.
Simple methods of drilling wells
Professional drillers have the equipment and tools that allow them to drill quite deep well literally in a couple of days. But an amateur craftsman usually has neither such tools nor the skills to work with them.However, there are drilling methods that do not require this. The most commonly used drilling methods are auger drilling or the percussion-rope method.
Method #1 - drilling with an auger
As the name suggests, this drilling method uses an auger or drill. The device is a rod with a working tool attached to the end. This drilling method also uses a bit to break up boulders if necessary. The design of the auger resembles a screw, the diameter of which can vary.
It is literally screwed into the ground, and the propeller blades help remove drilled rock from the trunk.

Drilling is carried out as follows:
- By rotating the drill rod, a vertical depression is made in the ground.
- As the well deepens, the drill with loosened soil is periodically raised to the surface.
- As the shaft lengthens, the rod is expanded, adding more and more parts to it.
- To extend the rod, use a reliable threaded connection or clamps.
- The walls of the well are immediately protected with casing pipes.
- The drill is cleaned and work continues.
- They drill until the aquifer is reached.
- It is recommended to go through the aquifer completely and go deeper into the underlying soil layer by about 0.5 m.
- The drill is removed from the well.
- A filter is lowered into the casing using a drill rod.
- The casing pipe is raised so that its lower edge is approximately in the center of the aquifer, and does not rest against the ground.
After this, the actual drilling can be considered completed.The well should be pumped, a pump should be lowered into it, a head should be arranged, etc.
It is believed that using an auger it is possible to drill only a relatively shallow well - about 20-30 m deep. However, much depends on the condition of the soil. For drilling loose sand and coarse sediments, it is recommended to use a bailer.
When auger drilling, you can use a drill rig that holds the equipment in the correct position. To lift the drill upward, you can use a motor. If so-called “wet” drilling is performed, a place should be provided for wet soil removed from the well, water to settle, etc.

When choosing auger drilling, you should remember that the presence of water in the wellbore has a destructive effect on its walls.
Sometimes you can come across recommendations to first drill, and only then proceed with the installation of casing pipes. When auger drilling, as indeed with any other drilling, it is safer to install the casing immediately as it goes deeper.
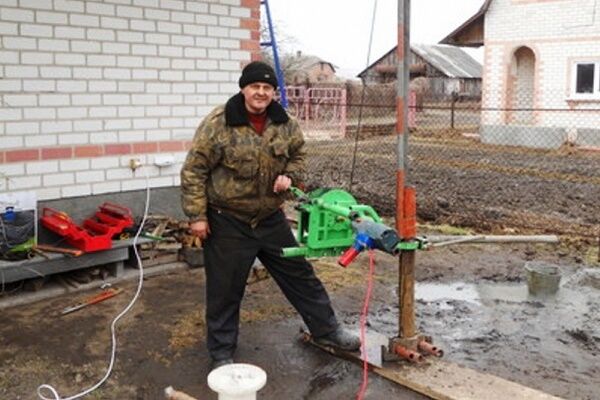
Method #2 - rotary drilling
Speaking about rotary drilling methods (namely, the auger method belongs to them), it is worth mentioning drilling using a rotor. It is this method that is most often used by drillers for excavation in rock formations. To implement it, a special drilling rig with a rotor is used.
Drilling is carried out using the same drill, but it is rotated not manually, but using a motor. The rotor transmits moving torque to the drill rod, i.e. and on a projectile located deep in the ground.
The soil is destroyed, the tool goes deeper into the rock.To remove it, water is pumped into the well under pressure, which washes out small fragments of soil, or everything is scooped out with a bailer.

The rotary method is not very suitable for self-drilling, since the equipment for it cannot be made in a couple of hours “on the knee”. You need to buy, rent or borrow a special drilling rig with a motor. By the way, such devices operate not only on electricity; there are also gas-generating models.
In addition to the installation, you need equipment for intensive flushing of the well and/or a powerful compressor for purging it. Finally, skills in working with such devices are required.
The drill must rotate almost continuously, and any nuances that arise, such as getting stuck in the rock, must be resolved skillfully and quickly. It is usually easier for a novice craftsman to work with a homemade drill or bailer.

Rotary drilling still has a number of undeniable advantages - it is the fastest method of drilling, and almost any soil usually lends itself to it. However, with this method of drilling, when water is almost constantly present in the mine, it is especially important to immediately begin installing the casing in order to prevent the walls from collapsing.
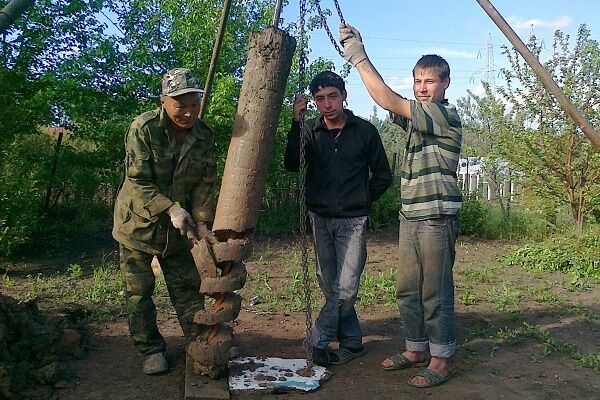
Method #3 - drilling with a bailer (shock-rope method)
The percussion-rope method or bailer drilling is significantly different from auger and rotary drilling, since in this case nothing needs to be rotated.
Bailer is a long and narrow piece of pipe with a valve and a pointed lower edge. Drilling using the percussion-rope method is carried out according to the following scheme:
- Make a hole in the ground using a garden drill (this makes it easier to start work).
- A tripod with a block is installed above this hole.
- A cable is attached to the block, from which a bailer is suspended.
- The bailer is dropped into the shaft from a height of about 1.5-2 meters above the ground.
- Hitting the ground, the sharp edge of the bailer loosens the rock, which is then captured by the valve of the device.
- The valve prevents soil from spilling back into the shaft.
- The blows are repeated several times to ensure that as much soil as possible gets into the bailer.
- Then the bailer is removed from the shaft and cleared of soil.
- The operation is repeated until an aquifer appears, after which it is recommended to continue drilling and go deeper into the next layer.
- As the shaft deepens, the casing is lowered into it, gradually increasing it.
To make it easier to remove a bailer filled with heavy soil, the cable is connected to a winch equipped with an electric motor. Water flushing is not usually used when percussion-rope drilling a well.
She recommends only in certain cases, for example, to speed up the passage of quicksand. This ensures a fairly high strength of the well walls, i.e. better drilling.

The absence of water in the face also makes it possible to fairly accurately diagnose the entry into the aquifer. When “wet” drilling, inexperienced craftsmen sometimes passed it and continued to deepen the well without any need.
Percussion-rope drilling allows you to create so-called filterless wells. To do this, a cavity is washed out in the sand under the casing pipe, which serves as a sump for water. The casing is then raised slightly.
With this drilling method, not only a bailer is used, but also a so-called driving glass. This is the same narrow pipe with a sharp bottom edge, designed for loosening and excavating soil.
Unlike a bailer, a driving glass is not equipped with a valve, since this tool is effective when passing viscous plastic rocks, mainly loams.
The glass falling into the face is clogged with cohesive rock (loam, sandy loam), which is held inside naturally. Long narrow slits are made in the walls of the glass, through which it is cleared of soil, for example, using a piece of reinforcement, etc.
At percussion rope drilling You can effectively use both the bailer and the glass, working with them when passing through different layers of soil. Impact-rope drilling is a simple, ancient and completely reliable method. However, it is deservedly considered quite labor-intensive and time-consuming.
Drilling a deep well with a bailer yourself can take several weeks or even a couple of months. But in this way you can create a well of considerable depth - more than 40 meters. Some sources claim that the bailer is quite capable of 100-meter structures.
If possible, you can combine different drilling methods to speed up work and increase its efficiency. For example, to pass through a layer of loam, you can use an auger drill, but it is better to pass through quicksand using a bailer.
Then you can return to using the drill again.True, combined drilling requires more tools, which is not always possible.
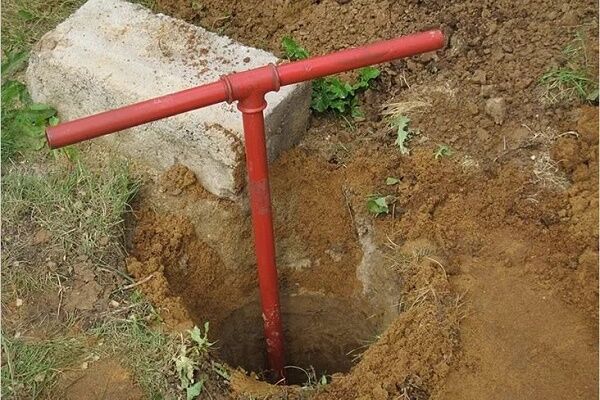
Method #4 - drilling a needle hole
In an area with an aquifer located close to the surface, water can be obtained almost a couple of hours after the start of work.
To drill an Abyssinian well you need:
- Drill a long hole with a diameter of 5-8 cm in the ground so as to reach the quicksand.
- Insert a narrow casing pipe into the hole, with a sharp tip and filter attached to the lower end.
- Drive the pipe into the ground until it reaches the aquifer.
- Extend the pipe as needed.
Primary drilling is carried out with a special long and narrow auger, the length of which is gradually increased. Once water appears in the pipe, drilling can be considered complete. Since the depth of Abyssinian wells is small, they usually use not submersible, but surface pumps.

The hose is not lowered into such a well; its role is played by the narrow pipe itself. The pump is installed directly on the top of the Abyssinian well.
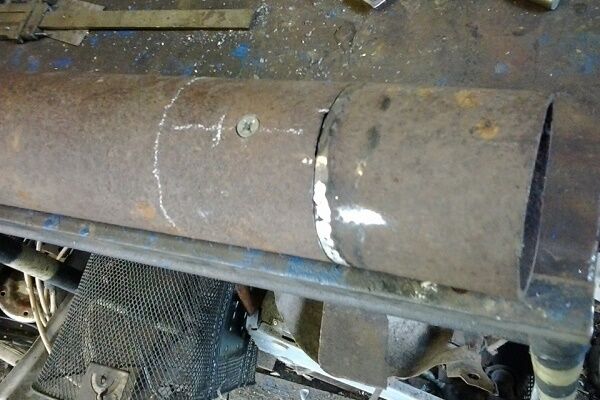
The casing pipe, which is also the shaft of the excavation, is extended in sections of 1-3 meters, and the threaded connections are carefully sealed using winding and silicone sealant. Its compact dimensions make it possible to install such a well even in the basement of a private house, so as not to take up space on the site.

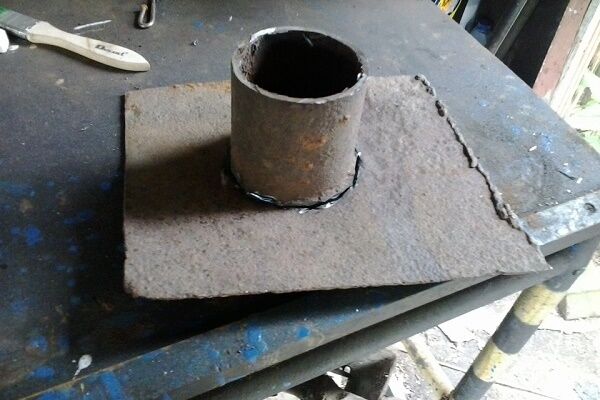
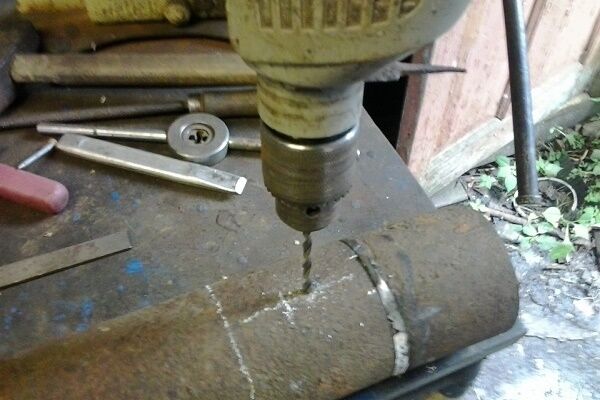
To make a needle well filter, a series of holes with a diameter of about 10 mm are made on the bottom of the pipe. The perforated area is covered from the outside with a layer of special galloon-weave metal mesh. Such a filter will reliably prevent fine sand from entering the well.
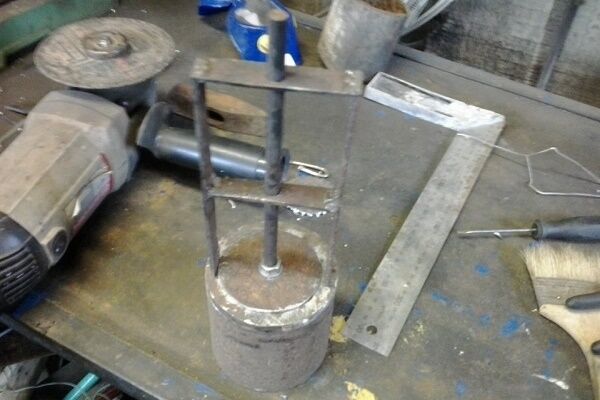
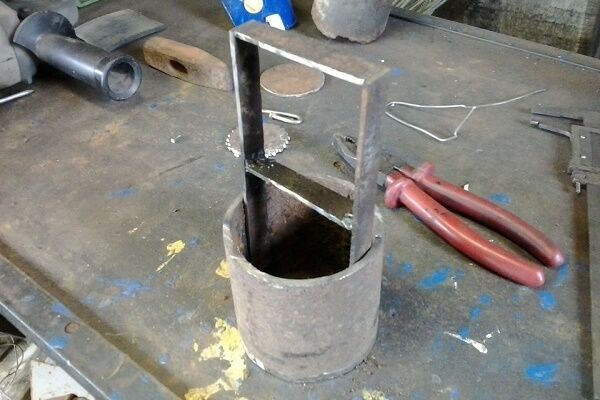
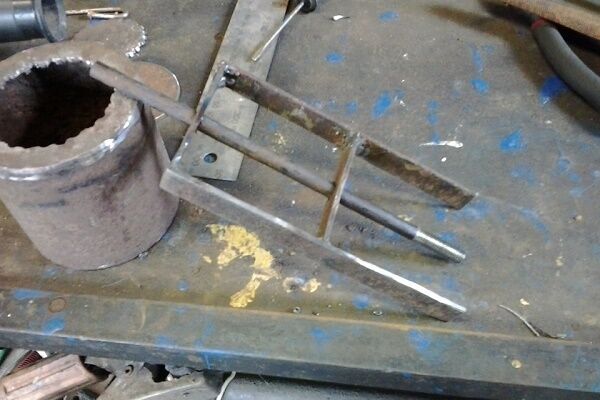
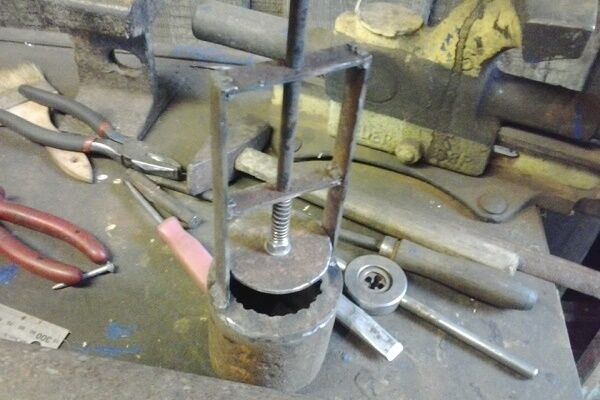
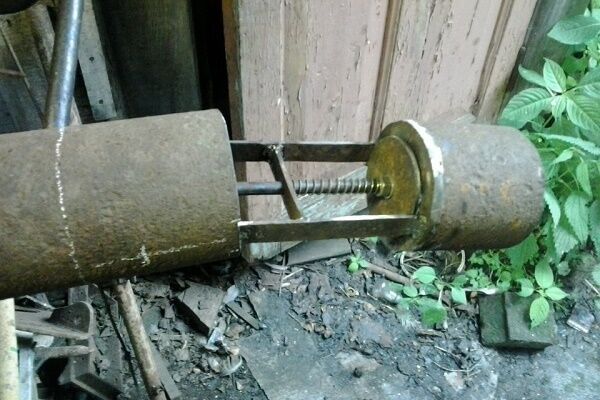
Figuring out how to drill yourself Abyssinian well or a needle well, the method of driving a string of narrow casing pipes should be given close attention. This operation can be performed using a barbell or headstock. A long metal rod is used as a rod, which is gradually increased as it descends along with the casing.
The impacts of the rod during operation fall on the tip. At the same time, the pipe connections also experience additional stress and may become deformed. Sometimes, with strong impacts, the coupling connection can simply break during the driving process, and this is unacceptable. The headstock is a weight with a hole.
A special head is placed on the upper end of the casing pipe, which is struck in order to drive the pipe to the required depth. With this method of driving, the load is distributed more evenly, but the integrity of the connections is still at risk. Therefore, only high-quality materials should be used to drill an Abyssinian well.
In this case, only a threaded connection that is coaxial with the center of the pipe is appropriate. This type of thread can only be made correctly on a lathe. A broken pipe will cause a lot of trouble for the foreman, since a piece of column stuck in the ground is almost impossible to pull out.
The work will have to start all over again, and costs will increase significantly.But if for some reason it was not possible to drill an Abyssinian well, almost all materials can be reused.
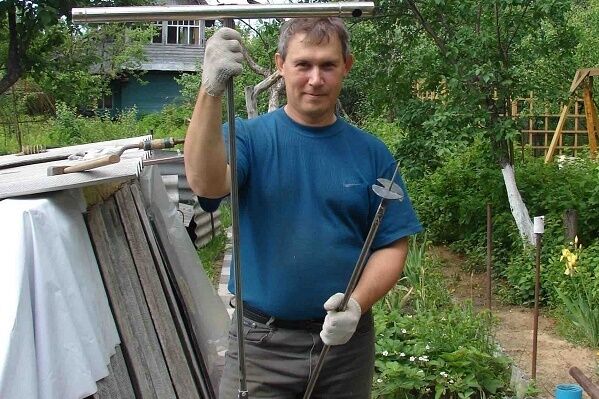
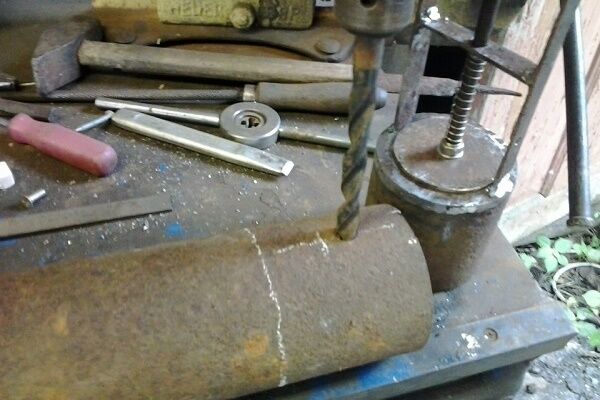
Manufacturing of drilling tools
As mentioned earlier, drilling devices can be made independently, borrowed from friends, or purchased industrially produced products.
Sometimes a drilling rig can be rented. However, the goal of do-it-yourself drilling is usually to keep costs as low as possible. The easiest way to do drilling cheaply is to do tools from scrap materials.

Option #1 - spiral and spoon drill
Hand drilling can be done with a twist or spoon drill. To make a spiral model, take a thick, pointed rod to which knives are welded. They can be made from a steel disk cut in half. The edge of the disk is sharpened, and then the knives are welded to the base at a distance of about 200 mm from its edge.

Knives should be positioned at an angle to the horizontal. An angle of about 20 degrees is considered optimal. Both knives are placed opposite each other. Of course, the diameter of the drill should not exceed the diameter of the casing pipe. Typically a disc with a diameter of about 100 mm is suitable. The knives of the finished drill should be sharpened sharply, this will make drilling easier and faster.
Another version of the twist drill can be made from a rod and a strip of tool steel.The width of the strip can vary between 100-150 mm.
The steel should be heated and coiled, hardened, and then welded to the base. In this case, the distance between the turns of the spiral should be equal to the width of the strip from which it is made. The edge of the spiral is carefully sharpened. It is worth noting that it is not easy to make such a drill at home.

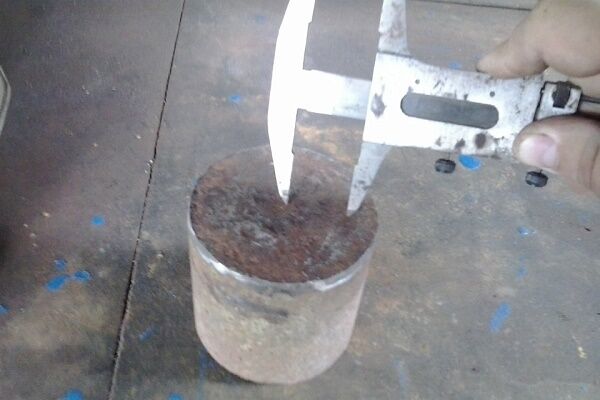
To make a spoon drill you will need a metal cylinder. In self-production conditions, the easiest way is to use a pipe of a suitable diameter, for example a 108 mm steel pipe.
The length of the product should be about 70 cm; a longer device will be difficult to work with. A long and narrow slot, vertical or spiral-shaped, should be made on this body.

Two spoon-shaped knives are mounted in the lower part of the body, the cutting edge of which is sharpened. As a result, the soil is destroyed by both the horizontal and vertical edges of the drill.
The loosened rock enters the drill cavity. It is then removed and cleaned through the slot. In addition to the knives, a drill is welded at the bottom of the drill along the axis of the device. The diameter of the hole made by such a drill will be slightly larger than the device itself.
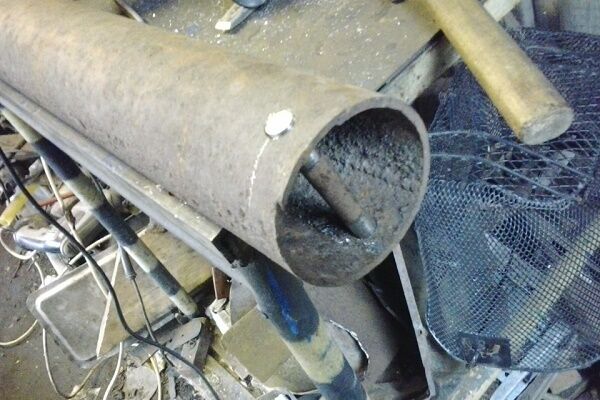
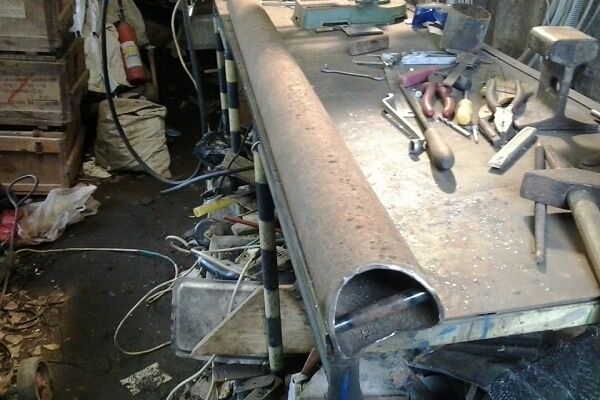
Option #2 - bailer and glass
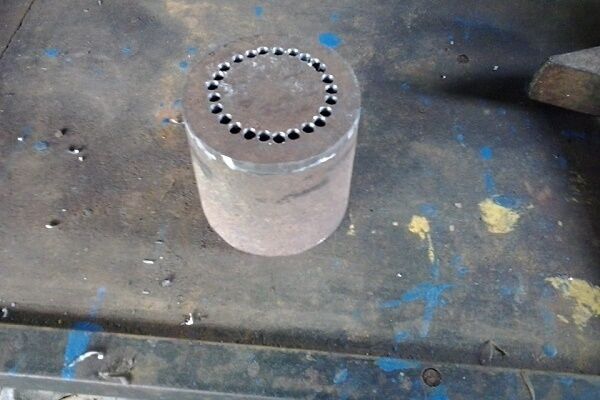
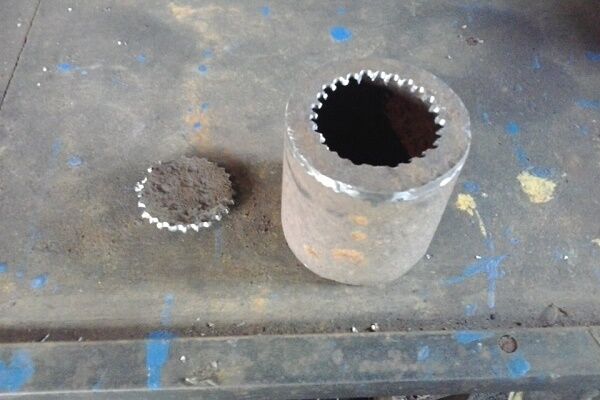
To make a bailer, the easiest way is to also take a metal pipe of a suitable diameter. The thickness of the pipe walls can reach 10 mm, and the length is usually 2-3 meters.This makes the tool heavy enough to effectively loosen it when it hits the ground.
A shoe with a petal valve is attached to the bottom of the bailer. The valve looks like a round plate that tightly closes the lower section of the pipe and is pressed by a fairly powerful spring.
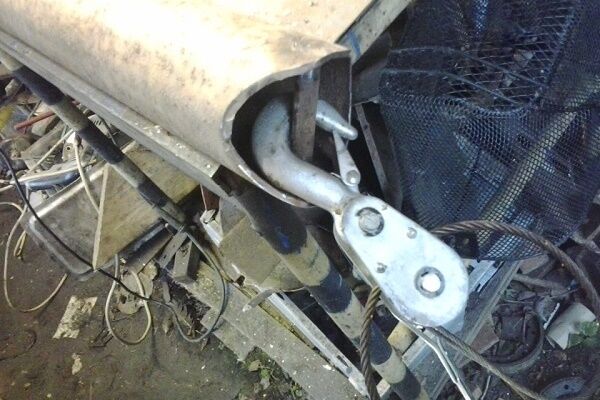
However, a spring that is too tight is not needed here, otherwise the soil simply will not get into the bailer. When pulling out the bailer, the valve will be pressed not only by the spring, but also by the soil collected inside.
The lower edge of the bailer is sharpened inward. Sometimes sharp pieces of reinforcement or sharpened pieces of triangular-shaped metal are welded at the edge.
A protective mesh is made from thick wire on top and a handle is welded to which a metal cable is attached. The glass is made in a similar way, only a valve is not needed here, and a slot should be made in the body to clean the device.
Some useful tips
After the well is ready, you should pay attention to a number of important nuances. For example, in order for the water in the well to remain fresh, it is necessary to ensure an influx of fresh air into the casing.
To do this, make several ventilation holes.The upper part of the well should not be walled up; it is covered with a hinged lid so that, if necessary, you can remove the pump, inspect the column, etc.
Upon completion of work, you must submit it to well water analysisto check for various impurities. Any problems with water condition are usually solved by selecting suitable filters.
Water is not taken for analysis immediately after drilling, but after some time, so that contaminants caused by drilling are removed from it.
Conclusions and useful video on the topic
Video #1. Review of various homemade drilling tools - drills, bailers and other equipment:
Video #2. Demonstration of the percussion-rope drilling method:
Video #3. The process of creating an Abyssinian well:
Drilling a well cannot be called a simple task that anyone can do. And yet, many craftsmen coped with this task and provided their homes with an autonomous water supply. Determination and the right actions usually lead to the desired result.
Did you find any unclear points while reading the article? Do you want to ask questions on the topic? Please write comments in the block located under the text of the article.


This information will be useful for those who have a desire to try their hand as a driller and who are not afraid of hard work. Several methods of drilling are discussed here, where everyone will choose for themselves what they need according to their capabilities, according to the soil. I myself need to drill a well in the yard, so I will use your material. So everything is written in detail. I hope I can do it.
Everything is not difficult if you have a tool and an experienced person nearby.You read, and it seems that everything is simple, but in fact the process is complex, and drilling is not everything, the water must continue to be used. Here it is important to do everything correctly: install the pump according to science so that it works properly, use it and enjoy it. I won’t decide on my own, I’ll trust the professionals, I don’t think it will work out cheaper on my own. So that it doesn’t work out, he spent time, effort, money, but did not receive drinking water.
Agree. I also thought about trying to drill on my own, but I read the guides and changed my mind. There is a decent risk of slipping through the aquifer or making some other mistake. Then it will be even more expensive to redo it, and I will waste time.
I'm trying to drill a hole for a casing pipe with a diameter of 160 mm. Storm with water. When passing quicksand, which starts from 3.5 meters and up to 7, the bar is strongly tightened and it is very difficult to lift it back. How can I walk more meters if at 7 meters it’s already hard to pull the barbell back?!
A fairly common occurrence is when a drill gets caught on quicksand and problems arise in pulling it back out. In this case, as they say, the main thing is not to make sudden movements. I can share a few tips from my practice that have helped me out more than once. So:
Method No. 1: lower the flexible pipe down and supply water to rinse the instrument precisely in the right places.
Method number 2 (if the first did not help). Take a HDPE pipe that goes to the entire depth (do not use any joints or couplings); A steel pipe is inserted inside (about 25-20 cm, no more), fixed with self-tapping screws, then the adapter from the pump to this miracle structure is welded, washed away.
Method number 3 - a jack to help.