How to make a bathtub screen with your own hands: analysis of installation nuances
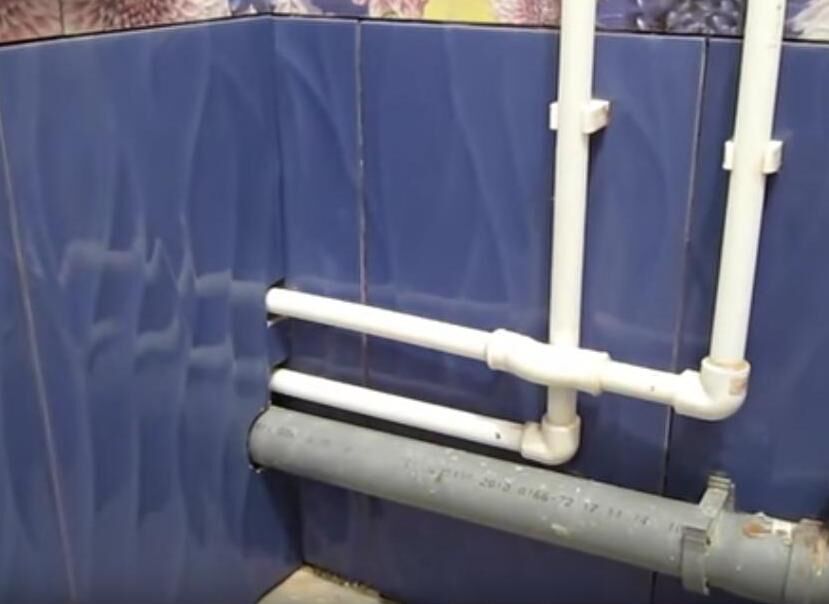
The screen is an optional part of the bath; it can be installed without a fence. But open communications don’t look at all aesthetically pleasing, do they?
Do you want to hide the communications of your bathtub behind a special screen, but you cannot find a ready-made barrier due to the non-standard design of your plumbing?
We will help you solve this problem - the article provides interesting ideas on how you can make a screen for a bathtub with your own hands, what materials are suitable for these purposes and which frame option will be optimal for a particular bathtub.
For clarity, we have selected colorful photos with finishing options and provided detailed instructions for installing the most popular materials.
Moreover, making a nice screen is not at all difficult if you know some of the nuances. And step-by-step installation videos will make working on the screen easier even for a beginner.
The content of the article:
Why do you need to cover the bathtub?
Modern acrylic bathtubs are often sold with ready-made plastic screens made according to their dimensions. Assembled and installed they are quite simple.
As for steel and cast iron structures, as a rule, screens are not provided for them and you will either have to make them yourself or leave them open.

Whether or not to close the bathtub is a matter of taste and preference of the owners.. But surely everyone wants to have a beautiful and tidy bathroom. The screen gives the bath an attractive and finished appearance and covers the sewer pipes protruding from underneath it.
However, this is not the only reason to install a barrier. The space under the bathroom can be usefully used for storing various household appliances by making functional screen with shelves.
You can make niches in the fence, install hinged or sliding doors.

With an open structure, water constantly gets under the bathtub during bathing and dirt accumulates. A humid environment promotes the formation of fungus, mold and various bacteria.
The floor under the bathroom also gradually wears out and takes on an unattractive appearance.
To avoid these troubles, it is better to cover the structure with a beautiful screen.

Requirements for barriers under the bathtub
There are quite a lot of options on how you can make a beautiful and functional screen for your bathtub. When choosing the material for its manufacture and installation method, it is necessary to take into account the requirements for the fence.
There is always a humid environment in the bathroom, so to make the screen you need to use only moisture-resistant materials that can withstand temperature changes and humidity well.
Otherwise, fungus and mold may form on the fence, or it may collapse under the influence of adverse factors.

The fence must be completely sealedto prevent water and dirt from entering the interior. However, you cannot make a completely blank screen.
It is necessary to provide access to communications located under the bathroom. For this purpose, small windows are left or doors are made.
Barrier design options
Before installing the screen under the bathtub, you need to decide on its design. Surely, many would like to see their bathtub not only beautiful, but also comfortable and functional.
Fencing with wide sides
One of the possible options is to make a fence with wide sides. In this case, the bathtub looks as if it is recessed inside the frame. This design is very convenient: the sides act as shelves on which you can put various bath accessories.

Many people are concerned about the question: will the screen interfere with a comfortable approach to the bathtub? This point is especially relevant for older people.
In this case, even at the stage of installing the frame or making brickwork, a special recess is provided for the feet. It is usually made in a rectangular or square shape.

Doors and technological openings for access to the sewer can also be made in different ways.
How to make a sliding screen?
A very convenient option - sliding screen, they also often make hinged doors, or install folding or removable panels.

The sliding structure can also be made of plastic. For this you will need a plastic sheet. The guides along which the doors will move must be made of a special aluminum profile.
First, a metal frame is made, as described above, then guides are fixed at the top and bottom along the entire length of the profile.
The required length and width of the doors are measured, their dimensions are transferred to the sheet and cut out. The doors are fixed on the sides of the screen in the first groove of the profile. A central fixed part is installed in the middle groove.

If you want the doors to move along the entire length of the bathtub, then two plastic pieces are cut out. Their size is calculated in such a way that when closed they overlap each other.
The first door is installed in one groove, and the second in the other.Finally, furniture handles are placed on the doors.
Types of frames for screens
Any finishing material must be attached to something. Collect bath frame You can use wooden blocks, a metal profile, or lay out a brick base. It is advisable to do brickwork if you plan to lay ceramic tiles or mosaics in the future.
In other cases, you can not make such a heavy structure, but limit yourself to a wooden or metal frame.
Option 1. Frame on a brick base
Brickwork is considered the most reliable and durable foundation, which will withstand any finishing material. If tiling is planned, then such a base is the best option.
A brick wall is built from one wall to another. The masonry is done in a quarter or half brick. In this case, each subsequent row is done with an offset.
It is necessary to leave a gap of two to three centimeters between the top side of the bathtub and the masonry, and then, after the solution has dried, blow out the empty space with foam.

It is also necessary to provide an opening for access to sewer pipes. If you decide to make a small hole, you can leave it open or hang a door on it. If necessary, make a recess for the feet.
Option #2. Wooden frame for bathtub
The wooden frame also has sufficient strength, but wood, constantly being in a humid environment, can begin to rot.Therefore, before placing a wooden screen under the bathtub, it must be treated with an antiseptic to prevent rotting processes.
You can use moisture-resistant wood from cedar, alder or larch for the frame, but the cost of these wood species is quite high. For the sheathing, timber with a cross section of 40 x 40 mm is used.

To make the frame even, you need to make markings:
- from the corners of the bathtub adjacent to the wall, vertical lines are drawn to the base using a plumb line;
- retreating 2.5 cm, a second vertical is made, parallel to the first line. A vertical line is also projected from the free corner of the bathtub using a plumb line, and at the point of its contact with the base, a square with sides of 2.5 cm is drawn;
- Horizontal lines are drawn from the inner corner of the square to the walls of the bath. This will be the perimeter along which it is necessary to install the wooden block.
The beam is attached along the entire perimeter of the bathtub to the floor using self-tapping screws. Then the corner vertical posts are installed and fixed to the wall with self-tapping screws.
A horizontal block is laid on them and fastened with metal corners. Intermediate vertical boards are installed from the corner posts at a distance of 50-60 cm.

Option #3. Frame made of metal profiles
To make the frame, it is best to use the PN 27 x28 profile, which is excellent for fastening sheets of plasterboard, plastic and MDF panels.
If you plan to cladding with ceramic tiles, then it is better to use metal profile pipes that can withstand any weight. But the manufacture of such a frame has its own difficulties - the pipes will have to be welded with a welding machine.
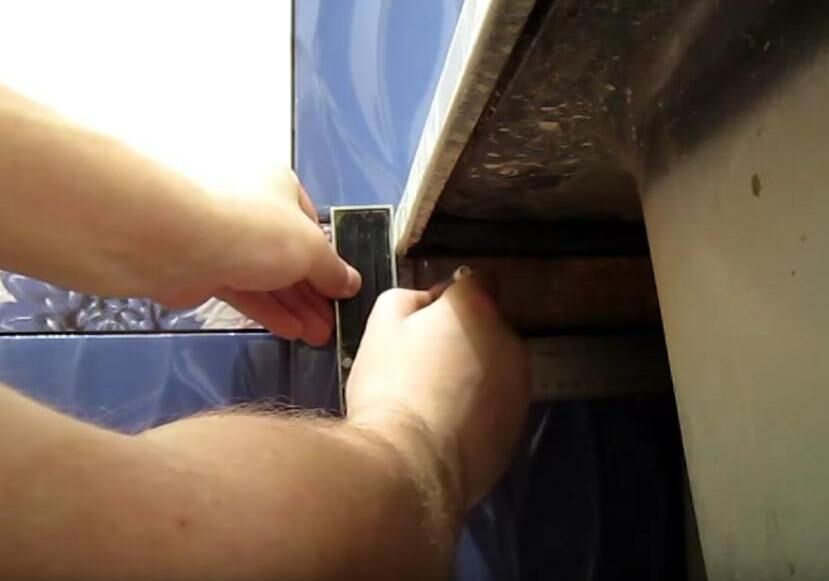
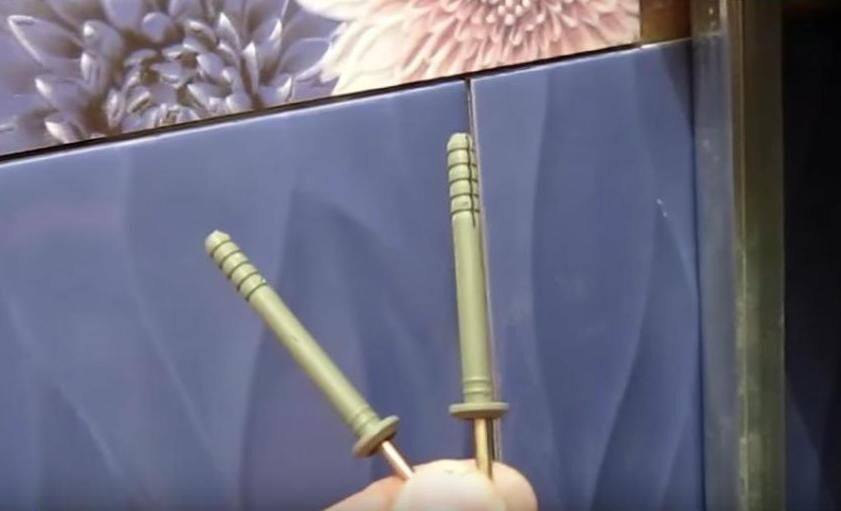
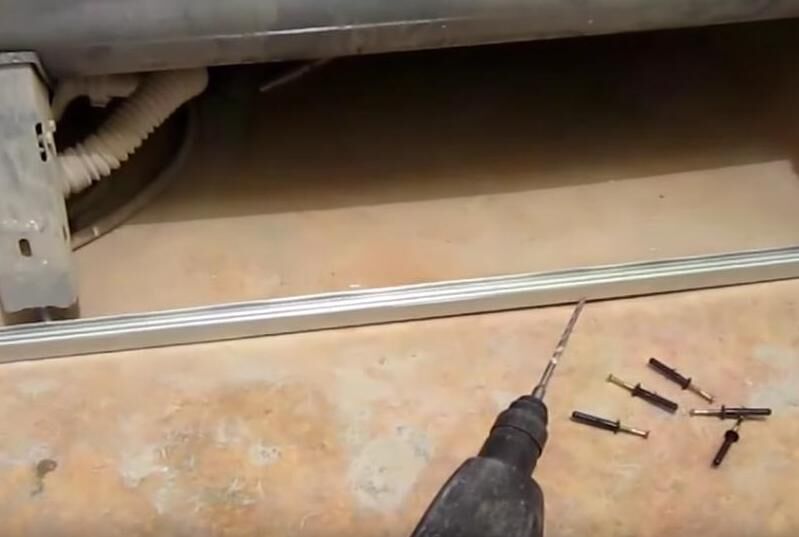
Marking the base is carried out according to the same principle as for a wooden frame. The lower guide is fixed to the floor with dowels; side racks are installed on it, which are also attached to the walls using dowels.

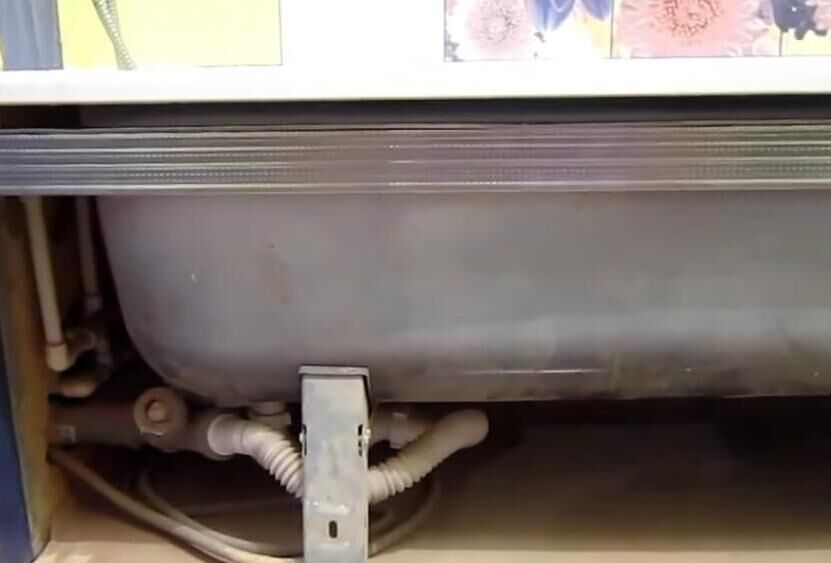
The upper horizontal profile is laid on the side supports and secured to them. To strengthen the upper guide, you can fold two profiles together and in this form secure them with dowels to the side posts.
Then additional vertical racks are installed in increments of 35-40 cm. After the frame is completely assembled, the space between them with the side of the bathtub is treated with polyurethane foam.

Option #4. Frame for a curved bathtub
The most important thing in making a barrier for a bathtub of a non-standard shape is to try to exactly repeat its curves.
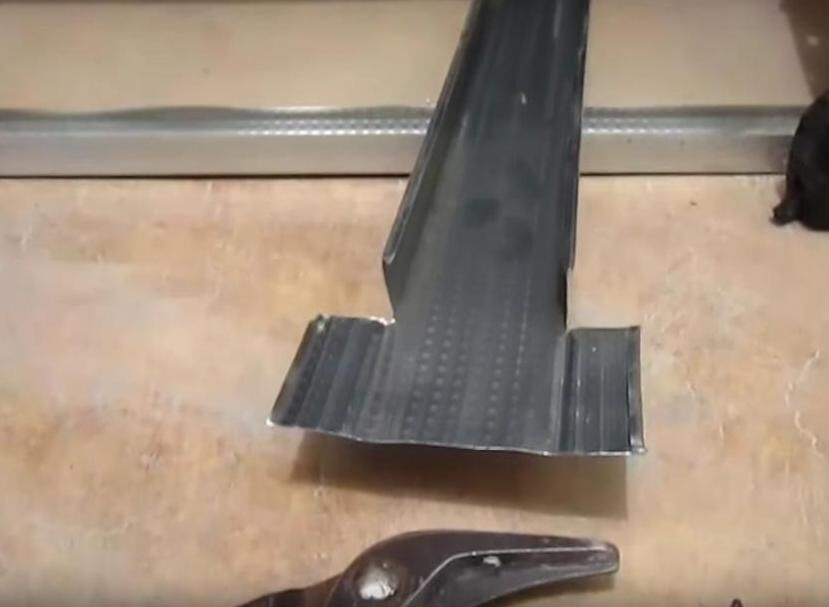
A galvanized metal profile is also suitable for the frame.
For sheathing, it is better to use extruded polystyrene foam of the highest density, which is a very durable and rigid material.
- Before starting work, measure the length of the bathtub and cut a profile of the same size.
- Every three centimeters it needs to be cut a little.
- Attach the profile to the edge of the bathtub and secure it on one side with tape.
- Smoothly bending it along the cuts, we bend it around the entire length of the bathtub, attaching it with tape to the sides at small intervals.
- To hold the resulting shape, also glue tape along the entire length of the profile.
- Unfasten the profile from the sides of the bathtub and attach it to the floor with dowels, moving it inward to the thickness of the finishing material. If tiling is intended, then in addition to its thickness, it is necessary to take into account a layer of glue and putty, approximately 4-6 mm in total.
- Cut two sections of the profile to fit the height of the bath and attach them to the walls.
- Cut the polystyrene foam into panels 15-20 cm wide; determine the exact size yourself, based on the curvature of the bathtub.
- Insert each panel with the bottom edge into the profile and the top edge under the side of the bathtub and immediately blow out the inside with foam.
- Install all the strips in this way, leaving a window under the hatch. It is installed after the foam has hardened well.
- Putty the entire surface with waterproof putty, and then, after it dries, go over it with sandpaper.
After completing the preparatory work, you can lay tiles on the finished frame or cover the screen with another finishing material.

Materials for making the screen
Perhaps the most popular are plastic screens. Although MDF panels, plasterboard and wood are often used. Let's look at the features of each of these materials.
Cladding with plastic panels
Plastic is a hygienic material, it is not afraid of dampness and moisture, and has a long service life. It is inexpensive and installs quickly and easily.

Today there are many interesting options for plastic finishing. The screen can be covered with a special film to match the color of the bathroom or with a variety of marine-themed images.
You can decorate the fence with plain or multi-colored plastic panels.
Plastic panels are an inexpensive and accessible material that allows you to immediately finish the screen for a bathtub.

The work process consists of the following stages:
- Under the upper sides of the bathtub, at a distance of 15 cm from each other, small blocks of wood are attached with liquid nails. They should be thick enough to fit under the hem of the bathtub;
- Using a stapler, the starting strip is attached to the blocks;
- Strips of the required length are cut with a drywall knife;
- The first panel is installed from the edge of the wall and the starting strip is put on it;
- The horizontal starting strip is coated with liquid nails from the inside and a panel is inserted inside it;
- The plastic is attached to the top with a stapler or glue;
- From below, if you plan to install a plinth, the panels are secured with self-tapping screws; if a lower plinth is not provided, you can also attach them with glue;
- The remaining panels are attached similarly to the first.
A starting strip is put on the last panel on the side where it adjoins the wall, and then it is inserted into the groove of the penultimate panel.
Features of using MDF panels
Another common option for finishing a bathtub is MDF panels. However, when choosing this material, it is worth considering that it is not moisture resistant and is susceptible to dampness.
Therefore, before finishing it must be treated with a water-repellent composition. The installation of such panels is also not particularly difficult; they are installed as simply as plastic ones.

Finishing the screen with plasterboard
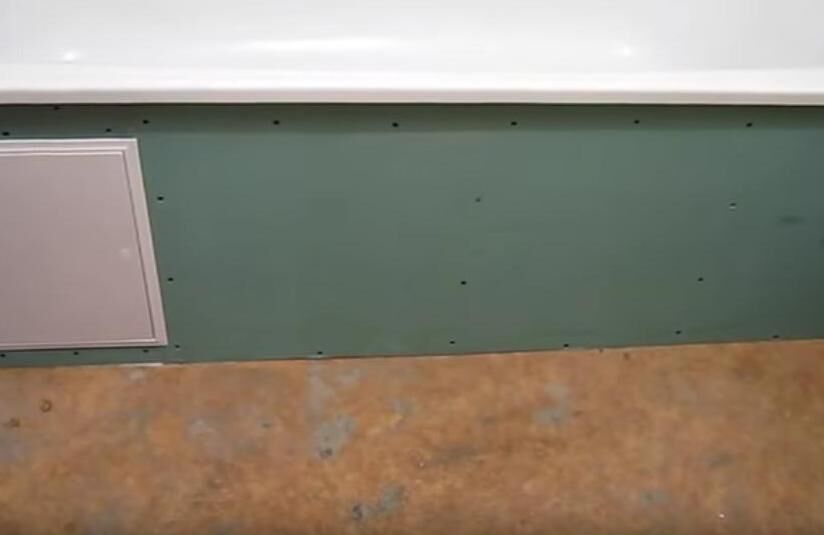
Many people prefer to finish their bathtub with moisture-resistant plasterboard.
And it is no coincidence that after installing a plasterboard frame, a completely flat surface is formed, which can be covered with any material: tiles, moisture-resistant wallpaper, decorative plaster, painted with paint, or glued with film.
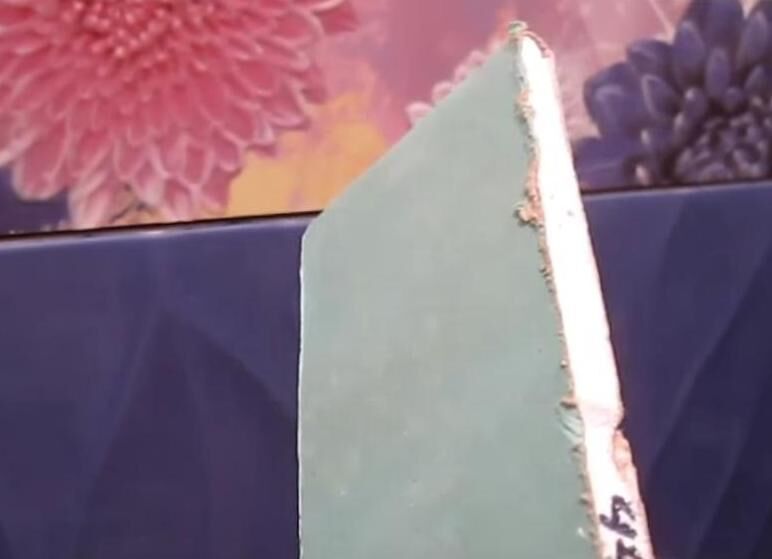
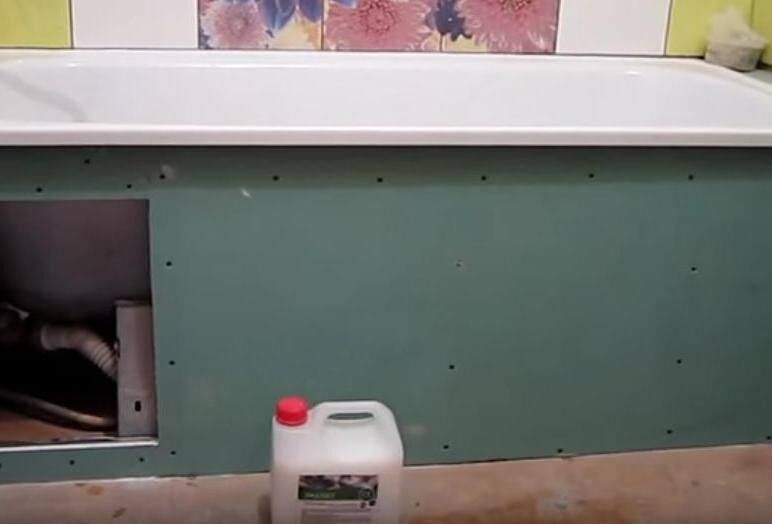
To finish a bath screen of a standard shape, only moisture-resistant green plasterboard is suitable, but despite this, it must be additionally treated on both sides with a primer before installation.
You can paint the inside of the sheet with oil paint. Drywall is cut in accordance with the height of the frame minus two centimeters.
When securing the sheets, you need to retreat one centimeter from the top and bottom edges of the screen. This is done in order to prevent moisture from entering and to prevent swelling of the canvas.
The drywall is secured to the profile using black self-tapping screws with fine threads. They are screwed in at a distance of 15-20 cm from each other along the entire length of the lower and upper profile.

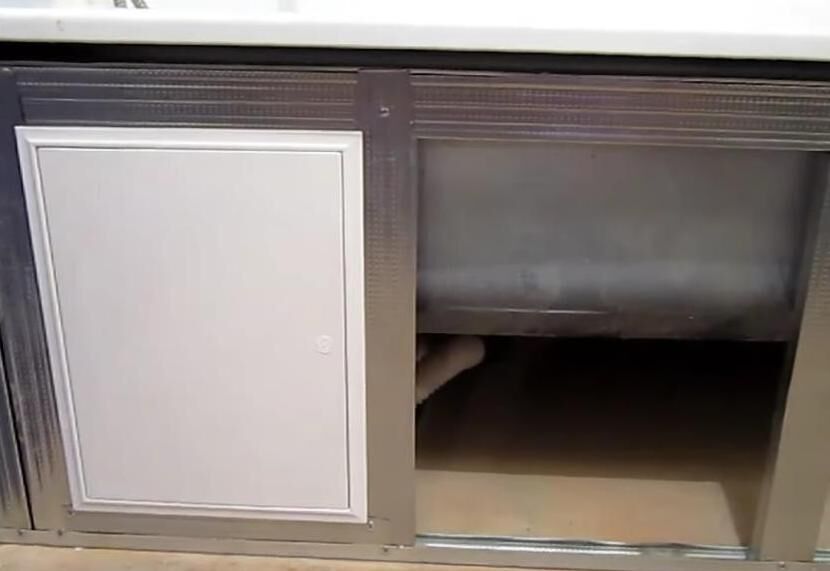
A hole is cut at the location of the technological hatch, onto which, after assembling the entire frame, a door made of the same material is hung.
If you plan to lay tiles on the drywall in the future, then the size of the door must match the tile. To fasten it, use the hinges of furniture fittings.
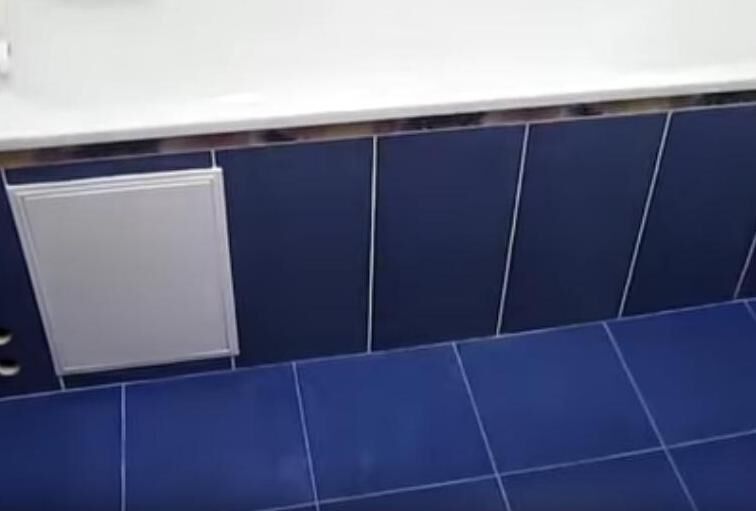
You can buy ready-made plumbing hatch with a fastener that just needs to be inserted into the hole. After completing the installation work, the surface of the screen is primed, and then the upper and lower joints along the entire length are treated with silicone.
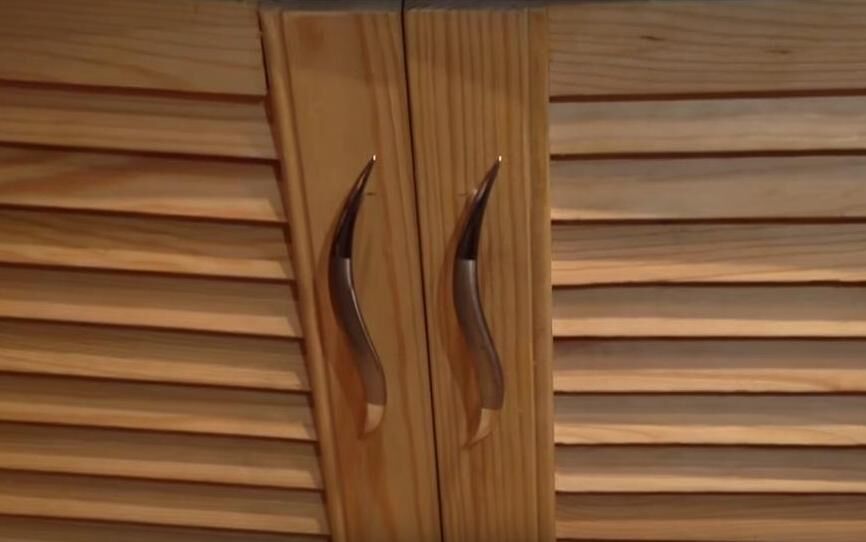
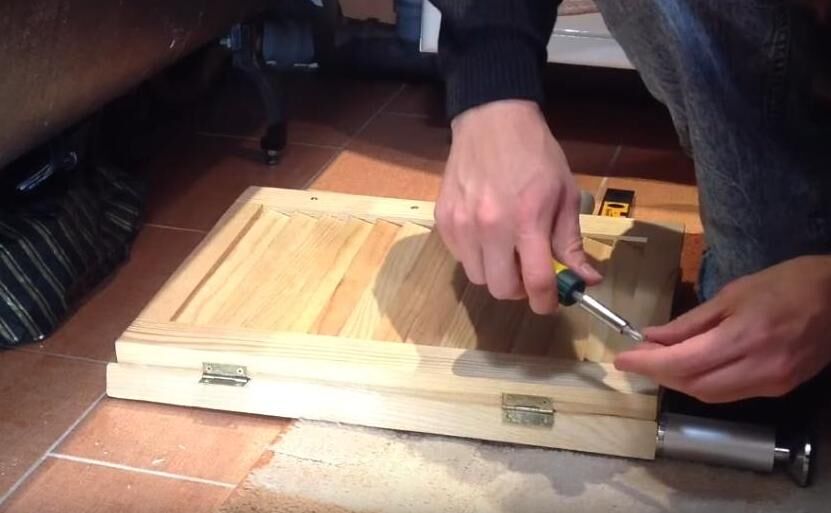
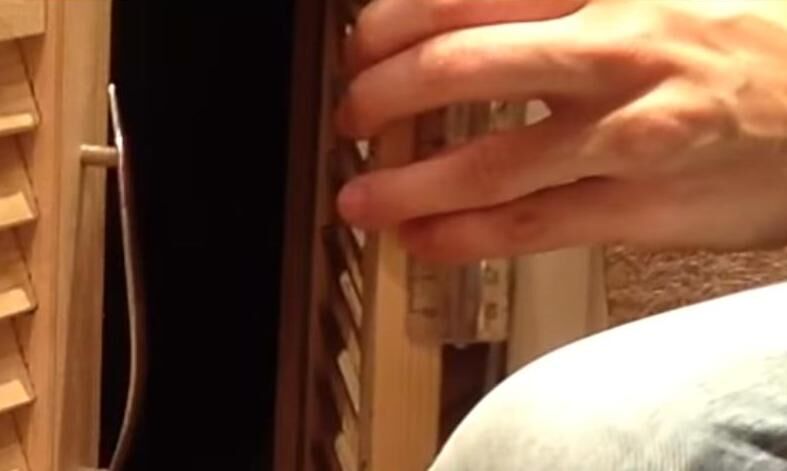
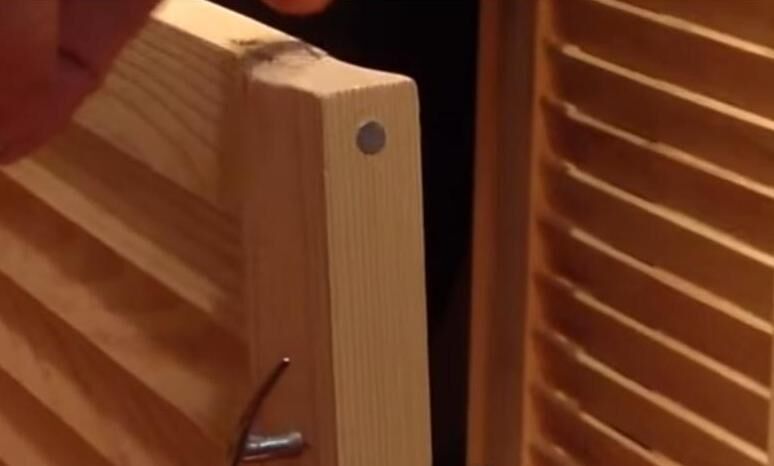
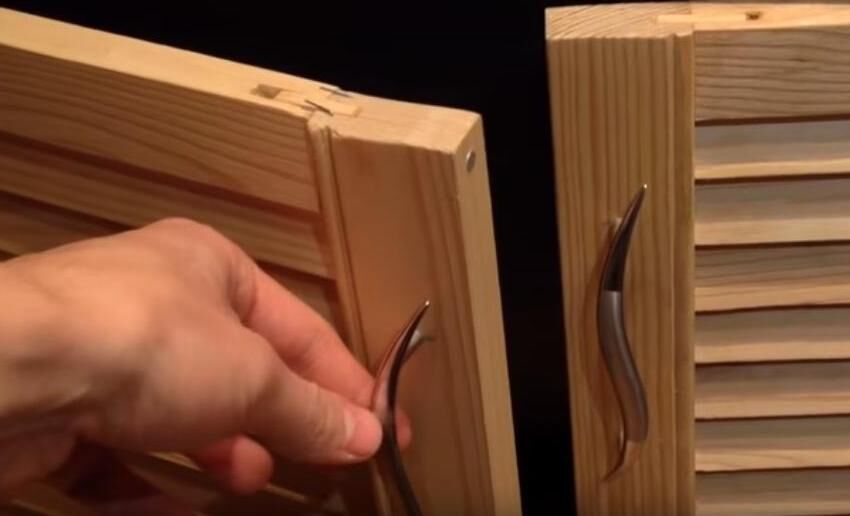
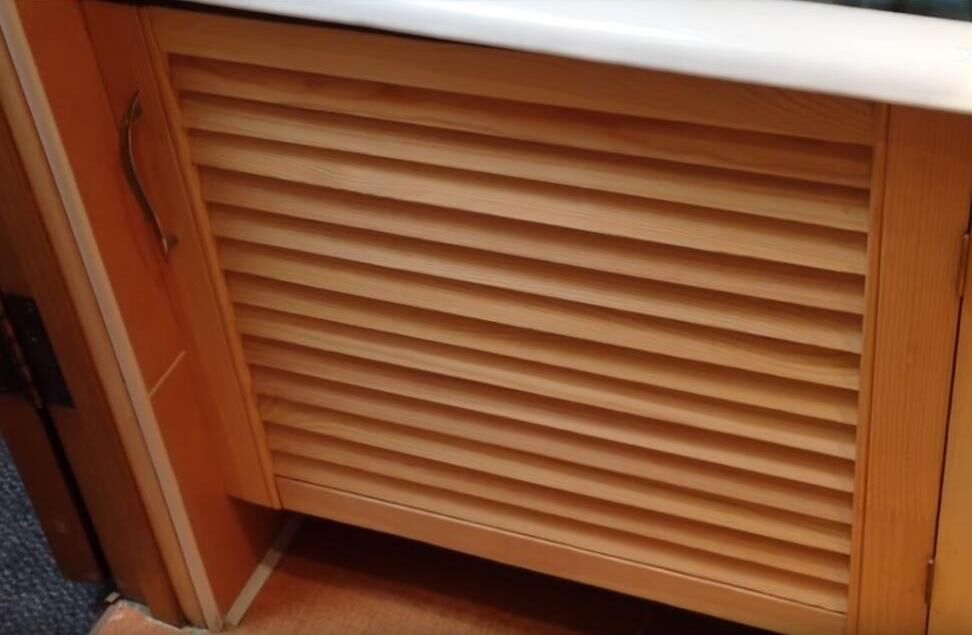
Features of using wooden panels
And here is an option made of wooden panels, decorated with transverse slats like “blinds”.
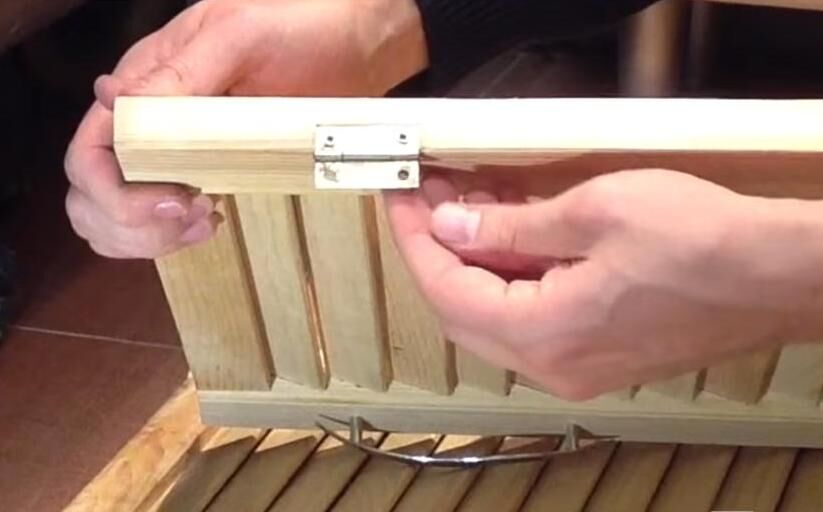
Main details of the wooden screen:
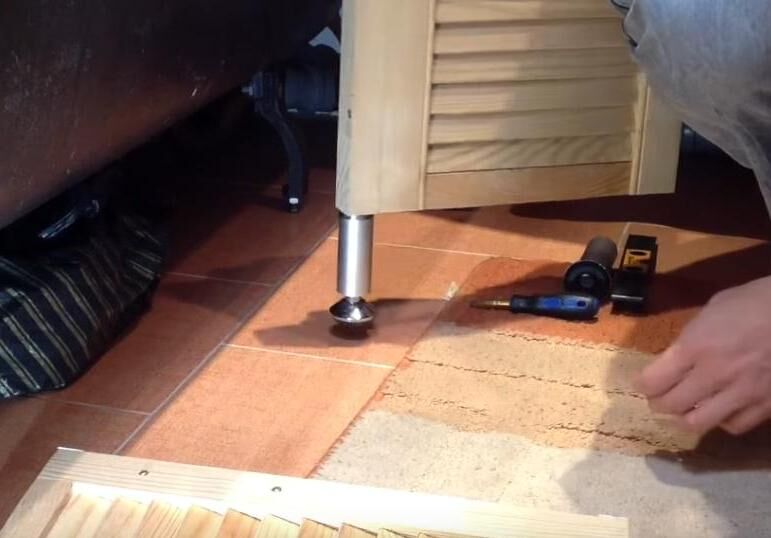
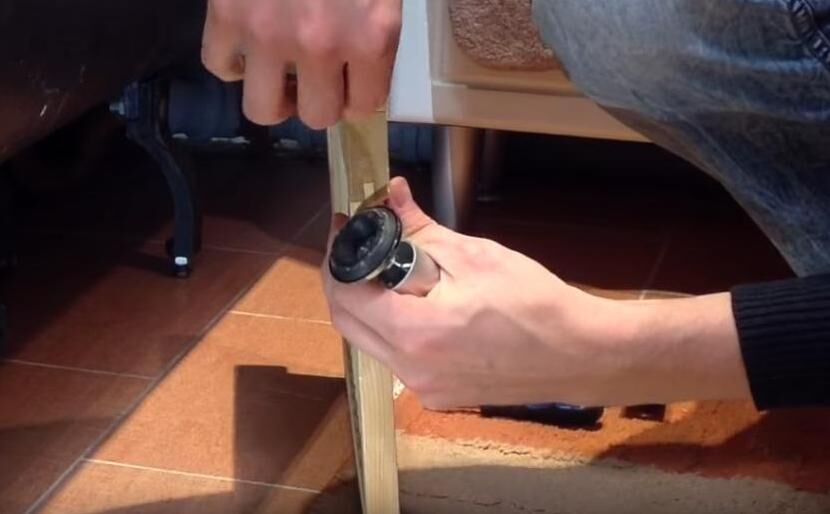
When all the parts are prepared or purchased, we proceed to assembling and installing the screen.
You will need the simplest tools: a screwdriver, pliers, a screwdriver, a level, and a set of wood screws.
Regardless of which bathtub finishing option you choose, you must first make a frame from wood or a metal profile, onto which the finishing material is then attached.
The base for the bathtub can also be made of brick.
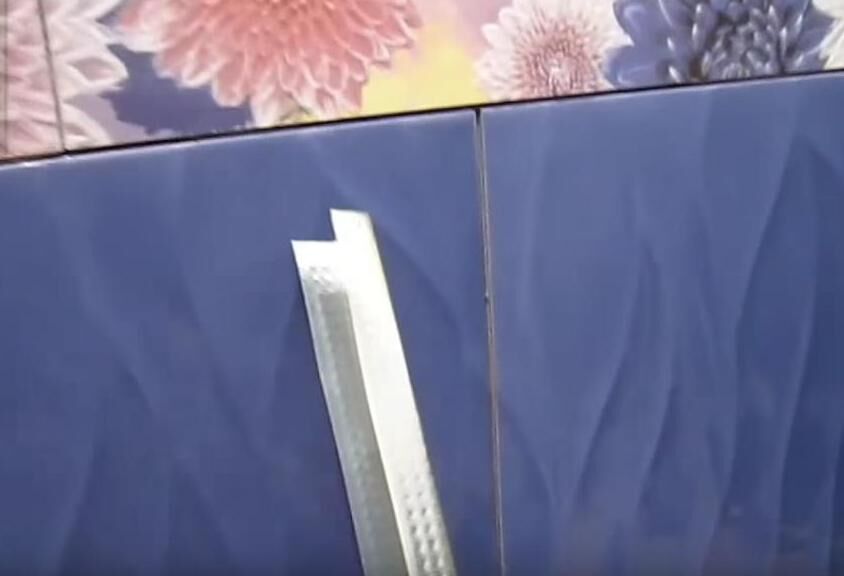
Laying ceramic tiles
The tiles can be laid both on a brick base and on sheets of plasterboard.
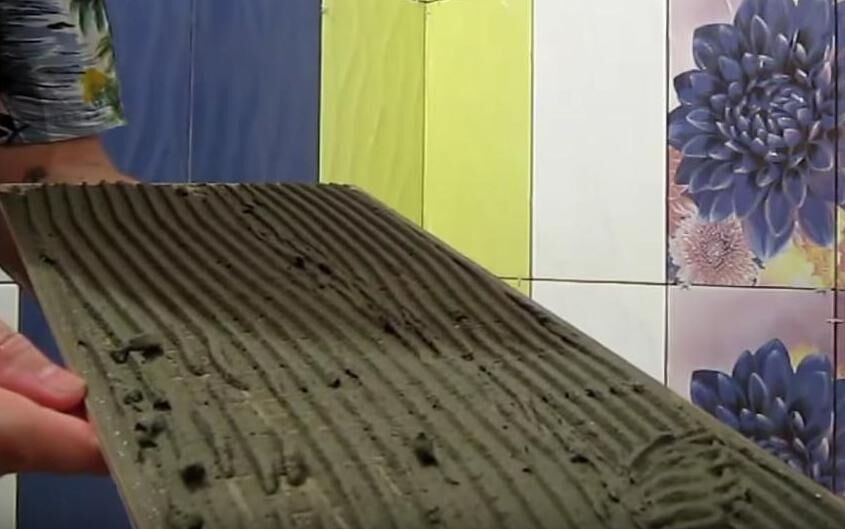
You need to use special tile adhesive. Start laying the tiles on the side that remains open so that the cut slabs are hidden by the plumbing fixtures.

The top row is laid first. Leave a gap of about 5 mm between the sides of the bath and the tiles, and after finishing the work, install a plastic plinth.
Don't forget to insert plastic crosses between the tiles to secure the gaps. After the glue dries, the seams are rubbed down.
Especially for beginners - detailed photo instructions for installing a screen, the decorative cladding of which is tile.
To install tiles on drywall you will need:
The first stage is the installation of a metal profile frame.
It is a rectangle that outlines the perimeter of the space under the bathroom.
When the installation of the frame is completed. We install drywall and lay tiles.
We cut out two ventilation holes at the bottom of the screen using a drill with a special cylindrical bit.
For more information on how to make a homemade tile screen, read this article of ours.
As you can see, there are a lot of options for making homemade screens. But if you don’t want to waste time or doubt your own abilities, you can buy a ready-made screen for the bathtub, choosing the best option in the store.
We also have an article on our website about what types of screens exist and how to choose the best option - go here and look.
Conclusions and useful video on the topic
You can learn how to make a screen for a bathtub from PVC panels from the following video:
The process of making a frame from metal profiles and attaching plasterboard sheets to it is described in detail in the following video:
A DIY screen allows you to create a unique bathtub interior and bring your design ideas to life. It’s quite possible to make it yourself, you just need to put in a little effort and imagination..
In addition to the screen arrangement methods discussed above, there are many other finishing options. You can use a waterproof membrane or nylon fabric, upholster mirror panels, lay out in mosaic.
Have you implemented one of the ideas for masking communications proposed in our article in your bathroom or come up with an original design for the screen?
Or do you have a different opinion about the installation process of one of the types of materials discussed? Please share your experience with readers by leaving comments below this article.


If there are children in the family who do not feed them bread, but let them dive and splash in the bathtub, then definitely no wood, cardboard, MDF, or fiberboard. Sometimes you go into the bathroom after the kids and it’s not clear where there is more water - in the bath itself or on the floor)). My entire screen is made of aluminum and plastic profiles and plastic panels. And he did everything very simply and quickly. I took the measurements and went to a furniture studio, and they picked and cut everything there. Assembly and fitting took two hours, and that was thanks to the “help” of the children)).
In the bathroom they made a sliding screen made of plastic: both the frame and the doors themselves. After 2 years, the doors began to jam and have difficulty moving along the grooves, because... Little by little the dust settles, no matter how you wipe it from these grooves.The plastic itself did not change in size, but the doors were slightly deformed. So I want some other option. I liked the example with tiles, but I’m a little confused by the strength and durability of this option.
For the future, know that to significantly reduce the chance of screen deformation, fill the bathtub with water before installing it.
Hello. As an option, a hinged door on a frame would be suitable, then there would be no such problems with the runners.
As for tiles, tiles under gypsum plasterboard are a fairly durable option if you eliminate the risk of leaks under the bathtub. But again, you can store additional tiles under the screen and simply change the deformed area at any time. This is not so difficult and you don’t have to disassemble the entire structure as is the case with plastic grooves.
Our bathroom is decorated with plastic panels, and they also made a screen for the bathtub. It’s solid on all sides, and sliding at the front: the panels move along a special profile with some difficulty, but I hardly touch them, there’s no need. In my opinion, this is the simplest and most inexpensive screen option, which, moreover, matches the overall design of the room.