Inspection plumbing hatches for bathrooms and toilets: types, placement rules, installation features
To install communications in apartments and private houses, two methods are used: open and closed.With the open method, all pipes and devices are in plain sight, while with the closed method they are disguised with false walls, partitions or boxes.
To provide access to equipment, plumbing hatches are used for the bathroom and toilet: the dimensions of the devices usually depend on the dimensions of the hidden pipelines and the number of devices being serviced.
The content of the article:
Purpose of inspection hatches in bathrooms
A distinctive feature of modern bathrooms and toilets is a thoughtful design, as a result of which the aesthetic side of the finish comes to the fore. Technical devices that provide comfortable bathing or ease of use of the toilet are hidden behind thin structures made of plastic or plasterboard.
Constant maintenance of pipes is not required, but periodically there is a need to use shut-off valves. For example, in order to cut off the water supply to the kitchen in connection with replacing the faucet, you need to turn off a certain tap.

If the bathroom is completely lined with plastic or tiles, more hatches will be required. Suppose one of the nodes that requires constant access is the location where the water seal for the bathtub is installed. If protective screen make it deaf, then it will have to be dismantled every time there is a blockage in the pipe or a leak occurs at the junction of the siphon parts.
We can conclude that any components and devices that require regular checking should be freely accessible. And when the premises are completely covered with tiles or plastic, this can only be achieved with the help of technical hatches.
What needs to be accessed
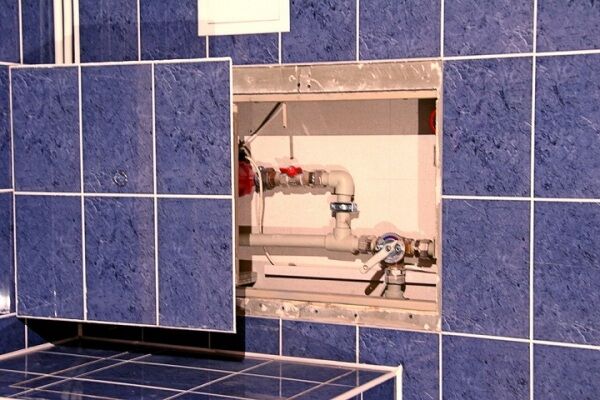
To make repair work easier, the pipeline supplying water to an apartment or house is divided into sections convenient for maintenance. Each individual section, if necessary, is cut off by a valve or ball valve installed on the pipe. If such a possibility exists, most of the shut-off valves are installed in one place.

When all the important shut-off, regulating and water supply devices are disguised behind a false wall, but concentrated in one place, it is much easier to build a hatch to access them. The door will be larger in size, but this will not damage either the appearance of the partition or the functionality of the hatch.
Modern apartments are equipped with so-called blocks or input nodes. In addition to ball valves, the standard unit includes a water purification filter, a pair of metering devices, and a pressure reducer.
The filter is often installed on a bypass to be able to be flushed with a reverse flow of water. All devices are equipped with ball valves for quick removal for repair or replacement.

There is a sewer riser in the combined bathroom or toilet. The pipes of the centralized cold water and hot water supply systems are located parallel to it.
If a corner with vertically placed highways is closed decorative and protective box, then a hatch is also installed on it - opposite the shut-off valves. As you can see, there are several options for placing an inspection hatch in the bathroom, as well as in the toilet.
Types of plumbing hatches
There are many reasons for equipping bathrooms with inspection hatches, but there are even more types of these hatches. There are factory-made models, large and solid, made of stainless steel or plastic.
They are contrasted with homemade panels made from improvised building materials and fasteners purchased at the store. When dividing into groups, different sides of the models are used.
Classification #1: by opening method
A plumbing hatch is a door that can swing open, move to the side, recline or slide out in response to pressure.
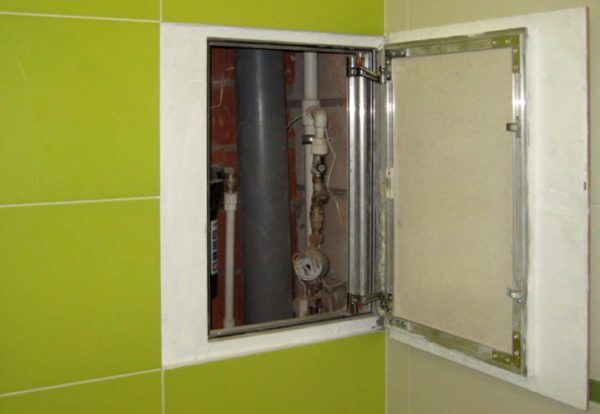
Hinged doors are a traditional type found on most entrance doors, furniture doors and window frames. They are hinged on one side, easy to open and last a long time thanks to their simple design. To open the hatch, you need to pull the handle, which can be regular or equipped with a latch or lock.
Sliding models resemble ordinary swing models, but have a more complex hinge design. The fastener consists of three links that allow you to move the hatch to the side in two stages: first pull it towards you (1.5-2 cm), and then carefully move it to the side.

Tilting hatches are designed according to a simple principle: on one side there is a fixing fastener, on the other there is a supporting mechanism. When the latch is opened, the door simply swings forward, moving from a vertical to a horizontal position.
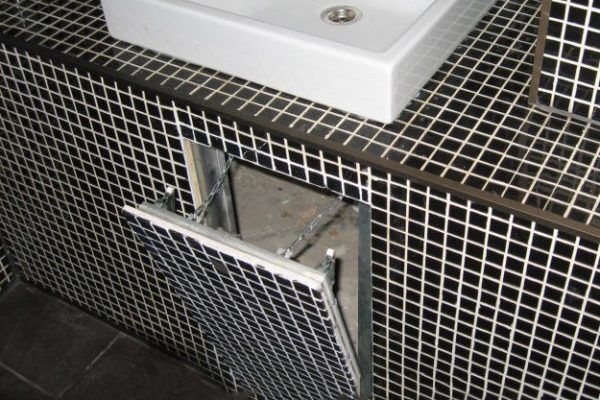
Push models are classified as “invisible”. They are difficult to notice, since the material of the hatch lining often coincides with the general decoration of the walls.
To gain access to the plumbing cabinet, you need to lightly press the panel, after which it will move forward. Then there are various ways of further opening - either swinging open or moving to one side.
When choosing a hatch based on the opening method, it is necessary to analyze the installation location and decide which model is appropriate to install and which one will cause difficulties during the maintenance of devices or components.
With device selection and steps inspection hatch under tiles The following article will introduce you, which we recommend reading.
Classification #2: by material of manufacture
Factory models can be divided into two large groups. The first includes metal products made of stainless steel and equipped with high-quality fasteners.
They are a durable frame with a door that can be opened in any of the above ways. Most of the proposals are designed to match tiles, but the doors can be decorated with any materials.
The second group includes plastic hatches. They are less reliable, lightweight and easy to install. The cost of plastic products is much lower. If a reliable steel hatch costs 3.5-4.5 thousand rubles, then the plastic equivalent has an average price of 200-350 rubles.

Unlike factory versions, homemade hatches are not made of metal, although a metal profile is often used in the manufacture of the frame. For the hatch panel, choose an inexpensive but durable material: plasterboard, plastic, wood. It is convenient to glue tiles onto plasterboard blanks if the master’s task is to create an “invisible” hatch.
When choosing a particular material, it is necessary to correctly assess its wear resistance and water resistance.If you take ordinary, rather than moisture-resistant, drywall, it will quickly lose its qualities and begin to swell and crumble. A similar process occurs with untreated wood, which becomes deformed over time due to excess moisture and temperature changes.
Classification #3: by degree of camouflage
This option of dividing into groups can be called a conditional classification, since there is no clear distinction between the two categories of hatches: some of them are visible, the second are called “invisible”.
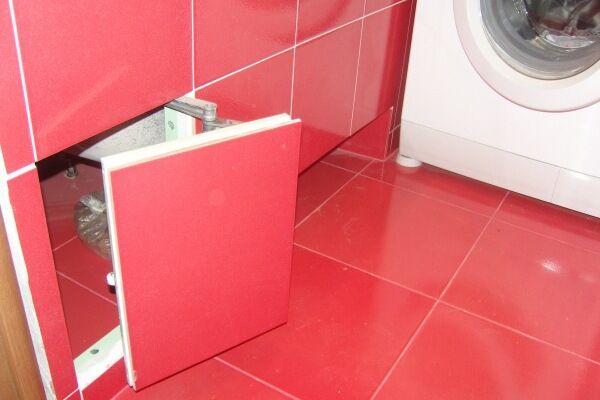
The first group includes structures that stand out against the background of the surrounding cladding. For example, these are white plastic hatches, which are noticeable due to both their color and material. If you place such a hatch behind the toilet, it immediately catches your eye, however, it does not spoil the overall picture at all, since it matches the color of the plumbing fixtures.
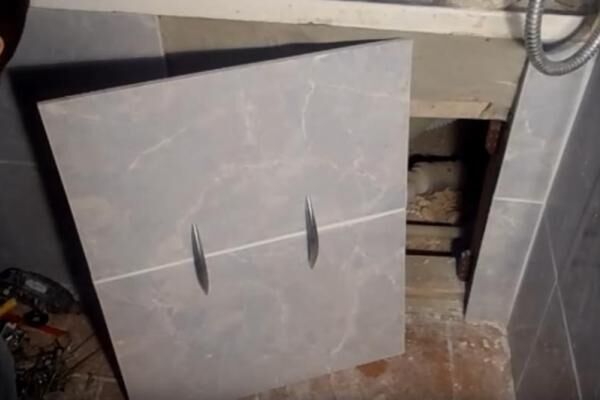
“Invisible” are visually hidden structures. Masking occurs due to the use of the same ceramic tiles in the cladding of the walls and the manhole cover.
Thanks to the frame dimensions adjusted to the tile elements and the seams between the tiles, the plane of the hatch merges with the finish of the walls. As a result, it is difficult for an ignorant person to determine where the technical hole is located.

The advantage of “invisible” is that the hatch cover completely merges with the wall, making the wall decoration look solid and untouched.
Classification #4: by installation location
It would seem that all plumbing hatches for a toilet or bathroom are installed in the wall.This is a common location, but ceiling and floor types are also found.
Holes in the ceiling are necessary to service communications that are located above suspended structures. It is more accurate to call such modifications revision rather than plumbing, since they provide access to ventilation lines and electrical wires.

Holes located in the floor lead to sewer pipes or water supply, which is located below the level of the finishing coating. This arrangement of communications is not typical for standard wiring, but can occur when the floor is raised or thick insulation is created (for example, in private houses or on the first floors of apartment buildings).
Hatches installed in the floor or in floor boxes lead to pipe connections, turns, ladders - that is, to structures that require maintenance and cannot be tightly walled up. There have been cases when, in order to gain access to a pipeline rupture at the junction of individual elements, it was necessary not only to remove the finishing coating, but also to hammer out the screed.
In addition, hatches built into floor protective boxes and tile screen, which is located under the bathroom.
Hatch Installation Instructions
The nuances of installation, as well as the choice of tools, completely depend on the type of hatch and partition material. Let's consider two options for installing a hatch - a factory model and a homemade revision design for a bathtub.
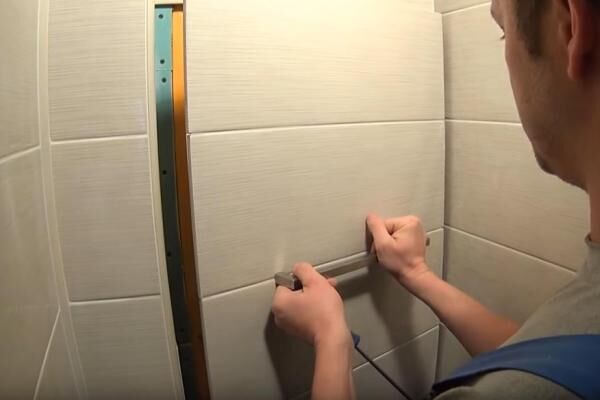
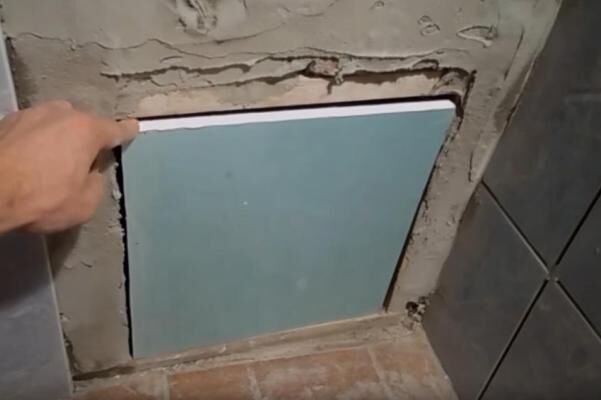
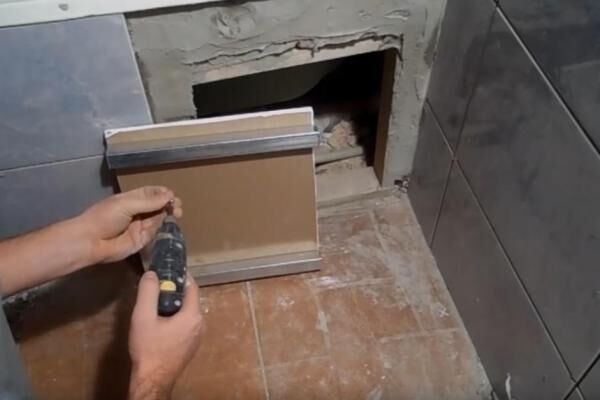
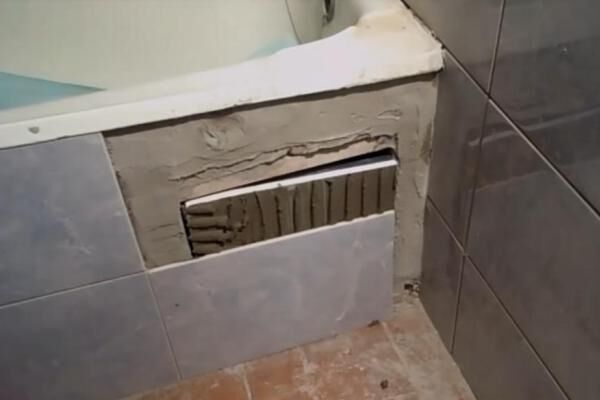
Installation of a metal model “under tiles”
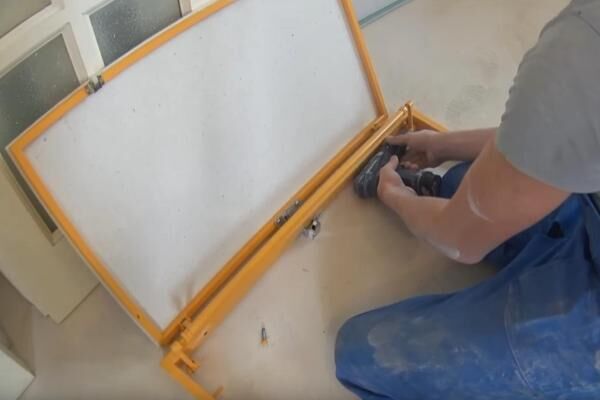
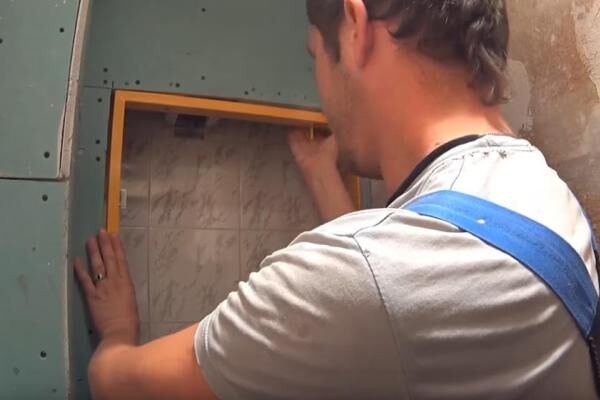
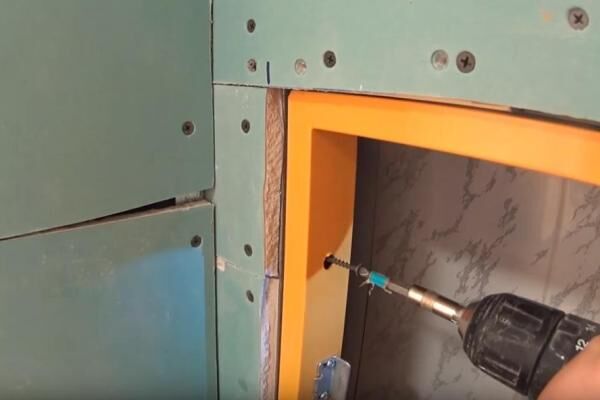
To install a hidden hatch lined with tiles, you will need a hammer drill, a screwdriver, liquid nails with a gun, a spatula, a set of screwdrivers, a marker and tape measure for marking, and a sponge for stripping.
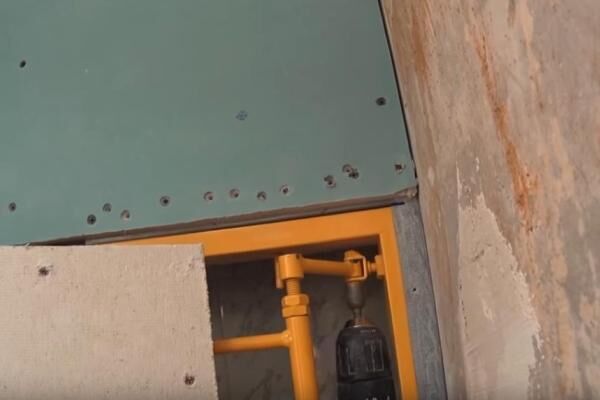
The factory model with a metal frame will be mounted in a false plasterboard wall prepared for facing with ceramic tiles. In order for the panels to withstand the additional load, it is necessary to first make embedded metal profiles around the perimeter of the hatch.
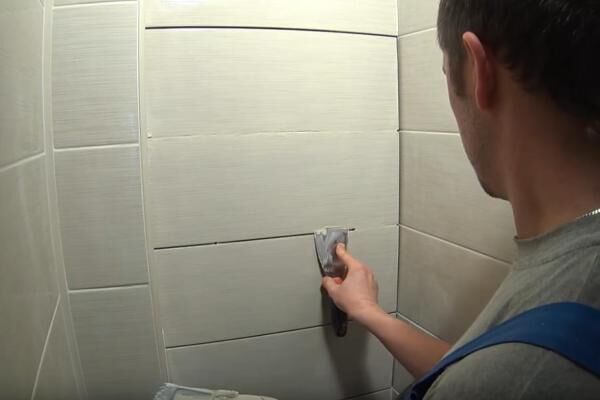
The final touch is framing the hatch with a plastic corner. The plastic is thin, however, even at the first stage, in the process of marking and cutting out the window, it is necessary to take into account its thickness. After finishing the work, there should be a gap of no more than 2 mm between the plastic edge of the door and the frame.

If the partition is made of plastic, then plastic is also used to finish the door instead of tiles. The hatch will weigh less, but mortgages are necessary in any case, otherwise the metal structure cannot be secured.
Tips for making a hatch for a bathtub
A small hatch under the bathtub, in the place where the trim is installed, will come in handy when replacement is required plastic siphon or eliminating leaks due to depressurization of connections. The same hatch can be installed on the other side, but to create a niche for disinfectants and detergents.
To work, you will need a metal profile, a piece of drywall and tiles, which are used to finish the bathroom and the screen under the bathtub.
If you have to use the hatch infrequently, the seams between it can be filled with a screen silicone sealant. It will fill the gap, and the door will look more organic and less noticeable. If necessary, the hardened sealant can be cut through with a construction or stationery knife.
Sizing rules
The most difficult mistakes to correct are those associated with the incorrect choice of dimensions of the plumbing hatch. When installing structures that serve several devices, you should remember that in addition to monthly readings from metering devices, you will occasionally have to make replacements or repairs “on site,” for which a small window will not be enough.
The larger the inspection hatch, the wider the coverage area and the possibility of repair work. It is good if the open technical area includes all significant pipe connections, shut-off valves and devices that require regular maintenance.

Factory models have standard sizes, for example, 55x45 cm or 70x50 cm.When producing tile-like hatches, manufacturers are guided by popular standards for facing elements.
There are no specific standards for self-made structures; you need to start from the size of the technical hole and the possibilities of creating a functional hatch from scrap materials.
Conclusions and useful video on the topic
There are a lot of features for installing homemade and factory models. To learn about some of them, we suggest watching interesting videos.
Video #1. How to install a metal hatch under tiles in a corner vertical box - recommendations from Praktika specialists:
Video #2. Installation of an invisible hatch from A to Z:
Video #3. An unusual solution for a bath:
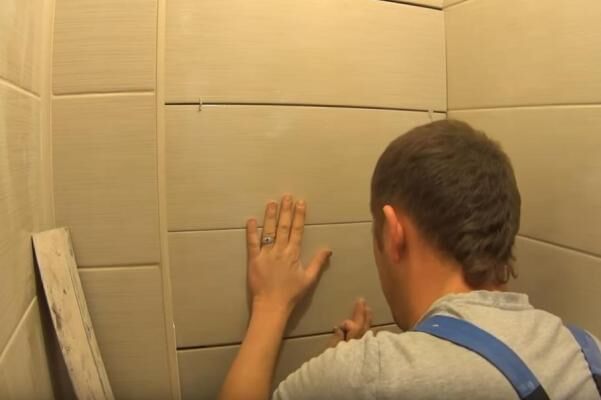
Installation of inspection hatches is carried out during repair work. If you are used to tiling walls or floors yourself, setting up a technical cabinet with a convenient door will not be difficult. The choice of factory models is quite large, but if you wish, you can make a neat hatch yourself using drywall, tiles or plastic panels.
It is possible that you have your own experience in installing a hatch in the bathroom, which you would like to share with site visitors. Perhaps your information will be extremely useful. Please write comments in the block below, ask questions, post photos on the topic of the article.


It’s paradoxical, but no matter how many different hatches I tried, they all “suffered” in one way or another from increased moisture, as a result, wear and rust did not take long to appear. It was interesting to read about the folding ones, I think it’s worth trying to test at least this option.I'm already looking at certain models. Hopefully this type will last longer.
Good recommendations, it’s a pity we didn’t get it 10 years ago... They were adding an outbuilding to the house, and guest workers did the plumbing there. Normal, in principle, if not for one “but” - the bathtub was sealed tightly, with no access at all. I don’t know whether it was foolishness or revenge, I treated them very strictly. And, most importantly, I somehow didn’t think about it at all, I figured it out. Then it was a lot of “fun” when the siphon started leaking...