How to make a screen for a bathtub from tiles: DIY methods
The decorative panel under the bathtub gives the bathroom a finished look. To decorate it, you can choose a plastic or acrylic design.However, they will cost a lot, especially if the bowl has a non-standard shape.
It will be cheaper to build this screen yourself from tiles, which are glued onto a specially prepared frame. In addition to financial benefits, this decor option will fit perfectly into the interior of the room - they try to choose ceramic finishes in accordance with the walls and floor.
Let's figure out how to make a screen for a bathtub - we'll describe the methods of arranging the base for tiles and the technology of facing work. We have supplemented the information with visual photo instructions and videos that will help you carry out all the finishing processes yourself.
The content of the article:
Why make a screen under the bathroom?
The walls and floor in the bathroom are tiled, and the plumbing is installed in its place and connected to communications. Everything looks great. The only problem that spoils the view is the space under the bathtub from its side down.
In order for the interior of the room to look harmonious and complete, it is necessary to somehow close the bathhouse itself and the pipes connected to it.

If the bathing plumbing is made of acrylic or plastic, then in most cases it looks quite decent from the outside.On the contrary, cast iron or steel products do not please the eye. They must be decorated from the outside, otherwise the bathroom will not look too neat.
Housewives often store detergents and other household essentials under the bathroom. It is advisable to close all this, as well as communications. decorative screen.
A screen like this is a great way to hide what is unnecessary and not too beautiful to look at. All these jars, bottles, rags and pipelines will be securely hidden behind it from people's view.
If the bathroom is tiled, then it is recommended to make the screen under the bathtub from it as well. This way the design of this room can be decorated in a single, complete style.
The main thing when installing this decor is not to forget about the need to have access to communications. You will need to make a hatch in the screen, through which in case of leaks you can get to the pipes for repair.
Possible design options
Bathtubs vary in shape, material and functionality. But the methods of decorating the space underneath them using tiles are the same in all cases. It is necessary to make a reliable base for the tile, and then glue it according to all the rules and rub the seams.

Structurally, screens under the bathroom can be:
- with swing or sliding doors;
- removable or permanent;
- with retractable drawers, designs with shelves or without them;
- deaf and with a niche at the bottom for feet.
The easiest way to lay tiles is under the side of the bathtub. When using it, you do not have to waste effort on carefully aligning the new edge.
It is enough to lay the top row of tiles under the side of the bathhouse or vertically flush with it. An additional plus is that the frame and rough surface for gluing ceramics in this case will also be easier to make.
If you decide to use ceramic tiles to line a niche under the bathroom, then the easiest way is to make a blank solid screen out of it without any frills. However, in case of blockages and leaks, it will not allow access to communications. It will need to be torn down and then re-decorated. It’s difficult to call such a decision thoughtful.

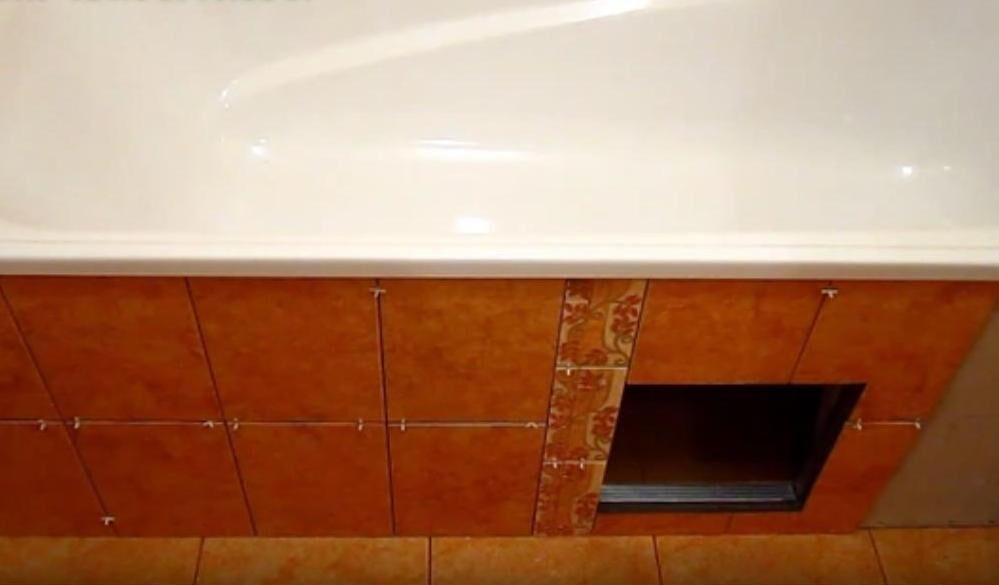
A more practical option is inspection door or a window. When installing such a screen, a technological hole is provided, closed with a plastic hatch or a removable panel the size of one tile. It turns out both presentable and practical.
Screens with sliding or swinging doors made of tiles are extremely difficult to make. The tile must be glued to a strong and undistorted base. But in the case of openable and closed door leaves, this is impossible to achieve. The tile will inevitably fall off from such a surface.
The bathtub is often used for bathing babies and washing clothes. At the same time, you have to stand close to her. If there is no niche made near the floor or the screen does not have a downward slope downwards from the edge of the bowl, then there will be nowhere to put your feet in this situation.
Standing nearby, you will have to bend deeper, unnecessarily straining your back. When decorating a bathtub, be sure to provide a recess for the feet.
Choosing ceramics for a bathtub panel
Ceramic tiles with glaze are impervious to moisture and durable. It is easy to maintain and install. Its only drawback is the fragility of the glazed layer; it easily cracks when struck. But if you don’t throw heavy objects at the tiles, then this problem is not so relevant and significant.

The dimensions of most baths are modest. It is recommended to choose small or medium sized tiles for decorating the space underneath. Large slabs will have to be cut, which means extra residue and potential losses from cracking of the glaze due to inaccurate cutting.
You can also use mosaics to cover the screen. However, laying out a pattern from small elements is time-consuming and labor-intensive. It’s easier to choose ready-made mosaic modules in the form of sheets of fiberglass mesh with ceramics already glued to it. They will simply need to be cut out and fixed to a partition made of plasterboard or brick.
Forming a base for tiles
The tiles under the bathtub can be glued to a wall made of plasterboard, brick or tongue-and-groove slabs. All three options are acceptable.
But brickwork will weigh quite a lot, so it should be used only as a last resort. It is better to avoid unnecessary load on the bathroom floor from a brick partition one and a half meters long and about half a meter high.
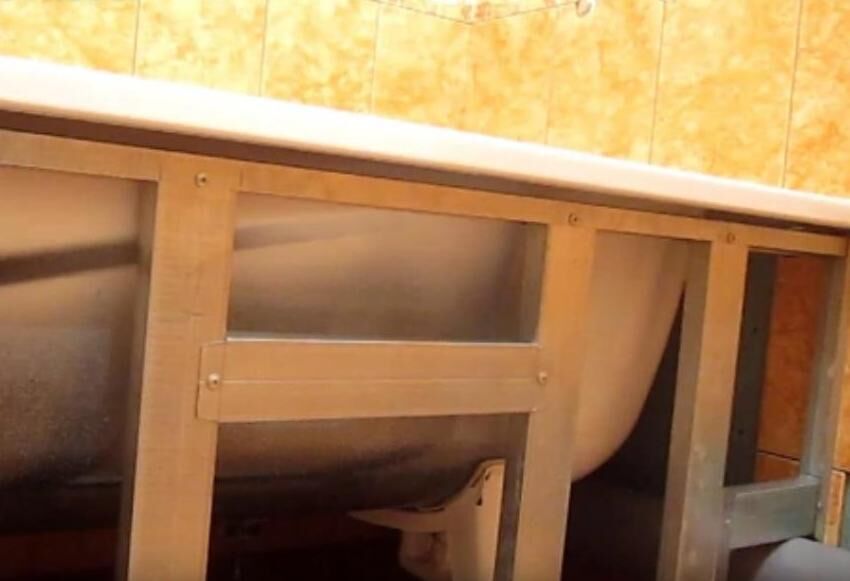
Method #1: Plasterboard sheets on a frame
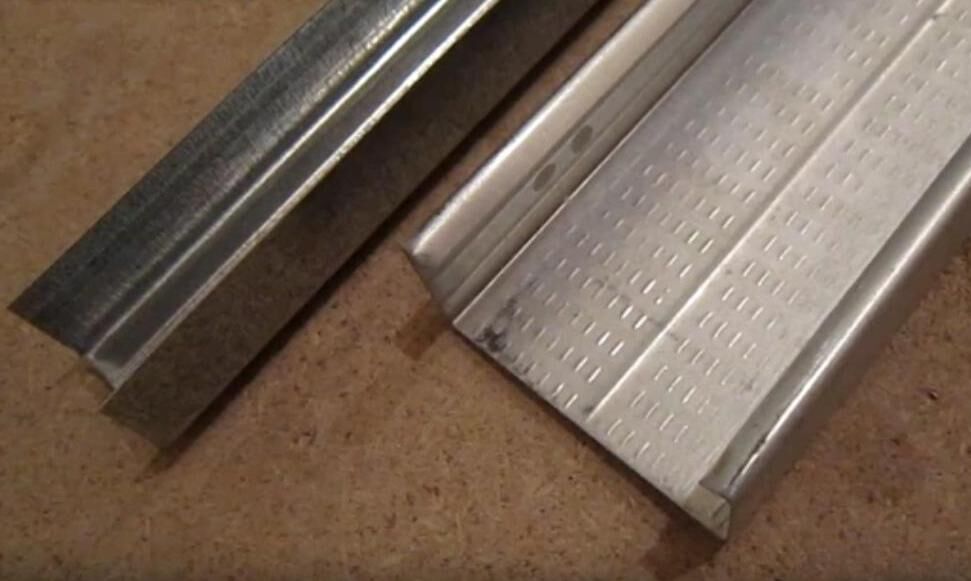
The rough base for the tiles can be quickly and fairly easily made using drywall.To do this, you need to build a frame from bars or a metal profile of the desired configuration, and then cover it with plasterboard slabs. Moreover, if wood is chosen to assemble the frame, it must be impregnated with antiseptics.
The main thing is that plasterboard for installation in the bathroom should be taken exclusively from moisture-resistant brands (GKLV) with a green surface. This material does not rot and mold does not form on it. It is strong, durable and will not swell from water that gets on it.
It is strictly not recommended to use regular gypsum plasterboard or wood-pressed boards without lamination in a bathroom with its constant humidity.

The base for tiling is done as follows:
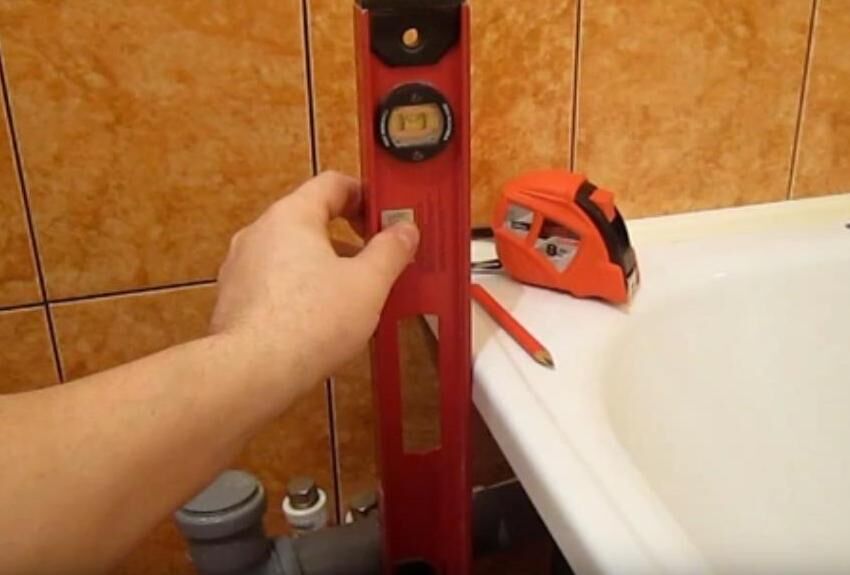
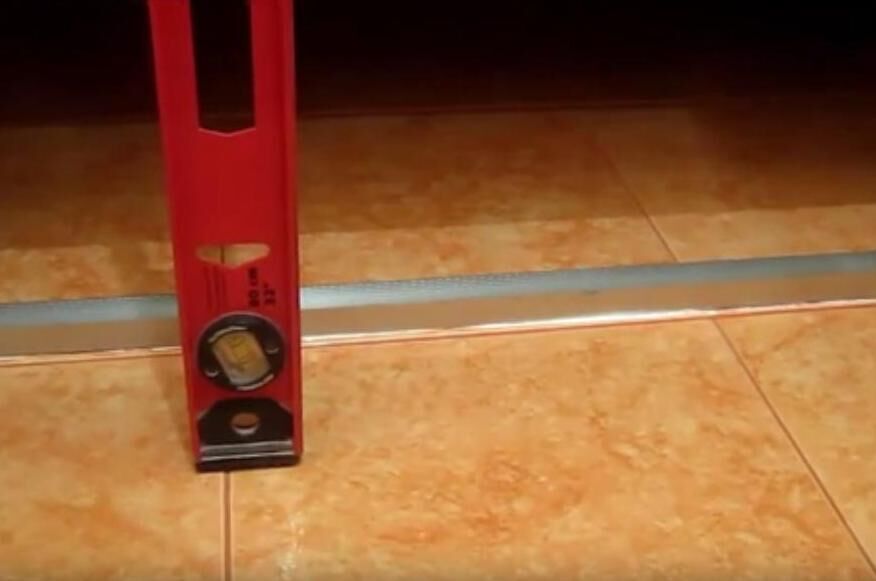
- Marking. Mark lines along the perimeter of the bath on the walls and floor flush with its side.
- Frame installation. The frame is assembled from metal profiles. The frame is installed on all sides of the bathtub intended for finishing. The structure is leveled and fixed to the floor and walls using dowels.
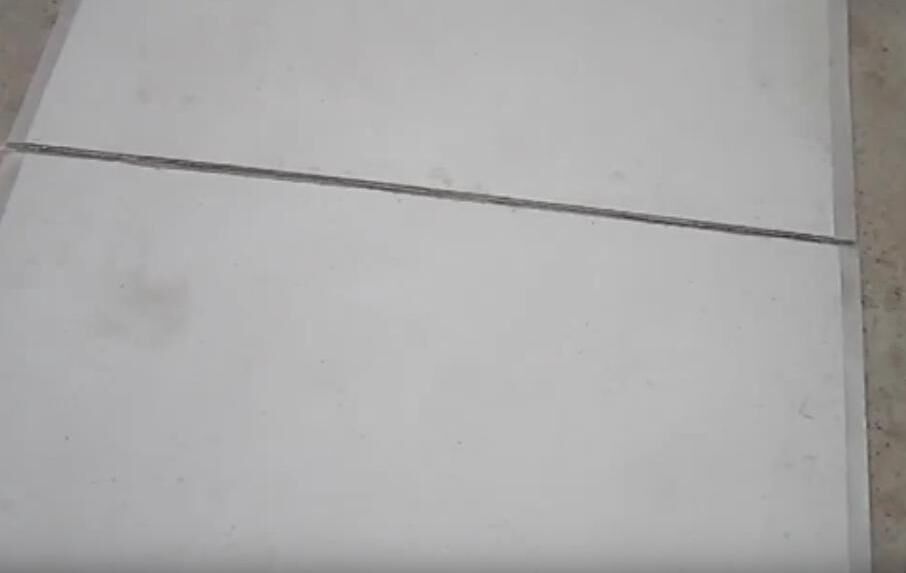
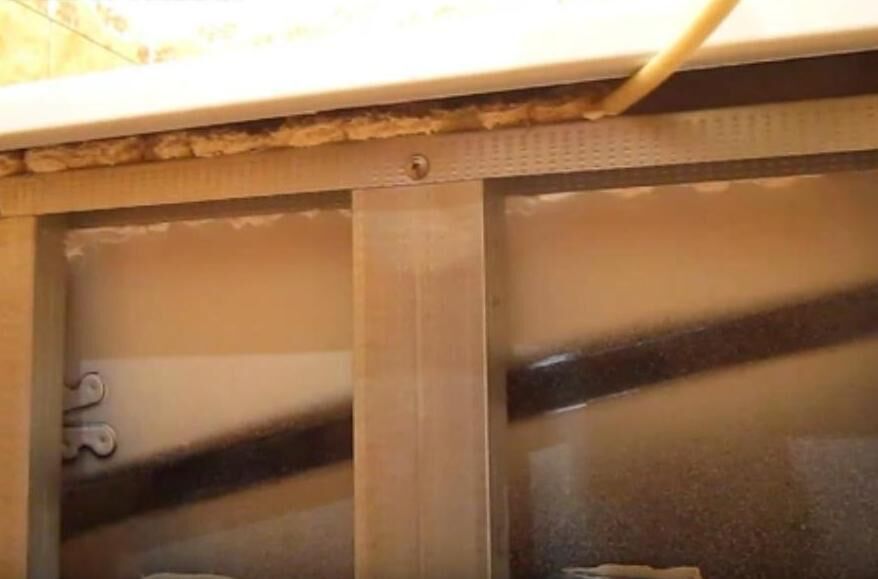
- Cutting drywall. The sheets are cut taking into account gaps of a centimeter near the floor and side of the bathtub, which will then be filled with sealant.
- GKL fastening. Drywall sheets are attached to the frame with self-tapping screws in increments of 10–15 cm.
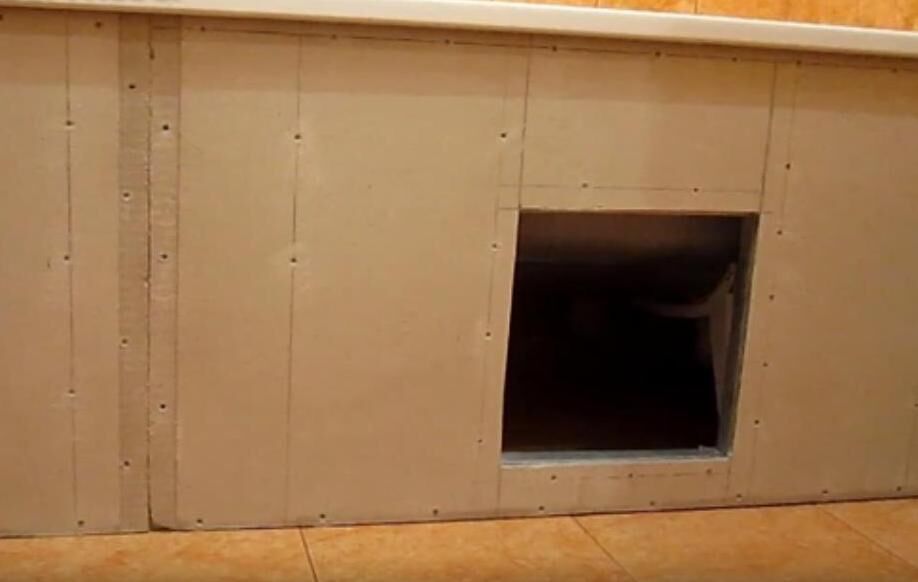
- Preparing the hatch. At the inspection site, a hole is cut out for a plastic hatch.
- Seam processing. The joints between the gypsum board sheets and the walls are glued with serpyanka. The seams along the entire perimeter of the plasterboard structure are coated with sealant, and the surface of the sheets itself is coated with an acrylic primer.
When fixing gypsum boards, you should not overtighten the screws, this can lead to destruction of the sheet at the point where they are screwed in. And the fasteners must be chosen short so as not to inadvertently damage the sides of the bath.
The inspection hatch will be installed after gluing the tiles during the final design of the screen under the bathtub. To fix it, ordinary liquid nails are enough.

When installing the frame, you can use foam. It will stick to the outer side of the bathtub, drywall and profile or bars, thereby connecting them into a single structure. You just need to make sure that it doesn’t squeeze out individual elements of the partition being formed under the bathhouse, otherwise the screen will turn out crooked.
And here is a version of the frame with subsequent cladding without fastening with dowels. Instead, plumbing sealant is used to fix the profile. For work you will need the following materials:
Having prepared all the materials and tools in advance, you can begin work. First we make markings, then we install the base for the frame, the frame itself and lay the tiles.
Don't forget about the hole for the service hatch - it will come in handy when you need to remove a blockage or change drain parts.
Often bathroom support frame, erected during the installation of plumbing, serves as the basis for attaching sheets of drywall.
Method #2: Brickwork
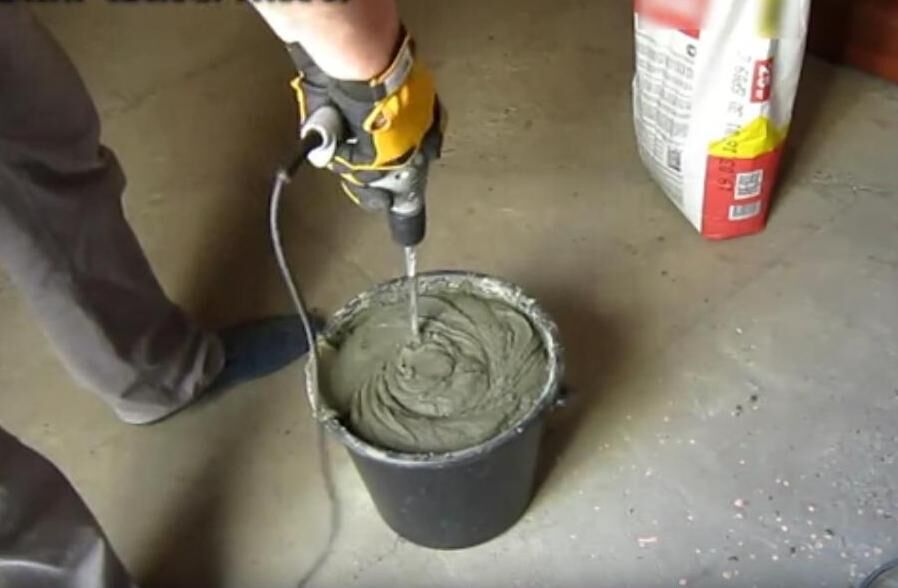
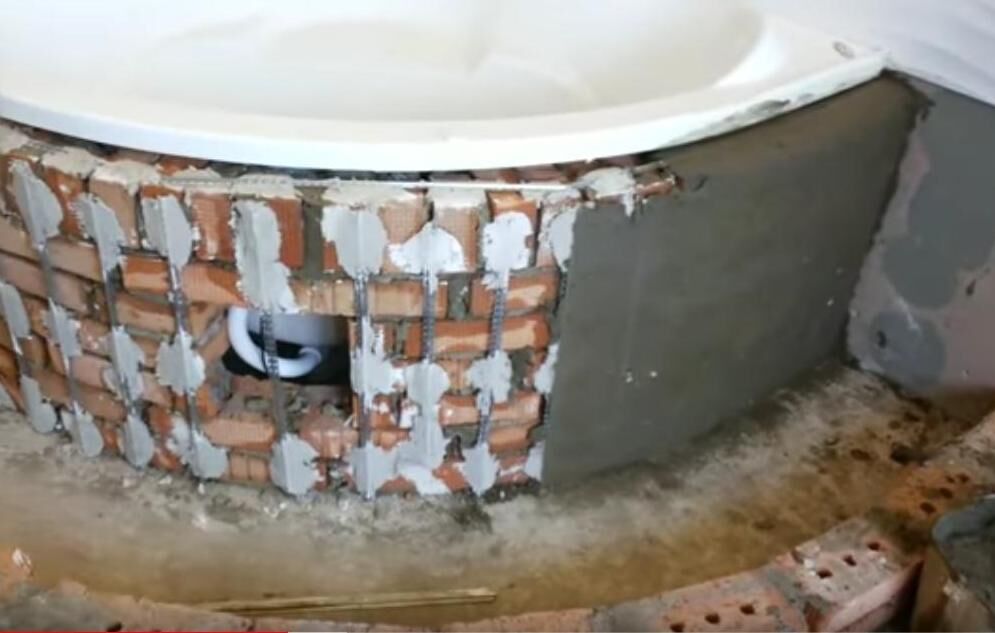
A beautiful and durable tiled screen can be made in the form of small brickwork.To do this, in addition to bricks, you will need a solution at the rate of 1 part M-200 cement to 6 parts sand and skills as a mason.
Such a partition is intended exclusively for gluing tiles; it is unacceptable to use it as a load-bearing stand for a bathtub. There are special legs and mounting frames for this purpose. Moreover, between the top bricks and the bathtub bowl there should be a gap of 2-3 cm for filling with polyurethane foam.

When laying the first row, it will be necessary to remove two or three bricks in the middle of the bath to subsequently form a niche for the feet in this place. And also do not forget about the opening for installing the inspection hatch.
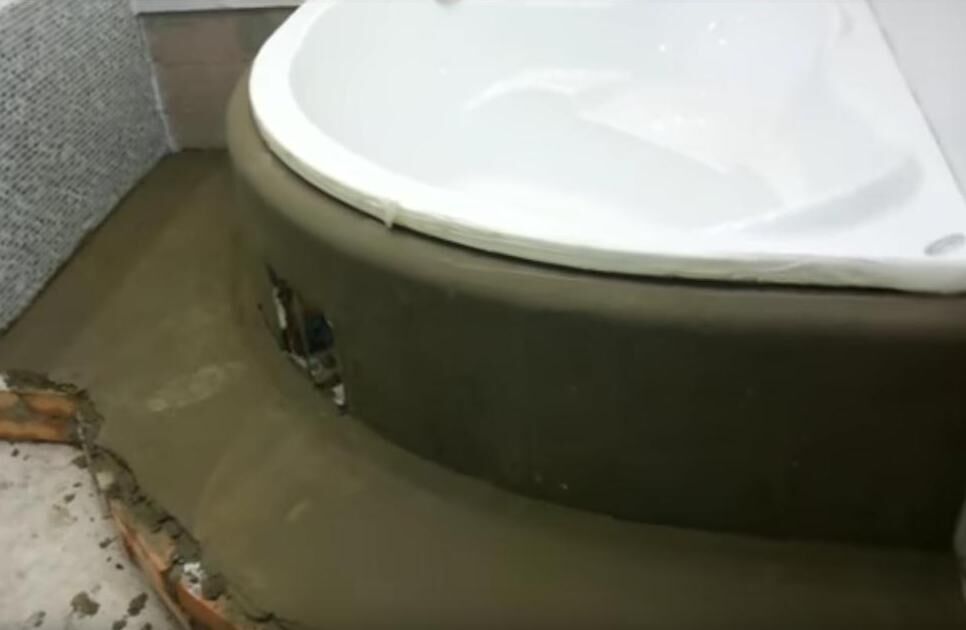
After the masonry is completed and the mortar has hardened, the resulting partition will still need to be leveled with plaster so that the tiles can be glued onto it.
It will be possible to start ceramic cladding only after two to three days. This time should be enough for the solution to finally set and dry, and for the partition to go through the stage of shrinkage deformation. If you start gluing the tiles right away, then after a couple of days they may simply fall off due to the unnoticeable displacement of the masonry.
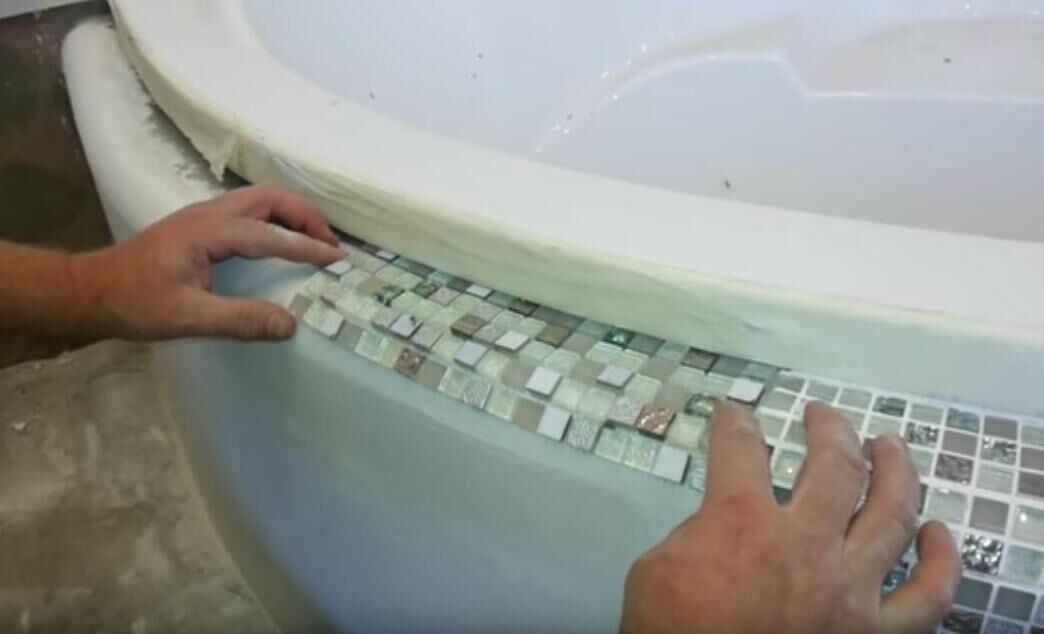
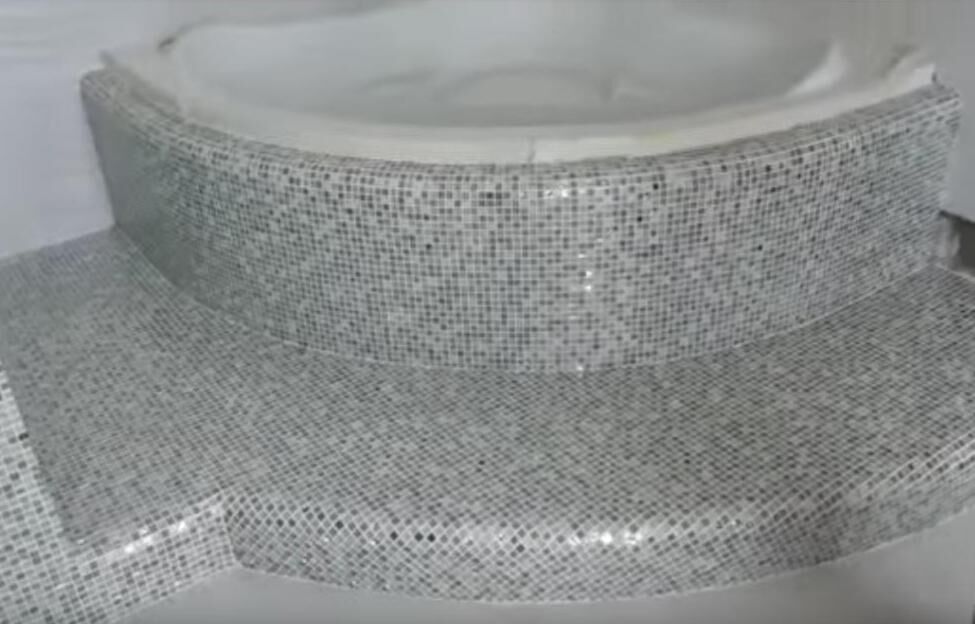
Photo instructions for installing a screen for an acrylic corner bathtub. Mosaic was chosen as the facing material - it fits best on curved surfaces.
Brick creates a foundation that does not deform over time and requires virtually no repairs.
Method #3: Partition made of tongue-and-groove slabs
Instead of brick, the base for the tiles can also be made from tongue-and-groove slabs. These can be moisture-resistant gypsum or silicate products. Both options can be used in bathrooms.
They are produced according to the standard with a minimum width of 80 mm, which makes it possible to easily create a strong supporting structure for the tiles under the side of almost any bathtub.

The slabs are connected to each other using special glue or gypsum plaster. The presence of grooves and ridges along the edge of the product greatly simplifies the laying.
Metal brackets and dowels are used to attach the partition to the bathroom wall. The result should be a flat surface, completely ready for gluing ceramic tiles.
Nuances of gluing tiles
The final cladding of the partition formed under the bathtub is done using tile adhesive or liquid nails.The first option is applied to the back side of the tile with a notched trowel, and the second option is applied from a tube at several points along the perimeter and in its center.

To prevent the tiles from floating to the sides, plastic crosses are inserted between them, allowing you to accurately control the size of the seams between the tiles. The latter, after completion of the cladding, are subject to mandatory grouting. Otherwise, water will get under the ceramic through them, which will sooner or later lead to its falling off.
Construction of a removable screen
In addition to rigidly fixed structures, to decorate the space under the bathroom, make a removable panel.
To create a mobile screen you will need:
- OSB;
- tile;
- furniture legs adjustable in height;
- slats 20x40 mm to create a frame for supports.
First, a piece is cut from the OSB sheet with such dimensions as to completely cover the side of the bathtub. Only they make it slightly smaller in height, about five centimeters. The feet should fit freely into this gap from below. After cutting, the frame is stuffed onto the OSB, and the legs are attached to it.

Tile tiles are glued onto a wood base using standard technology using sealants and grout mixtures. After grouting the seams, the resulting screen can be placed against the bathtub and the legs can be adjusted so that it stands level in its place.
By twisting the supports, its upper edge must be pressed against the side of the bath from below, then this decorative panel will stand motionless.
Bathtub cladding of complex shapes
If the bathhouse has curved contours, then a regular screen with tiles cannot be installed on it. The plasterboard base can be made of any shape. But then it’s unlikely to be possible to glue large ceramic tiles to it. Ceramics does not bend, it can only be broken.
However, it is quite possible to cover a screen with a complex configuration with arched outlines using mosaics. Its small pieces are ideal for this purpose. It is not afraid of moisture and will last in the bathroom for many years.

For cladding a bathhouse or jacuzzi, both mosaics in the form of individual pieces and ready-made modules on a flexible mesh are suitable. The first method is labor-intensive and long. It is much easier to use modules with mosaic elements already pasted under a given pattern. With their help you can easily follow the contour of the bowl.
In addition to tiling, there are various options for decorating the space under the bathroom. One of the original ways is mirror screen. Alternative methods for creating a screen and technologies for their implementation are described in this article.
Conclusions and useful video on the topic
How to make a base for an acrylic bathtub:
Installation of a decorative screen with bath tiles:
The nuances of creating a frame for cladding based on gypsum board:
If the appearance of the bathtub is not pleasing to the eye, then it can always be covered with a decorative screen. In a situation where the entire bathroom is tiled, it is recommended to use it to decorate the bath bowl.
The easiest way to base a tile is to make it with plasterboard, but options made from brick or tongue-and-groove slabs are also possible.The arrangement of such decor is not something complicated; you can do it yourself.
Share with readers your experience and interesting ideas for decorating a screen under a bathtub. Please leave comments on the article and ask questions that interest you. The feedback form is located below.


Personally, I am not a supporter of making the base of the screen under the bathtub from brick or a sheet of slate. It seems to me that the best option is to use drywall or aerated concrete blocks. At least this makes the design lighter. It is also necessary to think over a hatch of normal size, so that later it will be possible to carry out repairs and maintenance of communications.
We have a sliding plastic screen in our bathroom. We installed it as soon as we moved in. We've been living here for six years and have no complaints. The doors move easily along the grooves, although dust accumulates there, but it is not difficult to clean. Externally, I like how the sliding screen looks, beautiful, modern and practical. Plus to everything: the cost was quite inexpensive.