Sliding screen for a bathtub: step-by-step instructions for assembling a factory design + tips for craftsmen
The space under the bathroom is not very attractive from an aesthetic point of view: there are pipes there, and sometimes there is a mini-storage room for household chemicals and detergents. To improve the interior, install a sliding screen under the bathtub - a simple structure made of a frame and moving sashes.
Do you want to assemble such a screen with your own hands, but have never done it? We will help you understand the main points - this material discusses in detail the stages of assembling and installing the screen. We also provided the advantages of this design and useful information about which models are the most acceptable in terms of cost and reliability.
The content of the article:
Advantages of sliding screens
There are several types of screens that are installed under the bathroom. Solid products without doors are easy to install. Their main advantage is the ability to use any building and finishing material, from bricks and drywall to tiles and plastic.
Screens with drawers, sliding or hinged doors allow the hidden area to be used as a storage system. Thanks to this, space in cabinets is significantly saved, and all tubes, bottles, and packs of detergents can be collected and placed in one place. More about the design of sliding and solid types of screens we wrote here.

Thus, several issues are resolved at once:
- the usable space of the bathroom or bathroom increases;
- there is a convenient and accessible place for storing household chemicals;
- the appearance of the room becomes more attractive.
The disadvantage of sliding structures is the limited choice of materials. The sashes must be light and thin so that they can easily move along the guides, therefore, we exclude tiles or gypsum boards. Plywood is not suitable, as it quickly deforms in a humid microclimate.

Laminated chipboard and MDF boards are slightly heavier, but they are also used for the manufacture of sliding structures.
Owners have a choice: buy a ready-made model or assemble the screen from scratch with their own hands. Considering the low cost of factory-made products, we recommend purchasing a screen that is fully prepared for installation. It is equipped with fastenings and instructions, so you can quickly and easily attach it under the bathtub.
Self-assembly will require calculations, selection of suitable material, and additional processing of parts. This will take a lot of time, and the result may not be the most impressive.
Instructions for assembling a factory model
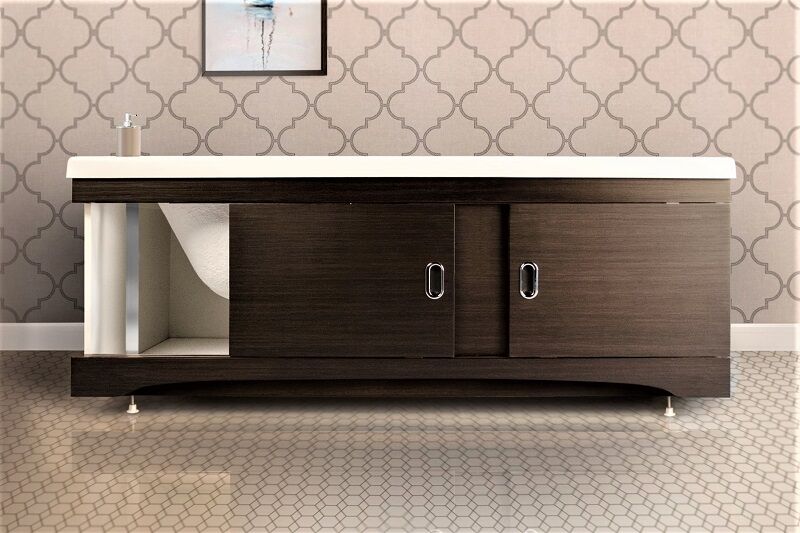
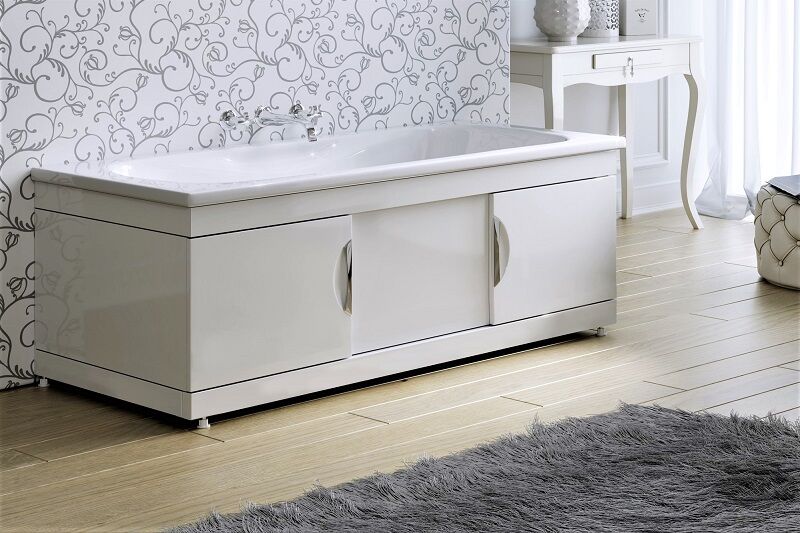
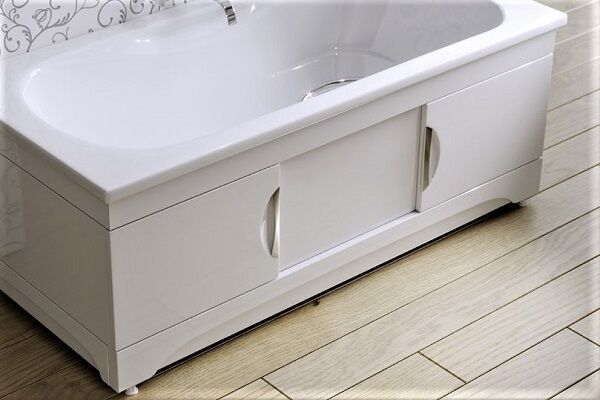
Before installation, you must buy/order a screen or a set of individual parts from which the frame and doors will be formed.Before purchasing, you should consider the design of the product - it should be in harmony with the cladding of the walls and floor, match in color and texture.
Some successful examples of installing a “basement”:
If you decide to make a screen yourself, we recommend that you first study ready-made models sold in stores. This way you will understand exactly what parts are needed for production of a functional screen and can they be purchased separately?
Stage #1 - selection of necessary tools
It all depends on whether you buy a factory model or are going to prepare the parts yourself. In the first case, a Phillips screwdriver and a key, which is often included with the kit, are sufficient.
The second will require tools for cutting and grinding: a jigsaw, a file, a construction knife, sandpaper for processing the ends.

If the guides will be attached to the floor, and the vertical racks to the walls, then a hammer drill or drill, as well as a set of dowel nails, will be useful.
Marking tools are required - tape measure, square, level, pencil. They will come in handy even before purchasing a screen to clarify the dimensions.
Stage #2 - checking the configuration and inspecting parts
When purchasing models made of plastic or MDF, all parts can be checked according to the list specified in the instructions.
Typically the package includes:
- 2-3 panels;
- 2 guides – upper and lower;
- 2 side racks;
- threaded legs (from 2 to 4);
- 2 handles with screws;
- hex wrench;
- step-by-step schematic instructions.
It is necessary to carefully inspect every detail: check the strength of the legs, make sure that the panels are not scratched and have smooth, jagged edges.
To assemble it yourself, you will have to find suitable panels made of plastic or MDF. If they are larger in size, it’s not a big deal - the extra centimeters can be cut off. You will also need a plastic or metal profile to make guides. The main thing is that it has two “tracks”.

The frame can also be made from wood, if you have a tool for processing wooden blocks at hand. But do not forget to sand each part, treat it with protective impregnation and cover it with paint or varnish. This way the wood will last much longer.
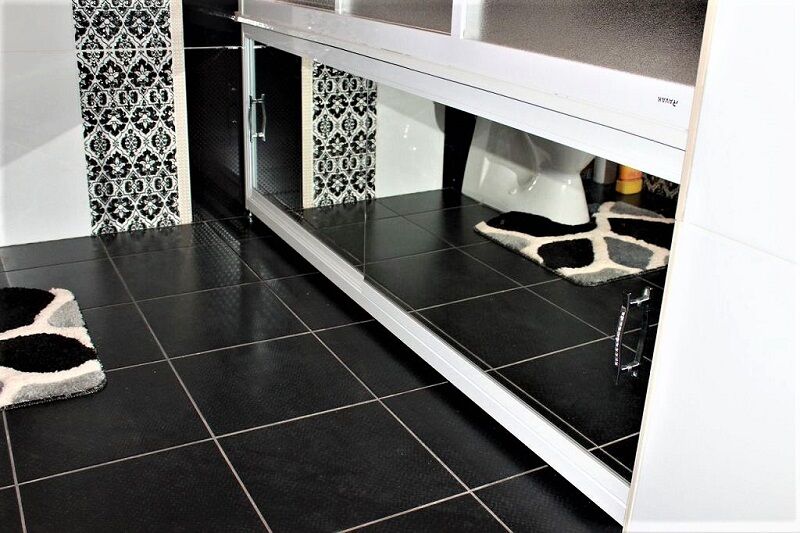
Stage #3 - preparing the space for installation
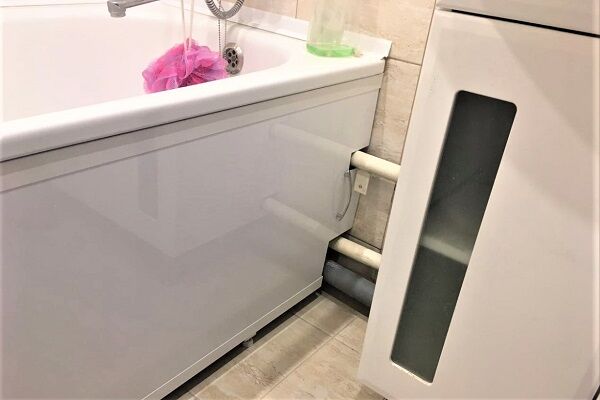
Before installation work, it is better to prepare the floor and walls in advance - complete the repairs and remove excess debris. We recommend tidying up the space under the bathroom: treat concrete surfaces with a sealant anti-mold composition, grout the tile joints, wash everything thoroughly.

Some pipes run along the walls - this should be taken into account when processing the panels. Sometimes you have to cut a corner, otherwise the screen will not “fit” into place. We do not recommend installing a “blind” element in the place where the pipes pass, otherwise if a leak appears, you will have to dismantle the entire screen.
Now let’s look at how to quickly assemble and install a sliding screen under a bathtub.
Stage #4 - installation of the frame under the bathtub
Some models are sold practically assembled. The frame, together with the doors attached to it, is packed in plastic film, and the legs and fasteners are in a separate bag.

For purchased models that are a set of individual parts, the screen is installed in the following order:
Step 1 – frame assembly
We place the horizontal guides parallel to each other, with the grooves facing each other. We place the racks on the sides, also with the grooves towards the center.
We take out the plugs from the vertical posts, insert the locks into the grooves of the guides, align the resulting frame and tighten the fastenings. The result was a rectangular frame.

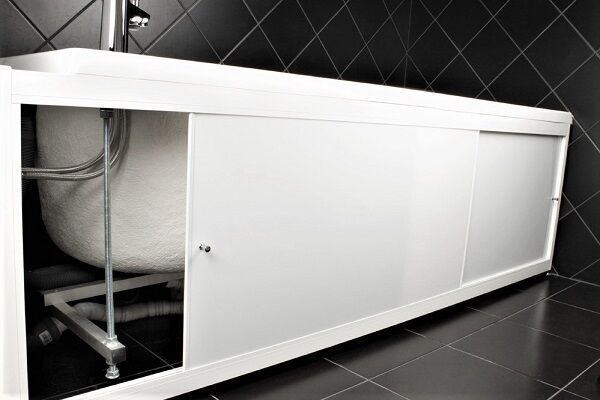
Step 2 – fixing the panels
We insert the panels into the lower profile so that they fall into different “tracks” (usually there are two of them, just like the panels). Adjust the top guide in height and tighten it. We make sure that the profile and the doors do not touch closely - a small gap ensures easy movement.

Step 3 - installing legs and mounting handles
We insert bushings with legs into the vertical posts - from the lower end, where the plugs were originally located.
We also screw in the handles that come with the screws.

Step 4 – installing a screen under the bath
We place the screen under the outer edge of the bathtub, align it with the floor, unscrew the adjusting feet until they stop so that the frame “fits” tightly and does not wobble when opening/closing the panels.

Pay attention to the manufacturer's recommendations. For example, to install a screen under a steel or cast iron bathtub, it is usually recommended to remove the upper bushings.
And for installation under an acrylic bathtub with a deep tint, they also suggest using the upper legs.
Features of making a screen yourself
If you install it yourself, the installation order can be changed. For example, sometimes they fix the lower guide - “rails”, and then insert panels into it along with the upper profile. But in this case, the parts must be adjusted very precisely in size or adjusted using the upper legs.
On our website there is step-by-step instruction on making your own screen and installing your homemade product.
Some more general useful tips:
Often, amateurs who make their own bath screen for the first time forget about the legs and mount the bottom rail directly to the floor.

In the future, such a decision will make using the bath uncomfortable. It will be difficult to care for the bathroom, since standing near a solid screen is inconvenient.
If installing a sliding model is impossible for some reason, do not forget about alternative solutions - screens with a hatch or a hinged door.
Conclusions and useful video on the topic
Detailed video instructions from the manufacturer:
How to install the screen assembly:
Review of budget homemade products:
The variety of screens allows you not only to create a convenient storage space under the bathroom, but also to stylishly decorate the screen outside using mosaics, 3D panels, mirrors, tiles and other materials. Installing a factory model is easy and takes a minimum of time; with a self-made screen you will have to tinker a little longer.
Are you assembling a purchased screen and have any questions during the work process? Ask our experts in the comments section, add a photo with instructions from the manufacturer - we will try to help you.
Or maybe you successfully completed the installation of the screen yourself and modified it a little by placing convenient stands or a cabinet with shelves to comfortably place it inside a package of detergents? Share the results of your work with other users - add a photo of the improved screen design.


I really liked the option in one of the photos above, where the “bathroom” design implies a small area of the bathtub itself that is open to the eye. It’s clear that a bathtub for such a design must be perfectly clean, smooth, or even completely new, but this is the best I’ve ever seen.
There is a good option for a “basement” - a small metal grate. In most bathrooms, where the owners have made a solid screen, when you open the doors, a bad aroma hits your nose. Either dampness, or mustiness, or household chemicals that are stored there. And only the grille guarantees 100% ventilation of the space inside, without losing the aesthetic function. The lattice can be beautifully painted in any color, it can be larger or smaller. It’s a pity there is no button to insert a photo here - I would show what a screen for a bathtub made of grates looks like.
We made the sliding screen ourselves. This is not difficult, the main thing is to be able to make a sheathing from wooden slats and secure it around the bathtub using polyurethane foam. A plastic profile was nailed to it, into which plastic panels were inserted. For my husband, all the work took several hours. But we didn’t think of the internal shelves. What a beauty! When we do the renovation, I will order a ready-made screen with shelves and doors in the style of a cabinet.
We have a standard plastic screen for a bathtub and a problem arose with it - a piece broke off on the bottom guide and now the screen seems to fall out of it. I went to hardware stores and found that the guide was not sold separately anywhere. Are they even on sale or will I have to buy and replace a completely new screen? Or maybe something can be fixed?
Personally, I haven’t come across plastic guides for a bathtub screen on sale.
If the broken piece is still there, you can try gluing it back to the same place. “Super Moment”, “Moment plastic”, “Cosmofen”, “Secunda” plastics adhere well. Before gluing, you can lightly sand the plastic to be glued.The resulting roughness will give better adhesion of parts. You need to apply enough glue so that during its connection and compression, excess does not protrude.
On the other hand, if this is such a standard screen as I am thinking about, then is it worth bothering with it? Isn’t it easier to buy a new one, since it’s quite inexpensive.
In this case, the glue that is best suited is “Moment”, which is super strong; take waterproof one, since the bathroom is a place with high humidity.
There is also an option to order the production of such a guide from plastic on a 3D printer. But this is the case if it is not sold separately, but must be purchased together with the screen. 3D printing is still not cheap.
If you still choose the option with 3D printing, then make several guides at once so that you have a reserve in case a similar situation happens again, and you are already ready for such a development of events.
I can say for sure that you shouldn’t bother making a bathtub screen yourself. Now on the construction market there are many manufacturers offering various products from various materials.
For myself, I chose a plastic screen with plastic guides and plastic sliding doors. Why? I believe that plastic is the least susceptible to water and dampness in the bathroom. Wood, MDF, chipboard, metal - this is not an option. I had a sad experience with a washbasin cabinet made of painted MDF. After a year, the cabinet was swollen in some places and the paint was peeling off. Using wood or materials containing wood under a bathtub is a crime.
I am from Ukraine and bought a bath screen from a local manufacturer, Pan Bilan.I'm happy with the quality. I recommend.