How to make a water heated floor with your own hands: a step-by-step guide from design to assembly
Warm floors are useful in all respects: they create additional heating of rooms and increase the degree of comfort.It is not surprising that some owners of private houses have an irresistible desire to assemble this type of heating system themselves. Why overpay for a team of craftsmen when you can do everything yourself, right?
Are you also excited about the idea of installing a heated floor, but you don’t fully understand the specifics of this system and don’t know all the intricacies of design? We will help you - in this material we will try to figure out under what conditions it is advisable to install a water heated floor with your own hands and what skills you need to have for this.
And to make the whole installation process clearer to you, we have selected step-by-step installation photos and detailed videos that explain the nuances of design, calculations and pipe laying.
The content of the article:
- Specifics of the “water floor” system
- Selection of pipes and manifold assembly
- Installation instructions for heated floors
- Step #1 - drawing up a diagram and performing calculations
- Step #2 - preparing the base for the “pie”
- Step #3 - laying waterproofing and insulation
- Step #4 - installation of water floor pipes
- Step #5 - laying the reinforcing mesh
- Step #6 - connecting circuits and hydraulic tests
- Step #7 - pouring concrete screed
- Nuances of choosing a finishing coating
- Conclusions and useful video on the topic
Specifics of the “water floor” system
There are several options for installing heated floors. The principle of operation of any of them is simple: place under the finishing floor covering electrical wires (mats), IR film or water floor pipes, which act as heating devices.
Film and electrical systems, mainly for private houses - water. Let's take a closer look at the last type.
Water systems can be divided into two categories - concrete and lightweight. Concrete is also called “wet”, so one of the stages in the process of preparing a multi-layer “pie” is filling the pipeline with a solution.
It is necessary that there be at least 3 cm of concrete above the pipes, the diameter of which is 16-18 mm.

Lightweight systems include polystyrene and wood. In the first case, the pipes are mounted in polystyrene foam grooves and then filled with cement mortar, in the second - in a structure made of wooden boards.
Lightweight systems have a smaller thickness (from 18 mm) and, accordingly, weight. They can be installed in places where it is not possible to make a thick concrete screed.

Selection of pipes and manifold assembly
An analysis of all types of pipes showed that the best option is products made of reinforced polymer marked PERT and cross-linked polyethylene, which are designated PEX.
Moreover, when it comes to laying heating systems around floors, PEX is still better, since they are elastic and work well in low-temperature circuits.

Typical pipe sizes: diameter 16, 17 and 20 mm, wall thickness - 2 mm. If you prefer high quality, we recommend the brands Uponor, Tece, Rehau, Valtec. Pipes made of cross-linked polyethylene can be replaced with metal-plastic or polypropylene products.
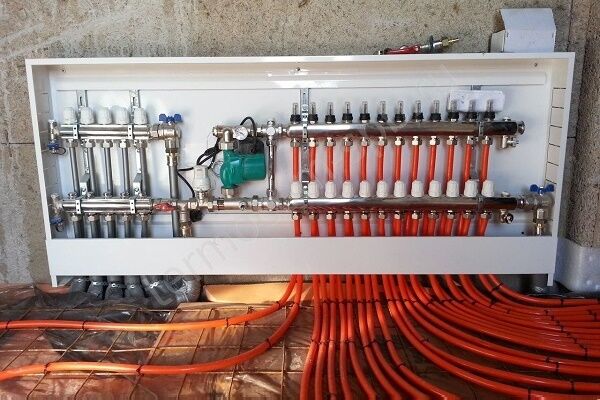
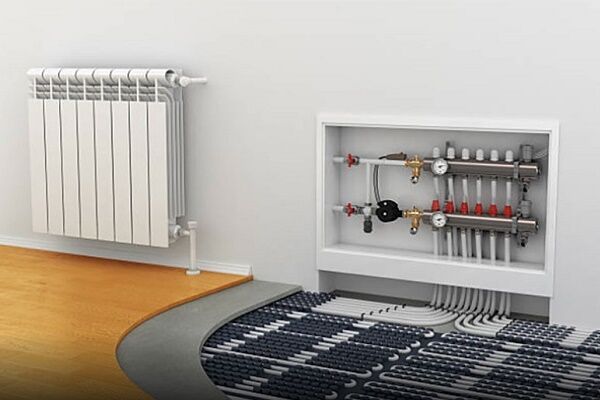
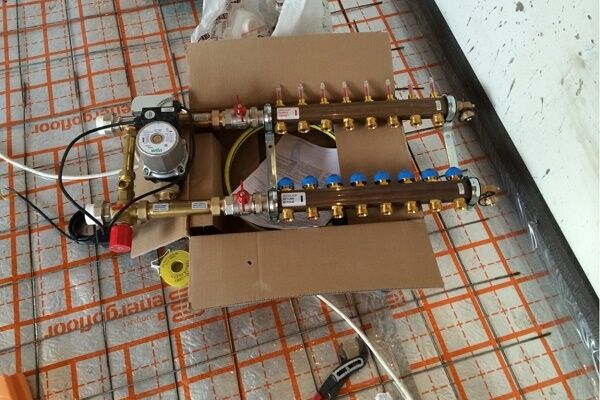
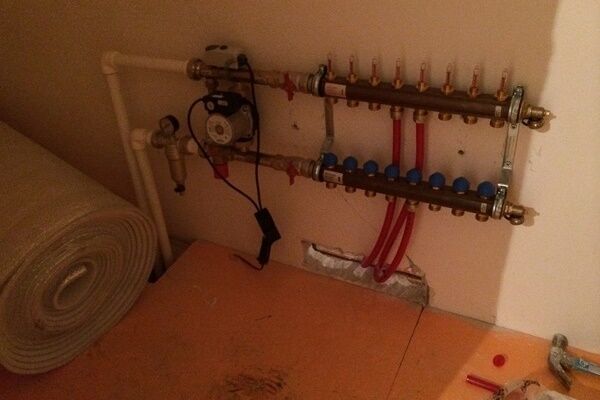
In addition to pipes, which are essentially heating devices, you will need collector-mixing unit, distributing coolant along the circuits. It also has additional useful functions: it removes air from pipes, regulates water temperature, and controls flow.
The design of the collector unit is quite complex and consists of the following parts:
- manifolds with balancing valves, shut-off valves and flow meters;
- air vent operating in automatic mode;
- a set of fittings for connecting individual elements;
- drainage taps;
- fixing brackets.
If the heated floor is connected to a common riser, the mixing unit must be equipped with a pump, bypass and thermostatic valve. There are so many possible devices that it is better to consult a specialist to choose a design.

It is desirable that all circuits extending from the collector unit have the same length and are located close to each other.
Installation instructions for heated floors
Let's consider the stages of installing a warm water floor of the “wet” type - it is considered the most popular. It is better to discuss points that raise questions and difficulties with professional builders.
We recommend constructing a water floor system yourself for those who already have skills in working with heating devices and know the basics of construction skills.
We do not recommend designing warm water floors in city apartments with centralized heating.Firstly, equipment of this type is very difficult to coordinate (more often it is impossible at the legislative level), and secondly, there is always a risk of an accident and flooding of neighbors.
The installation of heated floors with a water heating principle includes a number of standard steps:
After preparing the base for the installation of the heating system, pipes are laid in accordance with advance selected scheme and connecting the laid circuits to the collector unit.
Step #1 - drawing up a diagram and performing calculations
Drawing up a project will help eliminate some errors that occur during the purchase of building materials or installation of pipes.
You will need a diagram with contours that must be followed during the installation of pipes - it will also be useful in the future if the need for repairs arises.

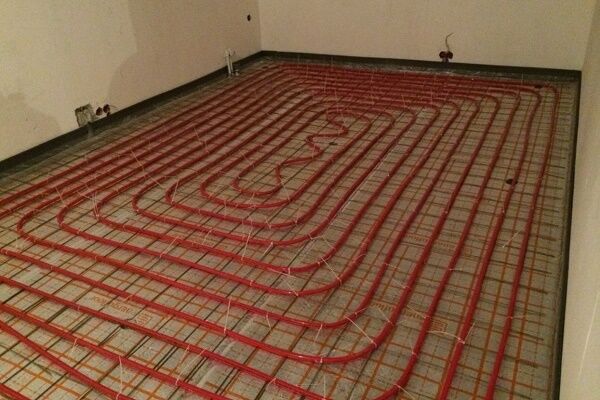
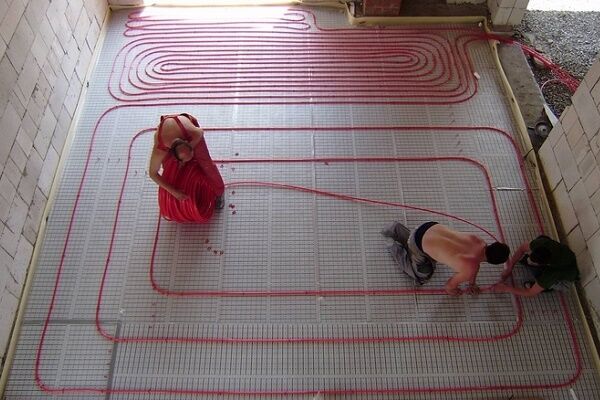
In large rooms, it is recommended to use combined schemes to achieve maximum heat transfer.For example, I place a “snail” in the center, and “snakes” along the edges, so that higher heating occurs along the walls with windows.
Tips for creating an effective outline:
- The length of the circuit depends on its diameter: for 16 mm pipes - no more than 100 m, for 20 mm pipes - no more than 120 m. This is necessary to create optimal pressure inside the system.
- If several circuits are used, it is better to make them the same in length (maximum difference is 15 m).
- Each circuit must be within the boundaries of one room.
- The intervals between turns of pipes - steps - should not exceed 300 mm in the center of the room and 150 mm at the edges. In the northern regions it can be reduced to 100 mm.
- Pipe flow is calculated as follows: at a pitch of 100 mm - 10 m/m², at a pitch of 150 mm - 6.7 m/m².
- The circuit should “bypass” the installation sites of plumbing fixtures or furniture.
One circuit is designed for a room whose area does not exceed 40 m², the maximum length of one side of the circuit is 8 m.

Standard formula for contour length calculation: active heating area (m²) is divided by the laying pitch (m) and the distance to the collector and the size of the bends are added.
If you want to get accurate calculations and a trouble-free heating system for a water-heated floor, contact specialist heating engineers. It is better to regulate the temperature in the circuits (and it should not exceed + 55ºС) using thermostats.
Having decided on the diagram, you can start purchasing the necessary materials: pipes and parts for installing circuits, waterproofing, insulation, reinforcing mesh, dry mixture for preparing the solution, damper tape.
When designing a pipe laying scheme, the following points must be taken into account:
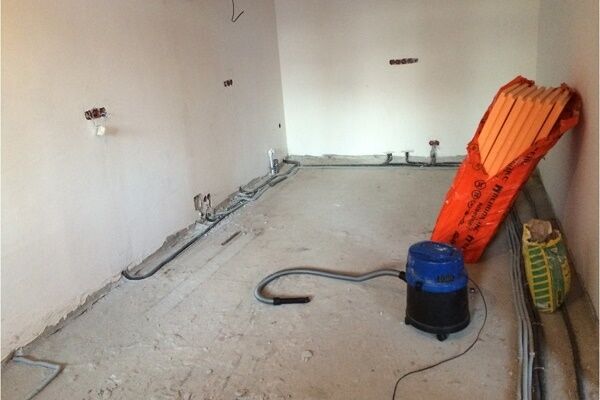
Step #2 - preparing the base for the “pie”
If the floor is a flat concrete slab, then special preparation of the base is not needed. In this case, the thickness of the “pie” will be minimal – about 80 mm.
The most difficult thing is to lay it on the ground, which requires careful leveling and maximum insulation.

The thickness of the thermal insulation depends on the climatic conditions of the region and the location of the system. If it is located on the second floor or above the basement, the insulation layer can be minimal - up to 30 mm. The main function of thermal insulation protection is to minimize heat loss by directing heat upward.
Is a rough screed always necessary? If the layers of soil, crushed stone and sand are compacted tightly enough, and polystyrene foam is used as insulation, there is no need for it.
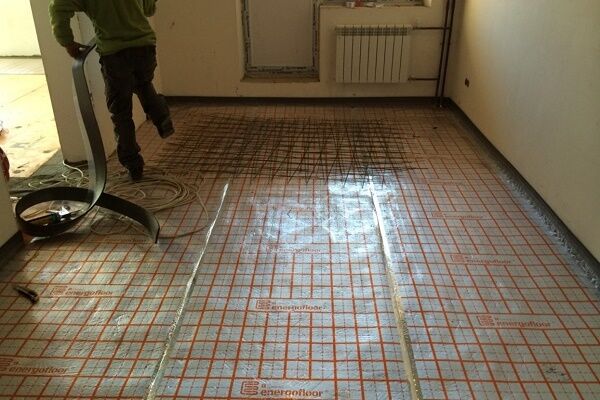
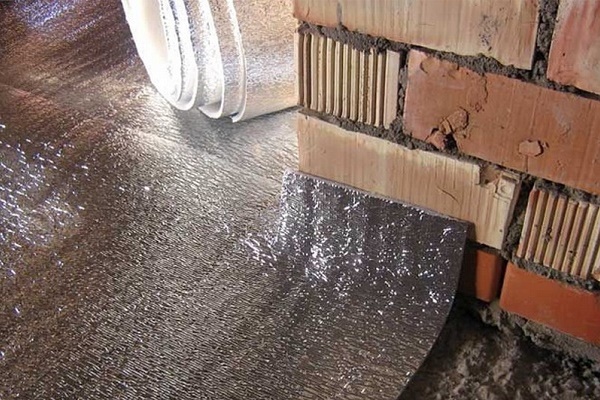
Step #3 - laying waterproofing and insulation
Waterproofing is necessary as another protective element, but many people skip this stage, since when using some materials (for example, expanded polystyrene), the protective effect is already present.
Experts still recommend using at least a thick film to protect the insulation from cement mortar and prevent the formation of condensation when heated.
Rolled polyethylene or roofing felt is used as waterproofing, as well as built-up insulation that requires heating. The rolls are cut into pieces of the required length, which are laid over the entire area of the room with an overlap of 15-20 cm and wrapped on the walls.
If the base is a concrete slab, then mastic is enough - a liquid impregnation, which is applied with a brush in several layers.
Insulation, unlike waterproofing, is a mandatory step, since it is water floor insulation ensures the preservation of heat in the room, rather than heating building structures or the soil under the house.
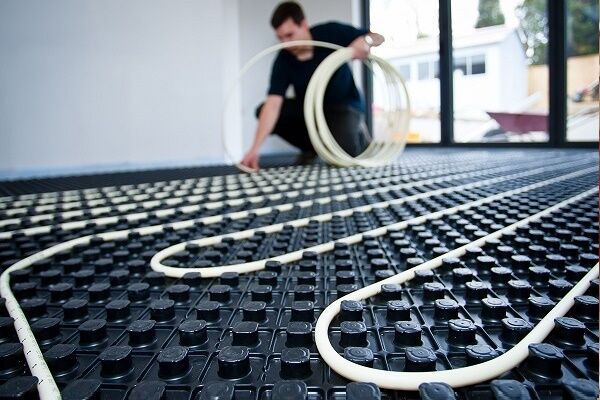
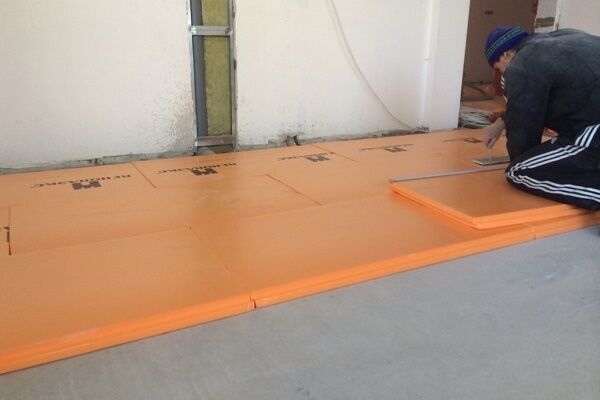
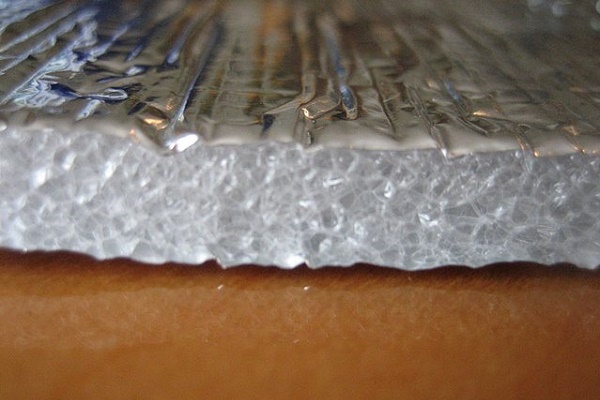
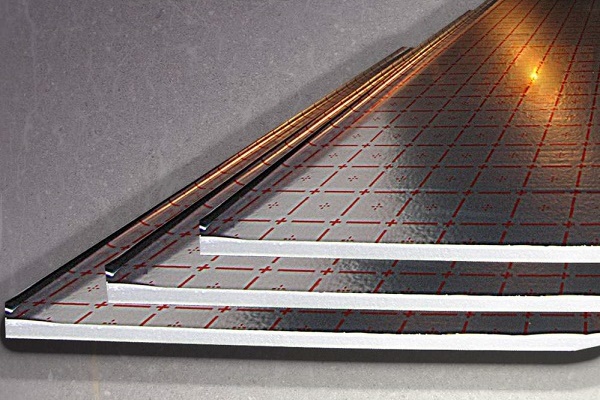
There are many traditional insulation materials, but it is better to focus on modern ones with suitable characteristics:
- EPPS – extruded polystyrene foam (EPS);
- teaching staff high density in the form of profile mats.
EPPS has excellent wear resistance, low thermal conductivity, moisture resistance - that is, a set of characteristics ideal for laying warm water floors.

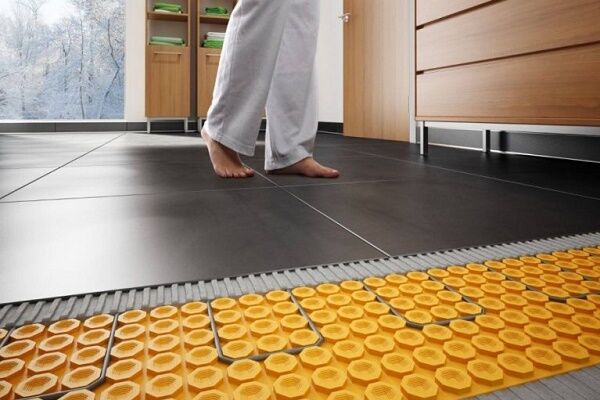
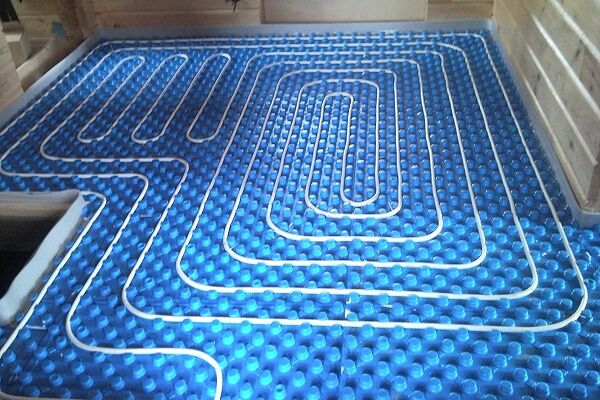
A distinctive feature of profile mats is a surface with protrusions that allow pipes to be laid evenly. The distance between the protrusions is 5 cm, this is convenient for creating a contour step of 10, 15 or 20 cm.
High-density PPS benefits from its small thickness, but for many it is unaffordable in terms of cost.

The thickness of the thermal insulation layer depends on the type of base:
- for soil – at least 10 cm (option – 2 layers of 5 cm);
- for the first floor with basement – from 5 cm and above;
- for the second floor – 3 cm is enough (provided the first floor is heated).
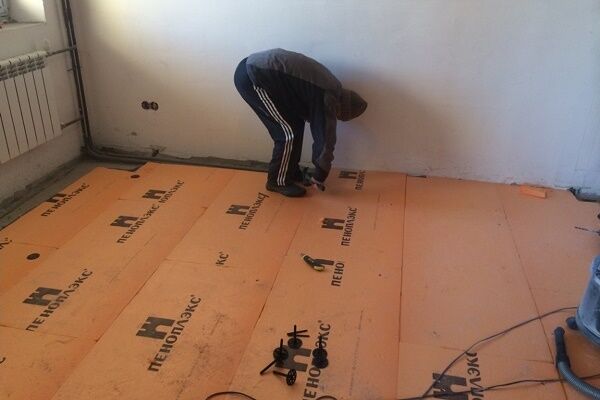
Mushroom dowels (umbrellas, disc-shaped) are used to fasten heat-insulating boards or mats to the base; harpoon staples are used to fix the contour to the insulation.

The procedure for installing thermal insulation:
- leveling the surface for laying polystyrene foam (by adding sand or rough screed);
- waterproofing layer flooring (with seams taped);
- laying slabs of extruded polystyrene foam close to each other (marked side up), starting from the far wall;
- sealing seams with tape;
- securing the slabs with dowels.
When installing the second layer (if necessary), the slabs should be laid according to the principle of brickwork, so that the joints of the lower row do not coincide with the seams and joints of the upper one.

Sometimes there are gaps in the insulation coating - they also need to be filled with either pieces of EPS or polyurethane foam.
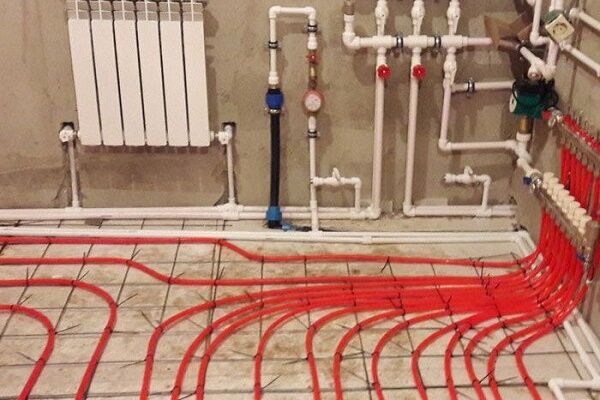
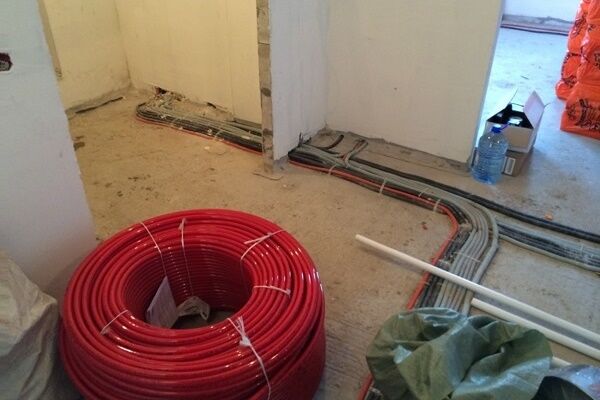
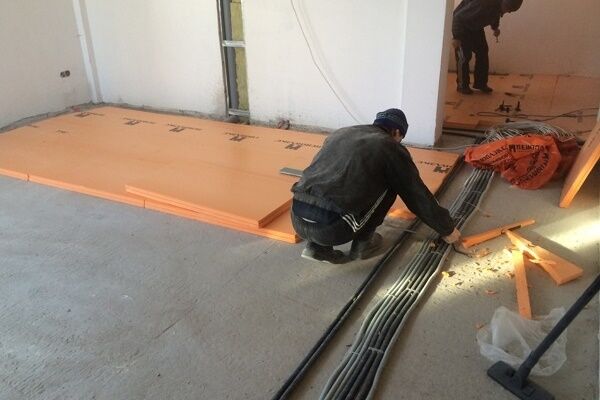
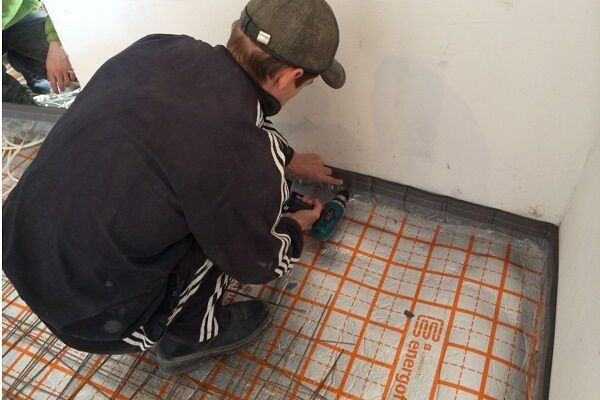
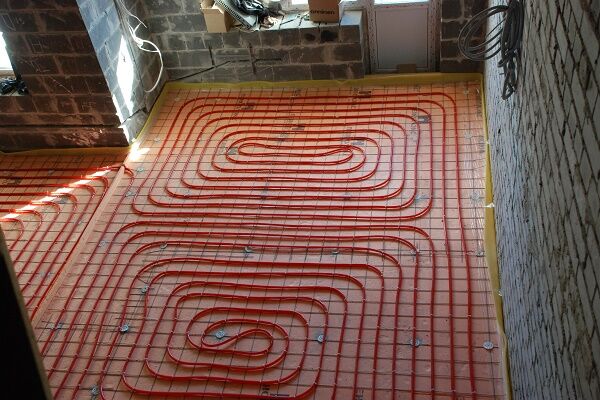
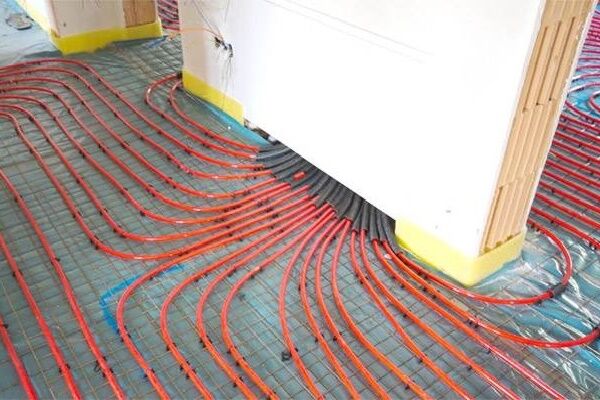
Step #4 - installation of water floor pipes
You should start with marking and indicating the directions of the contours.Some XPS slabs have their own markings, but if they don’t, you need to arm yourself with a marker and mark the route for laying the highway. For correct pipe laying Step width, turning angles, and pipe diameters should be taken into account.
At the same stage, you can secure the manifold cabinet and prepare a protective corrugation, which is put on the pipes at the junction with the unit and the concrete screed, during transitions from room to room or at the border of two circuits. Pipe installation begins from areas remote from the node.

Lines to heating devices can run parallel to the underfloor heating pipes. They are laid in such a way that they are below the heating circuit or, at a minimum, do not protrude above the polystyrene foam boards.
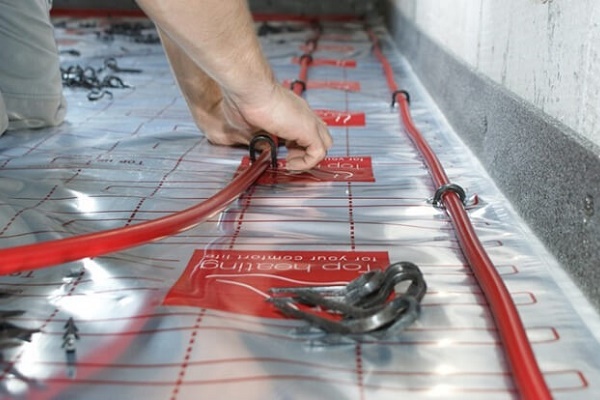
At the same stage, you can attach a damper tape, which runs along the entire perimeter and serves to compensate for thermal expansion. There are many types of tape, varying in width and material; some types have an adhesive bottom layer.

Pipe installation procedure:
- carefully unwind the pipe from the coil, trying not to stretch it, to a length of about 10 m, put on the corrugation and fitting;
- connect the end equipped with a fitting to the desired outlet of the manifold;
- we start the pipe according to the markings, fix it along the entire length with harpoon clamps;
- having passed the entire line, we return to the collector so that the return pipe passes next to the supply pipe;
- we cut off the pipe, connect its second end to the collector, and mark the exact length of the circuit on the wall.
To make it easier to cope with large lengths, you can first lay out the entire pipeline along the markings, unwinding it from the coil from time to time, and then work on the fastenings.
We install all water circuits using this principle. Before laying the screed, you should move along the thermal insulation with pipes laid on it very carefully; it is better to place pieces of plywood or boards under your feet.
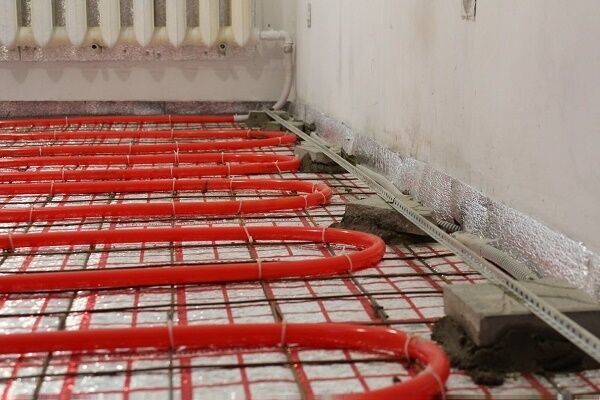
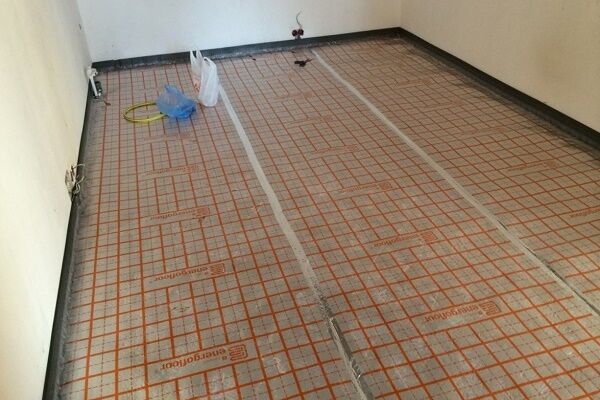
Step #5 - laying the reinforcing mesh
The need for reinforcement is very conditional. Some people have no idea how to make water-heated floors without a hard substrate, others believe that laying pipes on a metal mesh is a waste of money, and such a base itself does not carry any functional load.
If true reinforcement is needed to increase the strength of the structure, it must be placed above the pipes, and not vice versa.

With equal success, you can use both metal and plastic mesh with cell dimensions of 10 cm x 10 cm. The individual pieces are laid with a slight overlap on each other and secured with clamps.
Reinforcement rods with a corrugated surface cannot be used - they can cause damage to polyethylene pipes. The advantages of plastic over metal are low price and safety for the highway.
Step #6 - connecting circuits and hydraulic tests
Do not fill the screed until the system has been pressure tested. Timely inspection is the best way to detect possible malfunctions, in particular potential leaks.
To carry out the test, a water supply is connected to one inlet of the collector, and a pressure testing pump is connected to the other. The contours are checked one by one, the rest are blocked during the procedure.
After supplying water, you should check the presence of air in the system and the cleanliness of the liquid, in which “working” contaminants may appear. The test should be carried out until the water becomes clear.
The fluid flows out of the circuit back into the collector, from where it goes into the sewer system through a hose inserted into the drain hole. Any leaks found should be repaired.
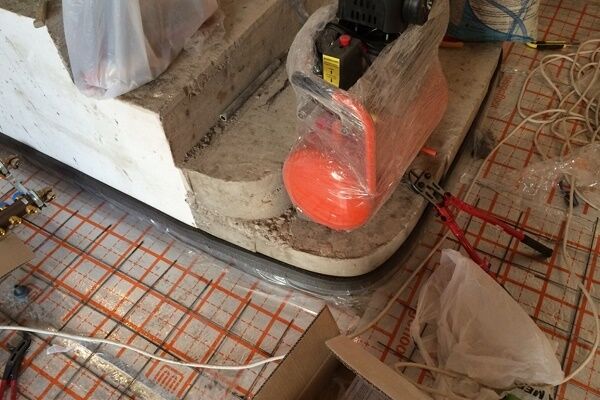
Step #7 - pouring concrete screed
Filling an existing system with concrete is a critical step, so without experience in construction work, it is better to turn to specialists. If you decide to fill it yourself, we recommend finding an assistant.

Using a level, it is necessary to install beacons, focusing on the height of the finished floor. Ceiling profiles for plasterboard work well as beacons. Then the screed is poured.
The ideal solution is a concrete mixture reinforced with fiber and plasticizers. The plasticizer increases the degree of mobility of the solution when drying, and the fiber makes the screed strong.
We recommend purchasing only professional products; folk products (liquid soap, PVA glue) cannot be used.After just a couple of days, you can start cleaning the surface - trim the damper tape, remove excess debris.
Within 10-14 days, the solution must be moistened and covered with plastic wrap.
Nuances of choosing a finishing coating
The best floor covering for a “warm floor” system is ceramic tiles (or porcelain stoneware). It has sufficient strength and does not emit harmful substances when heated.
The only disadvantage of ceramics – the coldness to the touch – disappears, so the combination of warm floors/tiles is ideal for the kitchen, bathroom or balcony.

If you plan to decorate the interior with practical linoleum or beautiful carpet, then when choosing coatings, be sure to pay attention to the markings: products intended for heated floors are marked with the appropriate sign.
Conclusions and useful video on the topic
The selected videos contain a lot of interesting and useful information about the choice of construction schemes for water heated floors and materials, about the correct installation of pipes and hydraulic tests.
Practical tips for laying pipes:
How to carry out crimping:
Installation rules from professionals:
As you can see, installation of a water-heated floor can be done independently: supermarkets have a huge selection of modern materials, and on the Internet you can find many detailed video instructions.
However, each stage - design, pipe laying, connecting the collector, pouring the screed - has its own pitfalls, which can only be circumvented with the help of professional builders and heating engineers.
Have you assembled and installed a warm water floor at home with your own hands? Tell us what difficulties you had to face.
Or are you just planning to start doing calculations and have some questions? Feel free to ask for advice in the comments below this article.


With your own hands, without involving professionals, you can make a heated floor in a private house or cottage. If you do something wrong, no one else will get hurt. And in an apartment building, such amateur activity can lead to trouble for neighbors. One craftsman in his sister’s house connected the heated floor in the apartment so that the radiators of the neighbors on the riser became barely warm. As it turned out later, he simply stupidly cut his system into the heating riser... Another craftsman, a work colleague who already had this in his house, managed to flood the three floors below with water-heated floors. So I am for professionals in this matter.
A similar situation to the previous commentator occurs in our nine-story building. A neighbor on the top floor arbitrarily installed heated floors throughout his entire apartment (60 square meters) without approval. He can afford it, all the water passes through his batteries and only then goes down to us. We are cold and freezing, but he is warm. For a long time they could not understand what was going on. But then they found out, and the house management imposed a fine on him and forced him to disassemble the system, because... it is not suitable for improving apartments in multi-storey buildings due to its enormous weight and the possibility of leaks, and it is still cold here.
Hello.In general, a warm water floor is rarely allowed into an apartment by agreement, because it is connected to the central water supply, which can lead to a decrease in pressure in the entire system. Such work requires very careful calculations and approvals.
Alexey, what is your opinion about heated floors in apartment buildings with gas boilers?
Overall the article is very useful for me.
I did not find any recommendations on the indentations of underfloor heating pipes from external walls for private housing construction.
I do not agree with the statement that “If true reinforcement is needed to increase the strength of the structure, it must be placed above the pipes, and not vice versa.”
Under the influence of load, the screed plate bends downwards, i.e. It is the underside of the screed that is stretched. Therefore, the reinforcing mesh is most useful at the bottom, preventing stretching.