Cross-linked polyethylene for heated floors: how to install a heated floor made from cross-linked polyethylene
The underfloor heating system can significantly increase the level of comfort in the home.The heat generated by the system is distributed in a comfortable zone for the owners and does not stimulate the movement of air with dust. If you have certain skills and knowledge, you can make a floor with a polyethylene pipeline yourself.
We will tell you how to use the most inexpensive material in arranging underfloor heating. In the article we presented, we discussed in detail how to correctly lay cross-linked polyethylene for a heated floor, with what step and according to what pattern to arrange it. Our tips will help you build a perfectly functioning system.
The content of the article:
Cross-linked polyethylene: features and benefits
Cross-linked polyethylene is a variant of conventional ethylene, strengthened by chemical, physical or complex effects. Thanks to this procedure, in addition to the characteristic longitudinal bonds, transverse connections appear in the polymer structure.
As a result of production manipulations, polyethylene products achieve dimensional stability and acquire increased resistance to deformation and exposure to high temperatures. The processing process with the introduction of organic compounds into the polymer is called “cross-linking”.
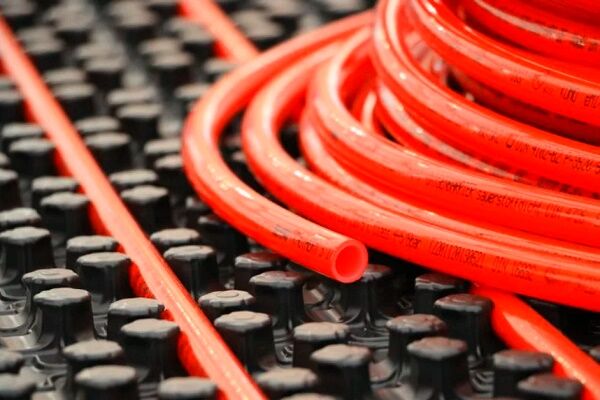
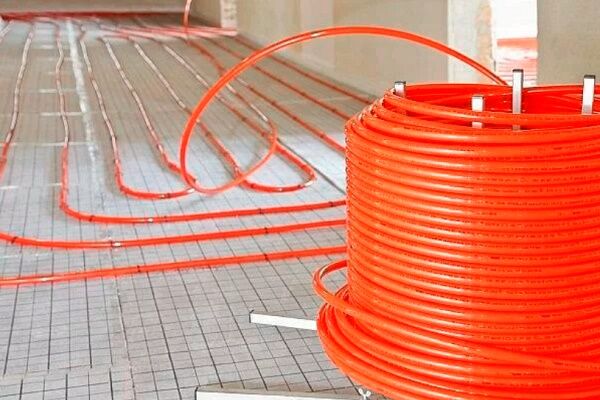
Depending on the technology, it is performed either before or after extrusion.Long pipes in reels made of cross-linked polyethylene are used for arranging heating systems due to their high tightness - the risk of leaks is reduced to zero.
Technical characteristics of linear products made of cross-linked polyethylene:
- outer diameter 10-200 mm;
- wall thickness 2-5 mm;
- average specific gravity 110 g/linear m;
- density 940 kg/m3;
- softening at temperatures above +100ºС, melting +200ºС, combustion +400ºС;
- average working pressure 6 MPa;
- average thermal conductivity – 0.4 W/mK.
Considering that the maximum temperature of the coolant is +90º C, and the pressure does not exceed 4 bar, we can conclude that pipes of this type are excellent for installing water heated floors.

In comparison with corrugated steel or copper pipes, also often used for heated floors, these products have the following advantages:
- Resistance to corrosion processes. The material is not subject to corrosion, exposure to aggressive environments, and does not deform under increased acidity, alkalinity, or upon contact with organic substances.
- Excellent strength characteristics. Resistance to static and dynamic loads, resistance to tearing, bending, stretching, etc. Pipes can withstand low and high temperatures without damage.
- Stable throughput. There is no sediment deposited on the pipeline walls, which reduces the internal diameter of the pipes.
- Elasticity. Flexible pipes do not break when bent under any radius.
- Environmental Safety. When heated, the product does not release toxins.
With proper installation and compliance with the recommended thermal conditions, polyethylene heated floors will last at least 50 years. The entire cost of creating the system pays off in 1-2 years.
Installation of heated floors step by step
The technology of the device consists in the gradual creation of layers laid in a strict sequence. The total thickness of the system will be 10-20 cm, depending on the characteristics of the screed, the insulation and reinforcement used.
The standard process for installing a water floor from polyethylene pipes includes a number of steps:
Preparatory work before construction
It should be borne in mind that the average load created by the “warm floor pie” on the concrete base is 300-350 kg/m2. Therefore, the floors must be designed for this weight.
When installing a heated floor using pipes made of cross-linked polyethylene, the following stages of work must be completed:
- Pipe selection. Calculation of the contour length. Drawing up a laying diagram.
- Preparing the base. Laying waterproofing and insulation.
- Installation of pipe circuits. Hydraulic tests.
- Filling the screed and finishing installation of the selected floor covering.
- Putting the system into operation.
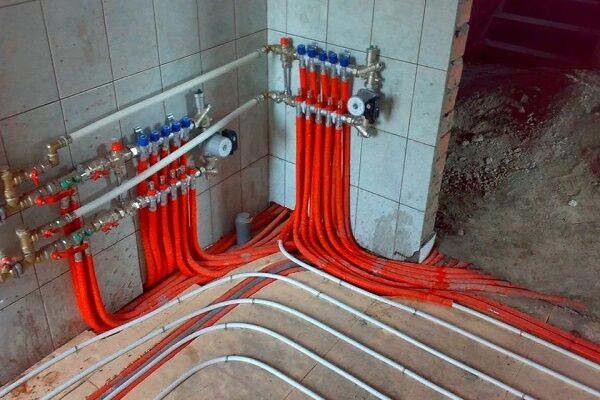
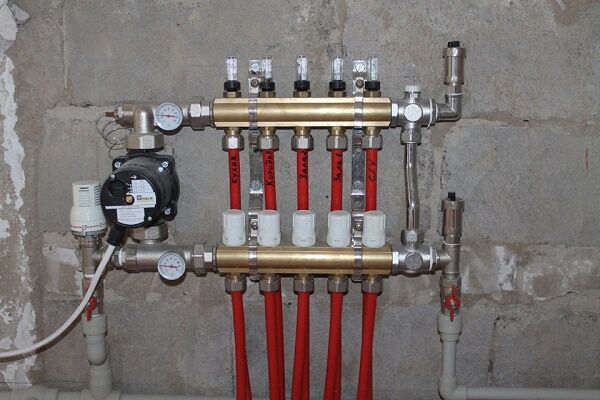
When purchasing manifolds, it is better to give preference to devices with balancing valves and flow metering devices, which will simplify system setup in the future, and in the event of a malfunction, help to quickly identify the problematic circuit.
To build a heated water floor you will need the following:
- water heating boiler for heating the coolant;
- expansion tank;
- circulation pump for forced movement of coolant;
- plumbing fittings: fittings, ball valves;
- pipe reel made of cross-linked polyethylene;
- fasteners for insulation boards and PE pipes;
- distribution manifold unit;
- damper tape;
- insulation and reinforcing mesh;
- screed mortar or dry screed mixture.
All materials should be prepared in advance so that during the process of installing a heated floor you will not be distracted by shopping and purchasing additional components.

Selecting and creating a pipe laying scheme
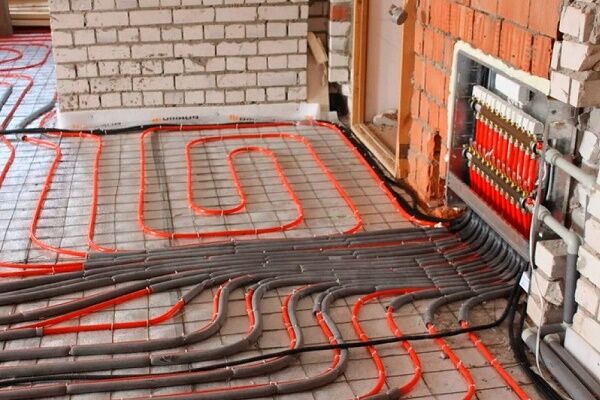
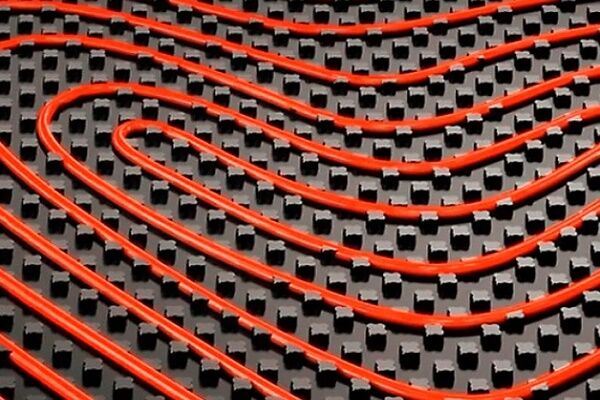
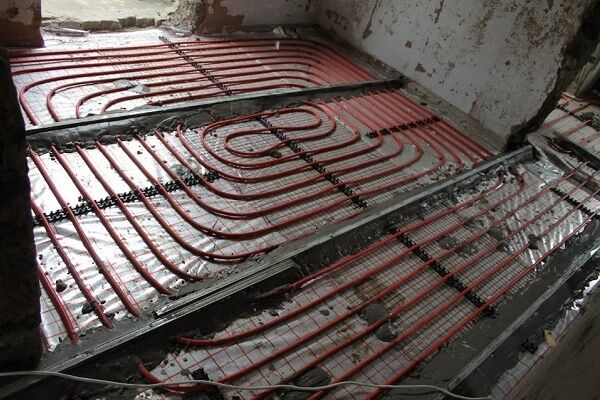
For residential premises, three laying patterns are used: “snake”, “shell” or “snail” and “double spiral”. A spiral “snail” is the simplest option, ensuring a uniform distribution of thermal energy.According to this scheme, water heated floors are most often built, because all angles in it are 90º.
Laying according to the “snake” pattern is somewhat more complicated, because it involves 180º turns. But it is excellent for constructing a system made of cross-linked polyethylene, because pipes made of this material bend freely, and the throughput in the loops is practically not reduced.
The choice of installation scheme depends entirely on the characteristics of the room. If we are talking about the arrangement of large-sized areas, installation is carried out according to the “double spiral” scheme. It is also used if it is planned to allocate zones according to heating intensity, for example in the hall, in front of the entrance or in front of a large terrace.

For simple spiral and serpentine schemes, the optimal contour length will be 60-80 m. For rooms where the length is much greater than the width, a contour length of 100-120 m is acceptable, but provided that larger diameter pipes are used.
The distance between the pipes (step) is 10-35 cm. The wider the step, the less heat will come from the floor.
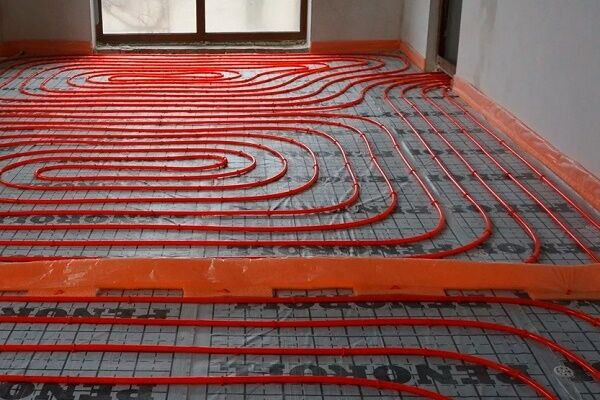
At peak points, where the maximum heat loss is observed, the step width should be minimal, for example, near the front door it should be 10-15 cm, increasing as you approach the center of the room. The distance of the pipes from the walls along the perimeter is 30-45 cm.

Schemes and options for laying a heated water floor pipeline are described in detail. in the article, which we recommend that you familiarize yourself with.
Selection and calculation of the number of pipes
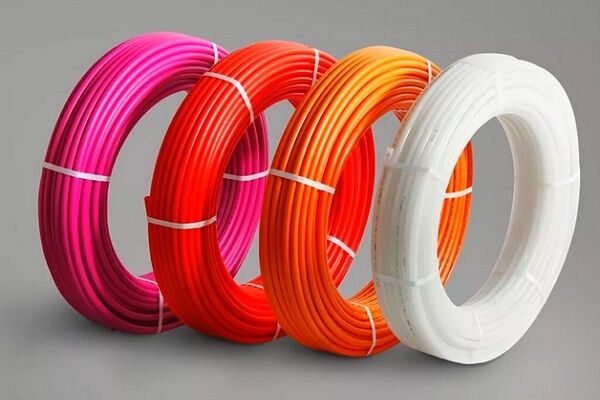
When choosing cross-linked PE pipes, you have to decide what diameter of the product is best to purchase. As practice shows, the best option for installing a heated floor in your own house or apartment located on the ground floor is a 16 mm pipe.
For rooms whose length is several times greater than their width, pipes of 20 or 25 mm can be used. The standard wall thickness is 2 mm.
To calculate the required number of polyethylene pipes, you can use the formula:
D=S / M × k
Where:
- D – design length of the pipe;
- S – area of the heated floor;
- M – average step selected according to the scheme;
- k – safety factor (for rooms up to 30 m2 is 1.1, more than 30 m2 – 1,4).
It should be remembered that the maximum length of a cross-linked polyethylene pipe depends on the diameter - the larger the diameter, the longer the coolant pipe can be. For products with a diameter of 16 mm - up to 90 m, 20 mm - 120 m, 25 mm - 150 m.

About how to complete calculation of water heated floor, including the determination of heat loss and the power of circulation equipment, you will learn from our recommended article.
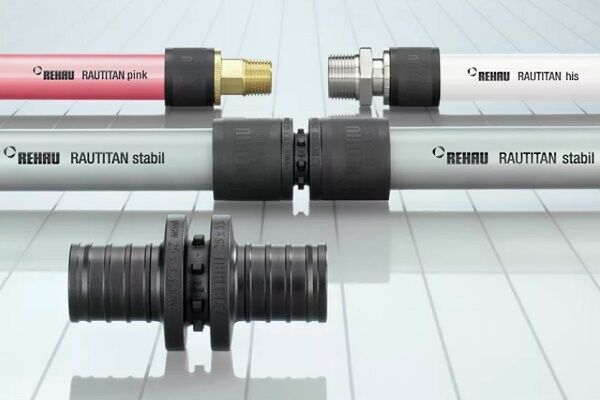
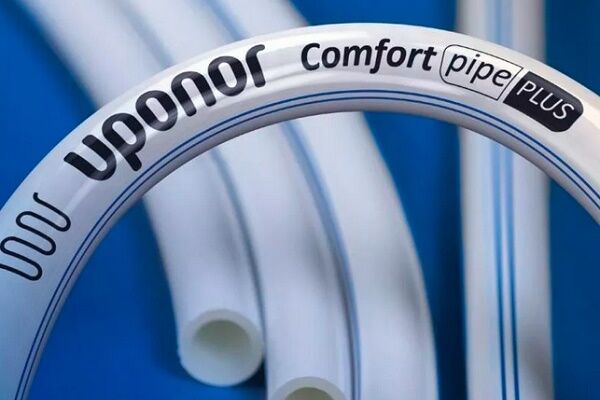
To assemble a water heating floor, it is better to buy products from manufacturers with a reputation and trade name that deserves respect:
All manufacturers, in addition to pipes, produce fittings and fittings; to achieve the highest possible build quality, it is recommended to purchase all components from the same brand.
Preparing the base for pipes
When the calculations for the required number of pipes are completed, you can proceed to preparing the base for the water-heated floor circuit.
This stage includes the following workflows:
- removal of old flooring and old screed;
- laying the insulating layer;
- installation of insulation;
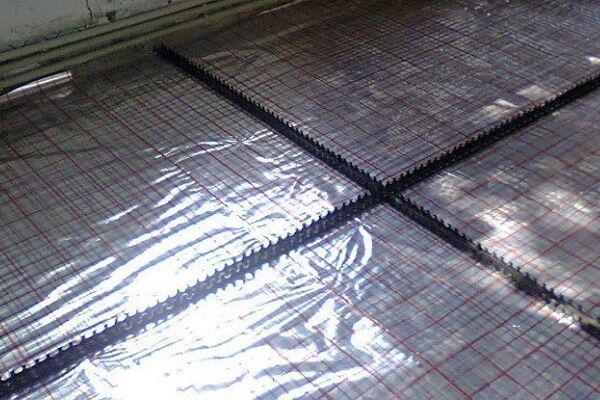
- laying reinforcing mesh;
- damper tape sticker.
First you need to level the base so that the differences are no more than 5 degrees (we check with a building level). For leveling, you can use a sand mixture followed by compaction or self-leveling compounds. The leveled base is removed from dust and debris.
Then the waterproofing layer will be laid. The simplest type is plastic film.
If you have financial capabilities, it is better to use high-quality Russian or European waterproofing in the form of a polymer membrane. It not only reliably protects the floor from moisture, but also allows the warm floor system to “breathe”.

Waterproofing comes next thermal insulation substrate, which can be used as extruded polystyrene foam. This is the cheapest and most effective way to reduce heat loss.
Of the new insulation materials, cork insulation is considered the most environmentally friendly, but its cost is tens of times higher than that of the most expensive polystyrene foam. Insulation boards 5 cm thick are attached to wooden guide rails using dowel nails. The plates are fastened together with glue and special staples.
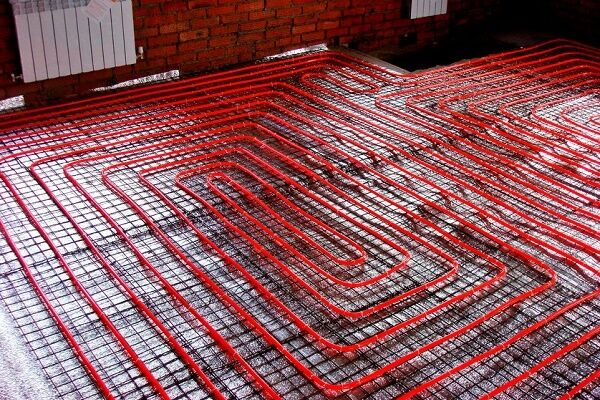
As for the reinforcing mesh, when using polystyrene foam boards there is no need to lay it - the pipeline is laid directly on the insulation. The use of mesh is justified if another layer of waterproofing is laid on top of the insulation.
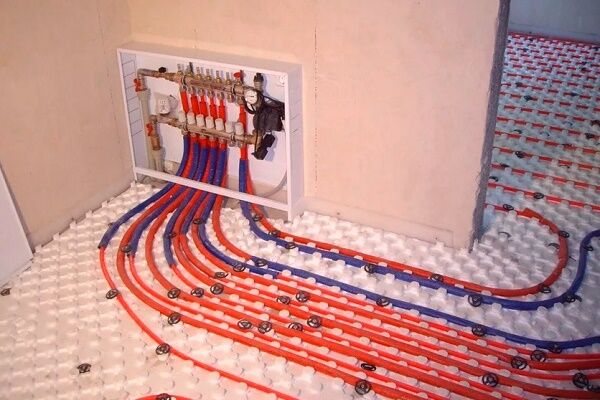
If you don’t want to overpay for insulation, then you need to keep in mind that there are special insulation blocks for sale for installing heated floors, which have channels for pipes.Such blocks significantly increase the cost of creating a heated floor, but they are very convenient to use.
After the mesh layer, it’s time to stick on the compensating damper tape. This is done simply - foam tape is glued around the perimeter of the room, which compensates for the expansion of the future concrete screed. Instead of damper tape, you can use even pieces of polystyrene foam.
After preparing the base, the heating boiler and manifold distribution unit are installed. The boiler is connected to the system water supply and power (gas or electricity).

Information about choosing thermal insulation mats, used in the construction of water heated floors, is described in detail in the following article, which we recommend reading before planning installation.
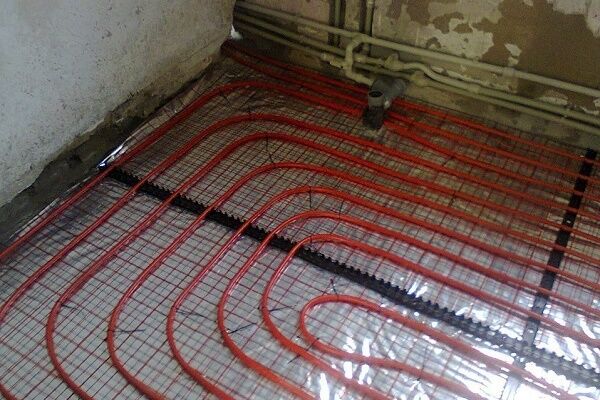
Installation of polyethylene pipes
The heated floor is laid using contours according to a pre-selected pattern. The circuit is a closed ring of pipe, which, upon returning to the manifold, is connected to it using a fitting.
For small rooms, 1-3 circuits are installed. To simplify installation, it is recommended to apply approximate markings to the polystyrene foam boards. If there are markings, it will be easier for you to lay polyethylene pipes and check the step size.
Before the start installation of underfloor heating pipeline it is also necessary to decide how the pipes will be connected and how the polyethylene pipes will be attached to the insulation.
The fact is that pipe connections can be made:
- welding;
- compression fittings;
- press fittings.
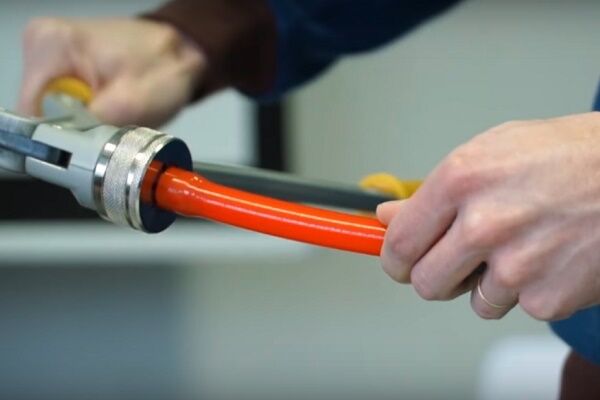
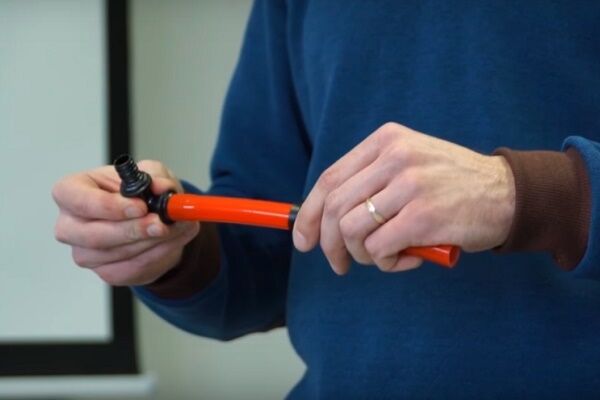
The last option is the easiest to implement and most reliable.To connect the pipes, it is necessary to install a movable coupling, and then use an expander to carefully increase the internal diameter of the pipe to the required size.
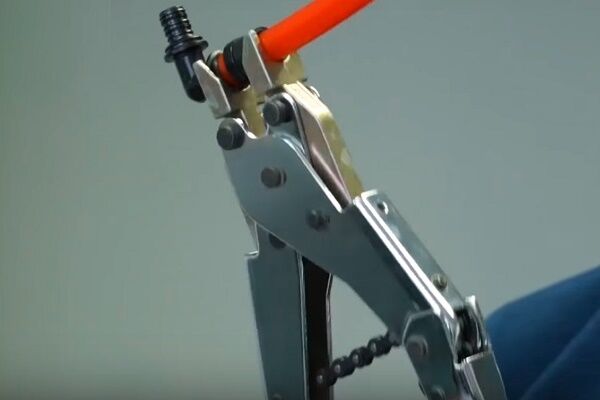
To connect a polyethylene heating floor coil using press fittings, you need to stock up on tools. For a one-time assembly, it is better to rent it; if a large volume is planned, it is advisable to buy:

Before building a system, a beginner in the plumbing industry needs to practice:
Fasten the fitting as far as it will go and push the sleeve over the pipe. The compression joint can withstand prolonged exposure to high temperatures and pressures up to 10 MPa.
As for the method of attaching polyethylene pipes to the insulation, this is relevant if regular polystyrene foam is used.
There are several mounting options:
- polyethylene tightening clamps;
- steel wire;
- fasteners secured with a stapler;
- fixing tracks.
The simplest and most economical method of fastening is with clamps. Consumption is 2 pieces per 1-1.5 m.

There are 10 rules for installing cross-linked polyethylene for heated floors:
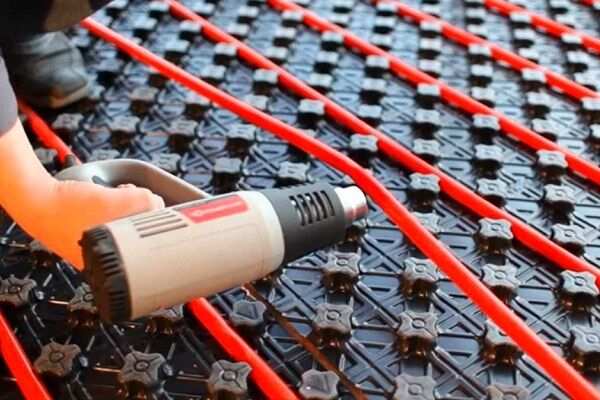
- When laying bends, sharp creases of the material are not allowed.
- Installation work is carried out at a temperature not lower than +18 C.
- After bringing the pipe in from the cold, you must wait until it warms up to room temperature.
- The maximum turning radius for pipes with a diameter of 16 mm should be 10-12 cm.
- During the installation process, it is not advisable to change the selected layout of the coolant.
- Trimming the excess length should be carried out immediately before connecting it to the distribution manifold.
- Do not step on, place heavy things, or place instruments on pipes.
- To move along laid pipes (if necessary), it is recommended to use large sheets of plywood to reduce the load on the coolant.
- To increase the heat retention rate, the pipes coming out from under the floor at the point of connection to the collector unit can be reinforced with thermal insulation.
- The pipes should lie flat, without twisting or excess tension.
After laying the circuit, the pipe returns to the manifold and is connected using a fitting selected to size. After this, the system is tested, the purpose of which is to detect defects before the system is hidden under the screed.
To carry out the tests, you will need a household compressor that can produce a pressure of 4-6 bar.The coolant is supplied into the pipes using a compressor and left for 6-12 hours. When the fastening clamps are removed, they must be reapplied 5 cm below the previous attachment point.

Screed rules
If the hydraulic tests are completed successfully, no depressurization of the pipes has occurred, and the system is completely filled with coolant, then the pipe installation stage is completed. Now you can begin installing the screed and finishing.
For screed devices it is necessary to use a purchased or self-prepared mortar based on M300 cement. The minimum screed height to protect polyethylene pipes is 3 cm above the laid pipe. This thickness will be optimal for uniform heat distribution.
In most cases, the screed is made continuous without expansion joints. Thermal seams are necessary when:
- the room has an area of more than 33 m2;
- room length more than 10 m;
- the room has a complex configuration.
Damper tape is used to create seams. Thermal joints are treated with sealant.
Is it necessary to do reinforcement before pouring the screed? There is no clear answer to this question. Experience shows that the system functions perfectly without reinforcement, but at the same time, the reinforcing layer gives the screed additional strength. For reinforcement, you can use a 100x100 mm mesh made of metal or plastic.
Also, reinforcement will be useful only if the reinforcing mesh does not just lie on top of the pipe system, but “sinks” into the solution, being inside the screed when it hardens.
The correct reinforcement device complicates the laying of the screed, therefore, when there is no experience or confidence that everything can be done correctly, this stage can be skipped. After pouring the screed, the system can be started no earlier than 25-30 days later.

Commissioning of the system
After the final hardening of the poured screed, it can be fed into the system coolant, the temperature of which should not be higher than +26ºС.
The algorithm for commissioning a heated floor system made of cross-linked polyethylene is as follows:
- collector connect to the supply and return pipelines;
- we open all circuits simultaneously using taps on the manifolds;
- We install the air vent valves in the “open” position;
- start the circulation pump;
- set the temperature to +25-26º C;
- raise the pressure in the system to working 1 bar;
- we close all circuits except the longest with taps;
- record all positions of flow meters and balancers;
- We open the next circuit in length and use a tap to equalize the pressure along the first circuit.
In this way we connect and balance all the circuits of the heated floor. The performance of the heating can be assessed only after 2-3 months of operation.
With features and rules for installing underfloor heating on a wooden base read the article, which describes in detail the rules for the design and construction of the system.
Conclusions and useful video on the topic
The rules for calculating the underfloor heating system are given in the video:
After laying the pipe, it is important to test it before carrying out further installation work. About this in the video:
Home craftsmen often make mistakes when assembling heated floors. The main problems of installing polyethylene pipes are covered in the video clip:
A correctly selected and installed heated floor will make your home warm and comfortable without any special expenses. The technology for constructing an underfloor heating circuit made of PE pipes is simple and can be used not only by professional builders, but also by ordinary people. If you follow all the rules and recommendations, the system will serve you well for a long time.
Have you ever had to lay polyethylene pipes when installing a heated floor? Perhaps you know some technological nuances that are not mentioned in the article? Please write comments, ask questions, post photos on the topic in the block below.


I would like to note that the temperature of the coolant for a heated floor is still not 90 degrees, but a maximum of 45. Otherwise, your heels will simply fry. And this point makes heated floors an excellent heating option when using a heat pump, where this temperature is optimal for the system. Due to the large heat transfer area (much larger than that of radiators), this temperature is quite sufficient to heat the room.
I made my first heated floor back in the 2000s, then only pipes were offered. Well, after 7 years, they started leaking for me. In the morning I got up and there was a flood in the bathroom.
When I ordered the installation of the floor for the second time, I already approached the issue wisely, studied everything, and polyethylene is really the most suitable material now. Durable, resistant, does not clog, does not rust. I don’t know about 50 years, but it will definitely last 20.
Hello. Before screeding, the pipe must be inflated