Laying underfloor heating pipes: installation + how to choose a step and make a less expensive circuit
The performance of water underfloor heating depends on the layout and pitch of pipe laying.Therefore, to design a system, it is not enough just to buy components; you also need to calculate the heat transfer, choose the optimal arrangement of rings or turns of the pipeline.
Agree, no one is attracted by the prospect of investing money and not getting the intended effect. You will learn everything about the design of underfloor heating and the schemes according to which underfloor heating pipes are laid from the article we presented.
Familiarization with the information we have verified and systematized will help you create a perfectly functioning heated floor. The basis for the information we offer is the requirements of construction regulatory reference books.
We have outlined in detail the principle of operation of floor heating circuits, described the design options and technologies for their implementation. Informative photos and video tutorials clearly confirm the presented data and make the process easier to understand.
The content of the article:
Water heated floor system
A distinctive feature of heated floors is that they do not have external heating structures, and the system itself accumulates and radiates the resulting heat.
With proper heat distribution over the surface of the flooring, you can save 30% or more on coolant consumption.
To rationally use the floor heating system, let's consider additional ways to help save:
- The length of the liquid circuit does not exceed 70 m. When choosing the optimal step for laying pipes, the coolant is transported with virtually no losses.
- Mixing hot and cold flows. The use of return water makes it possible to waste less energy from the boiler.
- Drawing up a detailed layout of the circuit with precise calculation of the step. Preliminary distribution of furniture positions will allow you to save on consumables, and, accordingly, on the circuit itself.
- When the system reaches maximum temperature, reduce the temperature by 20 °C. This action will help save 13% of the coolant.
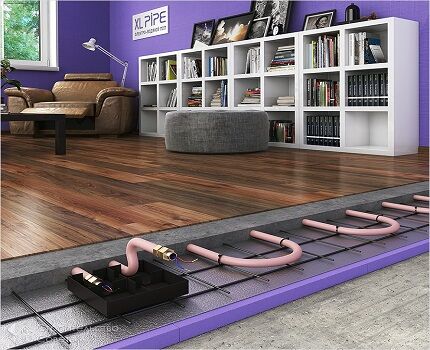
In order to get the best result, you must strictly adhere to the installation technology. The heating mechanism of such a system consists of several layers, each of them has its own function.
High-quality heating of the room by laying liquid heated floors is organized in several stages:
- Waterproofing. This layer eliminates the appearance of products resulting from condensation. Even polyethylene film can be used for the substrate.
- Thermal insulation. The main task is to eliminate heat leakage into the lower part. In most cases, sheet insulation is used. The thickness should be selected based on the conditions of the room - whether there is a basement or ground floor in the house. The colder the climate, the thicker the insulation.
- Foil or heat reflecting element. Foil film that promotes maximum redirection of heat flow to the top. Laying this material allows you to save up to 5% on coolant consumption.
- Pipe installation. The main structure of the entire mechanism. Heated liquid moves through the pipes. If, when laying a heated floor, you choose the correct pitch between the turns of pipes, this will enable efficient heating with the least amount of heat resources.
- Screed. Provided that all previous layers were laid on a flat surface, the thickness of the screed will be minimal - 3.5 cm. A fill of ordinary cement-sand mixture, 50 mm thick, is often used. The thermal conductivity of such a material is 0.4 W/(m*K).
- Flooring. The liquid floor allows the installation of any material. Nevertheless, ceramic tiles have the best characteristics, namely thermal conductivity and maximum efficiency.
The installation technology involves the initial arrangement of the collector unit. Only after this can you begin laying the individual layers of the system.
The role of the collector unit
Not everyone knows that heated floors with a water circuit can function normally without a collector. But even less people know what this looks like in practice.
However, in most cases, a heated floor system is installed in several rooms. In this case, without a collector unit it is impossible to ensure uniform distribution of the coolant.
Installing floor heating without a collector has a number of disadvantages: the coolant can only be supplied at the same temperature as in a general heating system, automatic air outlet is not possible, the same applies to pressure regulation.
Collector connection diagram
The choice of a ready-made mechanical or automatic collector model depends on the characteristics of the heating system.
The first type of control module is recommended to be installed for heated floors without a radiator, the second can be used in all other cases.
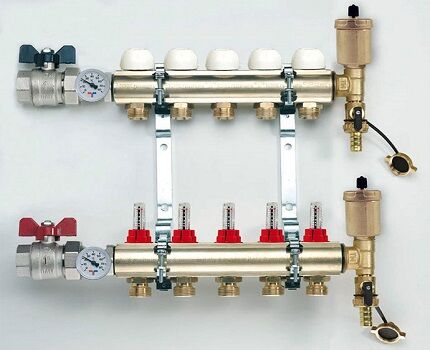
According to the execution scheme distributor comb assemblies for heated floors is done as follows:
- Installation of the frame. The following can be selected as the installation area for the collector: a prepared niche in the wall or a collector cabinet. It is also possible to mount directly to the wall. However, the location must be strictly horizontal.
- Connection to the boiler. The supply pipeline is located at the bottom, the return pipeline is located at the top. Ball valves must be installed in front of the frame. They will be followed by a pump group.
- Installation of a bypass valve with a temperature limiter. After this, the collector is installed.
- Hydraulic test of the system. Check by connecting to a pump, which helps build up pressure in the heating system.
In a mixing unit, one of the required elements is a two- or three-way valve. This device mixes water flows of different temperatures and redistributes the trajectory of their movement.
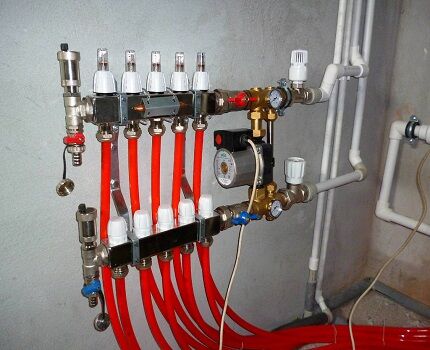
If servo drives are used to control the manifold thermostats, then the mixing unit equipment is expanded with a bypass and bypass valve.
Rules for calculating pipe footage
You can calculate the footage of elements for assembling heated floors after drawing up a diagram of the entire system.
When calculating, the following nuances are taken into account:
- Pipes are not laid in places where furniture, large floor equipment, and household appliances are placed.
- The length of contours with different cross-sectional sizes must comply with the following parameters: for 16 mm it should not exceed 70 m, for 20 mm - no more than 120 m. The location of each contour corresponds to an area of 15 m2. If you do not follow these recommendations, the pressure in the heating network will be low.
- The discrepancy between the length of the lines is no more than 15 m. For a large room, several heating branches are installed.
- Subject to use effective thermal insulation materials, the optimal pipe spacing is 15 cm.If the house is located in an area with harsh climatic conditions, where the temperature drops below -15°C, the distance should be reduced to 10 cm.
- If the installation option was chosen in 15 cm increments, the material costs are 6.7 m per 1 m2. Laying pipes at intervals of 10 cm - 10 m by 1 m2.
Warm floors can only be equipped with a solid pipe. Depending on the footage, several or one bay with pipes for the water circuit. Then it is divided into the required number of lines.
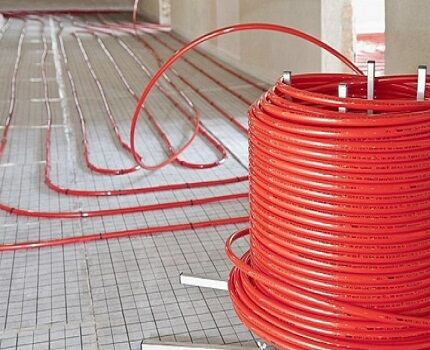
Work on installing heated water floors always begins on the coldest side of the room. The issue of choosing the optimal route for the coolant is very important - the water temperature decreases closer to the end of the circuit.
The nuances of choosing the optimal step
The degree of efficiency and cost of the entire circuit depends on the correct choice of the pitch between the laid heated floor pipes.
However, its calculation depends on many factors. The standard distance between contours is 100-200 mm.
Variable or constant pitch is also possible:
- If the heating load is less than 50 W per 1 m2, the contour step will be constant and equal to 200 mm.
- With an increased heating load of 80 W per 1 m2 or more the distance will be 150 mm.
- In other cases, it is necessary to use a variable step. For example, along the perimeter of one or two external walls, the water circuit will be laid in a smallest increment of 100 mm. Moving to the center of the room, the gaps will gradually increase to 200 mm.
In practice, if you plan to heat underfloor heating economically, a step of 150 mm is used. This indicator is optimal in almost any conditions.
If the heat loss of a building exceeds the heat transfer, it is worth thinking about its effective insulation - in this case, reducing the pitch will not solve the problem.
A detailed algorithm for calculating pipes for heated floors is described in this article.
Water circuit installation diagrams
Schematically, laying pipes for arranging a liquid circuit can be done in one of the following ways:
- coil;
- double coil;
- snail.
Coil. The method of laying such a contour is the simplest and is performed in loops. This option will be optimal for a room divided into zones with different purposes, for which it will be convenient to use different temperature conditions.
The first loop is installed around the perimeter of the room, then a single snake is inserted inside. Thus, a maximally heated coolant will circulate in one half of the room, while a cooled one will circulate in the other, and accordingly the temperature will be different.
The coil turns can be spaced evenly, but the bends of the water circuits in this case will have strong creases.
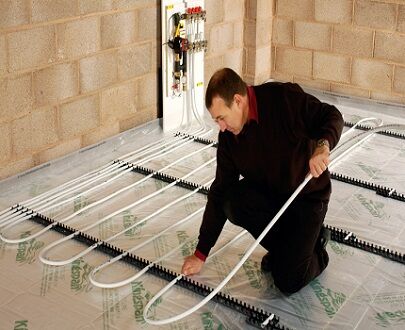
Double coil. In this case, the supply and return circuits are located next to each other throughout the room.
Angle coil. It is used exclusively for corner rooms where there are two external walls.
The advantages of the serpentine shape include simple planning and installation.Disadvantages: temperature changes in one room, pipe bends are quite sharp, so you cannot use a small pitch - this can cause a pipe break.
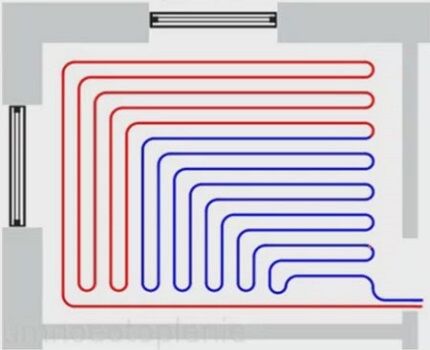
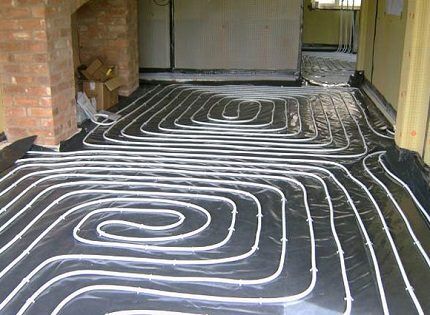
Snail. Using this arrangement, supply and return pipes are installed throughout the room. They are placed parallel to each other and installed starting from the perimeter of the walls and moving to the center of the room.
The supply line in the middle of the room ends in a loop. Next, parallel to it, a return line is installed, which is laid from the center of the room and along its perimeter, moving towards the collector.
The presence of an external wall in the room may require double laying of pipes along it.
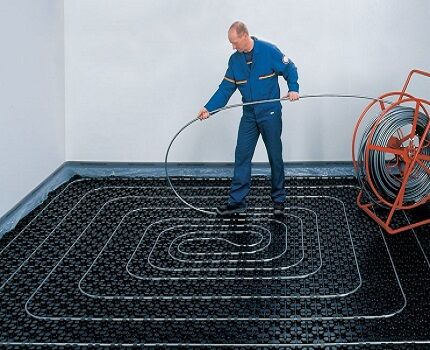
The advantages of this method include: uniform heating of the room; due to smooth bends, the system has little hydraulic resistance, and savings in consumables can reach 15% compared to the serpentine method. However, there are also disadvantages - complex design and installation.
Basic methods of pipe installation
There are only two pipe laying method for arranging heated floors - flooring and concrete. In the first method, ready-made materials are used for the base: polystyrene insulation and modular or slatted panels. There are no wet jobs that require a long drying time, so installation is quick.
When using the second option, the heating network is walled up with a screed.Depending on the thickness of the concrete, the time it takes for it to dry completely is calculated. It will take 28 days to harden and only after that is it possible to install the selected floor covering. This is the most labor-intensive and financially expensive method.
#1: Laying on profile thermal insulation boards
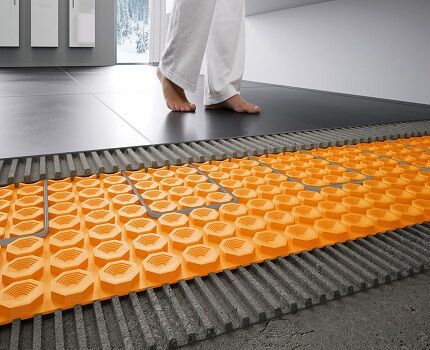
Arranging a warm floor system using this method is the simplest. Polystyrene insulation mats are used as the basis here.
The standard parameters of such slabs are 30*100*3 cm. They have grooves and low posts on which the finishing material is laid.
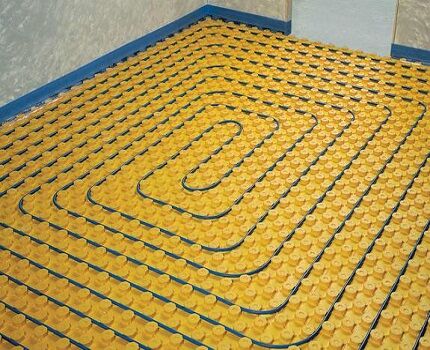
In this case, pouring a concrete screed is not necessary. If tiles or linoleum are used for flooring, gypsum fiber sheets will initially be laid on the base. The thickness of such plates should be at least 2 cm.
#2: Device using modular and rack panels
In most cases, such panels are used in houses built from wood. Fastening of pipes for arranging a heated floor is carried out on a rough foundation.
The modular system is equipped with chipboard panels 2.2 cm thick, on which the heating lines are laid. These modules are equipped with channels to accommodate aluminum fixing plates. With this installation method, the insulation layer will be located in the wooden floor.
All strips are placed with a distance of 2 cm. Based on the applied pitch between the pipes, strips of the appropriate length (15–30 cm) and width (13–28 cm) are used.
To reduce heat loss, pipe latches are installed on the plates. If linoleum was chosen for the final floor covering, one layer of gypsum fiber boards is laid on the pipes; if laminate or parquet boards are used, they are dispensed with.
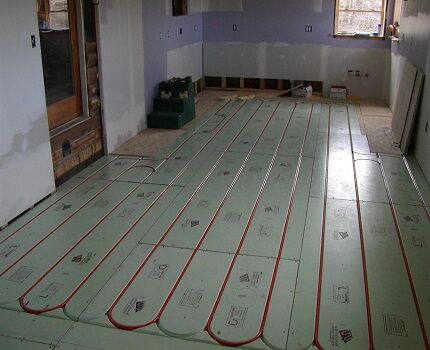
The slatted flooring system is almost identical to the modular one, however, it does not use panels, but strips, the minimum width of which is 2.8 cm.
Laying is done directly on the logs in increments of 40-60 cm, and the distance between the slats is at least 2 cm. For thermal insulation, choose extruded polystyrene foam or fibrous mineral wool.
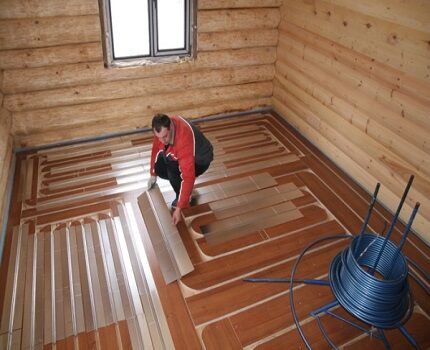
Both methods are more suitable for wooden floors. In other cases, a more complex option with a concrete screed is chosen.
#3: Installation of pipeline with screed
Despite the labor-intensive process, installation of a heating network with a concrete screed is the most popular.
The process consists of the following steps:
- First of all, the base is prepared. Irregularities in the subfloor are eliminated using a hammer drill.
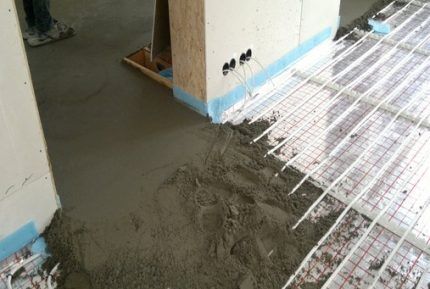
- The first layer is waterproofing material. It is spread in strips so that the edges overlap each other by 20–30 cm. The film should also extend to the base of the walls by 15 cm. The joints are glued with construction tape.
- Thermal insulation is laid over it.
- A damper tape is glued between the future fill and the walls.This action is required to compensate for the expansion of the screed when the floors are heated.
- Laying reinforcing mesh. It helps to increase the strength of the screed.
- Pipes are attached to the fittings according to the chosen pattern using plastic ties.
- A control check of the heated floor system is carried out by filling it with liquid and pressing it.
- Next, the guide beacons are installed.
- The final stage is pouring the cement screed.
For rooms with a large area, the sector division method should be used, with cells no more than 30 m2. For each of them it is necessary to arrange an individual circuit.
If the lower floor is heated, then polystyrene foam with a thickness of 20–50 mm is used as insulation. When there is an unheated basement floor or basement below, the thickness of the thermal insulation should be 50-100 mm. Pouring heated floors with a concrete-sand mixture can be done with or without a reinforcing mesh.
If polystyrene foam boards with connectors for the contours act as insulation, the use of a mesh is not necessary.
When standard thermal insulation material is used, a thin polymer or metal mesh is used to fix the heat-conducting line.
On our website there is a series of articles devoted to the design, installation and connection of water heated floors.
We advise you to read:
- How to make a water heated floor with your own hands: a step-by-step guide from design to assembly
- Connection diagram for water heated floor: design options and device manual
Conclusions and useful video on the topic
How not to make a mistake when calculating the optimal step for arranging a circuit at the lowest cost:
How to lay the contour of heated floors, the main methods, their disadvantages and advantages:
Difficulties that you may encounter when choosing pipes for a warm water floor:
The service life of the water heating circuit is about 50 years. However, such high performance is only possible if you adhere to all the rules when laying them.
Do not forget that the correct choice of the optimal step will help to significantly save on the purchase of materials, as well as reduce heating costs during operation.
Share with readers your experience of laying the contour of a water-heated floor. Tell us what method and installation scheme you used. Please leave comments on the article and ask questions that interest you. The feedback form is located below.


I made a heated floor in my living room at home. I always have children there, so I decided it wouldn’t hurt. Although the “experts” I knew scared me that the coating over the heated floors would crack, that the pipes could burst and the like. I did everything myself. I can say that everything is fine. Nothing broke, the floor was intact, and most importantly, warm. I noticed that gas consumption for heating the house has decreased by exactly 30 percent. Well, the main thing is to do everything correctly so that problems do not arise.
There is a desire to make a warm floor for your home. It’s not even a wish yet, but more of a dream. I, of course, estimated how much it would cost, but so far only superficially. I myself saw such a floor from a friend from work when I was visiting her, and the impression was very positive. Sooner or later children will appear, and it’s also pleasant to walk on a warm floor. Someday I'll get together and do it!