How to make a staircase to the second floor with your own hands: step-by-step manufacturing and installation instructions
When you independently build a house with two or more floors, you need to make a staircase yourself. If you have the skills to work with the material chosen for the construction of such a structure, this is possible. To make the staircase not only attractive in appearance, but also reliable and safe, it is important to correctly perform the calculations and take into account the basic requirements and nuances. Master classes with step-by-step instructions will help with this.
The content of the article:
Main parts of the structure
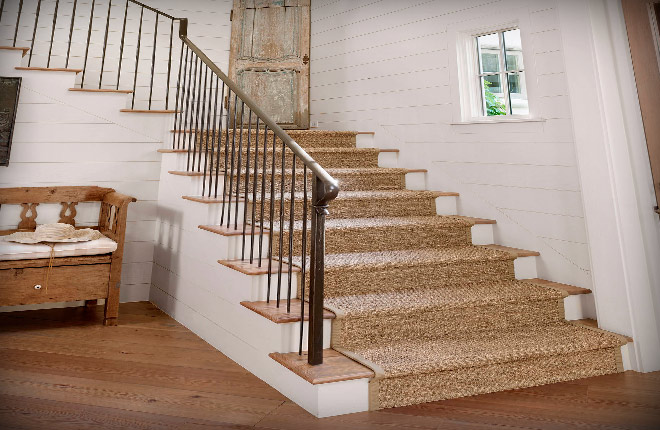
According to their shape and design, interfloor stairs are divided into marching, bolt and screw. The first option is a design of one or more groups of steps separated by platforms or turning steps.
In private houses, staircases are most often made with their own hands. They are distinguished by their reliability, ease of use, and ease of manufacture.
Marching structures vary in shape:
- Direct. Single march ones are the easiest to do. They include up to 18 steps and do not have a turntable. Using this form is possible if the ceilings in the house are low.

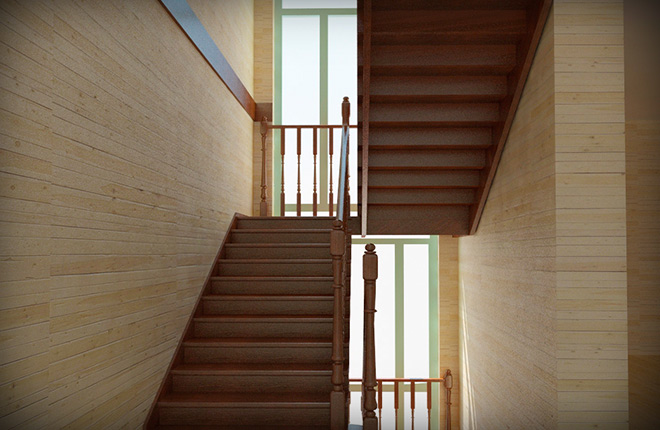
- L-shaped. The most convenient and compact option for a private home. Marches (groups of steps) are usually located along two adjacent walls. Between them there is a small platform or turning steps.
- U-shaped. Such staircases consist of two flights and a large platform (the form is used in the entrances of multi-story buildings).Lifting takes up more space. Suitable for private houses with high flows. There is often enough space on the site to place large pots with indoor plants or a comfortable chair.
- T-shaped. Consists of 3 marches. The first group of steps begins on the ground floor, and the next 2 flights diverge from the platform between them to the left and right. The climb looks majestic, but takes up a lot of space.

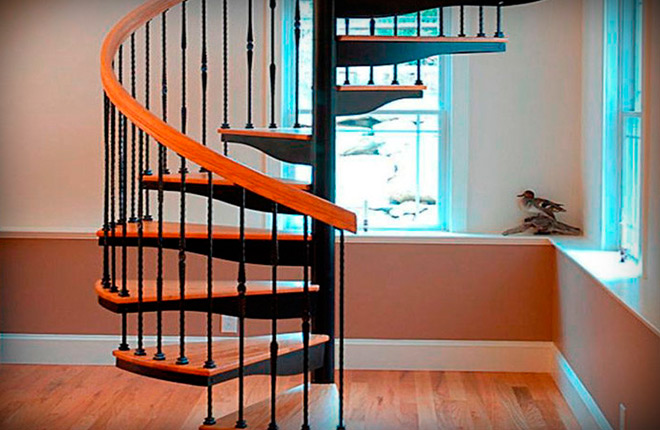
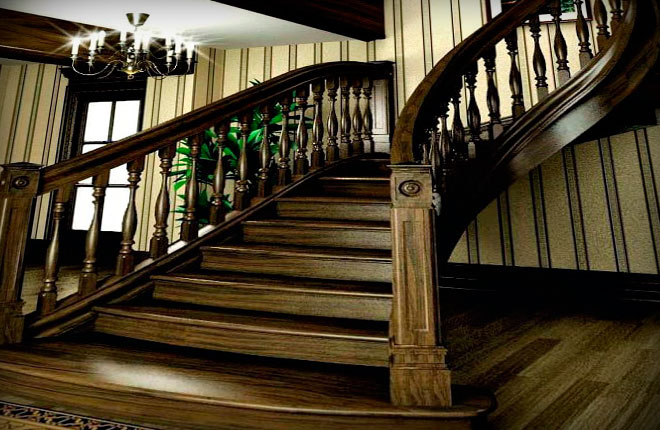
Spiral staircases are structures with a base in the form of a support pillar and turning steps around it. This rise looks impressive, but is difficult to install. In addition, it is less convenient to use.
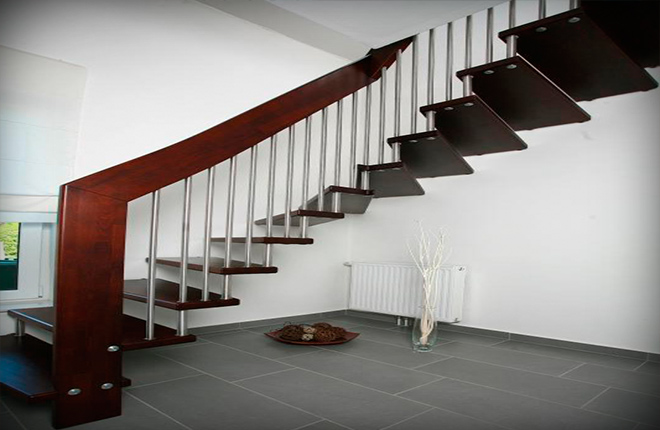
Stairs on rails are frameless and consist of steps that are attached directly to the wall. Due to this, they look airy and weightless. This is an easy-to-use and easy-to-use option. It's not difficult to make.
This is interesting for you! Metal staircase to the second floor. Do-it-yourself turning staircase.
Parts of stairs
To make a staircase in a private house with your own hands, you need to know the main parts of the structure. Its base depends on the type of product.
| Type of stairs | Base |
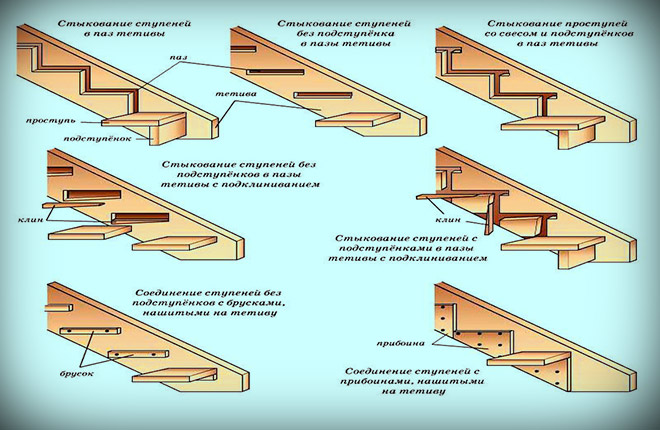
| Marching stairs | Bowstring. Sloping beams supporting the steps on the sides. On the inside of the bowstring there are grooves into which the ends of the steps are inserted. The stronger the bowstring, the more reliable the design. Kosour. These are the side parts of the lifting structure with a stepped edge. When using such a base, I lay the steps on top. Sometimes they are supplemented with a support beam. This basis is considered more reliable. |
| Spiral staircase | Rack. A rod to which wedge-shaped steps are attached in a spiral. |
| Bolt ladder | Boltsy.Metal fasteners that are mounted directly into the wall. I attach steps to them. |
An important part of the staircase is the step. The horizontal part is called the tread. The main load falls on her.
An optional element is a riser. This is a vertical bar that connects the treads to each other. It adds reliability and attractiveness to the design.
The shape of the steps is:
- Direct. They have the shape of a regular rectangle. Used in marching and bolt stairs.
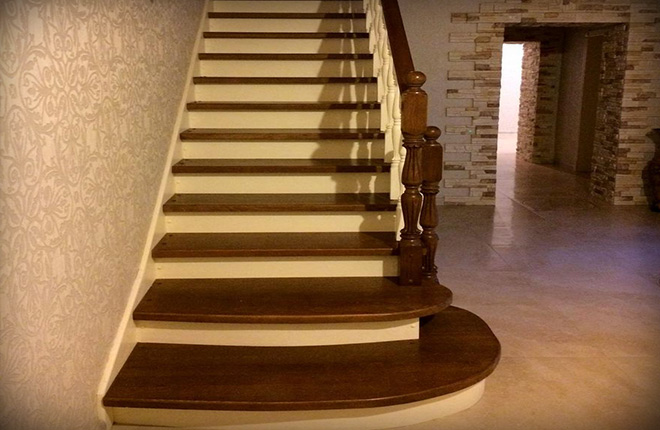
- Outsiders. They have a semicircular shape, narrowed on one side. Used to make turning parts and spiral staircases.
- Arc-shaped. Semicircular large steps with a rounded front edge. They are used at the base of the structure for decorative purposes.

Marching stairs consist of marches and platforms. Marches usually include 9-11 steps. Between them there are platforms, or turning steps.
To make climbing to the second floor convenient and safe, the stairs are complemented with railings. They consist of:
- Handrails. The upper part of the fence, which is a horizontal crossbar. It needs to be made smooth so that it is comfortable to rest your hand on.
- Support pillars. Vertical supports on which the handrail rests.
- Baluster. Crossbars located between the steps and the handrail. Provides additional fall protection.
The distance between the balusters should be made so that the child’s head does not fit into it.
Material selection
The construction of interfloor stairs is possible from different materials. The following options are common:
- Wooden. The most popular material for the construction of interfloor structures with your own hands.It is characterized by ease of installation, attractive appearance, availability of materials, and durability. The disadvantage is the need to periodically update the varnish coating. If this is not done, the steps will look shabby. Without a protective layer, they begin to rot.
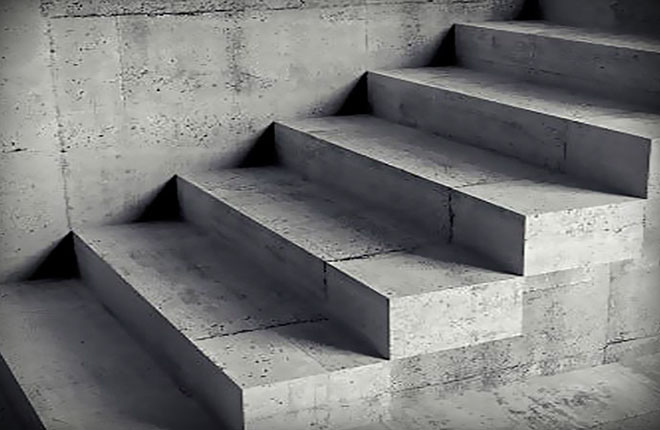
- Concrete. These are stairs made of inexpensive material, characterized by reliability and long service life. The downside is the unattractive appearance. Making them yourself is difficult.
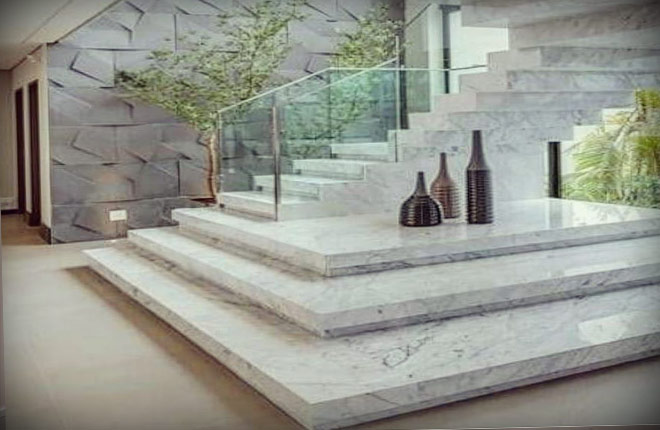
- Made from natural stone. Structures made of granite or marble look majestic, durable, and hopeful. The disadvantage is the high cost, as well as the impossibility of self-installation without experience in such work.
- Metal. Metal stairs are durable. If you have the skills, welding work is easy to manufacture. Such structures do not look organically in all interiors. With high humidity they become rusty over time. If you make the staircase from stainless metal or cover all the elements with an anti-corrosion compound, then this problem can be avoided.
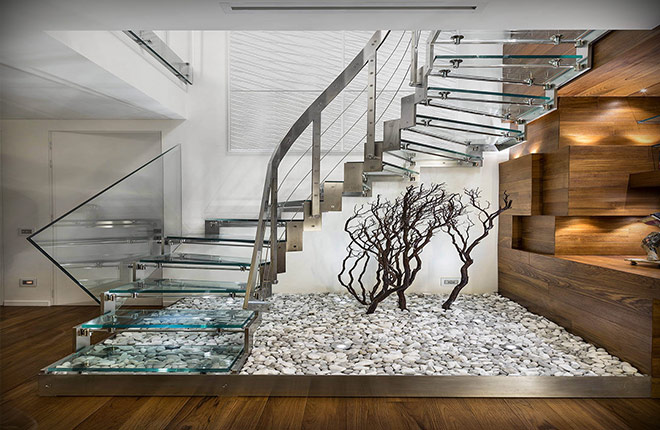
- Glass and ceramic. They look stylish and unusual. It is difficult to make a staircase yourself from such materials. The steps can be quite long.

Of all the materials presented, wood is most often chosen for private homes. Coniferous, deciduous and hardwood species are used.
The wear resistance of the product depends on the quality of the wood. The following species are chosen for interfloor stairs.
| Breed | Characteristics |
| Larch | Strong, durable material. It is distinguished by its rich color, fire resistance, ease of processing, and resistance to rotting. |
| Oak | A durable breed with high strength and high moisture resistance.It has a noble appearance and rich color. The disadvantage is the high cost. |
| Fur tree, pine tree | The most affordable breeds. The disadvantage is softness and low wear resistance. When processed and over time, wood changes shade and appearance. To improve the structure, you can apply colored stain. |
| Birch | It has an average density, which is superior to pine, but inferior to oak. The rock can withstand loads and local pressure. |
| Maple | Difficult to process, since the absorption of any products by wood occurs slowly. The consumer is attracted by its light, beautiful shade and high strength. |
| Ash | The strength of the rock is even higher than that of oak. The beautiful color and unusual pattern of wood make it a luxurious material for a private home. The advantage is wear resistance and impact resistance. Disadvantage: low resistance to high humidity and microorganisms. To level out this drawback, registration is done with moisture-proofing agents. |
| Beech | A strong and durable breed with a uniform shade of the core. Differs in ease of processing. Needs impregnation with moisture-protective agents. |
How to calculate dimensions
To make a staircase with your own hands, you need to do the calculations correctly. This will ensure the reliability and attractive appearance of the product.
If the staircase is designed together with the house, then use time-tested parameters for the rise height and tread width: 150,160,170 mm for height and 290-300 mm for width.
When designing a structure in an already finished building, you will have to calculate each parameter separately.Otherwise, the finished structure may be larger than the space prepared for it or may not reach the second floor.
To make calculations faster, use an online calculator or tables with ready-made values.
Stair width
The width of the stairs in a private house should be such that 2 people can comfortably move along it at the same time. But if there is not enough space in the room, the design is adapted for one person, only this reduces its convenience. Also, along a narrow ramp it will not be possible to lift assembled furniture and other large items.
Most projects assume a step width of 110 to 150 cm. These parameters are considered the most suitable for private houses.
Common parameters for the width of flights of stairs:
- 80-100 cm. An option for those who do not want to take up space with a lifting structure. Such a ladder cannot be climbed by 2 people at once, but it does not take up much space and requires less material.
- 100-125 cm. A convenient structure that can be climbed by two. These are the most popular parameters for interfloor lifts. They are more expensive than the previous version, but more convenient to use.
- 125-150. To construct such a lift, more material is required. But the structure looks impressive; 2 people can climb it at once without crowding each other.
Smaller steps will be inconvenient for even one person to climb. Wider flights require more financial investments, take up a lot of space, and make the interior heavier.
Height
In order for the staircase to be the desired height, you must take the correct measurements.To do this, measure the distance from the floor of the first floor to the floor of the second floor, along with the thickness of the lintels and the finishing floor.
If you change the distance from the floor to the ceiling, the staircase will be short. It will be problematic to complete the missing step so that the ascent is comfortable and looks harmonious.
Span height
The flight height must be such that the distance from the bottom step to the ceiling is at least 2 m. Moreover, such parameters must be maintained on any part of the stairs. Otherwise, tall people will have to climb bent over, which is not only inconvenient, but also unsafe.
Steepness
The steepness or angle of inclination of a staircase is measured in degrees. Parameters from 35 to 45 degrees are considered optimal. These stairs are convenient to climb, but they do not take up much space.
There are climbs with a smaller angle of inclination - 25-30 degrees. Such stairs are safer and more convenient for small children and the elderly. However, they take up a lot of space and not everyone has the space to build such a structure.

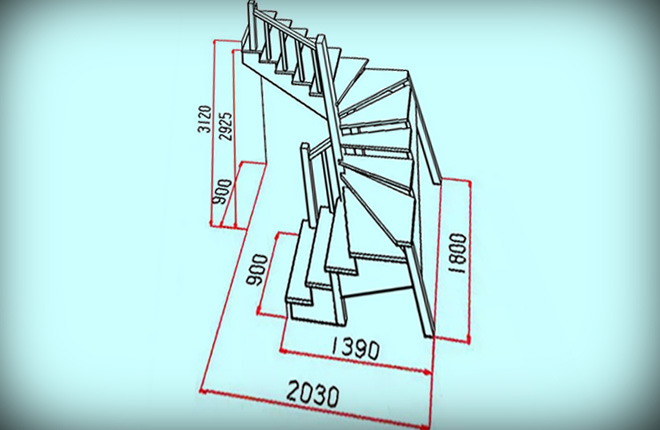
The angle of inclination of the stairs is easy to calculate. To do this, you need to make a diagram on a sheet of paper. The drawing is made on a scale of 1:10. Draw a vertical line corresponding to the distance from floor to ceiling. From the bottom point of the vertical segment, draw a horizontal line, the length of which is equal to the length of the space allocated for the installation of the lifting structure. The ends of the segment are connected to form a triangle.
Measure the angle between the end of the horizontal segment and the hypotenuse (oblique line). This will be the slope of the stairs.
If the angle is greater than 45 degrees, then the stairs are too steep and inconvenient. In this case, make several flights.
steps
To make the climb safe, the steps must be comfortable. If the staircase is laid at the design stage of the building, then the staircase can be made according to generally accepted standards. In this case, the width of the tread will be 29-30 cm, and the height of the riser will be 15-18 cm.
If the stairs are made after the construction of the house, then use one of the formulas:
- The first is called the safety formula. According to it, the difference between the width of the tread and the height of the rise is 12 cm, and the sum is 45 cm. Of course, it is almost impossible to accurately maintain such proportions, so you need to try to keep the deviations to a minimum.
- Another calculation option is called the Blondel formula. According to it, the sum of the tread width and the square of the rise height varies between 60-64 cm.
Length
To calculate the number of steps, the ceiling height is divided by the rise height. If the value turns out to be fractional, then the remainder is distributed among all stages or it is necessary to make the lower stage.
The number of steps in one flight should not exceed 18 pieces. Otherwise, you need to make several flights or add winder steps. This complicates the installation of the structure, but increases its safety.
How to make a staircase - step-by-step instructions
To make a wooden staircase with your own hands, you need to perform a sequence of works and follow step-by-step instructions. Start work with load-bearing elements.
It is important to check its level after assembling each element. This will help avoid distortion.
The master class is dedicated to wooden stairs. This material is the easiest to work with; it does not require expensive equipment or specific skills.
At the first stage of assembling the stairs, you need to make support pillars.They can have a cylindrical or square cross-section. These elements must be made of strong, smooth wood without knots or other damage. There is a significant load on the load-bearing element.
The support posts are attached to the ground floor at the base of the stairs. The height depends on the shape of the building. For straight single-flight buildings, support pillars are sometimes made from floor to ceiling. The supporting structure resting on the lower and upper floors is reliable. However, more often this element ends at the level of the handrail of the railing.
If the rise involves two marches, then the upper ends of the support pillars should be at the level between the marching platform and act as a support for this part.
Support poles are fastened using metal corners, zip bolts, studs, etc. Often the main method of fastening is combined with wood glue for greater structural reliability.
Pairs are made in the support pillars for stringers. If you use tall structures that reach the ceiling, then make a groove for the handrail.
Assembling the stringer
For a single-flight staircase, two stringers are used. This supporting element is more convenient for self-assembly compared to a bowstring.
Stringers are made from thick boards. A stepped edge is made at the top of the element. Treads will be laid on the ledges.
To cut out the recesses yourself, mark the height of the riser and the size of the tread on the board. The calculated indicators cover 2-4 cm. The horizontal parts of the recesses should be parallel to each other, and the vertical parts should be located at right angles to them.
According to the markings, the board is cut using a jigsaw. To facilitate installation work, you can order ready-made stringers.
Installation begins with the last stringer. First, markings on the wall are made and checked with a level. Installation consists of 3 stages:
- Installation begins from the bottom edge of the stringer. To do this, it is inserted into a groove in the support post and secured with wood glue.
- Then the upper part of the stringer is installed. It is attached to a pre-prepared groove in the upper ceiling using angles, bolts, studs or anchors.
- After installing the upper and lower edges of the element, attach the main part of the part to the wall according to pre-prepared markings using dowels or anchors.
During the installation process, it is important to constantly check the fastenings with a building level.

To increase the reliability of fastening, the groove in the support post and the “key” of the stringer are generously coated with wood glue, then the key is dipped in fine sawdust and only then inserted into the groove.
The installation of the external stringer also begins by attaching it to the groove of the opera column. I mount the upper part to the upper ceiling in the same way as in the case of a wall stringer. If the upper step is located below the ceiling, the missing distance is compensated by supporting steel plates, metal corners, or even reinforced furniture panels.
During installation, it is important to ensure that the stringers are strictly parallel to each other.
Bowstring installation
Some projects involve installing strings rather than strings as a supporting structure. These elements differ in the method of fastening the steps.
If the stringer has stepped ledges, on which I lay steps on top, then the stringer is a flat board with grooves into which the steps are inserted. This installation method is more complicated.
To make a bowstring yourself, slits are made in the boards, the length of which is equal to the width of the steps, and the width is equal to the thickness of the treads. The distance between pairs is calculated in accordance with the height of the steps.
When using a bowstring, support posts are not needed. Installation of steps into load-bearing elements is carried out before attaching the structure to the upper and lower floors.
First, all the steps are inserted into the grooves on the first string. Before this, the parts of the connection are coated with wood glue. Then a second string is placed on the free edge of the steps. All joints are coated with wood glue and tapped with a wooden or rubber hammer.
The finished march is placed in the right place. The lower part is attached to the floor with glue, bolts, metal corners, etc.
The upper part of the bowstring is installed in the grooves of the upper ceiling or turntable.
The advantage of bowstring structures is greater strength. However, due to the fact that the tree dries out over time, the sidewalls move apart, and uniform adhesion to the side parts of the treads disappears. To level out this drawback, every five steps the march is reinforced with metal or wooden cords.
Otherwise, the process of installing stairs on stringers and bowstrings is no different.
Installation of steps and risers
Installation begins with the installation of risers. They should be 2-3 mm less than the height of the steps. This is done because, depending on the humidity of the room, the wood can swell or shrink. The gap will not allow the entire structure to warp.
Before installation, treads and risers are sanded.
If stringers were used as load-bearing elements, then installing the risers will be easy.They are attached using self-tapping screws to the vertical parts of the notches using self-tapping screws, the caps of which are recessed as deep as possible.
When installing risers to a march on a string, each wooden plank is attached with its edges to the top and bottom of the tread. Installation can be done using self-tapping screws.
Straight treads are easy to make. To do this, wooden boards are attached to the horizontal protrusions of the stringers, recessing the heads of the screws as deep as possible. The width of the tread should be 2-3 cm larger than the tread on the stringer. Such a side will provide an attractive appearance to the structure and make it safer.
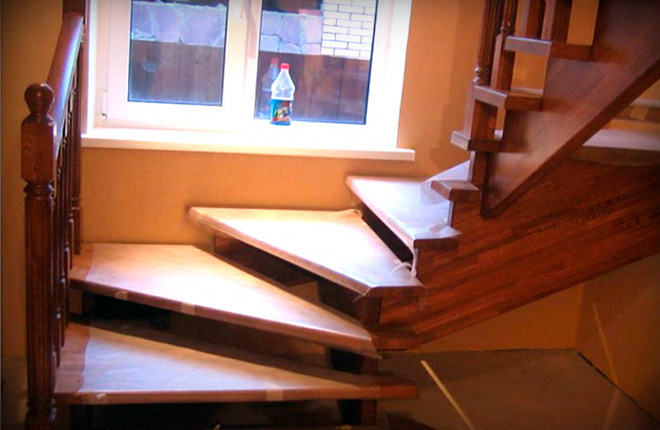
To make winder steps more difficult, 2 methods are used for this:
- Under the treads, blind grooves are made in the support column. In this case, the width of the grooves should be made a couple of millimeters less than the thickness of the board. This will make the mount as strong as possible. The grooves must be cut in accordance with the location of the rotating elements.
- Through holes are made in the opera column for the steps. The cut should be equal to the thickness of the board. The elements are connected using wood glue and a metal pin inside the support post.
In both cases, the outer part of the step is attached to a frame of winder stringers or support posts using self-tapping screws and wood glue. After carrying out the work, you need to check it using a building level.
Installation of fences
At the last stage of assembling the interfloor staircase, fences are installed, which consist of balusters and handrails. This part of the building provides convenient lifting and protects against falling.
First you need to install the balusters. They must be able to withstand a person of any size leaning on the railing. To do this, it is important to follow the recommendations.
Balusters are made of strong, smooth wood without knots or damage. Their height varies between 90-110 cm, which corresponds to the needs of a person of average height. At the same time, children and tall people can also hold on to the handrail.
To ensure that the structure does not burden the space, but at the same time remains safe, you need to make a gap between the balusters within 15-20 cm. Such a gap will not allow even a child to fall down the stairs.
The lower edge of the balusters is attached to the steps. For this purpose, different fasteners are used. The list presents the advantages and disadvantages of each option:
- Steel studs. The most reliable fastening method, which is only suitable for stairs on stringers. These are metal rods that can be smooth or threaded. To install the first type, a hole is made in the baluster, the diameter of which is equal to the diameter of the pin and the depth is at least 4 cm. Liquid nails are poured into the hole and the pins are knocked out. Then the baluster with a hairpin is attached to the step in the same way. When using a threaded rod, make the hole 1 mm smaller than the diameter of the rod, then screw it onto the baluster and step using a locknut.
- Hidden reduction fastener. This method of fastening allows you to make the connection strong and invisible. The fastener is a metal plate with holes for the corners and for a bolt in the center. The plate is attached to the recesses on the steps with self-tapping screws. A bolt is screwed into the lower edge of the baluster. The bolt head is then lowered into the recess in the center of the plate and driven into the narrow part with a hammer.
- Wooden dowels. This type of fastening is also called a chopstick.Mounting on wooden rods is reliable, but not dismountable. To make the installation, a hole is drilled in both the step and the baluster. The cap is dipped in wood glue and fine sawdust, then driven into the prepared recesses.
It is not recommended to fasten balusters with self-tapping screws. If this is done, the structure will turn out to be unreliable, since the attachment points become loose over time.
After installing the balusters, the handrail is attached. To do this, the upper part of the supporting vertical elements must be made at an angle equal to the inclination of the stairs.
The handrail is attached to the balusters using steel pins or wooden dowels. To do this, the rod is inserted into the holes in the lower part of the handrail and the upper end of the baluster. Can be glued with loose adhesive and mounted on a steel or wood rod through one baluster.
It is not recommended to use self-tapping screws to attach the handrail. Otherwise, it will not be possible to make the railing completely smooth.
After the installation of the stairs is completed, the recesses from the heads of the screws are puttied or covered with decorative plugs.
The stairs are cleaned of dust and sawdust. Then they are coated with several layers of varnish or impregnated with protective agents and a special oil for wooden products is applied.
Ladder safety and useful tips
It is very important to make the stairs reliable and safe. Therefore, the recommended design parameters must be followed. This especially applies to the width and height of steps, the step between balusters.
The lift must be made fireproof. To do this, use special impregnations and place the stairs away from electrical and gas appliances.
Making a staircase with your own hands is not difficult if you prepare the correct drawing and read the step-by-step instructions. To make your work easier, you can order ready-made components of the structure. In this case, all that remains is to do the assembly and installation.


I myself built the house in which we now live as a family. The entrance to the second floor is located inside the house. I made a two-flight staircase, 10 steps in each flight, since the ceilings are quite varied. From my experience I can say that cutting out all the details yourself is quite difficult and time-consuming. It's better to make them to order and then just assemble the structure.
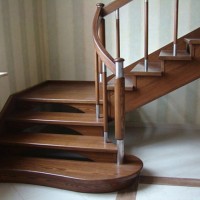
Our staircase to the second floor consists of one flight. We made it ourselves from ready-made parts. It will be difficult for one person to cope with such work, but if you invite an assistant, then this is quite possible. Our entire structure is made of larch and coated with matte varnish. There are no complaints about the material. My parents have a staircase built from pine; after 15 years it has become warped, creaks a lot, and looks untidy. We'll have to change it.