How to lay laminate correctly: step-by-step installation instructions + features of choosing a coating
Laminate is a leader in the ranking of finishing materials for floors.But you must admit that incorrect installation of such a covering will not only not decorate, but will also ruin the appearance of the room.
Therefore, in order to avoid getting into an unpleasant situation, in this material we will tell you about laminate flooring, how to install it correctly and what nuances should be taken into account - from surface preparation to the features of choosing this floor covering.
The content of the article:
Subtleties of choosing flooring
In a flooring store, your eyes literally run wide from the abundance of laminate types. It’s not enough to choose one that suits the interior or just likes the look.
After all, even the most beautiful material may not be suitable due to the characteristics of your house or apartment.
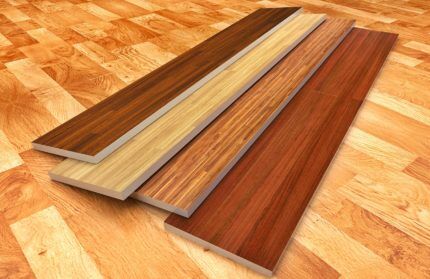
There are a lot of varieties not only in appearance, but also in various technical indicators. Let's try to briefly and simply deal with the main ones.
So the material is different:
- surface type - standard, glossy, matte, waxed, suberic, vinyl, quartz-vinyl, with grooved and textured surface, 3D, with imitation parquet;
- wear resistance - household, commercial;
- moisture resistance - not moisture-resistant, moisture-resistant, water-resistant;
- manufacturing materials - fiberboard, HDF, HPL, vinyl;
- type of locking connection - lock, click, ProLOCK, UniClic, aluminum, 5g, MegaLoc, T-Lock, without locks.
Let's take a closer look at these varieties.
We bring to your attention the article - Is it possible to lay laminate flooring on old parquet?.
Material surface type
As a rule, standard laminate is an imitation of boards. It is made from fiberboard or chipboard, then layers with a pattern, a protective coating, and so on are applied.
A budget variety, most often used in ordinary houses and apartments. The thickness of the fiberboard/chipboard base can vary from 6 to 14 mm.
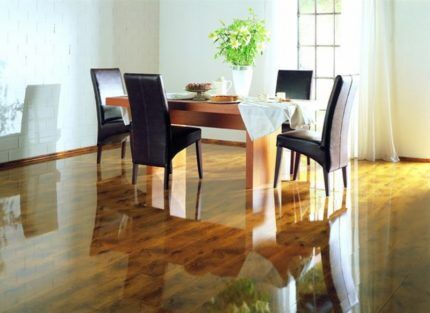
Glossy laminate can be simply shiny or with a reflective effect (mirror). Pros: visually increases the space, looks impressive.
According to reviews, it resists moisture well, but, in fact, it depends more on the locking connection and the “filling”.
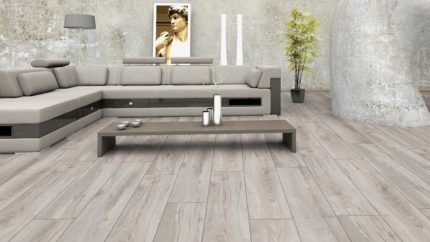
Matte laminate looks modest and noble. Perfectly imitates wood species. Wear-resistant, and, in addition, unlike the previous version, not slippery.
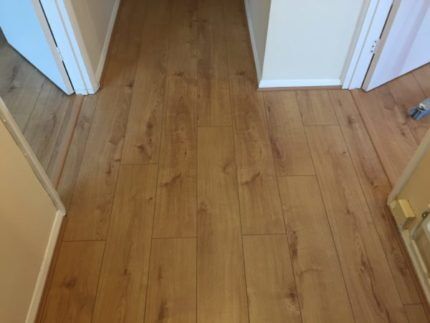
With a grooved or textured surface, laminate has anti-slip qualities and perfectly imitates the feel of the pattern that is depicted on it.
The downside is that cleaning is more difficult, since the surface is not smooth. But it will help to cope with this task vacuum cleaner for laminate.
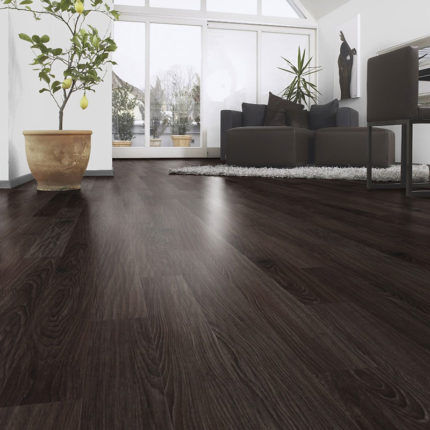
Waxed laminate looks very cozy. The effect is achieved through wax impregnation of the panels. Of course, it successfully resists moisture (again, look at the locks), but it is afraid of damage.
However, there is a way out - to restore the surface and get rid of scratches, you can purchase a special wax pencil that will hide the flaws that have appeared.
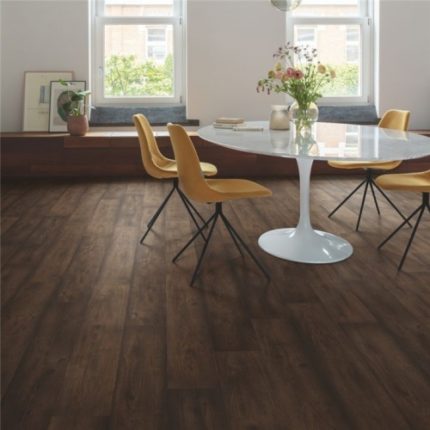
Cork laminate feels warm and soft to the touch. It has excellent thermal conductivity, environmental friendliness and sound insulation.
But it does not like moisture and is not resistant to damage; it also requires underlays for furniture. And its cost is the highest.
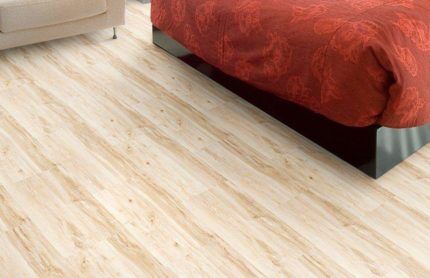
Vinyl laminate flooring is made from polyurethane. it comes with locks, without them (adhesive) and even rolled, like linoleum. Its thickness is from 2 mm to 6.5 mm.
It is flexible, durable, waterproof, but it is expensive, and its surface is not as visually close to natural as that of a conventional laminate.
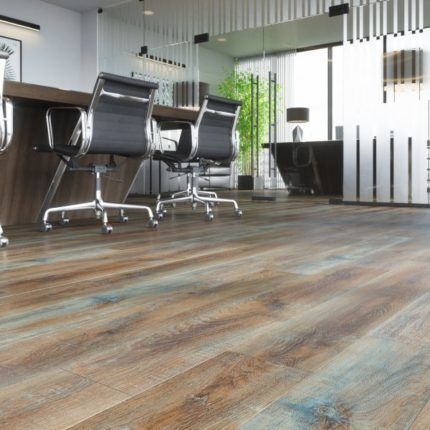
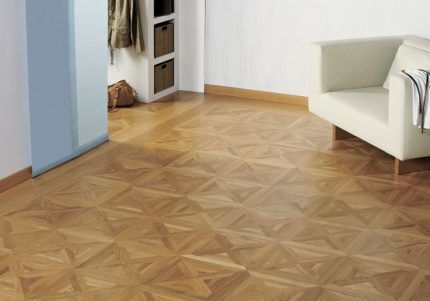
Laminate parquet is very difficult to distinguish from real parquet in appearance, it imitates it so cleverly. Produced in different strength and wear resistance classes.
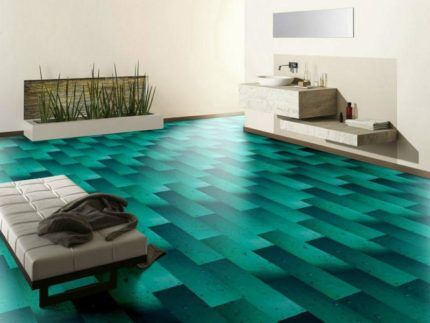
3D laminate is produced with an ornament that imitates three-dimensional images.
Before purchasing, be sure to calculate the required amount of material based on the size of the room in which it will be placed and take one or two packs more.
If you take the panels flush and during the installation process you accidentally damage a part or you need to replace a damaged/worn piece in the future, it is not a fact that you will find material of exactly that color in the store.
We bring to your attention the article - What is the difference between parquet and laminate. Engineered board or laminate: what is better to choose for floor construction.
Coating wear resistance class
This is a very important parameter that determines the strength of the laminate, moisture resistance and resistance to mechanical stress.
Thanks to it, you can determine the purpose of the laminate - household or commercial-technical.
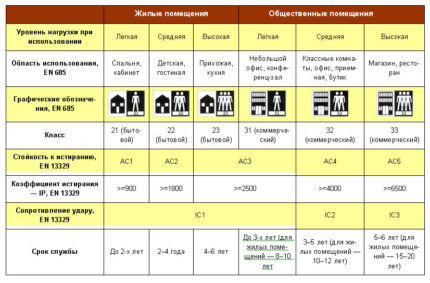
Sometimes there is a double classification on packaging. It's all about the features of laminate testing. It is carried out using a Taber abrasimeter.
Its classification depended on the number of laps in which the protective coating was worn off. And at the same time, the abrasive wheel changed every 500 revolutions, and now, every 200. Some manufacturers indicate both parameters.
Laminate resistance to moisture
Everything is very simple here. Wear resistance class 21-22 usually characterizes non-moisture resistant laminate. Unfortunately, it allows moisture to pass through well in the locking area, and the surface also swells as it wears out quickly.
It is possible to impregnate it with special agents and improve the quality of moisture resistance, but in terms of cost this is not the most rational way.
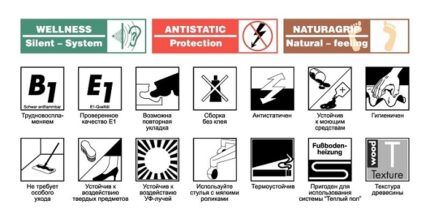
32-33 class - moisture-resistant laminate. Fiberboard or MDF is usually used as a base. It is impregnated with a special composition at the production stage, including seams and locks. However, prolonged exposure to moisture is still detrimental to it. Moisture resistance is indicated by markings in the form of a drop of water or an umbrella on the packaging.
Classes 32, 33 and 34 can be water resistant. Typically this is vinyl or plastic material. The marking is the same as for moisture-resistant, in addition to a drop of water or an umbrella, an icon in the form of a water tap is also possible.
Selection of locks for covering
The choice of locks directly affects the ease of installation and strong adhesion of the planks. Experts say that there are only 2 connection types - lock and click, and the rest are just modifications.
Lock is a direct tongue-and-groove connection. Assembly is carried out using a rubber hammer to ensure a snug fit of the planks. The disadvantages of the “lock” are the strength of the connection; such a lock is difficult to disassemble if you have to replace one or another panel in the future or during assembly.
Click - if you have chosen this type of connection, it will not be difficult for you to assemble it. This is also a tongue-and-groove assembly, but the assembly is not carried out directly, but is driven at an angle of 45 degrees. After which the bar falls flat until a characteristic click is heard.
It does not require the use of a hammer; everything can be assembled by hand, without any improvised means. To disassemble the connection, the laminate panel is again raised at an angle of 45 degrees and removed from the groove.
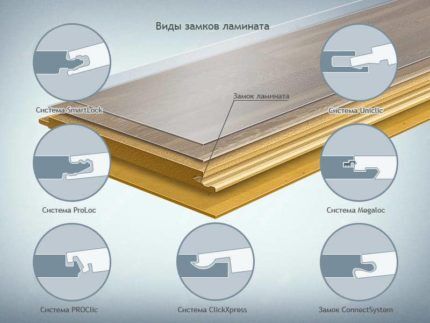
Apart from the adhesive method of securing the material, the locking ones are basically similar in assembly technology. All work should be carried out carefully. Inspect the planks for the integrity of the tenon ridge and its evenness, then problems should not arise.
Types of underlay for laminate
The underlay for the laminate is the material that will be used to cover the base surface before installation. Some types of panels already have a special layer, but they are more expensive.
The substrate is necessary for:
- Soundproofing.
- Leveling the quality of the base.
- Deterioration of thermal conductivity. In case of heated floor, you should purchase a specialized substrate that will not interfere with the functioning of the TP, but at the same time have all the necessary qualities.
- Waterproofing.
When choosing a material, you should focus on the prepared base.
If it is flat, it is enough to purchase a 2 mm thick substrate. On a base with minor flaws - 3 mm.
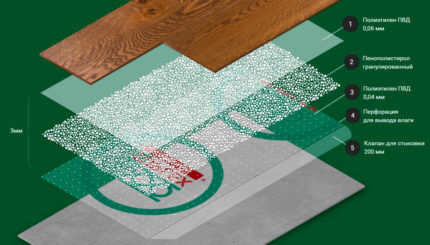
The choice of substrate material is also important. Let us briefly define the advantages and disadvantages of the most popular types:
- Izolon. Pros - moisture resistant, not afraid of rodents, fungus, good sound insulation, easy to install. Disadvantages - it loses its shape and elasticity over time, accumulates static electricity.
- Cork substrate - excellent recovery parameters after stress, low thermal conductivity, thanks to its elasticity protects the laminate from sagging, environmentally friendly, not afraid mold and mildew. Disadvantages - it allows moisture to pass through, is sensitive to uneven floors, and is not a budget option.
- Expanded polystyrene. Pros: sound insulation (up to 27 dB), thermal insulation, quite elastic. Disadvantages - fragility, capricious to surface changes.
- Foil material (also called “reflector”). Pros: thermal insulation up to 30%, provides waterproofing, and is not afraid of mold and mildew. Minus - not very good elasticity indicators.
When choosing a substrate, it is not necessary to focus on the manufacturer of the purchased laminate. They may be different.
Also, you should not take too thick a material; in places where heavy furniture is installed, it will be pressed through, and consequently, the laminate floors will begin to “walk.”
How to lay laminate?
So, the material has been chosen, let’s figure out how to properly lay it on the floor surface.
The work is divided into several stages:
- Surface organization.
- Preparation of material and tools.
- Underlayment flooring.
- Installation of laminate.
First of all, we prepare the floor surface. It should be cleaned of any existing contaminants, bumps, excess protrusions and roughness should be removed.
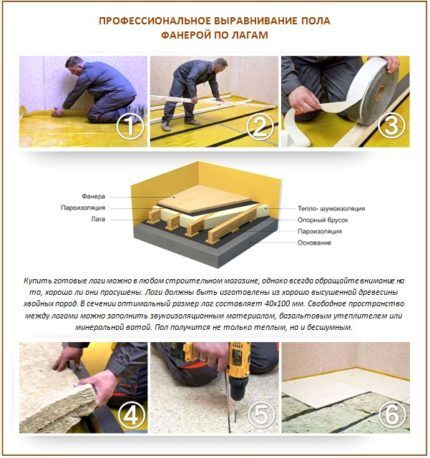
There is a second option - boards with significant level differences.It is obviously a failed idea to try to leave everything as it is; logs with underlays are laid on such a floor, and plywood is already attached on top.
It is necessary to dwell in more detail on the preparation of the base from the boards.
If you do not want to attach plywood, and even before laying it, it is recommended to carry out the following preparatory work:
- Remove old baseboards (if any).
- Replace boards that are rotten or of questionable strength.
- To get rid of squeaks, firmly secure the boards with self-tapping screws with a slightly recessed head, and blow out the joints with foam.
- Fill cracks and chips with wood putty.
- Get rid of fungus and mold, surface treat boards with fungicide.
- If the wall is uneven in relation to the floor, install spacer wedges. Do the same if the screed is flooded.
As for differences, the permissible limit for a wooden floor is no more than 2 mm, and for a concrete screed - no more than 3 mm.
Follow these rules and thereby you can not only lay the laminate evenly, but also extend its service life.
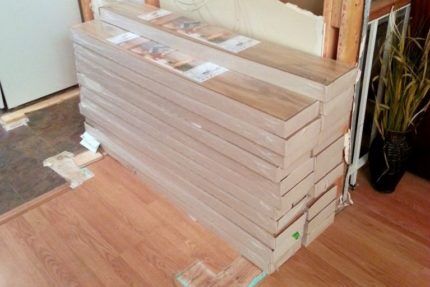
Preparing the material is a very important process. Ideally, unwrap the underlayment from the packaging and air it out before laying. The laminate should also rest in a dry room for 2-3 days.
This is done not only in cases where you purchased cheap material or PVC, with toxic odors locked in the packaging, but also so that the material gets used to your air humidity.
While the laminate is curing, let's prepare the tools:
- jigsaw for cutting laminate where necessary;
- roulette;
- You can take a regular pencil, but construction ones are also inexpensive and are better visible on the surface;
- square;
- a hammer with a rubber knob (if the lock is “lock”);
- tamping block;
- limiter wedges;
- C-shaped bracket, it is required to adjust the slats near the walls. You can also cut suitable strips yourself from scrap materials.
The tools are ready, the floor is dry, the material is settled. It's time to lay down the underlayment.
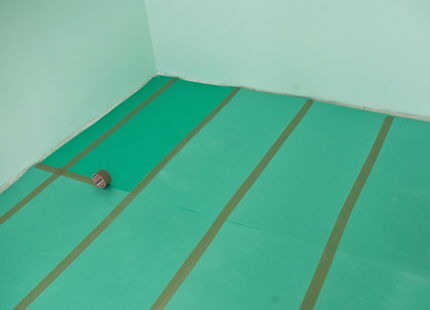
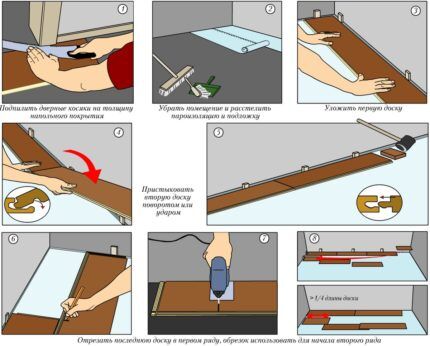
Using limiters, ensure a gap between the laminate and the walls of approximately 8 mm.
The panels are usually installed along the window light line.
We lay the first plank. We bring the second one to it and insert it into the groove strictly horizontally using the Lock type. By lightly tapping with a hammer, we adjust until it snaps completely into place.
With a Click-lock, the subsequent panel is inserted at an angle of 45 degrees and smoothly falls flat.
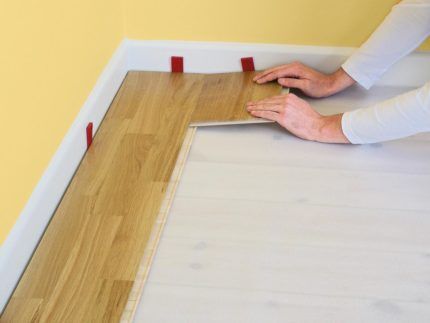
Thus, we finish the row, if necessary, cutting off the last board using a jigsaw.
We start the second row not with a whole bar, but with half. The offset of the panel joints should be approximately 30-40 cm.
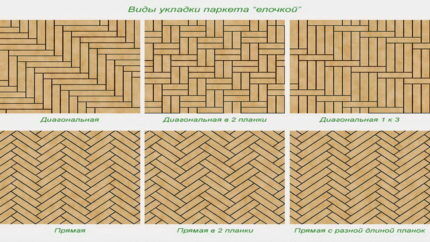
Please note that under no circumstances should laminate panels be attached with nails or self-tapping screws to the walls or to the base surface.The plinth is fixed to the wall.
You should also leave deformation gaps of approximately 1 cm for a floor surface area of 6x8 m; they can then be masked with special strips.
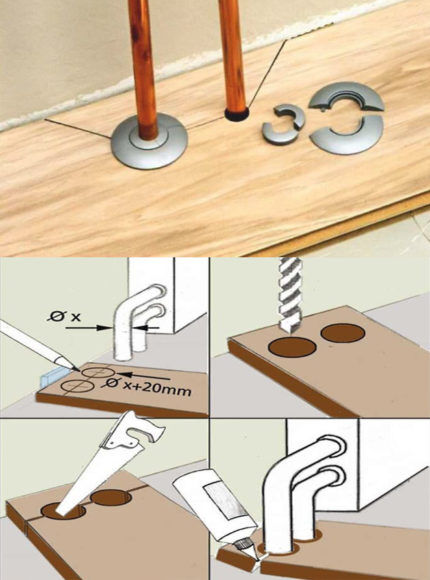
After the installation of the laminate is completed, you can screw the baseboards to the walls. If the laminate smells unpleasant, it is recommended to keep the room ventilated for several days.
Read the material: How to replace the baseboard.
Conclusions and useful video on the topic
How to lay laminate flooring correctly:
That's all, we've covered the installation of laminate flooring with our own hands step by step. Of course, there are many different installation methods, but using these instructions, you can definitely handle the most common ones yourself.
Write your comments and ask questions that interest you, and our specialists will try to give comprehensive answers.

Very interesting. Concise but informative. Thank you.