Connecting a heating cable: detailed instructions for installing a self-regulating heating system
Do you want to solve the problem of freezing private communication networks using cable, ensuring comfortable living outside the city during the cold season? But the services of professionals will be expensive, and you don’t want to invite cheap professionals. It wouldn’t be bad to save money by doing everything yourself, wouldn’t it?
Don’t know how to properly connect the heating cable on your own and is this even possible in principle? We will help you figure it out - the article discusses the connection procedure and selects step-by-step photos of this process.
To help novice installers, video recommendations on connection are provided; after reading them, you can independently cope with the task without involving specialists.
The content of the article:
Pros and cons of cable heating
Cable heating systems have become a real salvation for owners of private houses and cottages. If previously such a solution was available only for large industrial facilities, in recent years the market has been replenished with a variety of offers, and the range of manufacturers has expanded significantly.
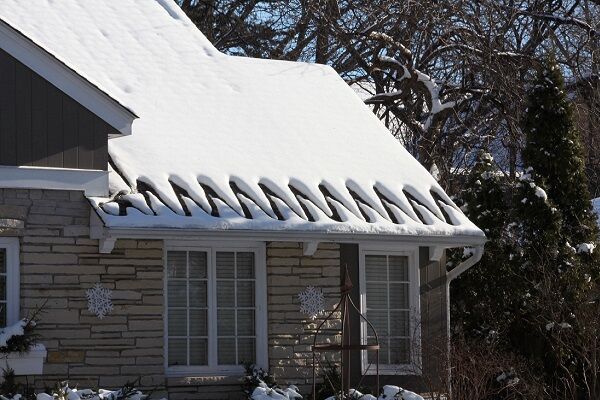
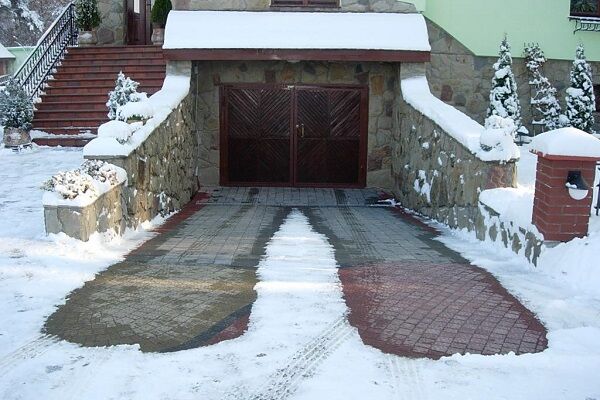
Moreover, there are quite a lot of options for using heating systems. The most popular among them are water pipes, sewer pipes, drainage systems, roofs of houses, steps, small areas for various purposes, etc.
This type of heating prevents the formation of ice, which can cause a breakdown of the water supply network and result in large expenses.
In addition, the heating cable also has the following advantages:
- affordable price;
- a wide range from various manufacturers, including kits for installation in hazardous areas;
- high efficiency of systems;
- low power consumption;
- ease of operation;
- availability of ready-made kits with instructions for independent connection;
- long service life.
As for the disadvantages, the biggest one of the heating cable is its volatility. After all, for the heating system to operate, it requires a constant power supply.
Users also note that without skills, self-installation can cause some difficulties. And the issue of cost is not entirely clear - products from famous manufacturers are not cheap at all.
True, experts advise not to skimp on high-quality cable, because it is installed for more than a dozen years. For example, the service life of Raychem cable systems is 50 years.

Instructions for connecting heating
We suggest further understanding in detail how to connect the heating cableso that it is operational and does not cause problems in the future. We carry out the instructions using the example of connecting a heating system located outside the pipe.
Stage #1 - preparatory work
The first step is to carefully inspect the section of the pipeline that needs insulation. Any problems found, such as rust, damage to the integrity of the outer surface of the pipe, etc., must be corrected immediately.
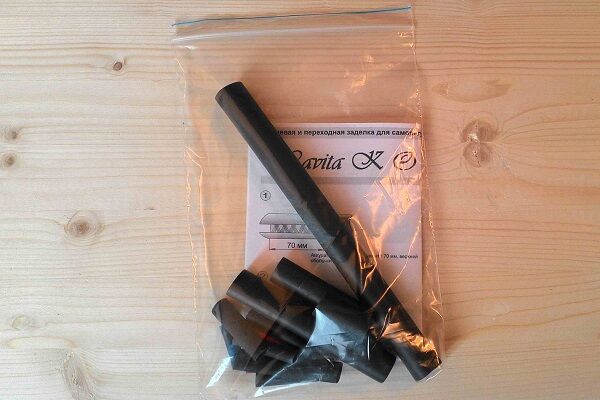
Then you need to prepare materials that will be useful during the installation of the heating cable system.
Having prepared the materials, you need to immediately complete the end seal of the pre-selected heating cable. To do this, take the free end of the conductor, to which nothing will be connected, and cut it with a “step”, after first removing the protective layer.
Then the resulting “step” is firmly and reliably insulated. What is a set of heat-shrinkable tubes used for? An easier option is to purchase a ready-made system, in which all the preparatory work with the cable has already been carried out by a specialist.
This option will cost several hundred rubles more, but will significantly ease the fate of a home-grown electrician who has no experience in performing such work.
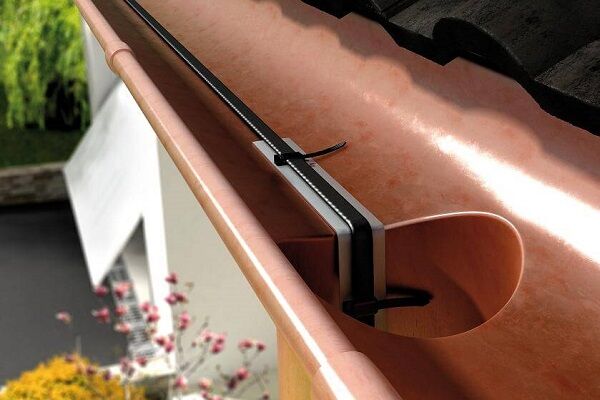
Stage #2 - fastening the cable system
The next step is to place the cable on the pipe and secure it in the desired position. Let's take a closer look at how to properly perform installation. self-regulating heating cable with your own hands. To do this, you first need to read the instructions supplied by the manufacturer in the kit.
Then you have to choose the optimal mounting method:
- straight, placing the conductor parallel to the pipe;
- rectilinearly, placing 2, 3 or 4 conductor strands parallel to the pipe and each other;
- winding, wrapping the cable around the pipe at a certain pitch.
There is another option to position the cable, simulating a wave. But here it is necessary to calculate the required footage and the feasibility of such fastening. Often, with a large pipe diameter, it is easier to run 2 parallel cables.
When using the winding fastening method, it should be taken into account that the consumption will be higher. Yes, and a certain step between turns must be maintained.

Having figured out the mounting method, you need to carefully position the cable in the desired position. It is recommended to select the lower part of a horizontally extended pipe.

Stage #3 - attaching the protective casing
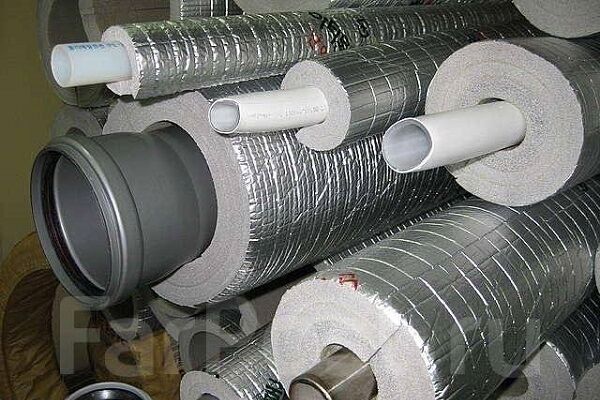
After attaching the conductor, you must immediately do additional insulation, using heat-insulating material for pipes. The range on the market is very rich, so you can choose the best option.
It is advisable to follow the manufacturer’s recommendations - the instructions most often specify the recommended thickness and type of heat insulator. Moreover, manufacturers such as Raychem indicate a specific material, without installation of which the buyer may lose the warranty.

Another nuance is the installation of special seals in places where the cable heating system passes through the thermal insulation. Such kits can be purchased along with the cable and other system components.
Stage #4 - connecting to the power supply
At this stage, we will consider how to properly connect power to a self-regulating heating cable. If you are using products from a well-known brand, then the seller will select all the necessary elements for you at a certified point of sale along with the cable.
We invite you to familiarize yourself with the connection process in detail:
- the free end of the heating cable is freed from insulation, the protective screen is twisted into one bundle, and the conductor cores are stripped;
- the end of the supply (power) wire is cut and the ends are stripped;
- the prepared cores of the cable and the supply wire are connected to each other, for which it is convenient to use a sleeve + crimping pliers, and put heat shrink on top.
This connection option is simple; only a little experience in electrical installation work is required.

In the future, the connecting nodes/boxes must be secured with tape to prevent accidental damage.
Stage #5 - verification and commissioning
When the installation work is completed, all that remains is to check the quality of its execution and test the functionality of the system.
But before putting it into operation, you should pay attention to the following points:
- the insulation of the heating cable must be intact; it would not be amiss to check its resistance between the braid and the conductors;
- the protective casing must be without damage along the entire length of the cable heating system;
- all connections, splices, connections must be sealed;
- It is advisable that circuit breakers and fuses be installed.
To avoid accidental damage to the cable, you must immediately begin installing the heat-insulating and protective casing after attaching it. It is advisable to allocate a separate line for the cable system, equipping it with its own shield with installed RCD and circuit breaker.

The nuances of connecting the cable inside the pipe
When heating water supply networks, internal installation is often chosen. For these purposes, a conductor is used, additionally enclosed in a food casing that does not release toxins and is completely safe for humans.

Next, we’ll look at how to properly connect and connect a heating cable designed to heat a pipeline from the inside. The process itself at many stages is almost identical to that discussed above.
The work includes the following steps:
- Perform insulation of the free end.
- Fastening the conductor and sealing the entry point.
- Installation of external thermal insulation and protective casing.
- Electrical connection.
- Installation of additional devices - thermostats (if necessary) and automatic machines.
The second step is different, so let's look at it in more detail. You will need to place the prepared cable inside the pipe using the entry kit.
But it is advisable to perform step No. 4 before the conductor is placed in its permanent location. Why do you need to connect the supply wire to the heating wire?

Will familiarize you with the rules and features of laying a heating cable inside a pipe next article, which we strongly recommend reading.
Installation and maintenance tips
To ensure that the operation of the heating system does not cause trouble, it is advisable to perform all the steps recommended by the manufacturer during installation. It’s good not to forget about stickers - place/stick notices about heating on the heated area.
In the future, especially if repairs are necessary, such forethought will come in handy. It is also worth carrying out regular inspections of the pipeline, and if problems are found with the heating cable or it is damaged, repairs should be carried out correctly.
Why remove the damaged piece and instead attach a new, undamaged piece in this area. There is no point in repairing the damaged area - replacement is the right solution.

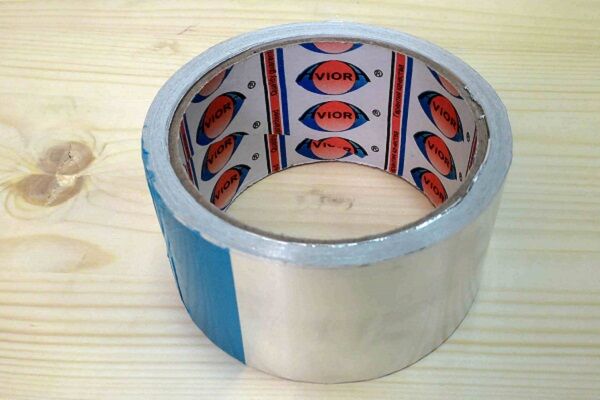
Experienced installers advise using metal tape to remove rough areas of the pipe where the heating cable is to be installed.
Another useful tip concerns saving: you should not save by buying a cheap Chinese counterfeit cable - removing pipes from the ground and changing the heating system on frosty days will cost several times more than buying a high-quality system from a trusted manufacturer.
It’s better to immediately buy a reliable cable and other components with a long-term warranty from a reputable manufacturer; in addition, it is advisable to consider one of the alternative options pipe heating as a backup addition.
Conclusions and useful video on the topic
The step-by-step process of cutting the cable, sealing the free end and connecting the power wire in the following video:
Connecting the heating system to the power wire and additional external insulation of the pipe:
Features of installing a heating system inside a pipe in the following video:
A correctly connected cable will ensure comfortable use of communications in a country house or country house, even on frosty winter days.
If you have instructions, a little experience in electrical installation work and components, you can connect the heating cable system yourself. Especially if you buy a ready-made kit, in which a sealed end seal is made and a power wire with a plug is connected.
Please write comments in the block below, ask questions, post photos on the topic of the article. Share useful information that may be useful to site visitors.Tell us about your own experience in connecting a heating cable.


