How to install a latch on an interior door yourself: step-by-step instructions with photos
Have you encountered a problem such as a broken handle or lock on an interior door? Every thing tends to break when it has reached its limit in work, don’t you agree? But such a breakdown always occurs at the wrong time, and calling a technician to fix the defect requires financial costs and time, and these two factors are not always in abundance.
You can solve this problem yourself. We will tell you in detail where to start and how to do it in our article. We will explain how to quickly and easily install a latch on an interior door, using the most ordinary tools and spending no more than a couple of hours of your time. Such experience and skill will be useful to every owner, and thanks to the detailed step-by-step instructions given in our article, even the housewife can handle the installation.
The content of the article:
Types and functions of door latches
First, let's look at the function and properties of the latch itself. Why is it so necessary? This door hardware is intended, first of all, to fix the door in a closed position, preventing it from opening in the event of drafts or slight pressure on the door leaf.
There are three main types of latch locks on the market, as they are commonly called “knobs”:
- stationary;
- rotary;
- push.
U stationary There is no main locking system. U rotary the handle is round in shape, and the movement of the tongue leads to its rotation clockwise.
Push – one of the standard variations of latch handles on interior doors, where the lock operates by pressing the handle down.
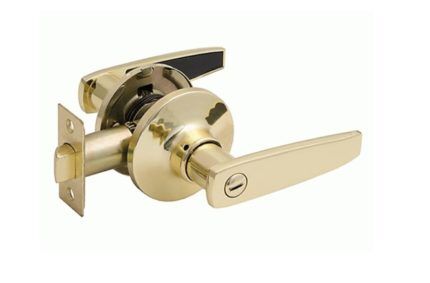
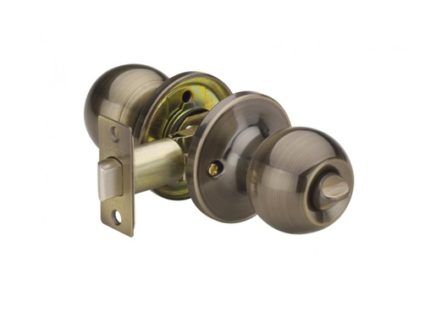
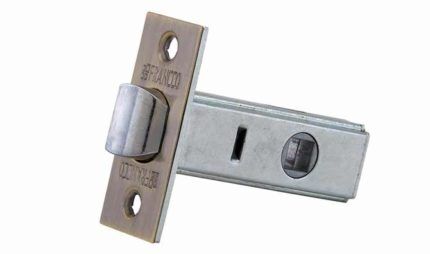
The latches themselves are also divided into several types:
- with metal tongue;
- with plastic;
- magnetic - fixing the door due to the adhesion of magnets;
- roller - the door opens due to slight pressure.
The main advantage of the plastic tongue is the low noise level when opening/closing.
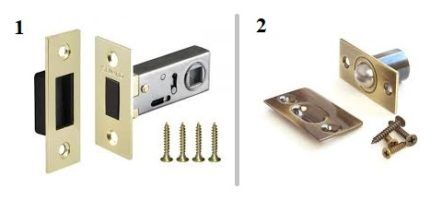
Latch installation instructions
So, having examined the existing types and a brief overview of the functions of each of the latches, having decided on the necessary option for installation, let’s move on to the detailed installation instructions.
First, it’s worth collecting the necessary set of tools that we will need for this work:
- Drill or screwdriver.
- Set with feather drills.
- Wood crown, diameter 25-50 mm.
- Chisel.
- Hammer or mallet.
- Pencil.
- Square.
- Roulette.
As you can see, the list of required tools is quite simple and everyday. All these tools can be found in every owner and in every home.
Step #1 - marking the space for the latch
First you need to decide on the height of the handle on the door. Of course, there are generally accepted standards, which range from 800 mm to 950 mm relative to the floor line, but changes are possible for greater convenience for a particular owner.
It is better to carry out the marking itself on a fixed door leaf. To do this, you can remove the door from its hinges and do it on the floor or securely fix it.
We recommend that you read the detailed instructions for installing an interior door.
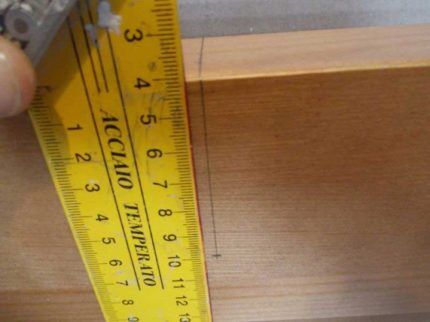
Using a simple pencil and a square, we make markings at the selected height on one of the sides of the door and on the end of the door leaf, where we additionally mark the middle for further drilling for the latch mechanism itself.
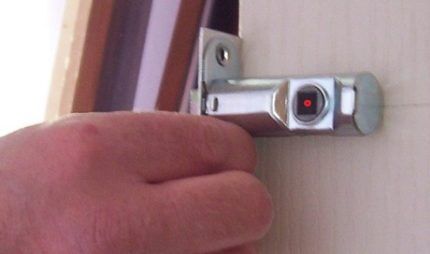
On the horizontal line that we drew on one side of the door leaf, we measure the required distance, relying on and taking into account the length of the latch. We measure this distance by placing the mechanism on the side of the door, as shown in the figure.
Apply the latch and mark the middle of the square hole with a pencil. This will be the center point for drilling with the wood core bit.
Step #2 - Drilling Holes
After marking, we proceed directly to drilling the holes. It's better to start from the side.
To correctly and efficiently drill a hole on the side of the blade, you will need to place a wood crown on a drill.The intersection point of the marked lines will be the drilling center.
But it is worth considering one important point - you do not need to drill to the very end on one side, but as soon as the crown reaches the opposite side, you need to change the drilling side. This is done so that at the exit the teeth of the crown do not chip the coating of the surface of the door leaf.
For some models of latch locks, there is another option for drilling from the side of the blade. In this method, we make holes not with a wood crown, but with feathers or a crown of a smaller diameter, which is enough for a square rod. Its size is 8 by 8 mm. And we also make two holes, each of which will be intended for tightening bolts. These two holes can be identified after applying the base of the handle adjacent to the side of the door to the door leaf.
The first hole is there, now we proceed to drilling a hole for the latch mechanism at the end of the door. To do this, we change the crown to a feather-type drill, the size of which depends on the diameter of the mechanism. The standard latch diameter is 22 mm.
We start drilling at the point where the lines intersect. We also do not forget about the correct drilling technique, in which it is imperative to hold the drill strictly horizontally, and in no case bend it, in order to avoid poor-quality work of the lock in the future, or, at best, breakage of the drill.
At the end of drilling, it is necessary to thoroughly blow out all the holes so that chips or dust remaining after the drilling procedure do not get on the lock mechanisms. Which can further lead to its malfunction or even jam the mechanism.
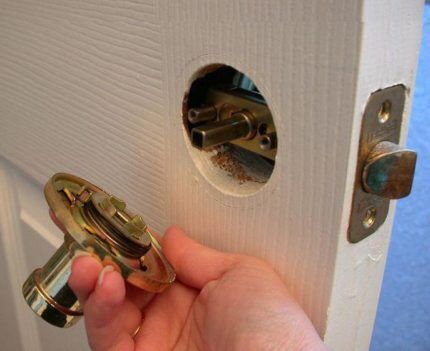
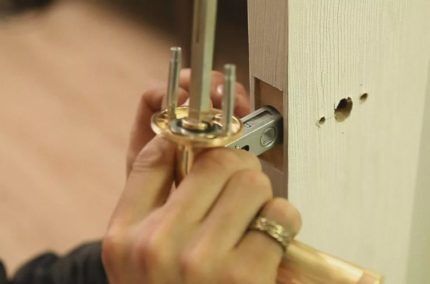
After the hole for the latch is ready, we insert the mechanism itself to the limit so that its outer part (vertical plate) rests tightly against the end of the door. You need to set it exactly vertically in relation to the sides and carefully outline it with a pencil - you will get an inverted rectangle. The purpose of this operation is to make a recess in the end for the outer part of the latch. To do this you will need a chisel and a small hammer. The depth of the slot depends on the thickness of the latch plate. The finished holes will look like the pictures below.
Step #3 - installing the latch
Let's start installing the latch lock itself.
Installation of the latch itself
The first thing to do is install the mechanism (latch) at the end of the door leaf.
We advise you not to tighten the screws right away, but first, use a pencil to mark points through the holes on the plate and use a small diameter wood drill, preferably 1 mm, to immediately drill holes for the screws themselves. This is done to make it easier for them to enter the tree. It’s just that the self-tapping screws that come with the kit are made of soft metal and have a coating that matches the color of the lock and are easily licked off when screwed in hard.
Installing handles on both sides of the door
When the mechanism is installed, we proceed to the handle itself. First, you need to disassemble it; in most cases, this is done using a special key included in the kit.But if for some reason it is not there, then this can be done with something narrow and straight.
The key hole is located below the handle. By pressing into the hole, we remove the handles themselves, and then the decorative plates, under which there are holes for tightening bolts and screws. But here, too, there are options with different manufacturers, some do not install decorative plates, they have self-tapping screws located on the outside, which simplifies the process itself.
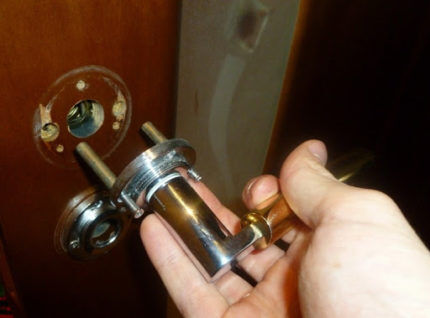
Now you can start installation. To begin, we insert the square into the hole of the latch, then put on the handle on one side and the other and, using tightening bolts, tighten the two sides to the door leaf. After this, we put on the decorative plates and snap the handles. If there are no plates, then use self-tapping screws to screw the handles to the door.
Making a recess for the latch tongue
The main part of the installation work has been completed. All that remains is to make a recess for the latch tongue on the door jamb. To do this, you will need to close the door all the way and mark the place where the tongue touches the door jamb.
Where we made the mark, we apply a metal plate and outline the inner rectangle. Now you need to gouge out a hole with a chisel or with the same pen. Usually the package includes a so-called plastic pocket, which is inserted into this recess for the purpose of improvement, because the hole for the tongue will be visible when the door is open.
Then we drill again for the screws and tighten them.The plate itself can be applied directly to the door frame without making a recess to recess it.
It is worth noting that all procedures associated with cuts or recesses using a chisel do not always turn out perfect for everyone, and as a result, small gaps or cuts remain. Here we recommend buying silicone that is as close in color to the door as possible, and going through these places to hide the defects.
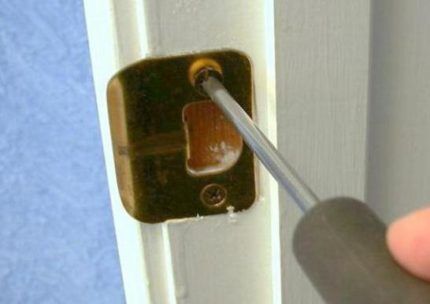
Now your latch handle is installed and ready to use. The installation process is quite simple and does not require any great knowledge. Now your latch will work properly and for a long time.
Careful and gentle handling of the lock will lead to its long-term and stable operation. And if it accidentally slams, you shouldn’t immediately resort to radical measures - you can open the door without a key in safe ways.
Conclusions and useful video on the topic
Video instructions for installing the latch:
In our article, we reviewed detailed instructions for installing a latch handle on an interior door. With its help, you can do it yourself without any problems. The task is simple even for people without special skills and practice.
Do you have any questions about installing the latch? Or would you like to share your personal experience of installing a latch handle? Write your recommendations, ask questions to our experts, add a photo of the finished work - the feedback block is located below.
We read: Do-it-yourself door closer installation.


I bought here Construction » Locks and hardware and accessories » Locks » Garage locks tovaromania.rf/index.php?cat=106254 delivered free of charge
After putting on the decorative strip, the handle does not latch. What should I do?