How to do the wiring in an apartment with your own hands from the panel: basic diagrams and rules + installation steps
Electricity is an integral energy resource of modern construction projects, intended, in particular, for housing. It's hard to imagine a modern home without electrics.
Traditionally, a home network is installed by default by electrical specialists during the construction process. However, in some situations you have to deal with electrification yourself. Is it possible to carry out the work without relevant experience?
We will tell you how to do the wiring in an apartment with your own hands from the panel, what schemes and arrangement options are best to follow, and outline the rules and requirements for electrical installation. In addition, we will describe the stages of the work - starting from selecting and pulling the wire, and ending with the installation of sockets, switches and a meter.
The content of the article:
How to conduct apartment wiring?
Suppose there is a private house built or a new apartment with a rough finish that requires engineering equipment - electrical wiring and all the included paraphernalia.
Of course, it is advisable to entrust the installation of the electrical network inside a private house (apartment) to professional performers.
However, professional service comes with inevitable serious costs. In addition, there are regions where professional electricians are in real short supply.
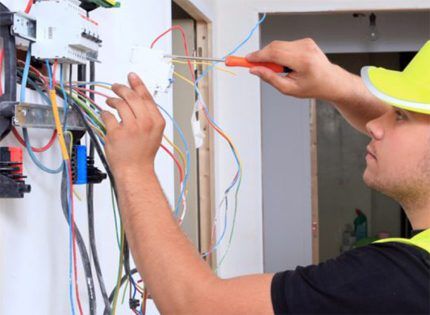
There is a clear way out of this situation - independent electrification of your own apartment/house. But how to install electrical wiring in an apartment with your own hands without any experience?
Perhaps, only with the help of the necessary information - understandable, consistent with current norms and rules.
Review of diagrams and installation options
Serious construction always begins with a plan. Electrification of your own apartment (house) also initially involves the creation of a circuit solution.
Urban apartments are usually built in a standard manner. That is, in fact, a standard power supply diagram should already be attached to a standard project.
The rough finishing of apartments includes laying channels for the electrical circuit. The channels are equipped with traction wire specifically for pulling wires.
This seems to be a definite advantage for a potential owner of a living space who plans to carry out electrical wiring in a new apartment on their own.
You only need to study the layout of the channels, and then begin laying (pulling) the conductors.
It is more difficult to resolve the issue of laying electrical wiring in an apartment when system channels are missing in the structure of the building.
In this version of the apartment (home) project, you will have to perform additional work:
- punch channels in the walls - prepare grooves;
- install protective boxes;
- install mounting fittings;
- prepare mounting points for sockets, switches, lamps, etc.
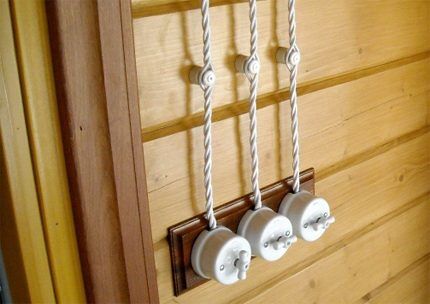
True, an exclusive version of the scheme cannot be ruled out - "open" wiring. This option is technologically and technically outdated, but from the point of view of “retro” design today it has a certain level of popularity, especially in country-type houses.
So, we will assume that the potential owner of the apartment was faced with the usual scheme of closed (made inside the walls) installation of boxes for electrical conductors and decided to do the wiring himself.
Then at the next stage, you should definitely study the rules and requirements.
Following the rules and requirements of the PES
Electricity does not forgive mistakes. This truth should become a truism for the electrician himself.
Electrical installation rules and requirements affect a lot of details of work execution, ranging from correct selection of conductor cross-sections and ending with the installation of grounding structures.
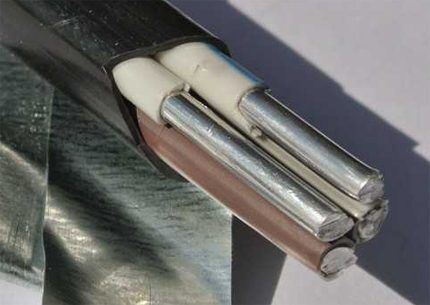
You should not skimp on safety, and if possible, it is always recommended to choose copper wire over aluminum wire.
Copper for apartment wiring is usually stranded, soft. Depending on the expected load, the cross-section of the conductors (not the diameter!) is calculated.
The total load (kW) for the apartment option is calculated by simply adding the power of all electrical appliances that are supposed to be used in everyday life, taking into account the coefficient:
P = (P1+P2+…Pn)*0.8,
Where:
- P1…Pn — the power of each electricity consumer in the apartment (electrical appliances);
- 0,8 - correction factor - it is believed that only 80% of all equipment can work in the apartment at the same time.
Knowing the total power, using the table for the household version it is easy to select the required cross-section (diameter of wires).
| Section, mm2 | Wire diameter, mm | Copper / power, kW | Aluminum / power, kW |
| 1,5 | 1,38 | 3,3 | 2,2 |
| 2,0 | 1,60 | 4,2 | 3,1 |
| 2,5 | 1,78 | 4,6 | 3,5 |
| 4,0 | 2,26 | 5,9 | 4,6 |
| 6,0 | 2,76 | 7,5 | 5,7 |
| 10,0 | 3,57 | 11,0 | 8,4 |
Since the power of electrical appliances for household use is relatively small, the diameter of the wires without taking into account the insulation for installing the liner from the panel is on average no more than 2.5-3 mm for aluminum, and 2.0-2.5 mm for copper.
The exception is apartments equipped with electric stoves and other powerful equipment. In any case, it is necessary to accurately calculate the cross-section under the load with a small margin.
The table clearly shows the difference in the cross-section of the conductors in relation to the type of conductor (copper / aluminum), which again is noted by the advantage of choosing a copper wire. The smaller the cross-section, the thinner the conductor, the easier it is to pull it through the channel.
Additional information on choosing a cable and wire for organizing wiring in an apartment is presented in this article.
How to stretch a wire in a channel?
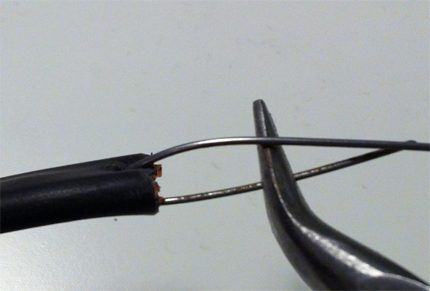
Each section of the channel for electrical wiring by default contains a traction thread - a metal wire with a diameter of 0.5-1 mm. The ends of this thread are brought out through the inlet and outlet holes of the channel.
It is enough to tie the electrical wiring to the traction thread at the input and then carefully pull the conductors along the channel using a pull-up from the opposite end of the channel.
If there is no traction thread in the channel, in fact, it is not difficult to pass it through yourself, given the small diameter and sufficient elasticity of the steel wire.
In this way, electrical wiring is “loaded” onto each individual section of the apartment circuit, including supply channels to traditional electrical points:
- electricity consumption meter;
- electrical outlets;
- light switches;
- residential calls, etc.
Next, all that remains is to mount all the electrical points in place and connect the removed ends of the wire to the appropriate terminals.
It should be noted that current regulations require that the ground bus cable be wired together with the terminal wires. It is recommended to connect terminals in a certain order.
The procedure for performing work with electrical wiring
It is recommended to start work on installing electrical installation products and connecting terminal units from the point furthest from the central distribution box.
Typically, this point is the electrical outlet(s) in the farthest room.
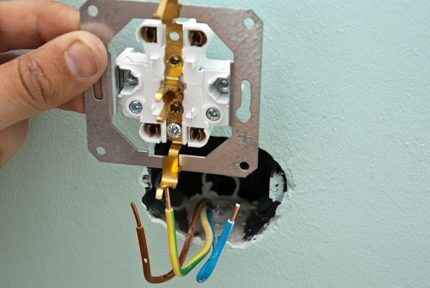
Stage #1 - connecting apartment sockets
The socket terminals are connected to the conductors of the electrical line (phase - zero), plus, according to the rules, each of the sockets is required to be connected to the grounding terminal to the grounding conductor.
Conductors - phase, neutral, grounding, as a rule, differ in color:
- phase - brown;
- zero - blue;
- Earth – yellow-green.
In addition, the grounding conductor, again according to the rules, always has an increased diameter in relation to the other two conductors.
Having completed the installation and connection, you should check the integrity of the lines of the current section of the apartment wiring using an electrician's tester.
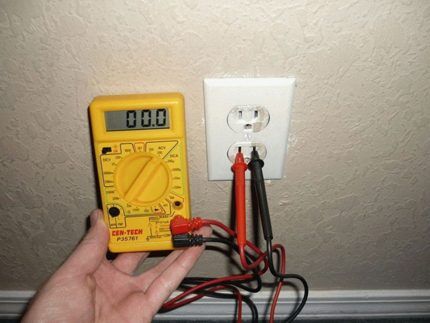
To run the test:
- At the other end of the channel in the junction box, connect the phase and neutral wires together.
- Plug in the probes of the measuring device that is turned on to measure resistance.
- Make sure the tester indicates "short circuit".
A similar check is also performed for the grounding line, connecting it to any of the linear wires. One of the probes of the device is moved to the ground bus.
Thus, moving closer to the main input point, all socket terminals included in the apartment circuit are sequentially switched off.
In this case, after testing each of the two sections, wire connections are made inside the junction boxes. Having completed work with sockets, they move on to switches - communication devices.
Stage #2 - installation of apartment lighting switches
This type of installation in general is not much different from work with apartment sockets. However, its technical aspects when installing a light switch.
So, if the sockets provide direct parallel connection to the circuit, the switch circuit creates an open circuit through one wire (phase) - that is, connection in series.
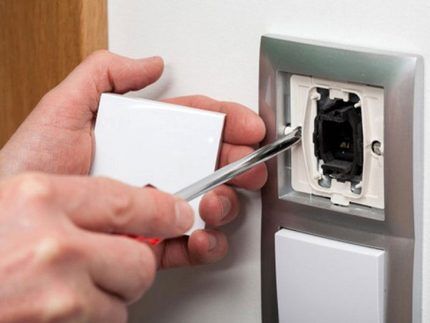
Switches are also mounted in niches of wall panels, but it is taken into account that each communication device works with a specific lighting device. From here you can choose the design of the switch - single key, two keys.
It is also recommended to test the operation of residential electrical wiring switches. This is done simply. The conductors intended for the lighting device are connected to the tester in resistance measurement mode, after which the key is manipulated.
In the closed state, the tester will show a “short circuit”; in the open state, no contact.
The part of the circuit with switches and lamps also assumes the presence of distribution boxes, where, after testing individual sections, connections are made to the rest of the electrical wiring.
Stage #3 - work at the meter installation site
Most installation options involve installing an electricity meter inside the apartment. Typically, this control device is mounted in close proximity to the point of entry of conductors emanating from the panel.
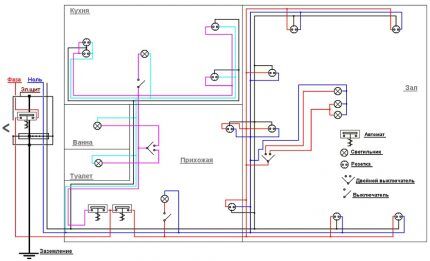
This requires installation of not only the meter itself, but also installation of circuit breakers, calculated according to the load, - theoretically, switching each functional section of the apartment electrical wiring, as in the example below:
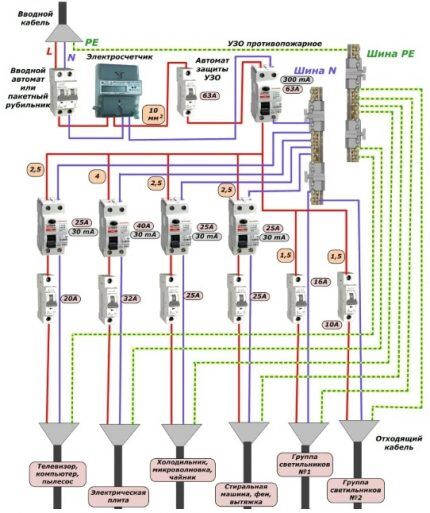
This scheme ensures reliable functioning of the electrical wiring in the apartment and allows you to eliminate possible faults without removing the voltage on the entire home network.
In addition, it becomes convenient to test apartment electrical wiring the first time it is turned on, sequentially turning on each individual segment.
Conclusions and useful video on the topic
For more complete information regarding the installation of electrical wiring in the apartment area, it is recommended to watch a video describing the processes.
Familiarization with the video will enrich your existing experience, which will only have a positive impact on the quality of work.
Electrical wiring done by hand in a city apartment is a completely acceptable option. However, there are some “buts” in solving the issue in this way.
Firstly, you should not take on this matter if you do not have the slightest experience in electrical installation. Secondly, when planning to carry out work independently, you first need to think about your own safety and only secondarily about your own benefit.
Share with readers your experience of independently installing wiring in your apartment, connecting sockets and switches. Please leave comments, ask questions about the topic of the article and participate in discussions - the feedback form is located below.


Of course, you need to think through the scheme, but the key to safety is still the quality of materials and equipment.You shouldn’t split the wiring too much into segments. I ran the cables separately only to the bathroom. There the washing machine and water tank are almost always included. There is only one switch for the rest of the house. I think this is sufficient. If the power of the switched on devices exceeds the maximum permissible, the switch will simply turn off. If the cables are good and the connections between them are made conscientiously, then there will be no fire.
Good day, Sergey.
You are right with the bathroom - even according to the PUE, a separate line is required, however, the reason is different: an RCD (see screenshot at the end of the comment).
The only switch for the rest of the electrical equipment in the house is excessive “efficiency”. In order not to describe the requirements of “SP 31-110-2003” “ELECTRICAL INSTALLATIONS OF RESIDENTIAL AND PUBLIC BUILDINGS DESIGN AND INSTALLATION RULES” I have attached a screenshot of the corresponding paragraph.
Your scheme in the spirit of minimalism will create a lot of inconvenience in operation - you will need, for example, to repair an outlet, replace a light bulb, or turn off the entire apartment.
A city apartment cannot avoid wiring. This is out of the question. Another thing is that in the old housing stock the wires have long served their useful life, and their replacement is necessary. Previously, wires were laid under plaster without any protection. Therefore, in order not to drill into the walls, the old wire is simply disconnected, and a new one is laid in the external cable channel. Or the entire network is driven into special plinths.
Hello, please tell me, is it possible to use, for example, a VVG ng 4*2.5 wire to the distribution box, and then power the sockets from each wire accordingly, let’s say one wall has one wire (in the panel it’s a separate circuit breaker), the opposite wall, the sockets are connected from another core (therefore, also your own machine in the switchboard), so as not to pull several branches, but to get by with just one wire from the switchboard to the distribution box, wouldn’t this be a violation of the rules?