How and with what to tap walls for wiring: instructions on construction work
When making major repairs or finishing a new building, all craftsmen are faced with the need to supply communications and disguise wires.The best way to lay utility networks is to place them in the wall. The work is quite labor-intensive and requires certain skills and special tools.
We will tell you how and what to use to tap walls for wiring, when you can get by with improvised equipment, and when it is better to use professional equipment. We will also describe the features of preparing grooves on different walls, and provide a step-by-step guide to grooves and sealing channels.
The content of the article:
Requirements and standards for grooves
Before choosing a tool and getting to work, you need to draw up an electrical wiring diagram in the apartment or private house taking into account construction standards (the requirements are regulated by SNiP 3.05.06-85).
The diagram must indicate the location of all lighting fixtures, junction boxes, sockets, switches and the route along which the connecting wires will pass.

Important details:
- The depth of the furrows should not exceed 2-3 cm, and the width - 3 cm.
- The maximum length of one channel from the junction box to the switch or device is 3 m.
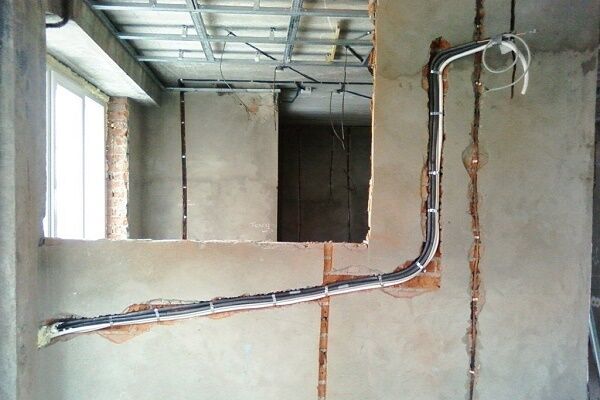
- Wires and, accordingly, grooves under them can only be routed vertically and horizontally, checking the level for parallelism with the main structures of the building. But it is impossible to reduce the distance “directly” with the help of oblique and especially wavy lines. The only exception to this rule can be the wiring in the attic room - in this case, the grooves are punched parallel to the slope lines of the walls.
- The minimum distance from floor slabs to horizontal grooves must be at least 15 cm, and from heating and gas mains - at least 40 cm.
- Vertical wiring should run at a distance of 10 cm or more from door and window openings.
- It is important to plan the wiring so that the wires have as few bends as possible on the way from junction boxes to lighting fixtures or outlets. Ideally, you should lead the path in a straight line from the box or use no more than one transition at a right angle.
- It is impossible to tap on load-bearing walls, floor slabs and corners - this can weaken the strength of the structures of the entire building and lead to an accident.
The following photo selection will clearly demonstrate the restrictions specified in the PUE:
If you carry out the drawing and subsequent gating in compliance with these rules, hidden wiring will work without problems or failures.
Choosing a tool for wall cutting
The easiest and fastest way to make deep grooves is with the help of special electrical equipment. But even if you only have a minimal set of household tools at your disposal, do not rush to give up your intention to do the work yourself.
We will tell you in detail how you can tap walls for wiring; we will consider options from “old-fashioned” methods to professional methods.
What is suitable from the home craftsman's arsenal?
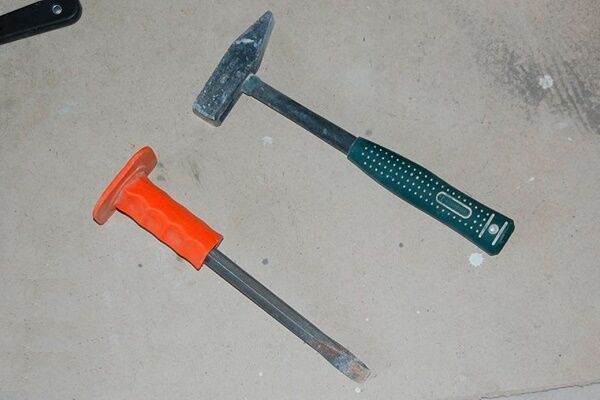
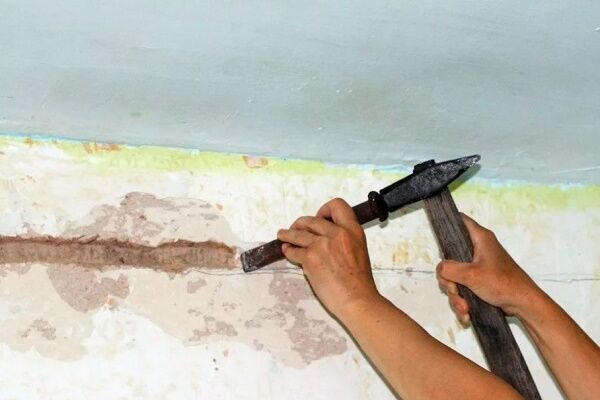
The simplest toolkit, which will almost certainly be found in the supplies of any home craftsman, is a chisel (chisel) and hammer. Place the chisel with its sharp edge against the drawn markings and hit it with a hammer to penetrate deeper into the wall.
Smoother lines are obtained if you additionally use a hacksaw - it is used to make cuts along the length of the grooves, which makes the process a little easier and faster.
But in any case, this will be the most labor-intensive and time-consuming option for making grooves for wiring.

This method is good because it does not require expensive equipment or special skills to work with it. Therefore, it is still successfully used to create short grooves on walls made of pliable material.
For example, if there is a need to extend an existing route to connect one or more new devices, moving the socket etc.
But if the room has concrete or brick walls, it is better to abandon the intention of making grooves with a hammer and chisel, and use more effective groove methods.
A simple power tool to help manual labor
A conventional electric drill will help improve the speed and efficiency of manual grating. But problems may arise with concrete walls - the drills will “burn”, so we will consider several important nuances and the principle of performing the work.

You need to act according to the following scheme:
- Draw markings on the wall surfaces.
- Select a Pobedit drill bit with a diameter of 8-10 mm for the drill.
- Make a “spot route” - drill holes of the required depth along the lines at intervals of about 0.5-1 cm. At the same time, you need to hold the tool perpendicular to the wall so that the drill does not bend and break. If you need a wide groove, make the holes in a checkerboard pattern.
- When working with concrete or brick, you need to turn on the drill at low speeds and stop periodically to cool the drill in cold water (just make sure that the liquid does not penetrate inside the device).
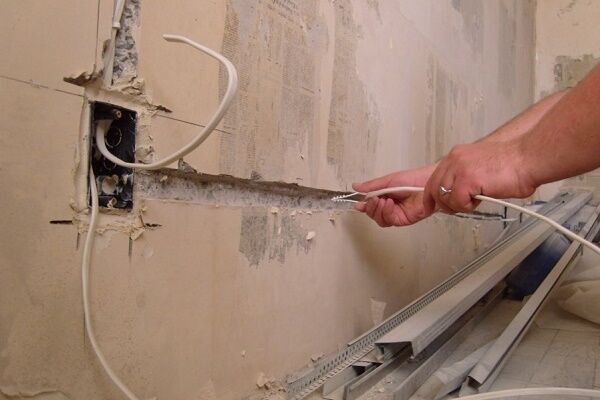
- Then, using a hammer and chisel, it remains to knock out the gaps.
Although the technology is quite primitive, it justifies itself when conducting darts at short and medium distances. For example, when laying wires in one room, a tandem drill and chisel will allow you to significantly save on the services of builders or the purchase of expensive equipment.
But for a thorough redevelopment of the wiring in the entire building or multi-room apartment, it is better to acquire specialized tools or invite a master electrician.
Professional equipment for quick installation
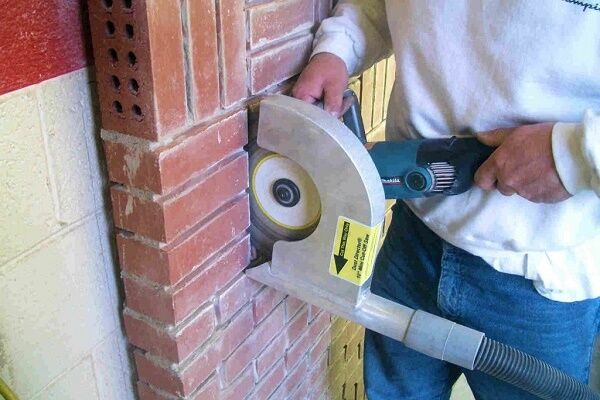
You can make grooves with a minimum of effort using special wall chaser. This tool can be fitted with two diamond-coated discs at once, resulting in neat and perfectly smooth grooves on any surface in one pass.
In this case, the circles themselves will be covered with a casing, on which there is an outlet for connecting a vacuum cleaner to prevent the spread of dust throughout the apartment.

In addition, the design of the wall chaser allows you to independently change the distance between the circles and set the desired width and depth of the groove.
In a word, this is an excellent solution with the only drawback - the price of the equipment is quite high, so it will be cheaper to invite a hired specialist than to buy a wall chaser for a one-time repair.
The following will help you quickly tap walls for wiring:
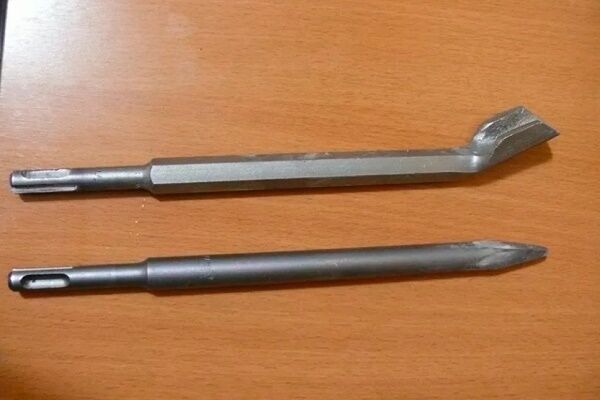
- Impact drill or hammer drill with replaceable nozzles. Both devices operate on the same principle: first, holes are drilled with a short drill at intervals of 1-1.5 cm. Then the nozzle is changed to a pointed “chisel” or “spatula”, installed at an angle of 45 degrees to the wall, the device switches to the “without” mode drilling" and clears the groove from the remaining material. This method is good for its speed, but not for its quality - the groove still turns out sloppy, with torn edges, cracks and chips.
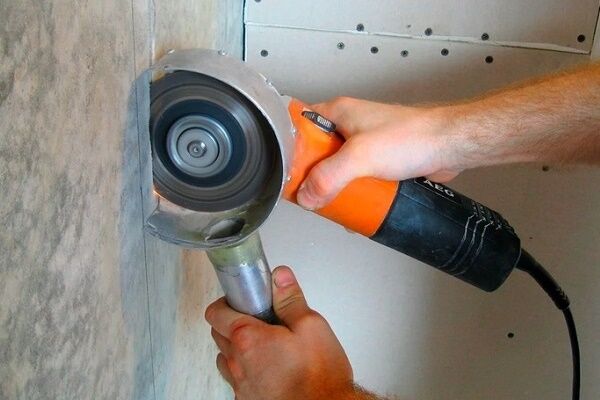
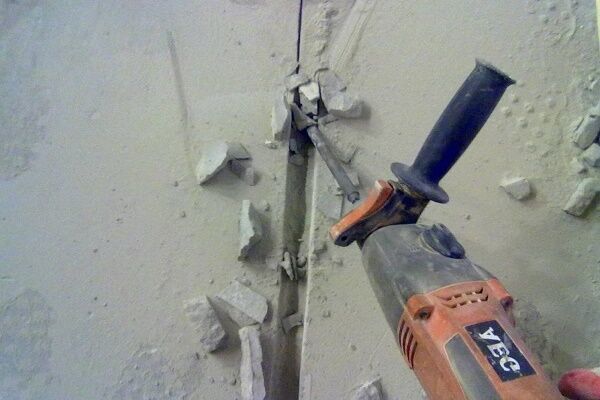
- Bulgarian (angle grinder) – if you equip the device with a sintered diamond or turbo-diamond disk, it will do an excellent job of making even grooves. Is it true, working with an angle grinder quite dusty and demanding of precision - according to the markings, you need to cut 2 parallel lines in 2 passes, maintaining a gap of the width of the future channel. Then the material is knocked out inside the groove using a hammer drill with a “shovel” attachment or other impact tool.
The grooves with a grinder turn out almost as smooth and neat as when using a wall chaser, but the cutting process is accompanied by such a huge amount of dust (especially if the walls are made of concrete or aerated concrete) that it is simply impossible to work without a respirator.
To remove at least part of this “cloud”, you can use a construction or industrial vacuum cleaner: While one person is slitting, the other will need to hold the suction hose close to the cutting line.

All objects that cannot be taken out of the room while the grinder and drill are working should be covered with film to prevent small construction debris from penetrating inside. Moistening the wall with water will also help reduce the amount of dust, but it is important not to overdo it, since working with wet concrete or brick will not be easy.
Features of working with various materials
If you have a correctly made diagram and suitable tools, it is not difficult for even a beginner in the construction business to perform wall gating. But this is the case if the wall is not load-bearing and is covered with a thick layer of pliable plaster.
But what if the internal partitions are made of high-strength concrete, lightweight aerated concrete or even wood? Let's consider the nuances of working with various materials.
Grooves in concrete and brick
On brickwork fastened with a mixture of sand and cement, you can even gouge out horizontal grooves with a chisel and hammer if you “get” into the seam. For vertical grooves, it would be better to use a power tool - an angle grinder, a hammer drill or a wall chaser.
If the masonry is covered with plaster, you can do it with primitive manual equipment, although the process will take a lot of time.

In principle, there is nothing difficult in working with concrete - although the material is quite strong, grooves on it can be made with any tool suitable for slitting, with the exception, perhaps, of a hammer and chisel.
But the best choice would still be a hammer drill, although the evenness of its grooves leaves much to be desired (however, plaster will correct all the nuances).

This impact tool has high power, so it can handle any hard surface. It does not create such a large dust cloud as an angle grinder, and does not require additional tools to clean out the remaining material inside the furrow.
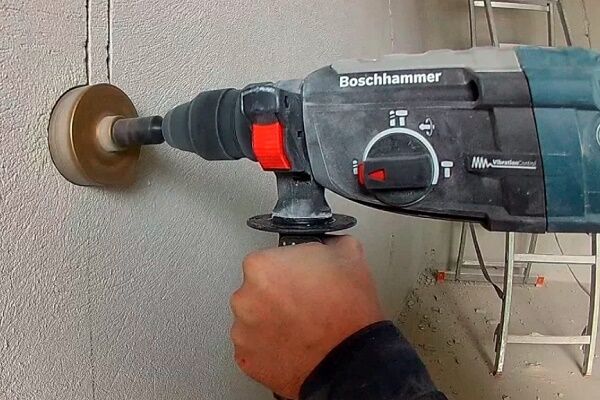
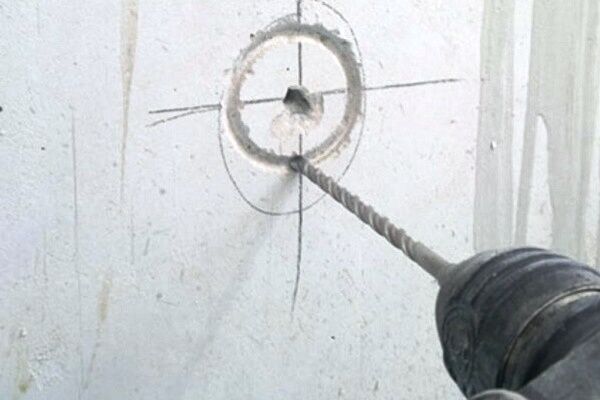
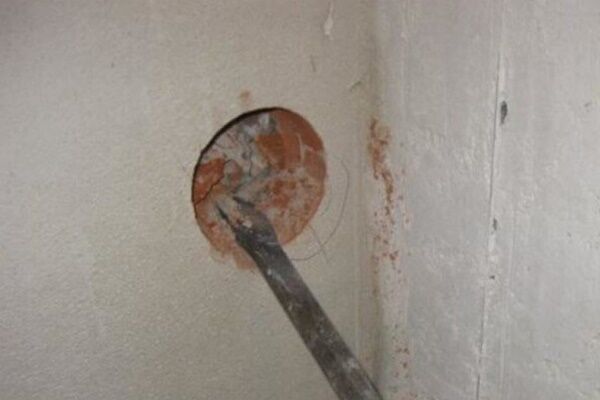
A hammer drill and a hammer drill are suitable for forming round holes, although for this the master will need experience:
In addition, on high-strength concrete walls, using a grinder (and its analogues - a circular saw, an angle grinder) is unsafe - the wheel may break if pressed hard.
How to work with wood and aerated concrete
You can make grooves in walls made of aerated concrete or foam blocks using a grinder, drill, hammer drill or circular saw.But if you want to minimize the amount of dust, use a special manual wall chaser designed for working with pliable material.
Its pointed arc easily cuts a neat groove, and the desired depth can be achieved in just 3-4 passes.
By the way, it’s easy to make such a tool with your own hands from a plate sharpened on one side or hard punched paper tape. To do this, you need to bend a small piece of improvised material into an arc and secure the edges with wire or electrical tape.
For small volumes, such a device is quite sufficient, but if you need to install a network of channels with a total length of more than 20 m, it is worth equipping the device with a convenient pipe handle.

As for walls made of profiled timber or rounded logs, according to fire safety rules, it is recommended here installation of exposed electrical wiringso that in the event of force majeure the source of ignition can be quickly neutralized.
As a last resort, for wooden walls you can use a special router, a grinder with a circular disk for wood and a chisel, with which you can remove the material remaining between the cuts.
But, we repeat, it is better not to take risks with masking the wires and carry out the installation without violating the PUE standards and the integrity of the wooden covering.
Nuances with load-bearing walls
As already mentioned, it is prohibited to ditch load-bearing structures - if the top layer in the wall is damaged, the reinforcement is exposed, which can result in corrosion that will weaken the entire frame of the building.But what about the owners of apartments in a building where some of the partitions are made of reinforced concrete or most of the walls are load-bearing?
There are several options here:
- Official approval – obtain permission to carry out gating work from the local building department. You can try if you can prove that the depth of the grooves will not affect or damage the reinforcing mesh, the deformation of which leads to softening of the load-bearing structures. But if we are talking about a panel house, the chances are almost zero, but for a frame-brick building, a permit will most likely be issued.
- Apply a layer of plaster to the wall and carry out gating without delving into the structure of the slab itself. Typically, the reinforcement lies under a 1.5-2 centimeter layer of concrete, so if you level the wall with a plaster mixture, the depth of the grooves will not affect the metal.
And the last way that will help solve the problem with any problematic wall is to hide the wires behind drywall or in special electrical skirting boards.
Step-by-step description of the gating process
First you need to draw up a diagram with a detailed indication of all the elements of the electric highway. Those who are computer friendly can use special programs, for example, "Compass Electric", ProfiCAD, QElectroTech or other graphic editors.

Step-by-step process for gating walls using wiring:
- If possible, we protect the room from construction debris - we close the doorway with a damp cloth, remove furniture and equipment or seal it hermetically.
- If there is wallpaper on the walls, it must be removed so that pieces of paper do not get stuck in the power tool.
- Then we transfer the wiring diagram to the walls using a drawing drawn up in advance, a marker and a building level.
- We check the marked area with an indicator or metal detector for the presence of old wiring - if any is found, you will need to dismantle it or make an indentation of at least 10 cm. Ideally, the apartment should be de-energized and the wire extended to the neighbors, because if you accidentally stumble upon a cable that was missed during inspection under voltage, serious injury may occur.
- Now you can make grooves using protective equipment and any tool convenient for you that is suitable for the wall material.
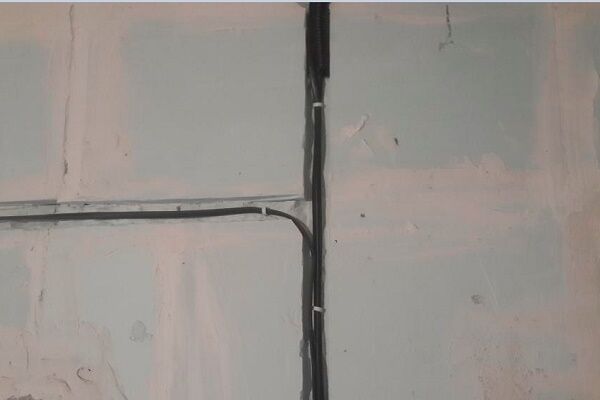
- When the entire route has been completed, the grooves must be cleaned of residual material and dust, then treated with a deep penetration primer.
- When the impregnation dries, you can install the wiring.
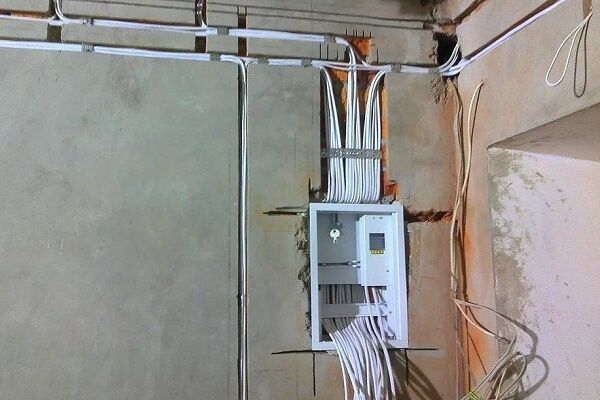
Please note that the grooves are different, because the grooves are intended not only for the cables themselves, but also for masking socket boxes, switches and junction boxes.
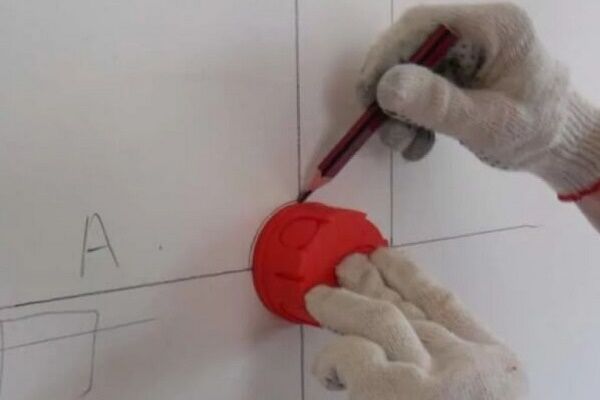
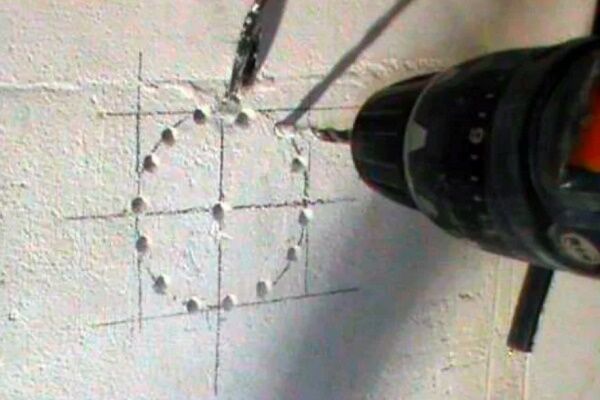
Typically, the boxes themselves are placed immediately under the ceiling (in the place where the main power line runs), and the sockets are placed 30 cm from the floor level. And for them you will need to make a recess in the shape of a circle.

Of course, to hollow out such grooves for installation of socket boxes You can do it manually by marking a line around the circle with a drill or chisel, but it is much more convenient and faster to do this using a hammer drill and a “crown” of a suitable diameter. The same attachment can be used to make a recess for switches.
How to disguise grooves with wiring
Work on laying hidden channels is usually carried out before applying plaster, so that after wiring the communications, the entire surface of the wall can be leveled for applying the finishing coating. But if the wiring is replaced after the rough finishing of the walls, you need to act carefully so that the grooves do not turn a spot repair into a major one.

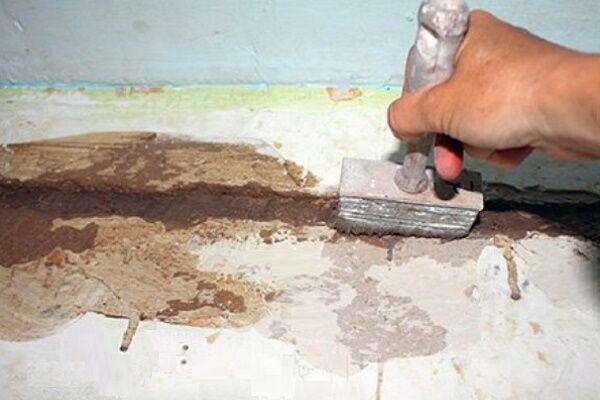
The simplest option for treating canals is gypsum plaster. It must be applied after the grooves have been cleaned of dust and primed, and all the wires have been installed according to the diagram.
To reduce shrinkage, it is recommended to moisten the wall near the grooves with water. Then you need to prepare a thick solution of gypsum plaster mixture and fill the channel using a spatula/trowel.
To prevent the plaster layer from collapsing over time and sagging, you can use a special mesh for reinforcement. Then smooth the mixture perpendicular to the groove (working the vertical groove from bottom to top) and remove excess solution with a smoothing iron.
Conclusions and useful video on the topic
For a better understanding of wall gating, we suggest watching craftsmen work with various tools and learn practical advice about the numerous nuances that may arise during the wiring installation process.
If you are in doubt about which tool to choose for gating, we suggest studying a master class comparing the work of a hammer drill, an angle grinder and a wall chaser:
Despite the noise, the hammer drill remains one of the most popular construction tools for making grooves. Learn more about the principles of working with this tool in the following video:
The grinder is an excellent device for creating smooth channels. Installing a protective cover with a dust extraction will help minimize the amount of dust:
How to make a manual wall chaser for working with gas and foam blocks:
If the examples provided do not inspire you to dabble walls yourself, you can always call a specialist with professional equipment to make a network of channels and route wires along them.
Do you have experience with wall slitting? Share practical skills and tips with our readers. Please leave comments and ask any questions you have. The feedback block is located below.


I was doing new wiring in the apartment, I didn’t draw up a drawing of the new lines before starting, I imagined everything in my mind. I don't think many people do it. I tapped the walls using a grinder.Since I had little experience working with it, the lines were not parallel everywhere and the width of the channel was not the same everywhere, but in the end this did not greatly affect the work. It’s really true about dust, there’s a lot of it! Why is it so categorically impossible to draw oblique lines? What does this mean?
You can’t cut diagonally because in 10 years you will either forget how you did it or the repairs will be done by people who moved in after you and there is a high risk of damaging the cable.
Good afternoon, Denis.
You're right. There is an expression: the rules are written in blood. For example, the instructions for investigating accidents include a clause: which paragraphs of the Rules need to be revised and supplemented in order to exclude what happened?
The verticality and horizontality of household wiring is regulated by the “Installation Instructions for Electrical Wiring...”, developed by the Roselectromontazh Association - the developers took into account the causes of accidents. The document was assigned No. I 1.00-12. I attached a screenshot of the required section to the comment.
In addition to the wiring project, I note that it is required to draw up as-built drawings. After all, gating, installation of sockets, switches, and other elements will always have a deviation from the drawing.
In general, the current SNIP prohibits the laying of wiring diagonally, except in attics. But, in principle, the guys are right, indeed, in the future, you yourself will not be able to even nail a nail without markings in such a groove, not to mention the new owners and households. As for dust, before gating, moisten the area of future trenches with water. A surface that has absorbed water will produce much less flying dust.
The drawing (and photos of the work) will be needed in the future, when, under the finishing touches, you forget how the wires were laid. In violation of the requirements, I installed oblique wiring under a suspended ceiling. I don't think there will be any problems. I also scratched the walls with a grinder - I cursed everything and I think caused damage to furniture, clothes, etc., although I tried to cover everything with film. An ordinary vacuum cleaner will not help here, but a construction vacuum cleaner is still expensive. Like a wall chaser, although, in my opinion, professional electricians need it. Yes, and I don’t see the point in installing sockets 30 cm from the floor or in baseboards; it’s inconvenient to bend over every time.
Good article, thank you. But it’s better to turn to a professional for wall gating, otherwise the neighbors will go crazy from endless repairs. If you are from St. Petersburg, then I recommend the company St. Petersburg Repair Service, I used this service a year ago. I was very pleased, including the neighbors, the guys worked: quickly, neat, not particularly dusty.