Do-it-yourself cesspool: analysis of popular arrangement options
It is impossible to organize the correct operation of the local sewer system of a country cottage without installing a drain tank.One of the cheapest ways to drain sewage is a cesspool - you can build a sewer structure yourself, using inexpensive materials.
We suggest familiarizing yourself with the most popular and budget options for waste tanks. The article describes in detail the technologies for their construction, and also outlines the features of the operation of cesspools.
The content of the article:
- Features of the operation of cesspool structures
- Classification of waste tanks
- Arrangement of the tank: taking into account sanitary standards
- Construction of a tank from tires
- Selection and installation of a plastic tank
- Concrete ring construction: step-by-step instructions
- Construction of a brick cesspool
- Conclusions and useful video on the topic
Features of the operation of cesspool structures
A cesspool is a structure designed to collect household wastewater of biological and technical origin, followed by pumping it out as it is filled with sewage disposal equipment.
The undeniable advantage of cesspools is the simplicity of their implementation. It is possible to build such a structure quite quickly, using even used building materials.
According to the standards, in accordance with clause 2.4 of SNiP 2.04.03-85, it is believed that the volume of the storage tank is determined on the basis that on average up to 25 liters of water are consumed per day for the needs of one person.
Therefore, if the daily amount of wastewater does not exceed 1000 liters, a cesspool with a capacity of 2-3 cubic meters can handle the function of collecting sewage. m.
The only disadvantage of cesspools is the need for regular pumping of waste. In order to reduce the number of calls to the services of vacuum cleaners, biological agents and chemicals are used.
This leads to the fact that over time the need for regular pumping decreases, and the periods between calls for a sewer truck increase.

When using biological agents, sewage is purified to a degree of 95%. As a result, they can be redistributed into the soil after filtration in an absorption well or in a sewer drainage system. But such drugs only work effectively if the ambient temperature is above +4°C.
In winter, chemical preparations - nitrate oxidizers - will cope with the task. When they are used, an insoluble sediment is released from the sewer mass, which also needs to be removed from the container.

Classification of waste tanks
The classification of cesspools is carried out according to two main criteria: design and type of material used to construct the walls.
Design options
The cesspool can be arranged in the form of an absorption well or a sealed storage tank. In the first case, the bottom of the tank is simply covered with a layer of fine gravel or crushed stone, which will be responsible for filtering the wastewater.
Absorption wells are installed mainly for collecting and purifying “gray” sewage from washing machines, dishwashers, showers, etc. On rocky, semi-rocky rocks and clayey soils (clay, loam, sandy loam) cesspools without bottom it is forbidden.
To organize a filter well, soils with filtration capabilities are required.
Partially sealed structures are convenient because they do not require regular pumping. At the first stage of operation, water seeps into the ground quite quickly.
However, over time, when installed on soil with layers of loam, silt may accumulate at the bottom of the tank, making filtration difficult. This leads to the need for more frequent well cleaning.

Giving preference to partially sealed structures, experienced owners recommend separating wastewater by constructing separate cesspools:
- first – for waste water;
- second - for the toilet.
In this case, the toilet pit will fill more slowly, and therefore less likely to need pumping with special equipment. And drains from the kitchen and bathroom, which contain a tiny amount of insoluble inclusions, will almost completely seep through the filter into the ground.
Leaky structures are allowed to be installed only if the drain does not exceed 1 cubic meter. m/day. In designs of this type, to accelerate the decomposition of impurities and improve the quality of cleaning, it is recommended to use specialized means for cesspools.

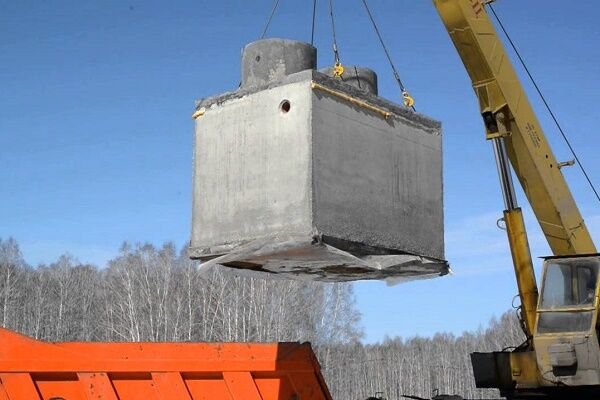
When constructing a sealed, closed cesspool, the bottom of the tank is completely concreted. To arrange the bottom of tanks, special slabs, cement fill or brickwork are used.
The walls of the storage tanks are also made of building materials: monolithic concrete, reinforced concrete rings, baked bricks, foam blocks. The walls and bottom of the sewer structure are completely covered with waterproofing.
Types of materials used
Depending on the dimensions of the structure, as well as the accumulating or filtering principle of operation, a wastewater collection structure can be:
- tire pit;
- Plastic container;
- tank made of concrete rings;
- building with brick walls.
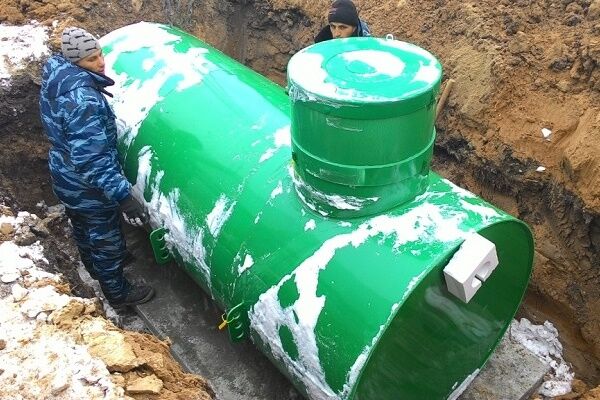
The choice of the appropriate option depends on the terrain conditions and the capabilities of the owner of the site. The main requirement for the material used to construct a storage tank is to prevent the seepage of wastewater into the soil in contact with it.
The material must have excellent resistance to soil pressure, and also be resistant to aggressive environments, which include sewage. For this reason, the use of metal or wood, which quickly deteriorates under the influence of moisture, is unjustified.
Arrangement of the tank: taking into account sanitary standards
Despite the fact that the process of constructing a cesspool is simpler than constructing the same septic tank, a number of certain nuances should be taken into account when constructing a structure. After all, the efficiency of the sewer system and the ease of use directly depend on them.

Regardless of the type of design chosen, in order to properly make a cesspool, you need to correctly approach the place where it will be installed.
When deciding on the location, it is important to take into account the level of groundwater. If there is a possibility of infiltration of treated wastewater into the water intake horizon, the installation of an absorption structure will have to be abandoned.
In addition, in regions with characteristic flood phenomena, it is impossible to build wells with filtration holes in the walls. Because there is a high probability of groundwater contamination when a sewerage structure is flooded during its seasonal increase.
The organization of the storage tank is also carried out according to special rules. The buried storage facility must be provided with free access for sewage disposal equipment, which in most cases has impressive dimensions.
The rules for placing cesspools are strictly regulated by SNiP. Failure to comply with the prescribed requirements is punishable by fines.

When determining the dimensions of the structure, keep in mind that the maximum depth of the pit should not exceed three meters. Exceeding the depth significantly complicates the process of pumping out wastewater.
In addition, the walls of the structure must be insulated to the depth of seasonal freezing of the soil, and a small protrusion must be provided in the upper part of the pit for installing a cover.
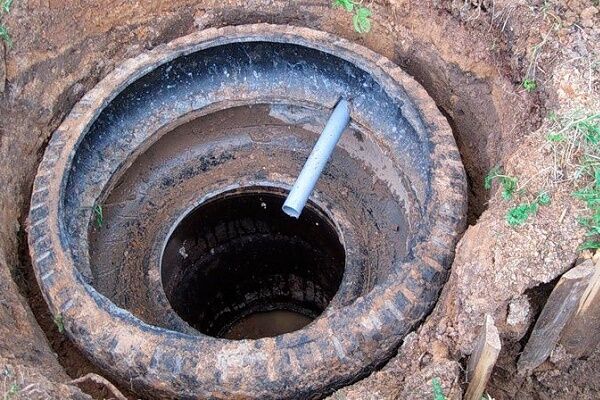
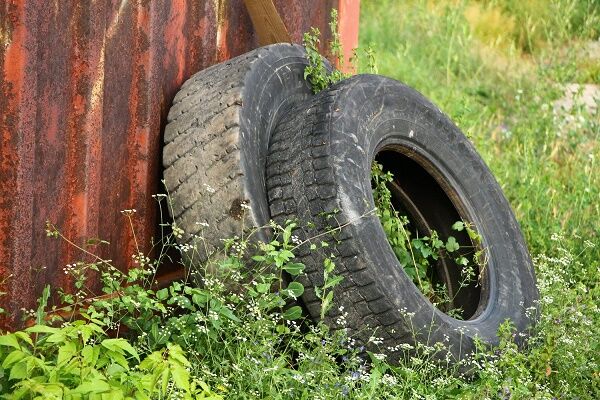
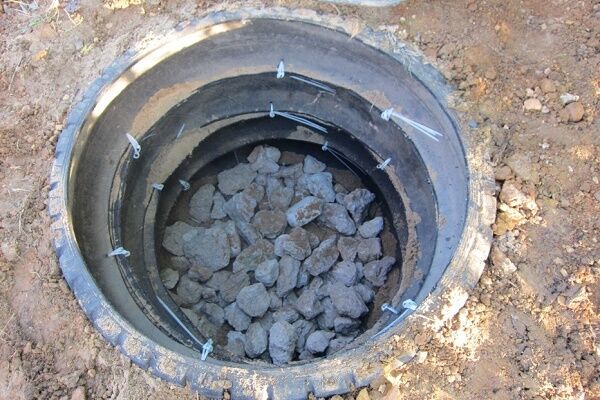
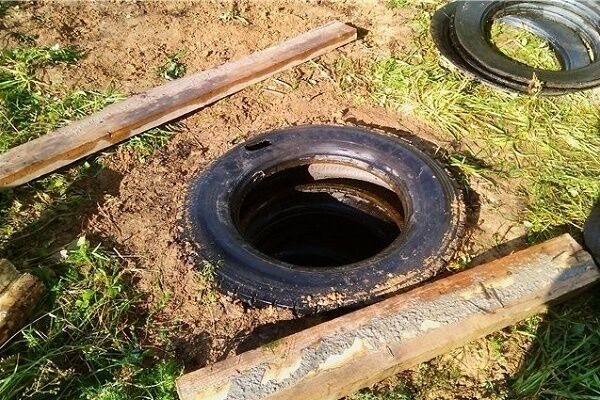
Construction of a tank from tires
Main advantage raking out tires - long service life and the use of practically free material. The structure will serve properly for more than 30 years.

The end parts of the tires do not need to be cut. But untreated car tires will reduce the size of the filter in terms of plan.As a result: with frequent use of the structure, the bottom quickly silts up and stops filtering water quickly and efficiently.
Therefore, to simplify the installation of car tires and prevent the accumulation of solid waste in protruding rims, it is advisable to cut the end parts of the tires using a jigsaw, forming a flat plane.
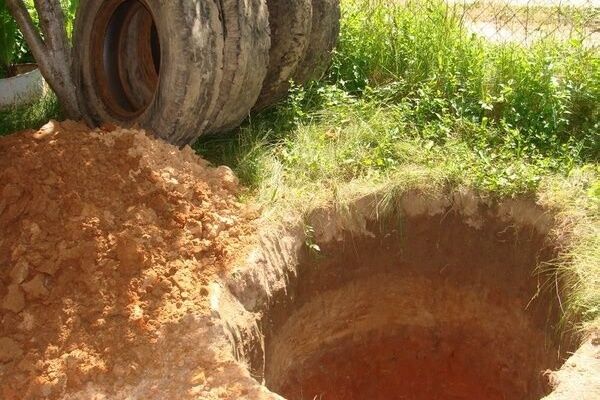
The construction of a tire pit is carried out in several stages:
- Determining the diameter of a hole in the ground. The calculation is made based on the outer section of the selected tires.
- Digging a mine. Excavation work by hand may take several days.
- Bottom arrangement. At the central point of the bottom, using a garden drill, drill a drainage hole for installing a well pipe. The well will pass wastewater through itself, retaining sediment.
- Formation of a drainage “cushion”. The bottom of the pit, equipped with a well, is sprinkled with a 15-centimeter layer of crushed stone with sand filler. A filter layer of at least 85 cm of sand is placed on top of the crushed stone bed.
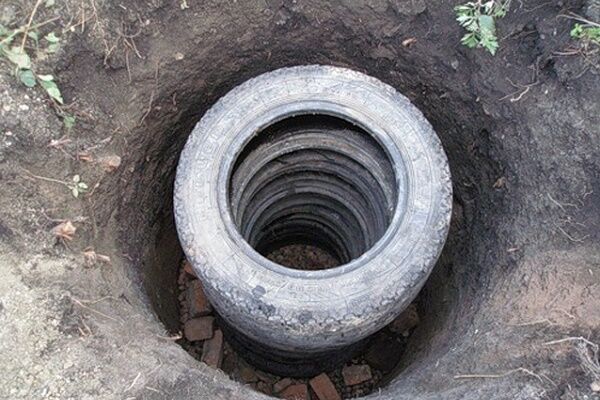
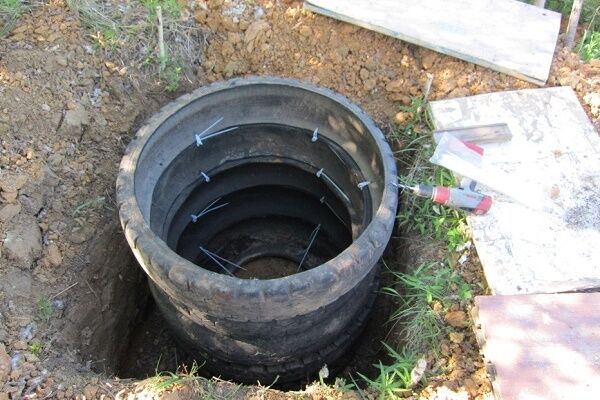
- Tire installation. The tires are sequentially stacked on top of each other and fastened together with a bolted connection. A hole is made in the side surface of the upper tire for inserting a pipe to discharge wastewater.
- Sealing seams. The joints and suture contours are treated with sealant.
- Backfilling of the pit. To provide additional waterproofing, it is better to first seal the outer walls of the sewer structure made from tires with clay.
- Overlapping structure. Cover the pit with boards covered with roofing felt.
- Installing the protective cover. It is best to use a finished product made of polymer materials.
If additional treatment of wastewater in the drainage sewer system is planned, then drains are connected to the well. These are pipes laid with a slope towards the filtration fields with drainage holes along the entire length.
To install an additional filter and improve the final quality of cleaning, a polypropylene mesh is stretched over the pipe walls.

Ventilation is not a mandatory element of the absorption waste tank. But experts still recommend installing an outlet pipe. It should rise approximately 60 cm above ground level.
In the future, with intensive use, such sewer structures require cleaning 1 - 2 times a season.
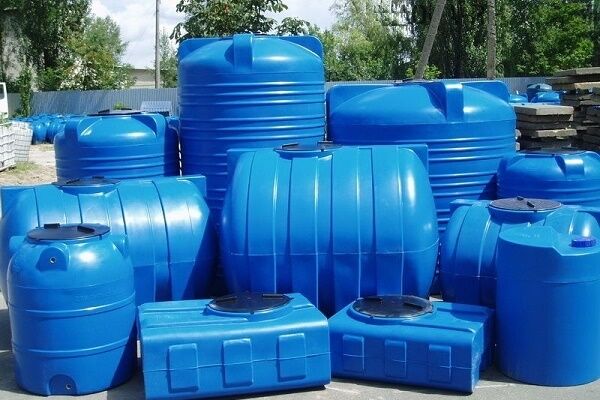
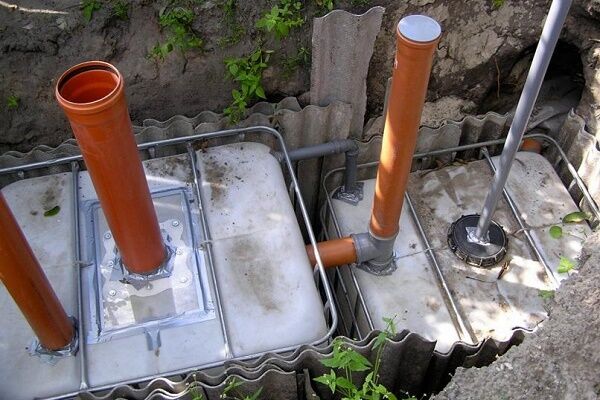
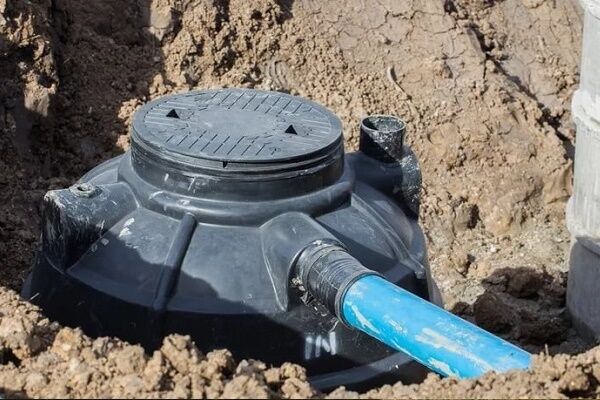
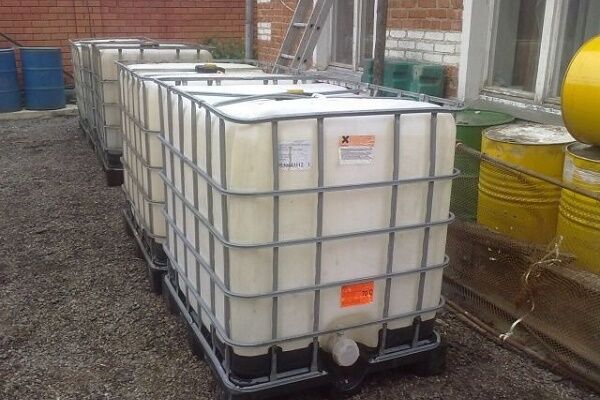
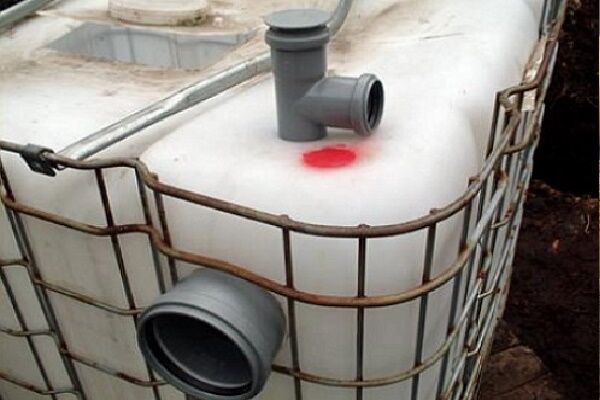
Selection and installation of a plastic tank
Today, plastic containers are quite actively used in the construction of local sewage systems - polymer cesspool It is resistant to rotting and aging, thanks to which it can last for several decades.
The light weight of the structure facilitates the installation process. But the lightness of the tank can also lead to the fact that under the influence of soil pressure during operation it will simply be squeezed out to the surface.
To prevent ejection, the container is attached to a reinforced concrete slab laid at the bottom of the pit, or fixed with an anchor holding the plastic tank in place.

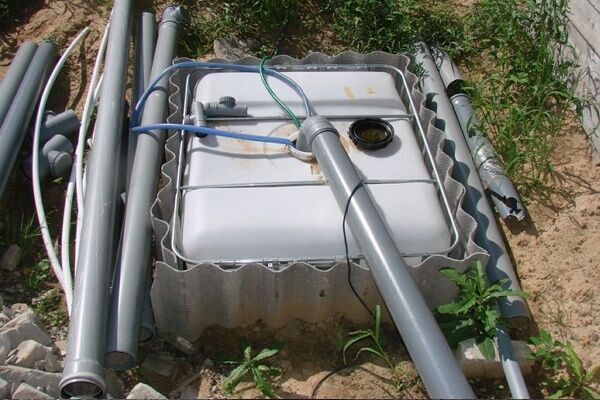
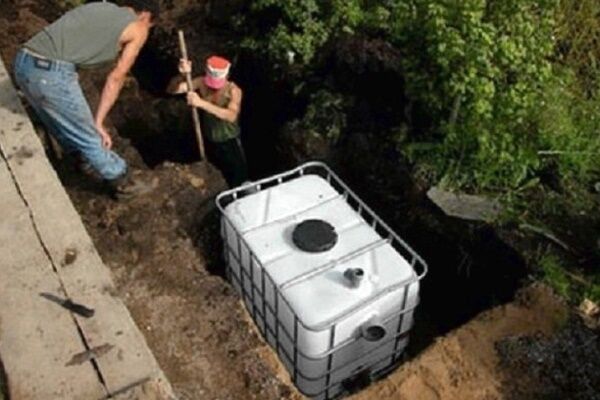
The technology for digging a pit and preparing the foundation is practically no different from the process described above.To install the container, dig a hole of such a size that the distance between the earthen walls and the plastic is 30-40 cm.
The bottom of the excavated pit is leveled and filled with a concrete layer 20 cm thick, checking the horizontal plane using a building level.
A plastic storage tank is installed on top of the hardened concrete slab. He is lowered down using ropes.
Some craftsmen, to protect the walls of the tank from the pressure of soil masses, construct a casing made of metal mesh, or erect brickwork.
Upon completion of installation work, the outer walls of the container are compacted with a layer of earth. To prevent the structure from accidentally cracking under the thickness of the surrounding soil when backfilling, water must be gradually poured into it as the walls are compacted.After installation is completed, the water can be pumped out using a pump.
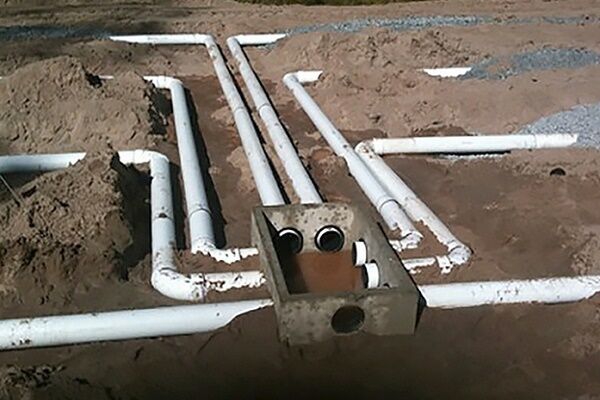
The storage type cesspool is ready. All that remains is to connect the sewer outlets to it, laying them at a slight slope. Direct it towards the receiving container. There should be 2 - 3 mm of slope per linear meter of sewer pipeline.
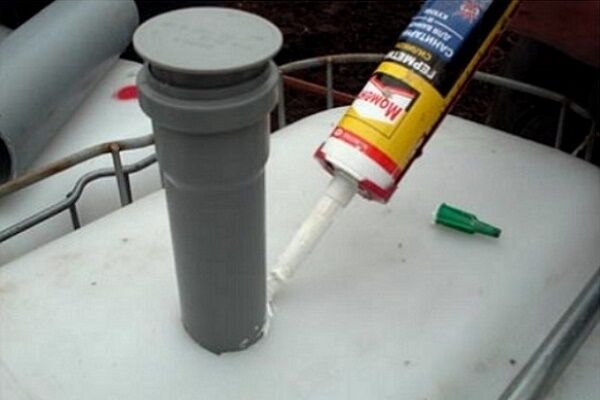
Pipe connections are connected using couplings of the appropriate size. To increase the tightness of the system, the joints are covered with silicone sealant.

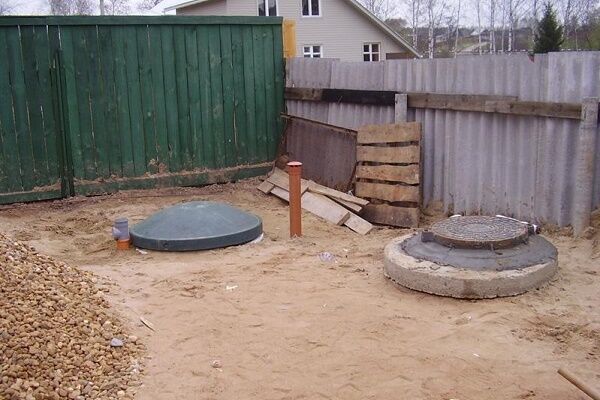
At the final stage they install hatch cover, and the earth’s surface is leveled around the container itself.
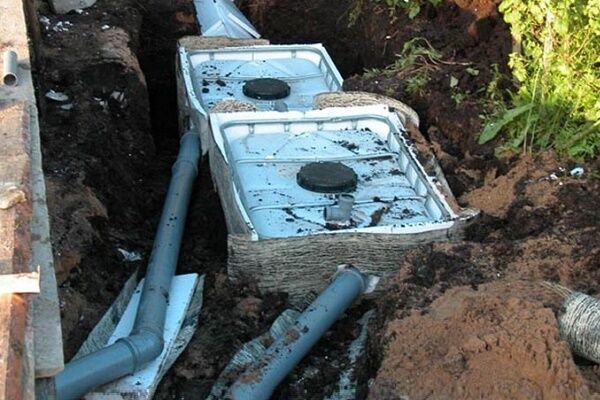
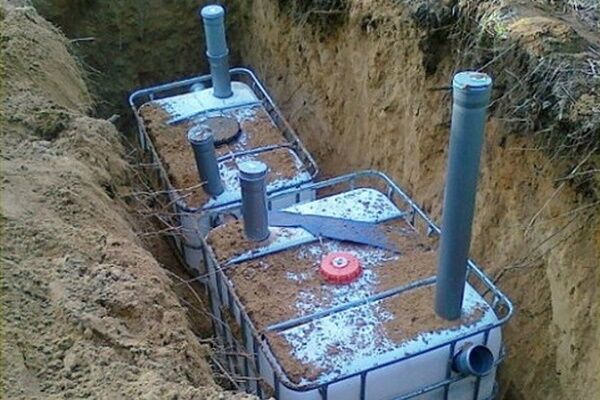
If you need cesspool with overflow, that is, an option to make it from Eurocubes:
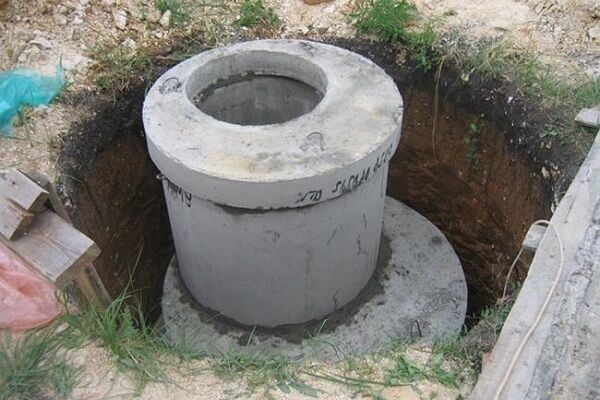
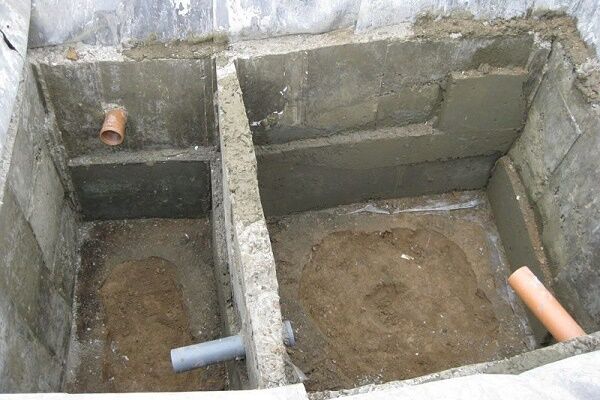
Concrete ring construction: step-by-step instructions
A standard sewer storage tank consists of 2-3 rings. Each ring measuring 1x1.5 meters can accommodate up to one and a half cubes.
Construction of a cesspool from concrete rings is a multi-stage process that requires adherence to a certain sequence.
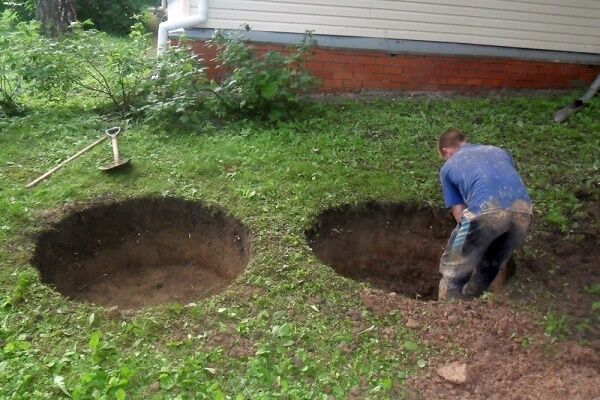
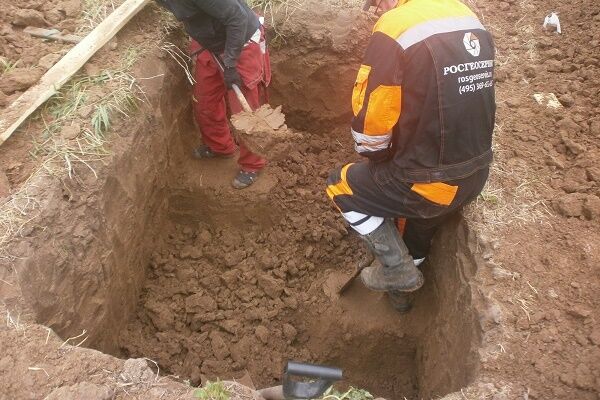
Step #1. Digging a pit and arranging the bottom
Having decided on the dimensions of the future “well”, they dig a pit, the dimensions of which are 80-90 cm larger than the diameter of the rings being installed. The walls of the pit are cleaned and leveled. The bottom of the pit is carefully compacted.

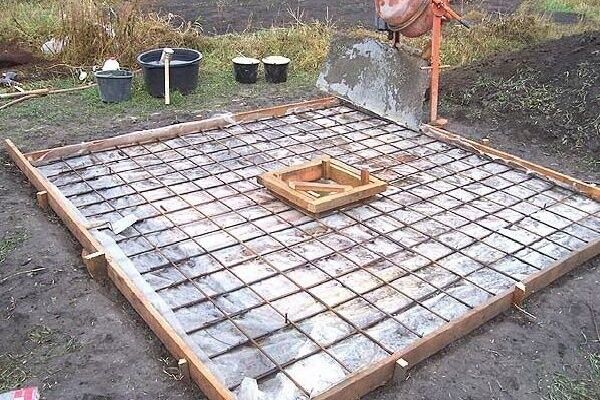
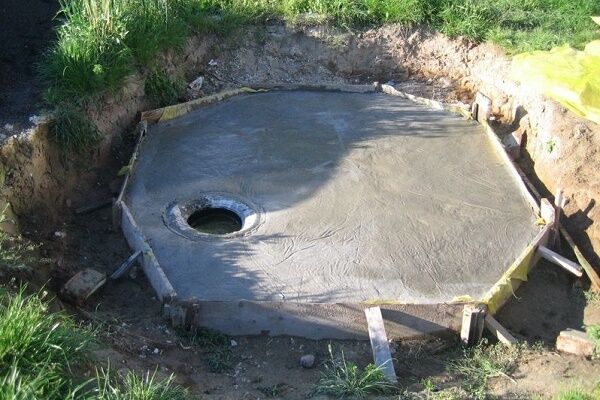
To create a sealed pit bottom, cement is poured or bricks are laid on pre-built formwork, the dimensions of which correspond to the shape of the future tank.
The bottom with the formwork installed is laid out with several layers of bricks or filled with cement mortar. It takes 5 to 7 days for concrete to harden. To simplify your task, use ready-made concrete rings already equipped with a bottom.
Step #2. Construction of the walls of the structure
After the poured bottom has acquired the desired strength, the installation of concrete rings begins. The rings are sequentially lowered into the prepared shaft well using a winch or crane. If during immersion the ring becomes warped and gets stuck in the ground, the hole should be slightly expanded.

To soften the blow and avoid the appearance of cracks in the concrete, boards are temporarily laid on the upper edge of each ring. Concrete rings, if necessary, are tied with reinforcement and fastened together with steel plates or brackets. A more reliable grip can be achieved by using rings with a “lock”.
The joints are covered with cement mortar with the addition of liquid glass and waterproofed using old rubber seals.

After completing the installation of the tank barrel, the voids between the outer walls of the constructed tank and the pit are strengthened:
- stones;
- broken bricks;
- soil dumped when digging a pit;
- construction waste.
In regions where the depth of soil freezing exceeds one meter, it is advisable to insulate the tank walls.
The pipeline to the cesspool is laid below the freezing point of the soil.To achieve the required slope, the pipes are laid in a trench using brick supports.
Step #3. Installation of hatch and ventilation pipe
The upper ring is covered with a slab made of reinforced concrete. At the final stage, ventilation is installed that will remove methane and explosive sulfur gas formed as a result of rotting.
To construct an outlet pipe, take a meter-long section with a diameter of 100 mm and deepen it into the cavity of the well so that the upper end rises half a meter above the ground.
To prevent the spread of unpleasant odors, the cesspool is covered with a plastic waterproof hatch. It is installed on a neck with a height of 300-500 mm.

The double lid will prevent the spread of unpleasant odors in the summer and freezing of the contents in the winter. To increase the insulating properties of the structure, the space between the covers is laid with pieces of mineral wool or pieces of foam plastic.
A layer of clay is laid on top of the ceiling, on top of which decorative soil is poured at the level of the installed lid.
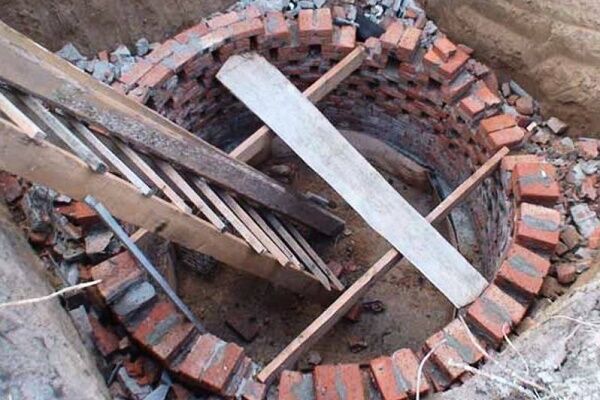
Construction of a brick cesspool
A significant plus brick cesspool - durability. The structure can last more than half a century. In addition, such a tank is repairable.
Step #1. Calculation of the volume of materials
To properly build a brick cesspool, you need to make a construction plan and carry out preliminary calculations. It is necessary to calculate the number of pieces of material and determine the number of rows.To do this, the estimated height of the walls is divided by the height of the brick row, not forgetting to add 6 mm to the seams.
Knowing approximately the number of bricks in each row, it will not be difficult to find out the required volume. To determine the number of bricks for staggered laying, you need to multiply the number of bricks in one row by 0.6.

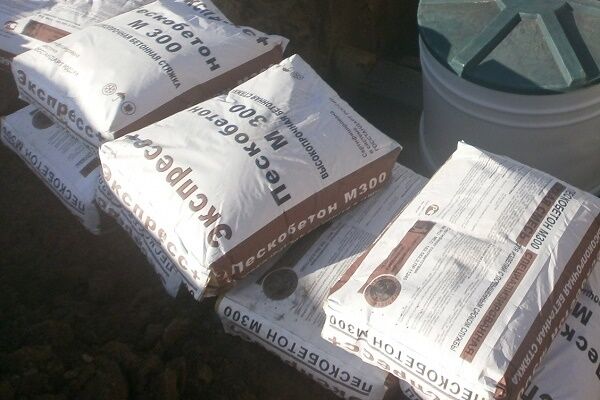
When constructing a brick wall, the masonry is done using a cement-sand mortar prepared in a ratio of 1:4.
Step #2. Excavation and wall laying
You can dig a pit yourself, armed with a bayonet shovel, or using small-scale mechanization tools. The shape of the pit can be any: round, square, rectangular. At the same stage, a trench 55 cm deep is dug for laying sewer pipes.
To construct an absorbent structure, the bottom of the pit is covered with a drainage layer at least 100 cm thick; when constructing a sealed storage tank, it is filled with a cement screed.

Brick walls must be plastered with cement mortar. To achieve complete tightness, the surface is covered with bitumen mastic, and to extend the service life of the plaster, ironing is carried out.
Reinforced concrete screed is best suited as a floor. The sides of the pit should overlap by 25-30 cm.
To create the ceiling, formwork is assembled from wooden boards. Concrete is poured inside it in two layers. To do this, first pour out a solution 7-8 cm thick.

An inspection hole with a diameter of 700 mm is made in the ceiling cavity.
After the concrete has set, the floor is covered with roofing felt, plastic film or any other waterproofing material. The finished structure is sprinkled with soft clay and soil.
After completing the organization of the sewerage system with a cesspool, all you have to do is monitor the filling of the tank and, as necessary, use sewerage equipment for pumping.
Conclusions and useful video on the topic
The easiest way to build a drive:
Step-by-step guide to arranging a cesspool with brick walls:
The choice of option for constructing a cesspool depends only on your capabilities and preferences. In any case, if all stages of installation are performed correctly, the sewage tank will serve you for many years, coping well with the tasks assigned to it.
Share with readers your experience in constructing and operating a cesspool. Please leave comments on the article and ask questions that interest you. The feedback form is located below.


In general, there is nothing particularly complicated in the construction. Dig a hole, buy rings and a cover, install the pipes themselves and fill the ceiling with cement. All the difficulties with sealing connections when connecting pipes. Well, the design itself is also not an easy task. And so, in essence, everything is simple and clear, but also, probably, not for everyone. Therefore, if you are just starting to do this, read everything in detail and look here.
Definitely, if you make a cesspool yourself, it will be cheaper) But, of course, it will take a lot of time to tinker, especially if you have no experience. For me personally, the most difficult process was designing the pit. During the study, many nuances emerged. For example, initially I wanted to make an absorption well without a bottom, but this option did not suit us, since the groundwater is too close to the surface. As a result, we made a waterproofed cesspool with a sealed bottom.