Do-it-yourself well in the country: a review of technologies and tools for manual drilling
A well in a summer cottage will save you from a lot of problems. Will provide water for irrigation, maintenance of personal vehicles and territory.It is unlikely that self-extracted water will be useful for drinking purposes, but it is quite suitable for performing hygienic procedures.
True, drilling a mine is not very cheap. It’s another matter if you build a well at your dacha yourself. In this case, you can acquire your own water source with minimal financial losses. Do you agree?
Our proposed article describes in detail the drilling technologies available to independent drillers. The drilling tool and the rules for selecting it depending on the physical and mechanical properties of the soil are described in detail. Our recommendations will provide effective assistance in installing a water intake.
The content of the article:
Short simplified course of hydrogeology
Groundwater differs significantly from its surface counterparts. They do not flow in the form of turbulent streams and rivers, nor do they gather in lakes unless they encounter a karst cavity in the earth’s crust.
If zealous streams frolicked everywhere under our feet, cities and settlements would collapse following the ground that did not have a reliable rock foundation.

The nature of the occurrence of water in rocks
Groundwater contains pores, voids and cracks formed in rocks during various geological processes.We will not go into the genesis and operating principle of the processes in this article.
Let us only note that the method of formation of soils determines their physical and mechanical properties, as well as the hydraulic technical and hydrogeological specifics of the water found in them.
Groundwater is characterized by some movement within the host layer - a layer of sediment with equivalent properties and structure. By analogy with surface ones, gravity acts on them, causing a current to flow to the layers located below or along the slope to the underlying areas.
If underground water has the ability to accumulate, but there are no ways to discharge, then pressure increases. Due to its physical properties, water cannot be compressed. Within a confined space, pressure forces the fluid to find a place to naturally exit. Thanks to this phenomenon, springs come to the surface and geysers erupt.

Soils whose pores, caverns and cracks contain water are called water-bearing or aquiferous. The excavation constructed for water intake must be buried precisely in them. Among water carriers, there are species that are capable of passing water through themselves without hindrance, and species that are only capable of retaining it.
In the geological section, aquifers usually alternate with aquitards. These are clay soils, the structure of which is similar to all known plasticine; they do not contain water and do not allow it to pass through.
Water can be found in small lenses and cracks formed in loams and hard sandy loams. However, most often it is simply absorbed by clay deposits, thereby changing their consistency.
Aquitards also include rocky and semi-rocky varieties in an undestroyed state, i.e. no cracks. If their body is riddled with cracks of various sizes, and even filled with water, then rocky and semi-rocky formations pass into the category of water-containing ones.

Classification of groundwater
The nature of the formation of soils containing water underlies the classification according to physical and mechanical qualities.
According to this, usable groundwater is simplified into:
- Sedimentary waters. They are found in the pores of sands of various sizes, in the voids of gravel, pebble, and crushed stone deposits. They contain clastic soils, the particles of which are in no way connected with each other. These rocks have excellent filtration qualities: water in and through them can move freely in a direction convenient for it.
- Bedrock waters. They are found in cracks in rocky, semi-rocky and a number of sedimentary cemented soils. The most common host representative is limestone. Water can spread through cracks in hard bedrock clays, marls, sandstones, etc., but these options are unsuitable for mining.
The filtration qualities of bedrock depend on the degree of fracturing. In an undestroyed state, their particles are secured by crystalline or consolidated bonds that do not allow water to flow within the layer, leak out, or penetrate from the outside.
Water in bedrock is formed due to condensation. It accumulates over centuries without receiving external replenishment. Naturally, it is cramped in a limited space, which is why when opening such a formation, the static level is usually set above the depth of occurrence. Sometimes such wells even gush.

Sedimentary deposits are regularly recharged by atmospheric water. It penetrates through banal seepage - infiltration through the underlying layers. Sedimentary aquifers can also become saturated in the horizontal direction, for example, receiving water through the same infiltration from a nearby reservoir.
The filtration properties and nature of the formation of rocks are closely related to the hydraulic qualities of the water in them.
Based on this characteristic, groundwater is divided into the following categories:
- Non-pressure. These are waters that lie in sedimentary rocks, in the first permeable layers from the daylight surface. They are freely recharged and in the same way discharged into reservoirs or underlying layers, and therefore have zero pressure.
- Pressure or artesian. It is clear that most of this is bedrock water. However, these include some wells that tap sedimentary aquifers. For example, if the site is located in a valley between two hills, the water uncovered by the excavation will tend to reach the average level in the formation and gush out.
If an aquifer associated with sedimentary rocks lies between aquifer layers of the same genesis, then they can be characterized by insignificant pressure. A striking example: water-saturated sand, “covered” by layers of loam above and below. When opening, the static level for some time may be slightly higher than the roof of the layer itself.

Popularly, such water is called interlayer water; among hydrogeologists, low-pressure water. In practice, such situations are extremely rare. Because water confined to sedimentary soils almost always has the opportunity to be unloaded.
This opportunity may be 1 – 10 or more km from the drilling point, but thanks to it there is no pressure in the water carrier. This means there can be no talk of pressure.
Drillability category as an argument
In addition to the listed classification differences, there is another very important feature that craftsmen who want to drill a water-bearing well at their own dacha need to become familiar with. This is a drillability category that significantly limits the range of manual drilling possibilities.
The drillability category is again determined by the physical and mechanical qualities of the rocks and the specifics of their origin. Based on these characteristics, soils are divided into:
- Bulk. Coarse and fine clastic sedimentary rocks that do not retain their shape during mining: sands of all degrees of density and grain size, gravel, crushed stone, and pebble deposits.They are easily destroyed, but are not always easily removed from the well.
- Plastic. Clayey sedimentary soils that retain their shape during excavation: this is a family of loams, clays and sandy loams. They are more difficult to destroy than the previous type, but can be removed due to their own “stickiness” without any problems.
- Solid. These include rocky and semi-rocky rocks. The highest category for drillability, confirming the complexity and labor intensity of development. Rocks are difficult to break down, and lifting them from the face is also not easy.
Sedimentary deposits are represented by loose and plastic varieties. You can handle their drilling on your own. There is no particular need to involve equipment for the work and make super-complex drilling tools.


The indigenous species include mainly rocky and semi-rocky types of rocks. For an independent driller, this is a practically inaccessible option.
Without drilling rigs, it is too difficult to develop, and without a specialized destructive tool, a chisel, it is completely impossible. Hard and semi-hard clays are drilled easier than “rock”, but water is not pumped from them.

Note that drinking water is obtained both from sedimentary deposits and from bedrock. However, the variety associated with “precipitation” is often only technical due to the ability of soils to pass any liquids, including drains, oils spilled on the ground, petroleum products, etc.
In any case, water pumped out from a personal source must be taken for testing to the SES to obtain a verdict based on analysis about whether it is potable or technical.
Selecting a location for a well in a summer cottage
Before making a well for collecting water at your dacha, you need to conduct independent hydrogeological surveys. It sounds loud, but they involve a simple survey of neighbors who have their own water source.
During the survey you need to find out:
- Depth of the water surface at existing intake points. You can find out this circumstance from the owners of both wells and wells.
- Static level stability. Doesn't it tend to drop significantly during dry summers and winters?
- Geological situation. More precisely, what rocks were exposed when digging a well or drilling? Were there any boulders?
Dacha plots, as a rule, are located in flat areas, which are characterized by almost horizontal occurrence of geological elements. Minor deviations will only be due to the difference in absolute elevations between the existing source and the drilling point.
It is better not to use any traditional methods of searching for signs of water on the site. Talk about the sensitivity of ants and taking into account climate is generally ridiculous; they in no way affect the occurrence of groundwater.It was generally necessary to focus on the climate when choosing a site.
It’s very worthwhile to decide on the shortest route from the source to the house or to the bathhouse. And the possibility of installing a tower with the convenience of carrying out the entire range of work is a must. It will help you determine the best time for drilling next article.
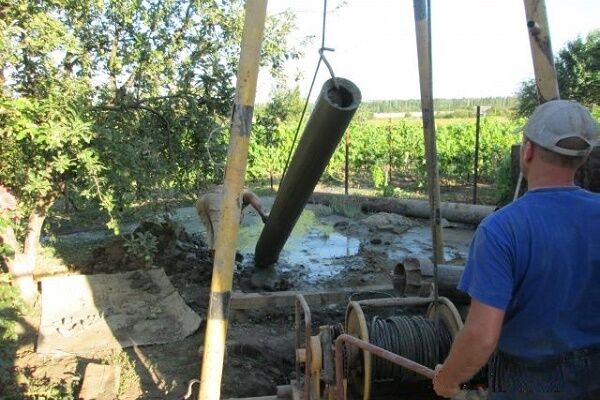
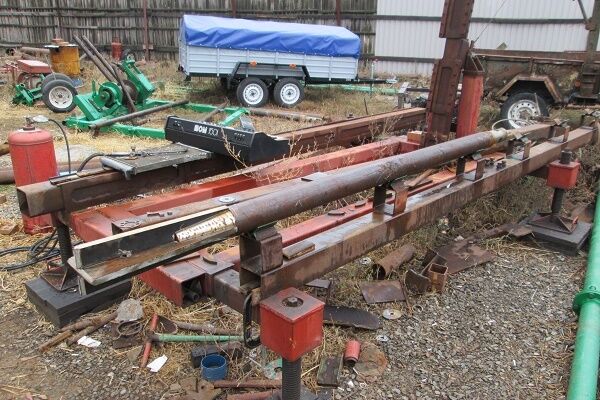
Mobile drilling rig rental
The simplest and least labor-intensive method of installing a well at your own dacha is to rent a mobile drilling rig. With its help, you can drill and equip a single structure for water intake on the site in a couple of days.
The installation will effortlessly pass through the thickness of sedimentary soils and, if the craftsman wishes, will open up the fundamental ones, but this method cannot be called cheap.
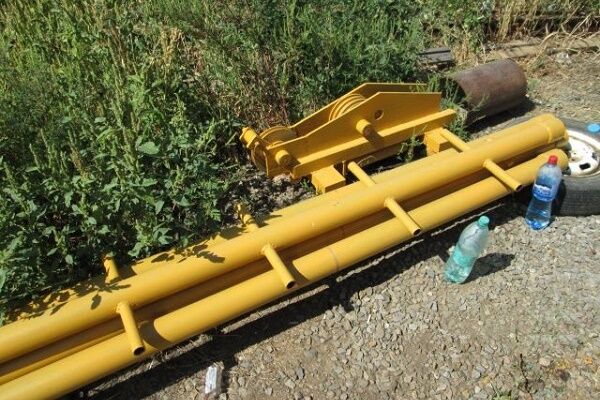
To drill a water intake, you will need a drilling tool. To extract loose rocks you will need a bailer; clay soils are easier to lift with an auger, glass or core pipe. If you have to destroy boulders or rock, you need to stock up on chisels.
As a more affordable alternative, a collapsible manual drilling device is suitable.It includes an auger with a handle for rotational movement during drilling and a set of rods for extending the drill string. Calmly use the handbrake drilling wells 10-25 m each. It can be deeper if health and the number of rods allows.
In the absence of a drilling rig or factory-made device, they resort to methods that were still used in professional drilling not so long ago. We will talk about the shock-rotational and shock-rope manual methods.
Due to the heterogeneity of the geological section, drilling methods are most often used in combination. The difference in the technology of destruction and extraction of rock allows you to go through literally any complex geological formations.

Methods for manual drilling
Before deciding to implement a water intake design project with your own hands, you should carefully familiarize yourself with the methods of drilling wells. The technology is selected depending on the geological structure of the site. To do this, they ask their neighbors with passion about how they dug a well or drilled a well in their place.
Having found out what type of soil had to be previously passed during development, they are determined with a drilling tool. You will need to make it yourself or rent it. You immediately need to decide what to do with drilling rig: borrow from someone or build it yourself.
Option #1 - rotary percussion drilling
From the name it is clear that the destruction and extraction of dumped rock from the trunk is carried out through impacts and rotations.
To perform these drilling actions, different types of projectiles are used, these are:
- Spoon. Designed for rotary drilling, used in driving through plastic soils. It is a cylinder lacking less than half or only a segment. The drill is made with some displacement of the central axis so that a hole is drilled wider than the tool itself.
- Drill, aka auger. Designed for the development of dense clay soils using the rotational method. It is a screw with one or more turns. It works in a simple way: it is screwed into the ground and carries the destroyed mass to the surface on its blades.
- Bailer. Designed for the development of loose sedimentary rocks using the impact method. Apart from this, no other tool is suitable for the full extraction of gravel and pebble deposits, crushed stone, pebbles, and loose sand. The bailer is indispensable in lifting water-saturated and therefore very heavy soils.
- Bit. Designed for crushing hard rocks by repeated persistent blows. It is used in conjunction with a bailer, which, after destruction, scoops the dump from the face.
The spoon is a universal drilling tool with two gripping attachments. To cut and grab the soil vertically, the left wall of a kind of opening in the cylinder is slightly bent.
For lower grip, a cutter in the form of a bucket is most often arranged on the base of the drill. There are a huge number of variations on the spoon theme. Those who want to make it themselves need only understand the principle of operation.

The spoon is screwed into the rock like an auger. With the lower cutter, it cuts into the soil, which, after being separated from the massif, falls inside the incomplete cylinder. Using a side cutter, the spoon cuts rock from the walls of the trunk while rotating. The newly cut soil compacts the previous portion and pushes it into the cavity of the projectile.
The work is carried out until the cavity of the spoon is filled by half or 2/3 with the blade. Then the drill is removed from the well and freed from the drilled dump through the side vertical “opening” in the cylinder. The empty shell is again lowered to the face and further drilled.
The axis of symmetry of the spoon is shifted for a reason. The eccentric allows you to drill a hole suitable for simultaneous installation casing pipe. Casing is absolutely necessary to form a mine shaft in sedimentary deposits.
Without it, loose rocks will endlessly crumble to the bottom of the well, and clayey rocks, when wet, will begin to “bulge” into the barrel, narrowing the opening and making it difficult to deliver the projectile to the bottom.
Recently, the spoon has been actively replaced by various modifications of augers. They really make digging easier, but by the standards of extracting destroyed rock they are significantly inferior to a spoon.
It can be used to drill out wet sticky sands, but the auger will not lift them completely.To clean the face after the auger, you almost always have to use a bailer. It turns out that the work is being done in double volume.

The simplest model of bailer is made from a piece of pipe Ø 180-220 mm, depending on the size of the well. Do not forget that to pump water with a submersible pump, the inner Ø of the casing must be 2-3 cm larger than the outer Ø of the pump. Otherwise, it will be impossible to lower it into the water intake structure.
The optimal length of a pipe section for a bailer is 1.0 - 1.2 m, so as not to have to worry about lifting, emptying the projectile and cleaning it from the inside easily by hand if necessary. A window is cut out in the upper third, which is required to extract the drilled soil. They attach it to the top of the head with bolts or weld an earring to which the cable will be attached.
The tool shoe is most often equipped with a single-leaf valve, less often with a double-leaf valve. In narrow bailers, the valve is a ball. In order for the lower part to better loosen and destroy the rock at the bottom, sharpen a sharp edge or file the teeth.
Several interesting options making a bailer are given in the article, which we advise you to read.
The bailer, held by a cable, is freely thrown onto the face. When it hits the ground, the valve opens, and the destroyed soil moves into the pipe cavity.
Having passed a portion of soil into the cavity of the projectile, the valve slams shut, due to which the bailer retains loose, non-cohesive rocks.Then the projectile is raised above the face to a height of 1.5 - 1.0 m and thrown again until the next 0.3 - 0.4 m has been passed.
About, how to make a drill rig for manual drilling of water wells, is described in detail in the article we recommend.
We present proven bit designs, but we sincerely wish not to be faced with the need to use them. Of course, it is impossible to destroy the “rock” manually without a chisel. But is it worth getting involved?
Drilling will take place literally a couple of cm per day. It makes more sense to use a mechanized method: rent a mobile unit or invite drillers.
A chisel may be needed if large pebbles and boulders are found in the sedimentary section. It is impossible to guess where you might stumble upon them in reality, because... They are characterized by a chaotic arrangement.
If a boulder is encountered after two/three meters of excavation, it is better to change the location of the well. If you have drilled about 15 - 20 m, then it is better to suffer, long and persistently dropping the chisel onto the stone.

While drilling with all the listed tools, water is periodically added to the well. It performs the function of a drilling fluid, temporarily binds loose soils, softens clay rocks and cools the tool, protecting it from premature wear.
For the manufacture of drill rods, pipes marked VGP are ideally suited, the internal diameter of which varies in the range of 33 – 48 mm. The length of the rod must be selected based on the height of the tower. So that when lifting, 2-3 links can be freely placed in the gap between the block and the ground surface.
The traditional length of the rod is 1.2 - 1.5 m, but it happens that they are made 5.0 m long. Of course, when assembling a drill string from long elements there are fewer connections. Consequently, there is less opportunity for the pipe chain in the barrel to break.
However, it is quite difficult to remove long rods from the excavation. Moreover, it should be remembered that when lifted, the top of the column almost reaches the block with the cable thrown over it, and at the bottom there is usually part of the casing sticking out of the well.

The rods are connected with threaded couplings or metal “fingers” - pieces of rod made strictly according to the Ø of the holes in the rods intended for joining. The starting link is equipped with an earring for fastening the rope.
The bottom of each link must fit perfectly into the next member and be structurally identical to the fixture at the top of the spoon or auger.
Option #2 - percussion-rope drilling
Rotary drilling deeper than 10 - 15 m becomes too difficult, because in addition to the loaded projectile, which has considerable weight, a string of drill rods has to be removed from the excavation. In addition, each time when lifting, all these meters must be constantly disassembled and then reassembled to deliver the tool to the face.
In mechanized drilling, everything is simpler - rotation, delivery and removal of the tool is performed by hydraulics. Doing this kind of work manually is impractical and too difficult.
In addition, when performing rotational movements without the use of mechanisms, you can easily deviate from the vertical.And the greater the depth, the greater the distortion will be, making it difficult to deliver the drill to the bottom, and install the casing, and subsequently install the pump in the well.
When manual drilling at such a depth, it is more reasonable to resort to percussion-rope technology. In principle, we have already outlined it within the framework of the description of the work of a bailer. This is a standard drill for percussion drilling.
For driving through clayey soils, a conical glass with a cutting edge at the bottom of the shoe is used. Unlike a bailer, the glass does not have a valve or window for excavating soil.
It is also thrown to the bottom of the well with force and removed as it is filled. Upon impact, clay rock is pushed into its cavity, held only by the walls and its own ability to stick.
Release the glass from the dump by tapping its walls with a sledgehammer. The sticky rock then separates from the inner surface of the projectile and falls out. No rods are needed for drilling with a glass.
This means that there is no need to constantly disassemble and reassemble a large “chain” of drill rods. True, one or two of them can be used to simply weigh down the instrument when lowering it to a considerable depth.

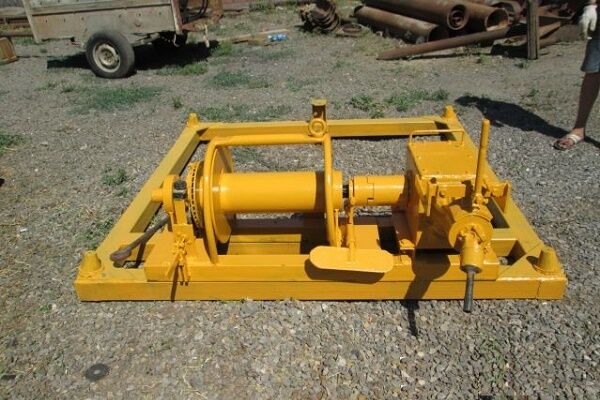
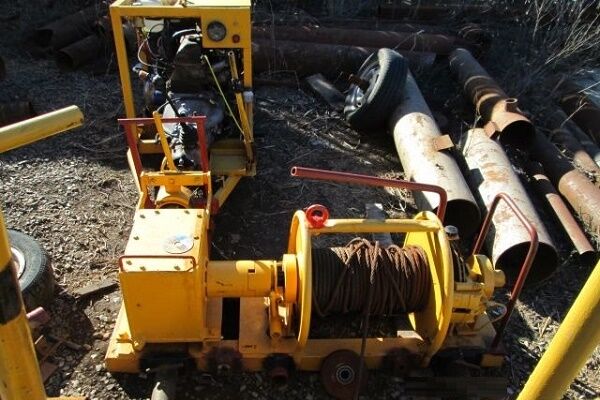
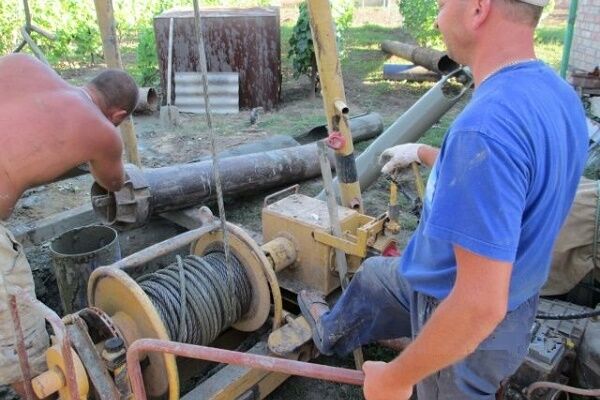
To perform impacts on the rock, a cable or rope is attached to the drilling tool, on the basis of which the drilling method is called percussion-rope. To perform rotational movements, a column of drill rods is used, connecting the drill to a manual or mechanical winch.
To increase penetration when drilling by rotation, the projectile also hits the bottom, and in order to increase the force of destruction, the drill shoes are equipped with all kinds of cutting parts.
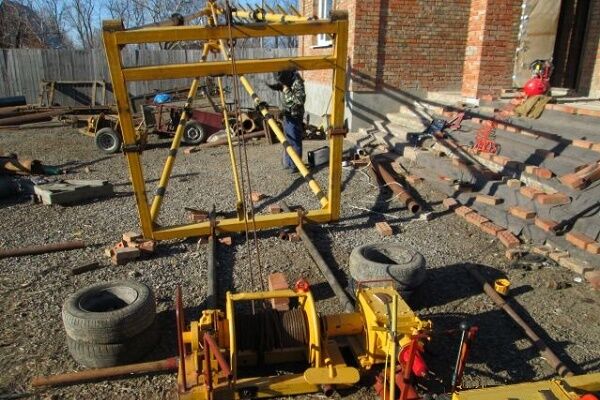
It is clear that when drilling, the drill must be regularly lowered to the bottom, and after it is filled, it must be removed to the surface. Do not forget that as the depth increases, it will become more and more difficult to remove the tool with the developed soil with each penetration. A homemade drilling rig will help make drilling easier using the described methods and tools.

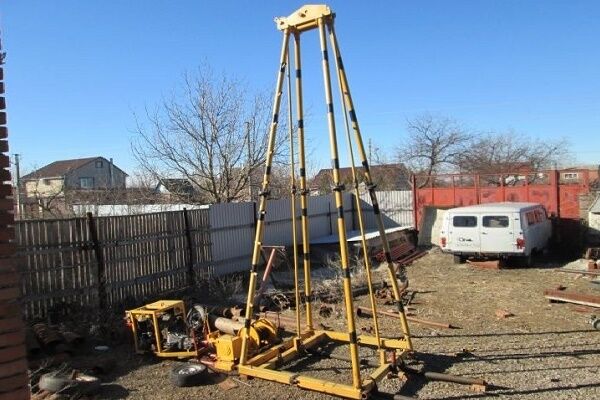
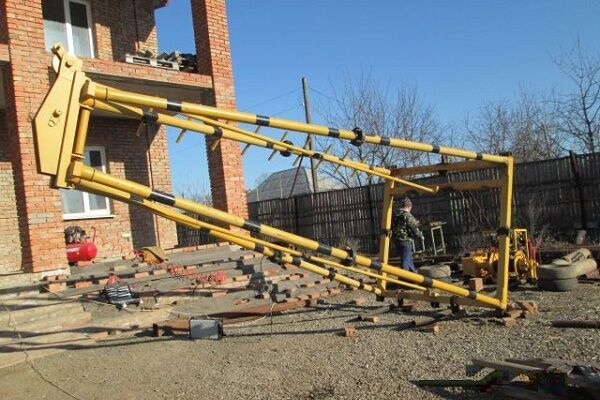
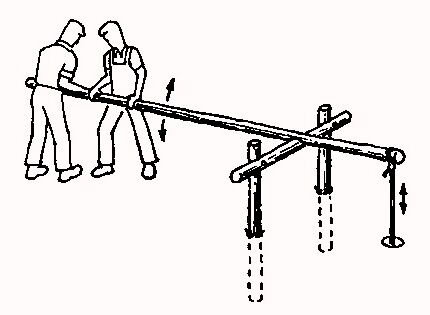
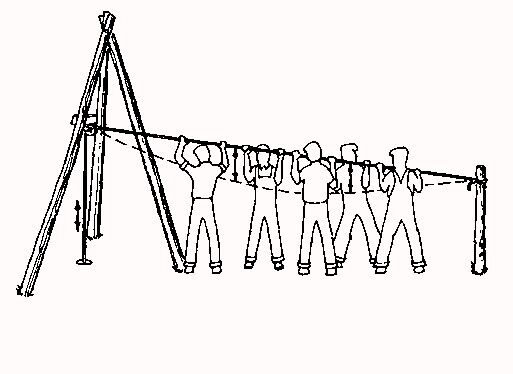
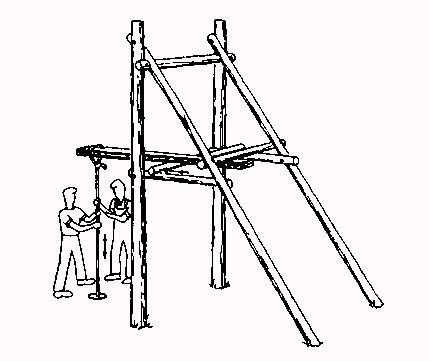
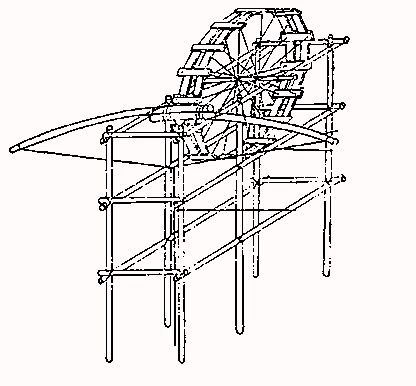
The classic version of the drilling derrick is made in the form of a tripod with a total height of approximately 4.5 - 5.0 m. A block is installed in the upper part of the derrick, through which a cable connected to the projectile is thrown. In rotary drilling, a derrick is needed to lift the drill string, consisting of tools and drill rods.
When drilling a mine with a depth of 10–12 m, you can do without a drilling rig, but the work will require more muscular effort. So it's better to go with her.
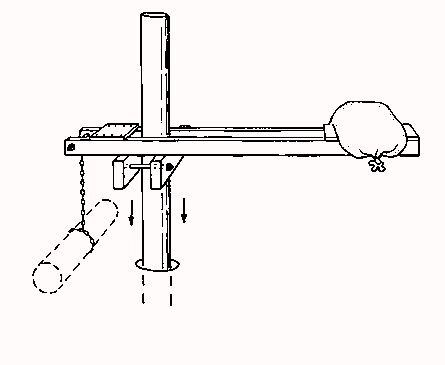
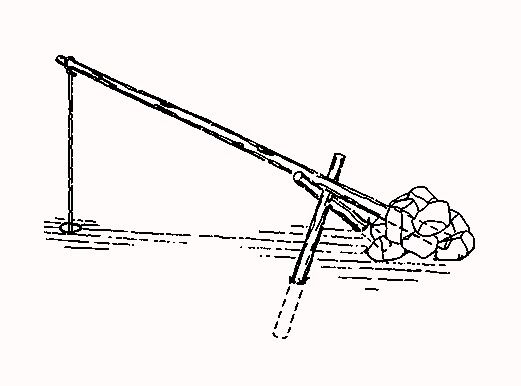
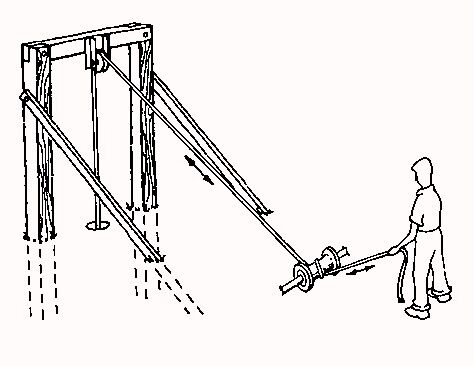
If you really don’t want to get involved with its construction, a device in the form of two pillars with a crossbar and a lever thrown over it will do. It is possible that, based on the proposed designs, you will be able to develop your own device that will facilitate the work of the driller.
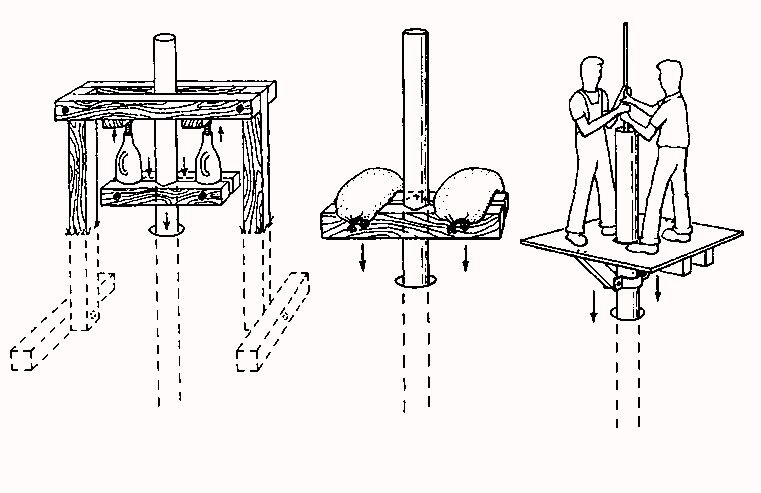
Wellbore casing
For borehole casing, the best option is steel pipes. Polymer ones are suitable, but in terms of strength when buried in the ground they are not very good. Again, it is not hydraulics that will push the casing into the well, but manual efforts, and light plastic pipes are not at all easy to deepen into a manual excavation.
The casing is assembled from individual links, approximately 2 m long. More is possible, but it will be inconvenient to install them in the trunk during drilling. Therefore, although there will be many connections in the casing, it is better to use the size that is suitable for the job.
The first link is installed after two/three walks. Then it is gradually pushed through, placing a block on top to apply its own force and weight. When drilling using the rotary method, the casing is deepened after the tool and soil are removed.
The use of the shock-rope method in loose rocks forces the casing to be deepened with some advance of the projectile, otherwise the drill will endlessly scoop up the layer without moving down.

The casing links are connected by welding or threaded couplings, but it is best to initially select threaded pipes. As they deepen, it is easier and more convenient to screw them on than to constantly weld and check the seam for defects.
They continue to drill until they pass through the aquifer and go deeper into the underlying aquitard by at least 0.5 m. After this, the casing string is slightly “pulled” to the surface to exit the aquifer. Then produce pumping the water intake shaftto get rid of rock destroyed during drilling.
Upon completion of flushing, another string of pipes with well filter, which will rid the water of contamination and protect the pump. Now you can install a pump, the type of which is selected depending on the depth of the aquifer.
The final stage of organizing your own water source is the arrangement of its mouth. For this build a caisson or put a head purchased in a store.
Conclusions and useful video on the topic
Video #1. Demonstration of a homemade drilling rig:
Video #2. Testing a homemade auger drilling machine:
Video #3. The principle of hydraulic drilling based on drilling a well with an auger:
The manual drilling methods we present will help in the difficult but useful task of developing your own water source at your summer cottage.
We invite those who want to share their own experience in drilling wells to leave comments in the block below. Ask questions, talk about useful nuances in the construction and arrangement of water intake workings, and post photos. We are interested in your opinion on the information presented for review.


I didn’t find a place on my summer cottage where there was guaranteed water and where I could drill on my own—I invited a specialist. It was impossible to rent a drilling rig, so I borrowed a hand-held drilling device from friends. Two friends helped. Over the weekend we covered 10 m. We used rotary impact drilling (we have sand at our dacha, so we didn’t need a chisel). We reached the water successfully.
To be honest, I can’t even imagine how to drill a well myself. I installed the fence and drilled holes for the posts. Got drunk. What if there is no drilling rig nearby, and one needs to be made? In general, I don’t see the point in all this. Yes, it will probably be cheaper, perhaps much cheaper. But labor costs were also not close. It’s a pity that the cost of third-party drilling and the cost of manufacturing such a thing are not given. It would be interesting.
I understand you perfectly, if there is no experience in this direction, and water is urgently needed on the site or in a country house, then such experiments are not worth undertaking. Yes, the article covers very different subtleties, but without experience, when drilling a well, a beginner will immediately be baffled by several things: quicksand, boulder, hard rock.
Using the manual for self-drilling a well will be important for people whose homes are very far from city or regional centers or if local specialists inflate prices for their services. And, of course, enthusiasts who have a lot of free time and a large number of different tools - such people love to challenge complex projects.
For an ordinary resident of a private home, it is easier to order a well drilling service than to do it yourself, make mistakes and ultimately still entrust the drilling of the well to professionals.