How and with what you can paint a cast-iron bathtub: a review of the best restoration methods
Each product has its own service life, which sooner or later ends. Any thing becomes unusable at some point, and cast iron bathtubs are no exception.Time and water have a negative impact on it and lead to the destruction of the enamel coating.
Agree, changing a bathtub is expensive and labor-intensive. A more practical solution is to restore the plumbing yourself.
We will tell you how and with what you can paint a cast-iron bathtub, give recommendations on choosing a method, and also provide step-by-step instructions for updating the product.
The content of the article:
Benefits of restoring a cast iron bathtub
The enamel coating of the bathtub becomes thinner over time, rust appears on it under the influence of water, and if measures are not taken in time, the process may become irreversible. The bottom may simply rust to holes, and then the bathtub will no longer be able to be saved.
A bathtub covered with rust and limescale does not look aesthetically pleasing, to put it mildly. Undoubtedly, installing a new bathtub will be the only right decision if you plan to do major renovations, change tiles and plumbing. However, if the renovation is still far away, then buying a new bath will bring more problems than joy.
Modern cast iron bathtubs are not cheap, and you will also have to pay a considerable amount for delivery. Due to the large weight of the product, dismantle the old one yourself and install a new bath Not sure it's going to happen.You need to either ask friends and neighbors, or hire people, which again costs money.
Most likely, you will have to make repairs, even if they were not planned.
At the same time, the cast-iron bathtub, having lost its appearance, has not lost its very decent performance characteristics, and can still serve its owners faithfully. If there are no significant chips or cracks, you can restore the product yourself, and quite quickly, without dirt and high costs.
Another significant argument in favor of restoration: classic old-style cast-iron bathtubs are superior in quality to modern analogues, the service life of which does not exceed fifteen years.
Basic methods of updating coverage
Today there are three ways to update a cast iron bath:
- Paint the surface with special enamel.
- Apply coating with liquid acrylic.
- Insert the acrylic liner into the bathtub.
Each option for restoring an old bathtub has both advantages and disadvantages, which we will discuss in detail below. To coat a cast-iron bathtub with enamel or acrylic, you don’t have to be a specialist; you can easily handle this work yourself.The main thing is the correct choice of composition and strict adherence to application technology.

You can also install an acrylic liner with your own hands, but this work is more delicate and requires certain skills, so in this case it is better to resort to the services of specialists.
Surface preparation before painting
Regardless of the method used to paint a cast iron bathtub, the surface must be carefully prepared. This is a very important stage that cannot be missed. Proper surface preparation is 99% of success.

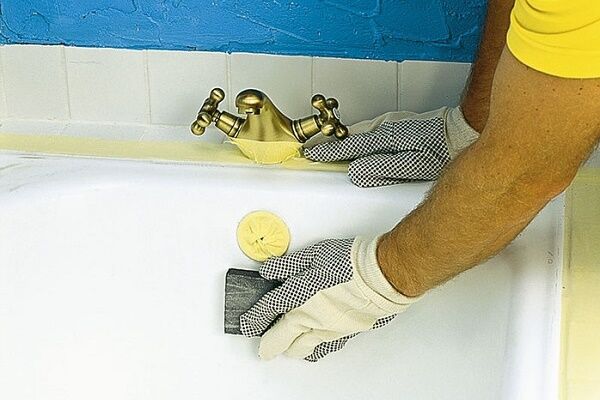
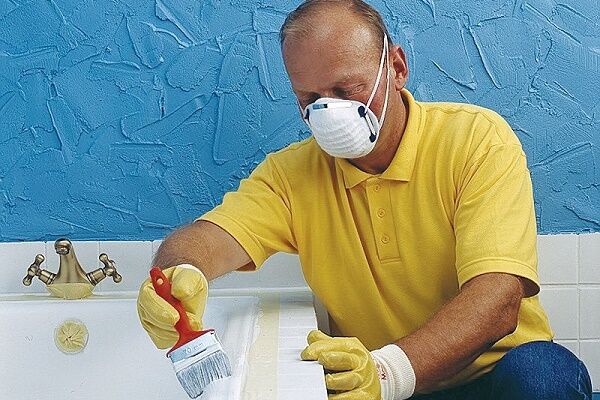
First of all, the cast iron bathtub needs to be thoroughly washed and degreased. Dirt and grease interfere with adhesion, will not allow the solution to be well absorbed into the surface and will negate all restoration work. The new enamel may soon crack and peel in areas where fatty deposits remain.
Acid household chemicals are suitable for cleaning and degreasing. Oxalic acid cleanses the bath very effectively - treat the bath with the solution and leave to act for 10-15 minutes.
But it is very aggressive, and when working it is necessary to use hand and respiratory protection. You must wear rubber gloves and a respirator.
After treatment, rinse the bath well, or even better, fill it with water and hold it for 20 minutes, then let it dry.Now there is no less important work to be done - treating the surface with an abrasive, with which the old enamel is removed, and the surface of the bath becomes rough, thereby ensuring better adhesion of the materials.

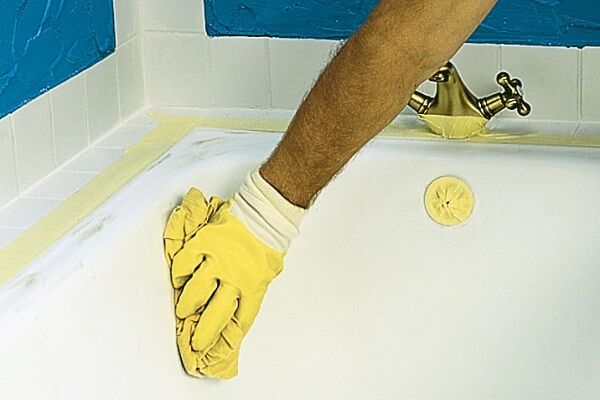
Areas of the bathtub covered with rust must be cleaned down to the metal so that in the future it does not show through the new enamel coating. After stripping and sanding the surface, vacuum the bathtub to remove dust and small particles from its surface, and then treat it again with an acid-based liquid detergent.
Pour it into the bath and rub it well over the entire surface, leaving it to act for about an hour and a half. After this, fill the bathtub to the brim with water and let it sit for about an hour.
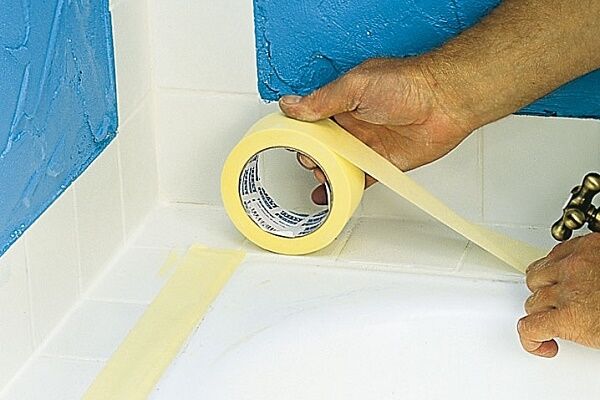
It is recommended to repeat the washing procedure at least 2-3 times, and then dry the surface with a hairdryer. To avoid clogging the siphon with dyes, disconnect the bath from the sewer.
Before applying the composition, the bowl must be carefully inspected. Identified defects must be eliminated; for more details, see this article.
If there are chips and cracks on the surface, they must be puttied and then treated with sandpaper, after which the resulting dust must be removed again. At this point the preparation process is complete, you can start painting.
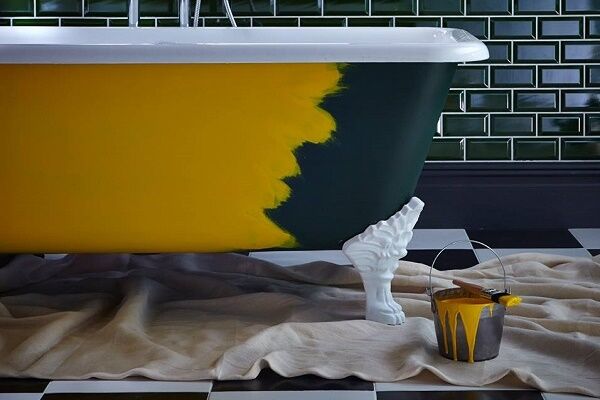
Restoring a bathtub using enamel
Enameling a cast iron bathtub is an old time-tested method that has been used for a very long time.But one should distinguish between professional enameling, which the bath undergoes during the production process, and home painting with enamel.

In the first case, professional compositions are used that require preheating cast iron to a certain temperature. It is impossible to paint a cast-iron bathtub at home in this way, and it is not necessary, since today there are easy-to-use and inexpensive enamel dyes for self-application.
Advantages and disadvantages of the method
Among the advantages of this painting method are:
- inexpensive cost;
- lack of installation work;
- Can be used on both cast iron and steel surfaces.
However, this method also has disadvantages:
- the coating turns out to be quite thin and fragile, the enamel is very sensitive to household cleaning products and impacts. Therefore, you will have to handle the bathtub very carefully so as not to inadvertently damage it;
- the coating does not eliminate severe defects: chips, dents, cracks;
- over time, yellowness forms on the surface;
- The enamel takes a long time to dry, so you can’t use the bathtub for about a week.
The service life of the coating ranges from 5 to 9 years. Although for those who are planning to make repairs in the future and replace the cast-iron bathtub with a new one, such a service life will certainly suit them.
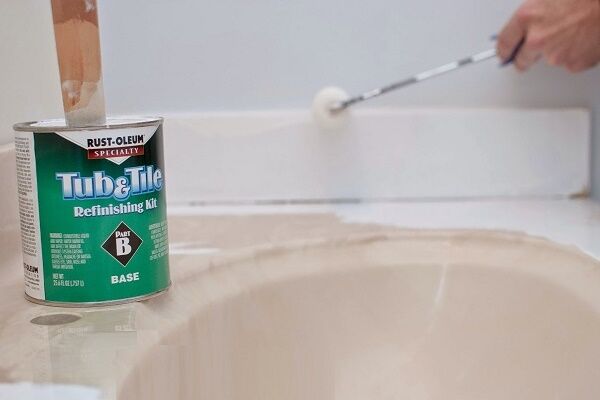
Review of enamels for painting bathtubs
Question, what can you paint with? an old cast-iron bathtub, which is by no means idle, since ordinary enamels are not suitable in this case. It is necessary to use special compositions intended for baths.
Before applying any of them, you need to study the instructions and strictly follow the technology, otherwise the coating will not delight you with its novelty for long and will quickly peel off.

Among Russian-made enamels we can highlight Epoksin 51 And 51C. The enamel consists of two components: epoxy resin and amine hardeners produced at chemical plants in Germany and America.
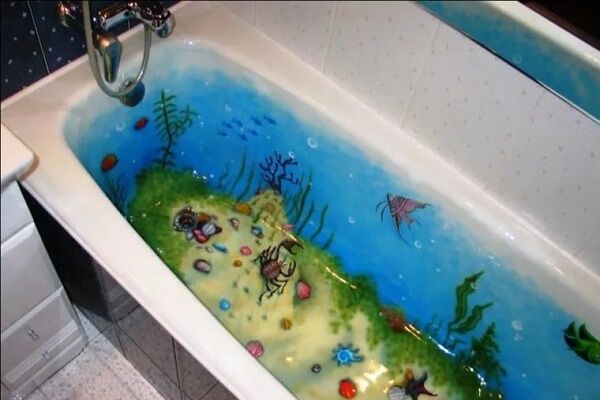
Before use, the ingredients are mixed with each other and applied to the surface of the bath. If desired, you can paint the surface in any color by adding color to the paint.
The composition is durable and, if applied correctly, can last up to 9 years. The enamel has a thick consistency, which makes it difficult to work with.
In addition, you need to take into account that the time of using the prepared solution is no more than an hour, after which the mixture begins to harden and applying it to the surface becomes almost impossible.

Finnish-made enamel has proven itself well Reflex 50. It also consists of two components that are mixed together before application. The price of the paint is somewhat more expensive than its domestic counterpart, but the high cost is fully compensated by its excellent quality.
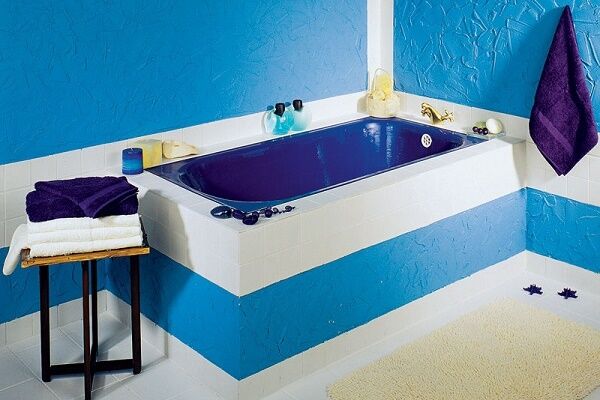
The enamel forms a durable and durable glossy coating of white or blue color on the surface of the bathtub.
There are also Russian-made compositions, which, although not as popular as those listed above, have quite decent characteristics. These are enamel Svetlana And Fantasy, which are ready-made kits that include, in addition to the enamel and hardener itself, tools for processing the bathtub.

The process of coating a bathtub with enamel
If a two-component composition is used for coloring, then before use it must be mixed in the proportion recommended by the manufacturer. But don't mix the whole amount at once.
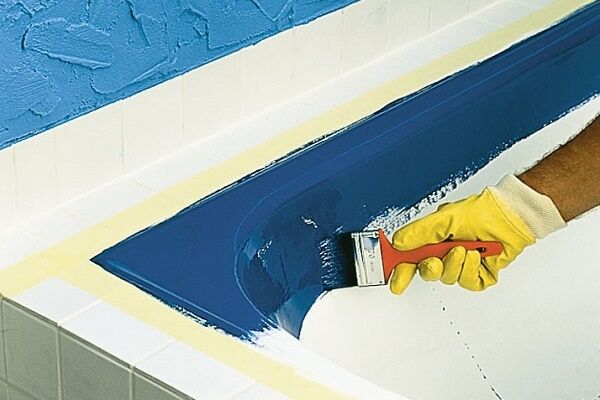
The bath is painted in two layers. Therefore, the enamel must be divided into two parts and first dilute one portion, and after applying the first layer, the second. The working time of the solution is limited, and if you dilute all the paint at once, you may not have time to use it.

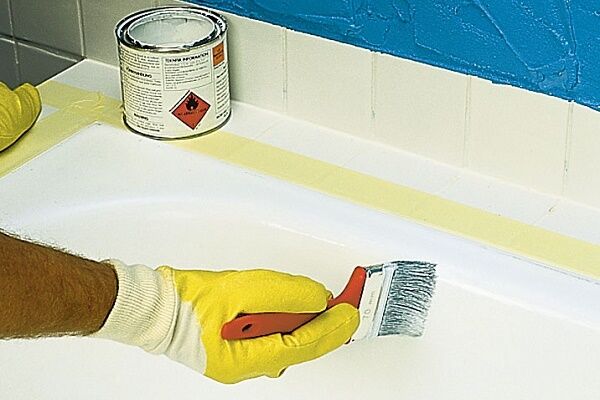
Enamels intended for home use have a fairly thick consistency, so it is recommended to add solvent 646 to the mixture in a ratio of 10:1. For the first time, the walls of the bathroom are painted in one, and the bottom - in two layers.
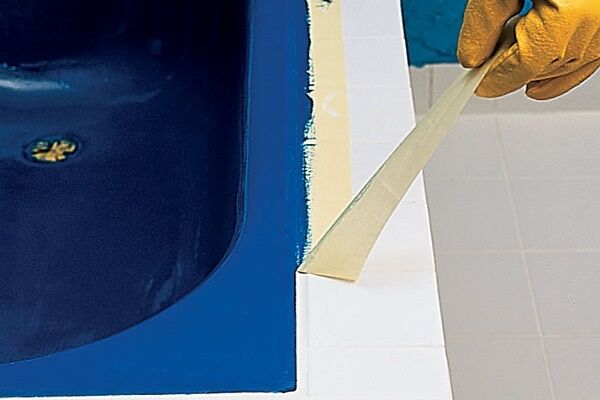
If smudges have formed on the surface, they must be removed immediately with one upward movement of the brush. If you let them dry out, then nothing can be fixed. The second layer is applied 15-20 minutes after the first. During this time, the paint will dry, and you will have time to dilute the second portion of enamel.
The new layer is applied in the same way as the previous one. You can use the bath no earlier than after 4-7 days; the exact period is indicated in the instructions.

How to care for a renewed surface
The cast iron bathtub is as good as new, but don’t forget that enameling a bathtub at home cannot provide such a high-quality and durable coating as that originally applied during the production process. Therefore, the new surface must be treated very carefully, since its hardness is significantly lower than the original one.
The bathtub must be protected from impacts and heavy objects from falling; abrasives must not be used to clean it. Surface bathtubs can be washed only liquid formulations. It is also not recommended to pour too hot water into it.
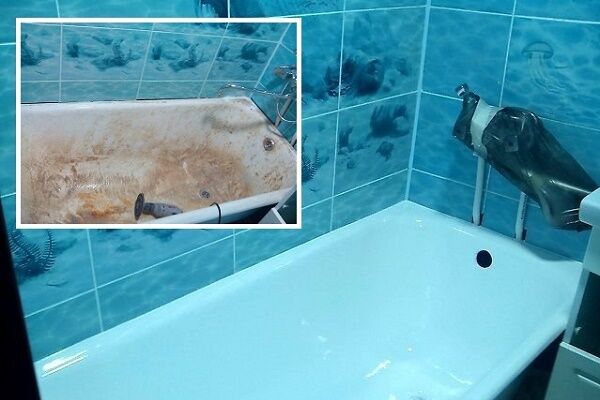
Restoring a bathtub with liquid acrylic
This method appeared relatively recently, about ten years ago. Today it is very popular and is used by both professional companies and home craftsmen. And this is no coincidence; it is considered the most effective way to restore a cast-iron bathtub.

Advantages and disadvantages of the method
Self-leveling acrylic is a truly revolutionary product that can literally transform an old cast-iron bathtub beyond recognition in just a few hours.
This method has other advantages:
- high processing speed with minimal labor costs - this work can be easily handled by a person who does not have special skills;
- the coating is perfectly smooth with a beautiful glossy shine;
- when applied correctly, acrylic coating retains its performance and external characteristics for 15 years;
- acrylic is harmless, does not emit any unpleasant odors and does not require the use of special protective equipment;
- After three days, the bath is completely ready for use.
Among the disadvantages, only one can be highlighted: the fairly high cost. self-leveling acrylic compared to enamel. Although the quality and durability of the coating completely compensate for this small minus.
Applying acrylic to a bathtub
Painting a cast iron bathtub with acrylic is much faster and easier than with enamel. For this you will not need any rollers, brushes or other improvised means. Acrylic is simply poured onto the bathtub, and then, under its own weight, gradually flows down the walls, forming an even and smooth coating.

Before the beginning bathtub treatment with acrylic Lay newspapers or cellophane on the floor so as not to stain the floor covering with the solution that will drain from the sides. Mix hardener with acrylic enamel. The container in which the hardener was located can be turned into a convenient watering can for applying acrylic by cutting off its nose part at an angle.
Applying acrylic begins with the inner sides of the bathtub, those that are located near the wall. Acrylic has a liquid consistency and flows down quickly. After the top edge of the bath is completely filled with mortar, start a new circle, but not from the sides, but from the middle of the side walls.

All the acrylic flows down, but some places on the bottom and walls of the bathtub still remain uncoated. To close them, the acrylic must be carefully leveled with a spatula over all unfilled fragments.
The mass, as it flows, usually rushes towards the drain; to prevent it from clogging, it is necessary to divert it in the other direction with a spatula. At this time, acrylic already acquires viscosity and hardens.
Acrylic is applied in one layer, and this completes the work of painting the bathtub. Now your task is to protect the surface from particles of dust, debris or drops of water getting on it. All this can ruin the coating. Complete hardening of the acrylic composition occurs within 1.5-2 days.
Restoration using an inlay
The essence of the method is to install an acrylic liner in an old bathtub. The product is made from sheet acrylic, which is heated to the desired temperature and extruded using a mold. The thickness of the liner is usually 5 mm.

An acrylic liner has many advantages, the main one of which is long service life. With proper use, it can last up to 20 years. It is very durable, not afraid of mechanical damage and shock, does not rust and does not become covered with a yellow coating.
The acrylic insert is easy to clean with ordinary household products and does not require the use of aggressive compounds.
After restoration, a cast iron bathtub takes on the appearance of a completely new product with an even and perfectly smooth glossy surface. Behind the liner you can hide any damage and defects of the old cast iron structure.
However, this method also has many disadvantages.The liners are made for standard cast iron bathtubs 1.5 and 1.7 m long, so if it has other dimensions, then this restoration method will not work.
The insert is placed on the bathtub and should enclose it completely. To achieve this, it is necessary to dismantle the bottom row of tiles, as well as remove the siphon equipment.

Before installation of acrylic liner The bath needs to be prepared, but such thorough preparation as before painting is not required. It is enough to remove the enamel coating using a sanding brush, and then degrease the surface with a cleaning agent.
The liner needs to be tried on; if there are protruding parts, they will have to be cut off with an electric jigsaw. Next, mark and cut out holes for overflow and drainage with a drill. Sealant is applied to the edges of the bathtub. The liner is installed on a special foam, which evenly covers the entire surface of the bathtub.

The acrylic insert is carefully lowered into the container and installed in such a way that there are no distortions. Then the siphon is connected, and the bathtub is filled almost to the brim with water. In this state, it must be left for a day so that the foam and sealant dry completely.
You can restore the bathtub yourself using this method, but it is best to turn to the services of companies that will carry out the work at a professional level.
If you are in doubt which restoration method to prefer, then read the article - Liner or filling bath: comparison of technological and technical characteristics
Conclusions and useful video on the topic
Restoring a cast iron bath using special enamels:
Bathtub coating with liquid acrylic:
Restoration of a bathtub using an acrylic liner:
Restoration is the best way to update the appearance of a bathtub because it allows you to quickly, easily and inexpensively give new life to an old cast iron bathtub. Each method has its pros and cons, so it's up to you to decide which one to adopt.
Do you have experience restoring a cast iron bathtub? Please share information with our readers and suggest your way to solve the problem. You can leave comments in the form below.


I just have a cast iron bathtub from the 80s. I tried to paint it with epoxy enamel - it’s a simple matter, but the method is unreliable, after a year the enamel began to peel off. I found out about the acrylic liner: it costs a lot, but still reduces the internal volume of the bathtub. The most normal option is acrylic. I have had a bathtub painted with acrylic for three years now, it looks like new and has not peeled off.
Our bathtub is forty years old. I wash it, but it doesn’t look the same anymore. I would like to restore it, but I don’t know how best to do it. Isn't there spray paint in a can? This is not mentioned here. But for me this type of restoration is much more attractive: both quickly and evenly. But with a brush you will have to work hard, and it seems to me that it will not be possible to achieve an even coverage.
Acrylic in aerosols exists, but it is much worse than regular acrylic. It is less durable, as it is applied in a thin layer and contains a solvent.Plus, it’s easier for a non-professional to apply acrylic with a brush. If the aerosol is applied incorrectly, smudges will remain.
Hello. This paint is available in 3 versions, with different advantages and disadvantages:
1. Epoxy enamel - toxic when painted, hardens quickly, provides uniform coverage, but is difficult to paint without drips. If you paint it without color, with white color, it quickly loses its whiteness, but in general, the coating is durable and abrasion-resistant.
2. Acrylic - it is better to use the pouring method. It has low thermal conductivity, is durable, and resistant to color loss. Also very toxic. When caring for the coating, do not use alkalis or acids. It is recommended to apply accurately and carefully, avoiding gaps.
3. Alkyd paint - difficult to apply and consumed in large quantities. But in general, it is non-toxic and retains color for a long time.
The disadvantage of spray paint is that it is difficult to adjust and has a thin coating layer. Well, of course, you need to prepare the surface almost perfectly.
How to paint:
1. Cover non-working surfaces with film.
2. Wear a protective mask, gloves and old clothes.
3. Clean the device from dirt and rust.
4. Remove the remnants of the old coating with sandpaper or a sander.
5. After this, rinse the bath thoroughly and dry.
6. Treat with solvent and primer.
7. Shake the can.
8. From a maximum vertical position from a distance of 30 cm, spray the paint in a thin, even layer.
9. If problems occur, correct them with a rubber spatula.
10. Use paint according to the manufacturer's instructions.