How to build a Russian stove: do-it-yourself masonry, the best orders and diagrams
Construction of a stove in a private home is a responsible undertaking that requires special skills, which is recommended to be carried out under the guidance of an experienced stove builder.Only he knows how to build a Russian stove: choose the right masonry scheme, choose a brick, prepare a mortar.
Even small miscalculations in the order can result in disastrous results, so it is necessary to follow the work rules and regulatory requirements in construction.
The content of the article:
Construction of a Russian stove
Russian stoves may differ in size, shape and design features. According to one definition, these are heating and cooking structures with 2 fireboxes, intended, in addition to heating functions, to also prepare typical dishes and bake bread.
The process of burning firewood in the main firebox occurs as follows: the gases generated during the combustion of logs enter the 1st section of the hearth chamber, then through special holes - undercuts - enter the 2nd section. After this, they move to the upper cooking chamber, from where to the collection channel and into the pipe.

When burning wood in a small firebox, combustion gases first enter the main firebox, and from it into the chimney. Here you can use not only dry logs, but also bark, wood chips, branches and other waste.

The basis for the structure is a foundation, usually 0.1 m larger than the dimensions of the lower part of the Russian stove. Here, below, there is a storage area - free space for storing a poker, grip, spatula and other equipment.

For laying the cooking chamber, and in particular for the vault, the most fire-resistant, selected bricks are selected. The thickness of the walls determines how long the heat will last.
The thin walls of the cooking chamber heat up very quickly, but cool down just as quickly. Standard thickness is 1 or ¾ brick. The front wall is thinner - ½ brick, like the partition in front of the furnace.
At the bottom of the cooking chamber there is a floor for which a strong, smooth brick is suitable. Often it is laid dry, without using a solution, on a backfill of coarse sand, to which crushed stone, gravel or broken glass is added. The floor is laid with a slope of 3-5 cm towards the mouth.
The shape of the vault affects the degree of heating and the complexity of the masonry.

Gentle vaults are more difficult to lay; steel ties must be used to distribute the load. However, with this design, the underfloor heats up more.
The technology for laying the roof of a Russian stove may differ, but the following rule is often followed: lay it out on both sides simultaneously and finish in the middle. A castle brick is laid in the center, and a clay solution is used to coat it.

If they are baking bread, then they clear the floor - they scoop out the ash, and sweep away its remains.
There is still a way to bake bread without baking sheets or molds, when it is placed on a special shovel, lightly sprinkled with flour, and then “put in the oven” - simply dumped with a sharp movement onto the floor.
Construction: preparation and laying
To protect yourself from all sorts of risks associated with fire, as well as from claims from the fire inspectorate, we recommend that when constructing a structure, you rely on the rules and regulations set out in the legal documentation:
- SNiP 41-01-2003 – section on heating;
- SNiP 23-02-2003 – on thermal protection;
- SNiP 3-01-01-85 – general construction standards.
Materials for the construction of the furnace must also comply with safety standards and fire regulations.
Choosing a location for masonry
Traditionally, the location of the stove is chosen so that the mouth faces the window and is well lit. The structure can be located either in the center of the room or against the wall, in the corner.
If the walls are wooden, they must be protected with non-combustible material - for example, steel sheets or asbestos boards. In this case, the brickwork should be placed no closer than 0.2 m.

Sometimes the building is placed in a wall between two rooms. To protect a wall or partition, you can use brickwork with a thickness of about 0.2 m or cladding with non-combustible material.

You can also use this option, when a large firebox goes into the kitchen, a small one into the next room. It was previously practiced in five-wall houses with a “summer” hut, in which the firebox of a large stove with a stove bench was not used during the warm season.
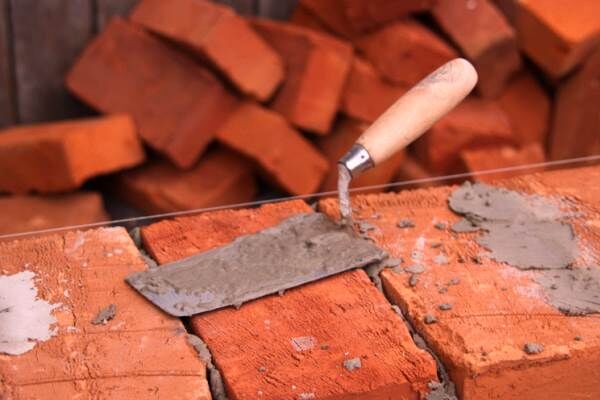
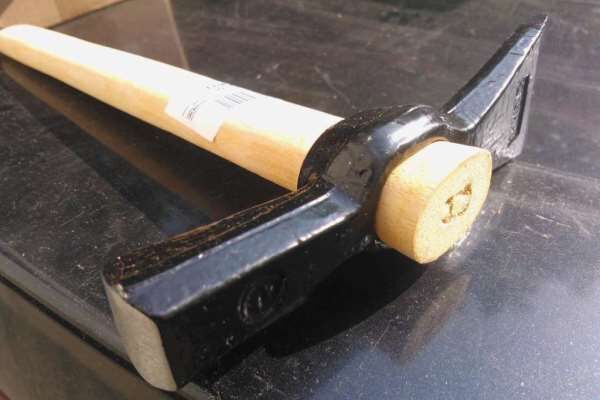
Preparation of tools and materials
Equipment and tools for masonry are prepared in advance so as not to be distracted and not rush to look for them at the most inopportune moment.
The main tool of a stove maker:
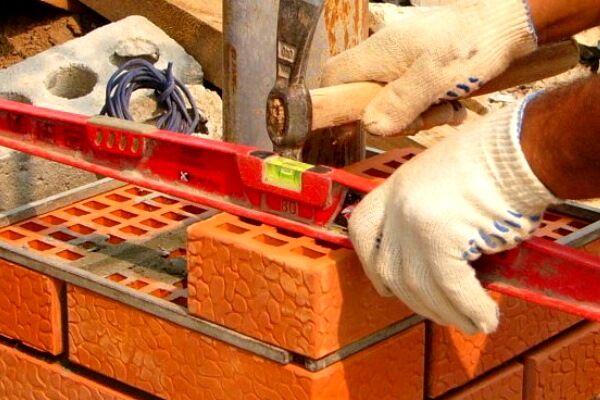
A plumb line and a construction cord can also be useful - for precise adjustment of the corners and walls of the structure vertically, a rule - for leveling the foundation, a folding steel meter - for marking and leveling. For safety reasons, we recommend wearing protective clothing, comfortable shoes and gloves before working.
The materials and their quantity depend on the selected stove model - with a heating panel, a stove bench or a hob.
A table of required materials might look like this:

The advantage of cast iron over steel is obvious: it does not rust, does not burn out, practically does not deform under the influence of high temperatures, and retains heat for a long time.
When buying doors and latches, make sure that the first ones close smoothly and tightly, and the second ones slide easily in the canvas. Previously, the dimensions of devices were subject to standards, for example, cleaning doors had dimensions of 112 * 150 mm. Today you can find equipment of various shapes, lengths and widths.
How to prepare the solution?
Based on the main material, mortars are divided into clay, cement, and lime.

When designating, the binder component comes first, the filler comes second, for example, 1:1 or 1:2. Complex solutions are indicated by three parts, for example, 1: 2: 6, with two binder components in the first place, the last one is the filler. The brand of cement mortar depends on the brand of cement used.
The finished solution must have the following qualities:
- plasticity, convenient for application and distribution;
- sufficient thickness to prevent spreading;
- normal density, not skinny and not fat.
The general rules apply here: solutions that are too thin are considered weak and short-lived, while greasy solutions crack after drying.

The most difficult thing in preparing clay mortar is finding the right type of clay. It must be greasy so that the composition is elastic, convenient for laying and creating neat, even seams. Finding the right proportions sometimes takes years - this is another reason to work under the guidance of an experienced craftsman.
Beginners select the composition of the solution experimentally. First, the clay is cleaned of foreign matter before mixing, then soaked in water for 24 hours.
Equal portions of clay are mixed with different portions of sand, cakes are formed and allowed to dry for 2-3 days. In the future, to prepare the solution, use the proportions that give the least cracks.
To give the clay mass a suitable texture and uniformity, it is soaked and then rubbed through a mesh with a 5 mm mesh.
When constructing a firebox, instead of sand, it is necessary to add fireclay powder 1:3 or 1:4 to the fireclay. You can use a masonry compound prepared in a factory.
For laying chimneys and smoke circuits within the house, a lime-cement or lime-sand mixture is used. In the construction of pipes above the roof, cement mortar or lime-cement composition is used.
Basic principles of order masonry
To construct a Russian stove, it is recommended to use solid refractory bricks without cracks or chips. The thickness of the gaps between adjacent rows filled with mortar is from 0.5 to 0.8 cm.
Various sections of the oven can be made by laying a whole brick, placed on an edge or laid flat, as well as ½ (equal to the width) or ¼ (equal to the edge) of a brick.

We suggest using diagrams and descriptions to get acquainted with the serial laying of a Russian stove. The dimensions of the proposed option are 1.45 * 1.28 m (that is, 6 bricks in length and 5 in width).

The foundation is laid in the ground, on which the structure of the structure depends. At a depth of 12 cm from the floor, lay two-layer waterproofing (for example, 2 pieces of roofing felt).

The first layer of the furnace also consists of bricks laid flat.
1-4 rows laid out according to the diagrams below, while in the 4th row you will need to secure steel strips and blower doors (3 pieces).

5 row differs in the installation of a grate, which is necessary to remove ash from the cooking furnace into the ash opening. The floor should be laid only from refractory bricks.
Pattern of row 5 and pattern of rows 6-11:

Rows 6-11 laid out according to the same scheme with some differences:
Row 6 – installation of the main firebox door,
Row 10 – installation of a blower door for a small firebox,
Row 11 – grate for removing ash from the small firebox.
Rows 12-17 – additional installation work:
Row 12 – small firebox door,
Row 13 – 2-burner cooking stove made of cast iron (0.71*0.41 m), material – refractory brick and steel strips for reinforcement. After this, the arched openings of the internal and then external cooking chambers are laid out,
Row 15 – refractory bricks are placed on edge, a door for the cooking chamber is installed (0.45 * 0.45 with a latch), the remaining bricks are laid flat, alternating with steel strips.
The 17th row is laid out from bricks laid flat, then 5 rows are a pipe, while a sheet of asbestos is laid between the last row and the ceiling.
Row diagrams from 12 to 17 (3-3), from 17 to 22 (4-4), from 22 to 27 (5-5):

Above the main structure of the furnace there is a pipe laid with 5 bricks (flat position). For strength, it is connected in a dressing. Thus, 32 rows are obtained.
Stove with hot water boiler and stove bench
In addition to the simplest option with two fireboxes, they build complex Russian stoves with their own hands with a stove bench, a boiler for heating water, with a firebox or a fireplace. Let's consider the order of popular solutions that can be used for self-construction.
The ordering greatly simplifies the laying, since the graphic representation and description of each row shows exactly how the previous row differs from the next, and what elements are needed at all stages.
Consider the schemes for construction Russian stove with boiler, created in a computer program.
1 row determines the location of the entire structure; it is made of solid refractory bricks laid flat.

2nd row – start of construction of compartments.

3rd row – design of two chambers, a cleaning chamber and a blower chamber.

4 row – closing the hearth.

5 row - grate.

6 row – water heating tank.

7 row – reinforcement of the side wall.

8th and 9th row – removal of channels.

10 row – combining the arches of the main and small fireboxes.

11 row – installation of a hob.

12-13 row – design of the walls of the hob.

14 row - entrance to the pipe.

15 row – roof of the cooking chamber

16 row – strengthening of the walls.

17 row – installation of metal parts.

18 row - vault of the furnace.

Row 19 – strengthening of the internal partition.

20 row - backfilling with sand.

21 row - the base of the bed.

22 row – installation of a metal part in the chimney.

23 row - chimney door.

24 row – installation of the damper.

25-26 row - narrowing of the masonry.

27-29 row – connection of the overpipe and the chimney.

The chimney is led through the attic to the roof, where an otter is installed and the adjacent area is waterproofed so that there are no gaps between the chimney and the roofing material.
The main thing during construction is to follow the order of the Russian stove and monitor the quality of the materials used.
Recommendations for use by stove makers
The efficiency of fuel combustion and the overall condition of the stove depend on compliance with operating rules, which should be followed not from time to time, but regularly.
Brick, like mortar, is a “living” material that can become deformed over time due to temperature changes. Therefore, you will have to not only clean it, but also cover up the cracks so that condensation does not form and the heat capacity of the structure does not drop.
This happens very simply, here is an example: over time, a gap of only 2 mm wide has formed around the valve. It turns out that in an hour it passes as much as 15 m³ of air heated to a temperature of 90-100 ° C, that is, approximately 10% of the total heat emanating from the stove.

Furnace repairs and cleaning are carried out once a year, before the heating season. But chimneys need cleaning much more often - about 2-3 times per season. Before starting the fire, remove ash from the grate to ensure free access of air for efficient combustion.
Fuel is prepared in advance, since the logs must dry. To do this, they are put in woodpiles under a canopy and left for at least a year. It is not recommended to use wet firewood, since evaporating moisture settles on the walls and mixes with soot.

Typically the combustion process takes from 1.5 to 2 hours.
Firewood is stacked in the combustion chamber in rows or in a cage, with a small distance between logs. It is important that they burn at the same time, as the heat will be greater.
It is not recommended to heat the stove for a long time for increased heating. This can provoke the appearance of cracks, as a result of which first cosmetic and then major repairs will be required - laying the masonry again.

As soon as the wood ignites, the firebox is closed and the vent is opened. The draft is regulated by the position of the valve or view.
Some more useful tips:
- A bright red flame and black smoke indicate a lack of air - the flow needs to be increased.
- A white flame and a hum in the chimney is an excess of air; it is better to cover the vent a little.
- You can move the logs only after they have thoroughly burned out and formed wastelands that allow air to pass through.
- The firebrands are pushed into the center of the hot coals so that they burn out faster.
- As soon as the coals stop burning with a blue flame, they are distributed over the hearth, moving closer to the mouth.
- To protect against carbon smoke, the pipe is not closed for another 10 minutes to prevent carbon monoxide from entering the room.
If the stove is heated with coal, it is still recommended to heat it with wood.
When finishing external walls, remember that beautiful cladding can partially reduce the flow of heat into the room.
Conclusions and useful video on the topic
Video layout of a Russian stove with order:
The process of dismantling the old and building a new furnace:
One of the options for a Russian stove with the order:
If you build a Russian stove correctly, you can immediately get an almost “eternal” heating device and excellent kitchen equipment for cooking. However, for this, the device must fully comply with the order, and the technology for laying bricks and mixing mortar must comply with generally accepted standards.
And before making a Russian stove project, it is better to consult with qualified stove makers.
Please write comments in the block below. Tell us how you built a Russian stove in your dacha or country house. Ask questions, share information useful for site visitors interested in the topic, post thematic photos.


The most intelligible material on laying a Russian stove that I have seen on the Internet. And approximately what price does it cost?
If you order it from a master, it will cost 150-180 rubles. If you do it yourself, then 50-60 tr. for materials. Although the price may vary in different regions.
Oleg, people throw away clay when they dig drainage holes and don’t know how to get rid of it. You can collect sand from a quarry if you have it available in the region.
The oven is not built quickly, several rows per day, even in a passenger car you can carry a little bit at a time. Again, bricks, if you put a heel brick where they break the stoves in the villages, in connection with gasification, you can negotiate, get a good one for pennies. Jokes aside, there is not much fuss, but the savings are significant just on these details.By the way, we, for example, bought fittings there; we were lucky - people broke an almost unused stove.
And another life hack. At scrap metal collection points, you can also find fittings at the price of metal for delivery. In a store this would cost 50 times more. People break stoves and sell them. You may be reluctant to bother so much, but essentially, it’s just a matter of spending a couple of hours on the Internet and going to a couple of places to find out.
Actually, a friend who is a stove/fireplace maker, built 4 stoves and 3 fireplaces for people. People have had them for about 9 years now and they don’t complain. The main thing is to select the material of better quality.