Enameling a bathtub with your own hands: how to treat a bathtub with liquid acrylic at home
The enamel coating of a bathtub is not just a decorative layer. It protects the bowl material from damage and extends its service life.In addition, the smooth coating allows you to effectively remove various contaminants from the surface. You can restore the damaged layer yourself if you know how to achieve an impeccable result.
We will tell you how to enamel a bathtub yourself. We will list everything that a home handyman will need, and describe the order in which the work must be performed. Taking into account our recommendations, you can restore the protective and decorative coating without any problems.
The content of the article:
What is liquid acrylic?
Liquid acrylic means a special polymer substance that is in a liquid state before use.
After application to the surface, the material is evenly distributed over the treated surface and hardens as it dries. The result is an even, smooth and durable coating that reliably protects the bath from damage.
Typically, liquid acrylic is a two-component composition. Before use, it must be mixed in strict accordance with the manufacturer's instructions. Some manufacturers supply a ready-made composition that does not need to be mixed.
Among the most popular types of liquid acrylic are:
- Plastrol — is considered one of the highest quality materials for bathtub restoration; it does not have the unpleasant odor characteristic of such materials.
- Stakryl — a two-component composition that allows you to complete all restoration work within 3-4 hours.
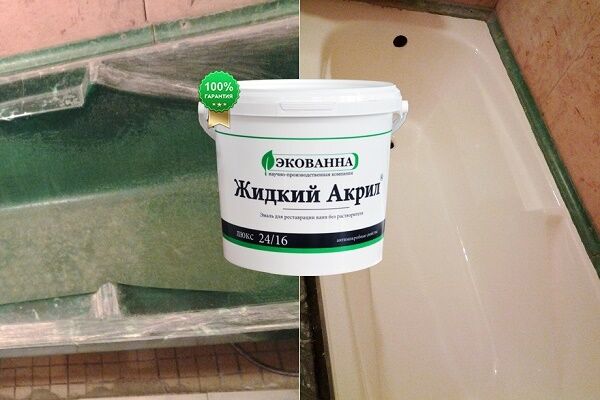
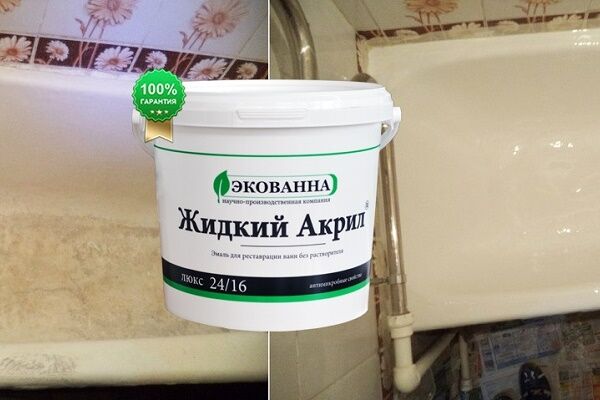
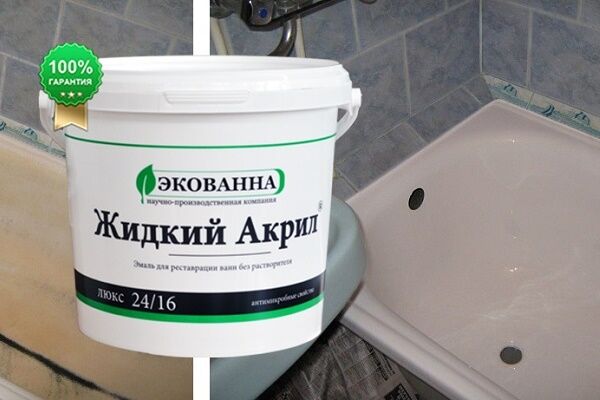
- Ecovanna - a good formula that allows you to get a high-quality coating, but the work will be accompanied by a characteristic unpleasant odor.
These brands of self-leveling acrylic are constantly being improved. In addition, more and more new varieties of acrylic filling compositions with improved characteristics are appearing on the market.

Features of the restoration process
Although the process of restoring a bathtub using liquid acrylic seems simple, you need to accurately fulfill all the requirements of the technology. Careless handling of the composition can lead to the formation of bubbles on the surface of the coating. In this case, the repair will have to be completely redone. But you should start with proper preparation of the foundation.
Preparing the bath surface
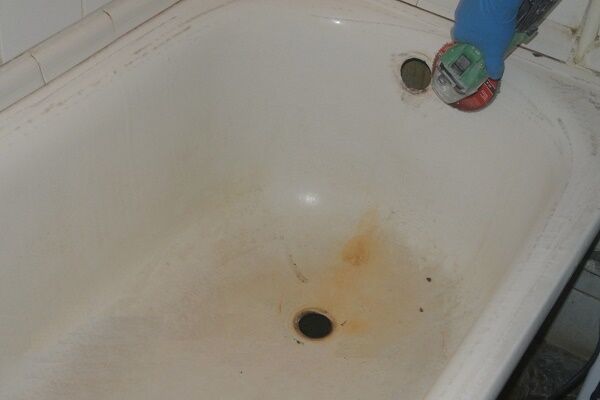
You can’t just pour the composition onto the surface of the bathtub and expect that all the flaws will be hidden under a layer of acrylic. Over the years of use, contaminants have accumulated on the enamel surface, and possibly areas of corrosion have appeared. Even if the base looks solid and clean, it still needs preparation.
It is produced as follows:
- First, the entire surface of the bath should be sprinkled with a cleaning agent containing abrasive particles.
- Then you need to clean the enamel using this product and sandpaper or sand the surface with an electric drill (optionally with a grinder) on which an abrasive wheel is installed.
- Now a rust converter is used, which should be used to treat all areas that are at least slightly affected by this type of corrosion.
- The converter is left on the surface for some time specified in the instructions of the drug, usually the period is about half an hour.
- Then the surface is carefully treated again with sandpaper.
- After this, the powdery contaminants accumulated inside the bath are completely washed off with water.
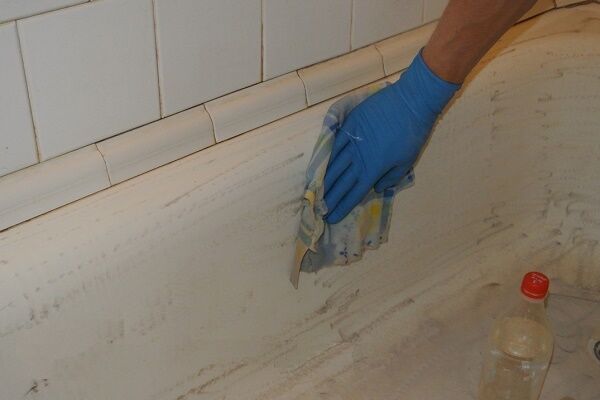
- Now the surface of the bathtub should be degreased using a special product and a lint-free cloth; this will protect the base from new contamination.
- The bath is filled with hot water and left in this state for about 10-15 minutes so that the surface of the base warms up.
- Then the water is drained and the bath is wiped again with a clean, lint-free cloth.
- Now the surface needs to be carefully inspected again to make sure that there is no contamination, even the slightest.
The base prepared in this way will be smooth, clean and warm. These conditions will ensure maximum adhesion of the repaired surface to the acrylic composition.
Using a grinder with abrasive is not necessary; it all depends on the initial condition of the bath.

If the enamel has only minor damage, but overall it looks smooth, it is enough to simply sand the surface with sandpaper. The grinder is used in cases where the damage to the base is deep and noticeable.
You cannot do without this operation even when there are areas of the bathtub affected by rust. The more serious the situation, the deeper the base cleaning should be.

Grinding with an abrasive wheel is dirty and dusty work. Such operations are best performed in special protective clothing and a respirator.
If the bathroom has furniture and plumbing fixtures, before starting such work it is better to cover them with film or cloth, otherwise all surfaces in the bathroom will have to be washed.It is very important that in the future such dust does not fall on the grease-free and dry surface of the base.
It happens that in some areas of the bathtub it is not possible to remove old enamel by grinding. In this case, you can use a special acid-based solvent.
You can use a solvent to degrease the surface, but regular baking soda will work just fine. Soda is mixed with water to form a paste.

It will be difficult to repair large chips and cracks with liquid acrylic; you may need too much of this expensive material. Some craftsmen use a trick: deep cracks are filled with auto putty. Of course, after such repairs, you should wait until the composition dries and then carefully sand the surface.
Adhesion of the substrate surface improves if it is heated. To prevent the surface from cooling down before you start enameling the bathtub with liquid acrylic, you can do this: fill the bathtub with water, mix the composition and prepare it for application, then drain the water and wipe the surface with a napkin.
Of course, it should be remembered that the shelf life of the finished composition is limited, usually it is an hour or a little more. This is quite enough to perform all the necessary operations.
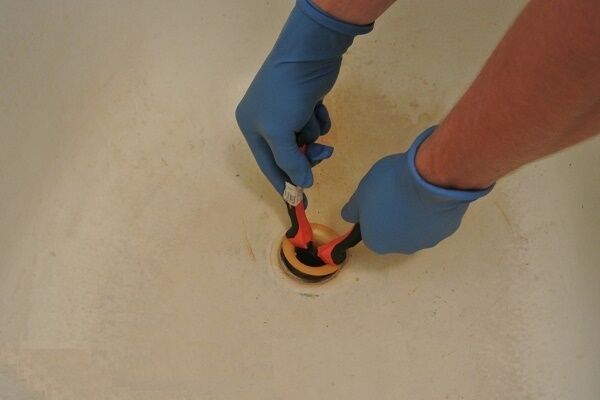
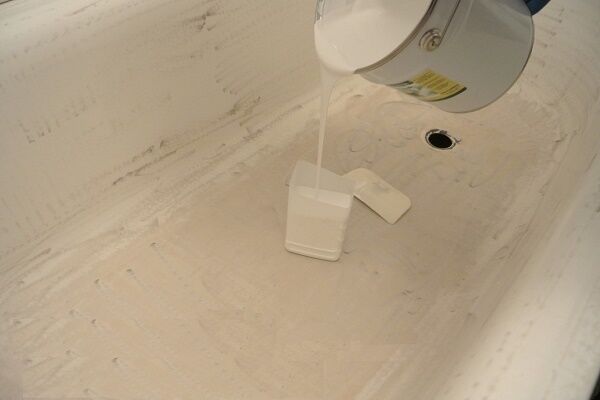
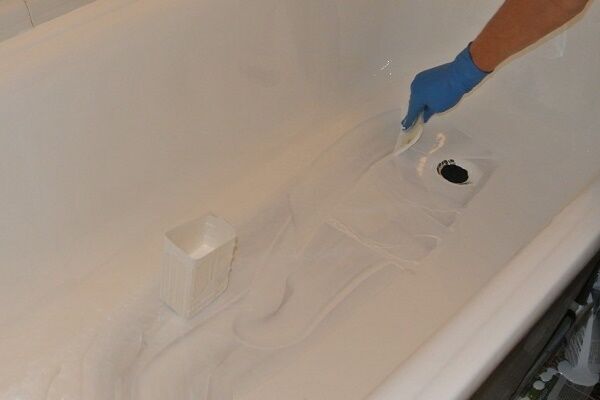
The last preparatory step remains - dismantling the drain. If this is not done, excess acrylic will fall into the drain and harden there, which can cause damage. Place a small unnecessary container under the hole to collect the spilled composition.
Pouring the acrylic layer
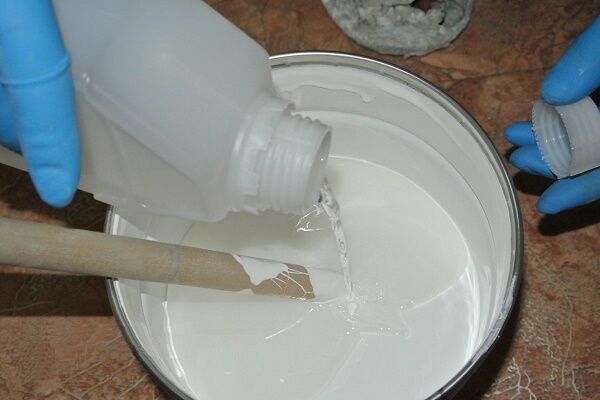
When preparing the composition for application, two points should be taken into account. Firstly, strictly follow all the manufacturer’s recommendations. After mixing, the material must be homogeneous, otherwise bubbles and unevenness will appear on the surface after drying.
Secondly, you need to immediately prepare a sufficient amount of liquid acrylic. The pouring process should not be interrupted to mix an additional portion of the composition. It's better to make a little more liquid acrylic.
The material should be in one container, this will also help to fill continuously. If it is inconvenient to handle a large container, you can pour it in portions from a small plastic container.

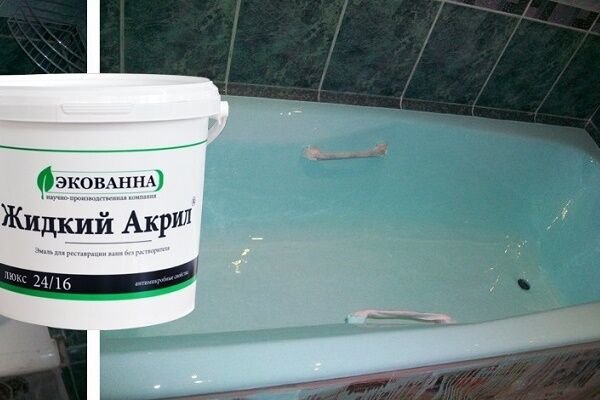
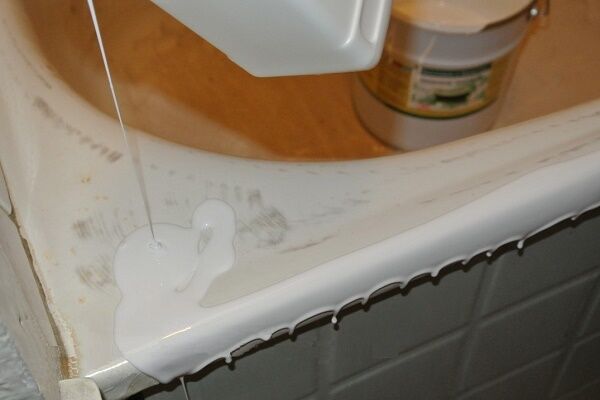
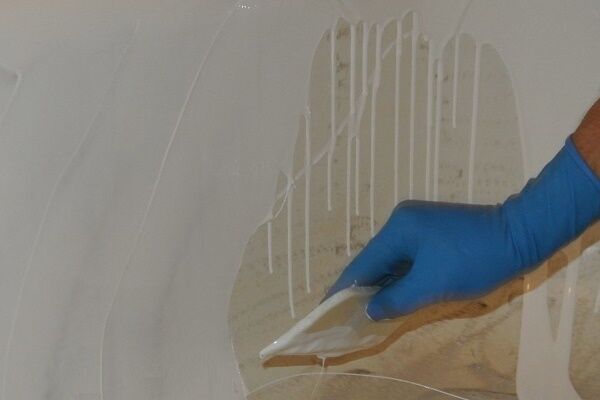
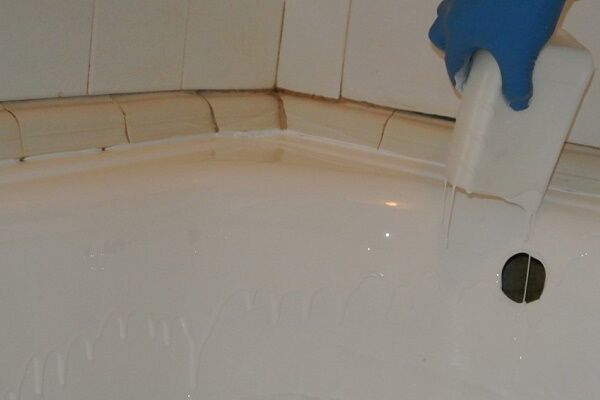
So, filling a bathtub with liquid acrylic start from the top of the side. As soon as the stream reaches the middle of the side, the container begins to smoothly move in a circle, carefully filling the surface with the composition. When pouring the top is completed, move the container to the middle of the side and continue pouring in a circle until it is closed.
The stream of liquid acrylic should have a moderate intensity; do not rush. If everything is done correctly, the layer of material will be approximately 4-6 mm.

Actually, at this point the main stage of the repair can be considered complete. If it seems that in some area the layer is too thin, and somewhere it is too thick, you should not try to correct the process. The properties of liquid acrylic are such that during the drying process the material will automatically be distributed in an even layer.
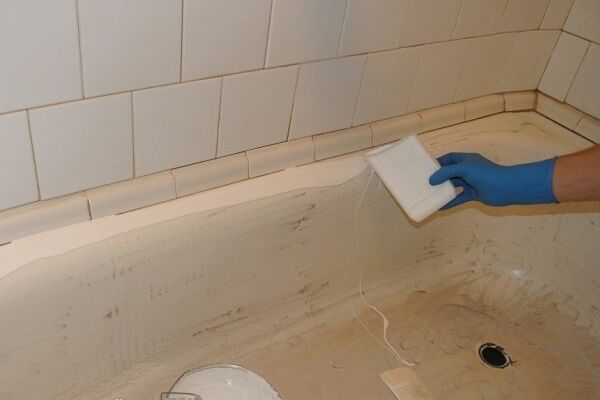
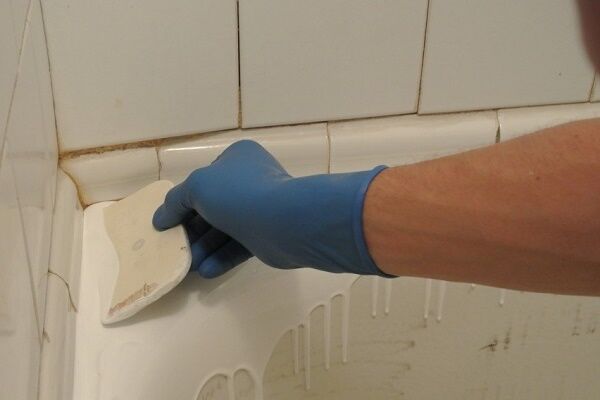
Outside interference may damage the finished layer. The only thing that can be done is to use a spatula at the very beginning of the work so that the acrylic completely fills the side.

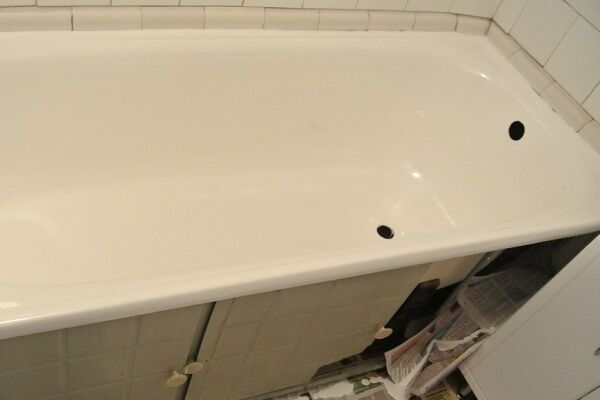
Now it’s best to close the bathroom and leave it alone for about a day and a half. During this time, the surface of the bath will have time to dry.
It is very important to prevent any contamination from reaching the surface of the bathtub during this time. Drying times depend on the manufacturer's recommendations. Experienced craftsmen recommend waiting an extra couple of days to improve the quality of the coating.

Now you can remove the container with the remaining acrylic from under the drain hole. All that remains is to connect the bathtub drain to the sewer system and check the characteristics of the new coating in action.
List of advantages and disadvantages
Self-leveling acrylic is one of the most popular methods restoration of enamel coating bath This material is extremely easy to use. The actual work of applying the repair layer takes only a few hours.
No special tools or special skills are needed, just follow the instructions. The properties of the composition are such that after application it fills all the cracks and depressions that appeared on the enamel during operation, and its surface is automatically smoothed out, becoming smooth and glossy.

The resulting layer tolerates contact with hot water, detergents and significant mechanical stress. The lifespan of a restored bathtub can be 10, 15 or even 20 years. At the same time, the cost of repairs is relatively low. Removing the old bathtub and installing a new one will cost several times more.
The acrylic layer improves the sound insulation properties of a metal bathtub. Water will flow into the container, making fewer sounds. The bath’s ability to retain the heat of the water in it will also increase.
This type of coating is resistant to dyes. With proper care, paint or rust that gets onto the surface will not leave unsightly marks or streaks there. Acrylic perfectly withstands corrosion and extreme temperature changes. In general, repairs using self-leveling acrylic improve the performance of the bathtub.
However, it should be remembered that the standard repair kit is designed to eliminate damage to the enamel, the depth of which does not exceed one centimeter. More serious flaws can be repaired if you use an additional portion of liquid acrylic, and this will entail a slight reduction in the useful volume of the bath.
Although the work itself takes relatively little time, preparing the surface is a long, labor-intensive and rather dirty process. This circumstance is usually not mentioned in advertising brochures.
In addition, after the work is completed, you will be able to use the renovated bathroom only after 24 hours.In some cases, the waiting period can be four days. And if it is necessary to apply a two-layer coating, it will take even more time to complete the repair work.
To one degree or another, most self-leveling acrylic compositions emit a specific odor that not everyone can easily tolerate. It may be better for the residents of the house to leave their home while the repairs are being carried out. While drying, the bath door should be closed tightly to protect against unpleasant fumes.
Alternatives to bulk technology
There are other ways to make the surface of your bathtub smooth, beautiful and durable. This is either restoration of enamel, or use acrylic liner. In the first case, the procedure for preparatory work is practically no different from the technology described above using bulk material.
In the same way, it is necessary to eliminate all dirt and unevenness in order to increase the adhesion of the base to the material. But in this case, liquid enamel is applied with a brush. You will need two layers of material. This is a less reliable way to enamel a bathtub at home, since after about 6-8 years the restoration work will have to be repeated.
At first glance, installation of an acrylic liner looks very simple. It is glued to the surface of the bath. But you need to choose a liner that exactly follows the contours of the bathtub, and this is not always possible.
Usually the liner is ordered from a specialized enterprise; it is almost impossible to produce such an element at home. All that remains is to cut off the excess along the edge of the bath and glue it to the surface. Installing an acrylic liner requires less time and effort than the pour-in restoration technology, but its service life rarely exceeds 10 years.
Some useful tips
There are situations when liquid acrylic coating applied not in one layer, but twice. For example, this is done if the damage to the base is extensive and requires additional repairs. In this case, it should be remembered that pouring the second layer should be done only after the initial coating has completely dried.
This means that the repair time will increase by several days. Otherwise, the technology for pouring the second layer of liquid acrylic is performed in the same way as when applying the first layer.
The white acrylic coating looks very attractive, but the design of the bathtub can be slightly changed if desired. If you add a little tinting paste when mixing the material, it will acquire a certain shade.

The color palette is quite diverse, but the amount of dye in the total mass of liquid acrylic should be no more than 3%. if you add too much tinting paste, it will worsen the performance characteristics of the coating and make it less durable.
Will introduce you to the technological rules for painting a cast iron bathtub next article, which describes in detail the steps to perform a difficult job.
It is recommended to care for the new coating according to the same rules as for a solid acrylic bathtub. To regularly clean the acrylic surface, it is enough to use a sponge and soap solution. But you should not use cleaning agents containing abrasive particles, as they can scratch the enamel.
It also pays to be careful when using acidic or alkaline cleaning products. Acrylic coating does not always tolerate contact with such aggressive chemicals well.
It is believed that acrylic coating perfectly resists mechanical damage. This is true. But still, the enamel should be handled carefully, trying not to drop heavy objects onto its surface. Following these simple recommendations can significantly increase the life of the bathtub.
Conclusions and useful video on the topic
Restoring the enamel coating of a bathtub using PlastAll liquid acrylic as an example is clearly presented in the following video:
Before starting work, it won’t hurt to get acquainted with the results of improper installation of self-leveling acrylic:
Practical experience of filling a bathtub with liquid acrylic can be seen here:
Self-leveling acrylic is an easy-to-use material that allows you to effectively and relatively inexpensively restore the coating of a bathtub. The performance characteristics of a new bathtub will meet expectations only if the repair technology is strictly followed.
Tell us about how you restored the enamel coating of the bathtub with your own hands. Please write comments in the block below. Ask questions, share your opinion and useful technological subtleties, publish photographs on the topic of the article.


Our bathtub also needed renovation. The guys who do the baths said they would take on the job for 5 thousand. I felt sorry and decided to do it myself. I sent the family to my mother-in-law for a couple of days, because we can’t use the bathroom until everything is dry. I cleaned the bathtub of the old coating. Fortunately, I have a grinder, and then I sanded it with sandpaper.The most difficult thing, it seemed to me, was to distribute the acrylic evenly so that there were no drips or streaks. You need to pour it in a thin stream, don’t rush anywhere. There were some dubious places here and there, but I didn’t touch them; the acrylic then distributed itself. I didn’t touch the bathtub for 2 days, and then I screwed on the drain. Of course it looks cool, like new. I hope it will last for a long time.
Enameling a bathtub is not such a simple process, I watched how they did it for us, and I am sure that my husband would not have succeeded. Firstly, the difficulty was that we have an old house with old pipes, so initially we had to change the drain. Secondly, the bath is treated with very unpleasant-smelling products; we did not want to breathe these fumes. Thirdly, this is a labor-intensive process. Therefore, it is better to entrust this matter to a specialist. After painting the bathtub, we didn’t bathe in it for another 2 days.
And why are you sure that your husband would not be able to enamel the bathroom himself with liquid acrylic? The only difficult part of the whole process for a beginner is uniform distribution. It doesn't always turn out beautifully at first. If you didn’t want to breathe in vapors, there’s a special mask for that, in which the enameling is done. In general, if there is a desire, anyone can figure it out and do everything on their own.
Yesterday I filled the bathtub for the first time. Fortunately, the harness was originally intended to be replaced - it was concreted to death))) Otherwise, I liked everything. There were no difficulties or smells observed during the work. I used Stakryl.